Creating Brad: A Blender-Based Pipeline
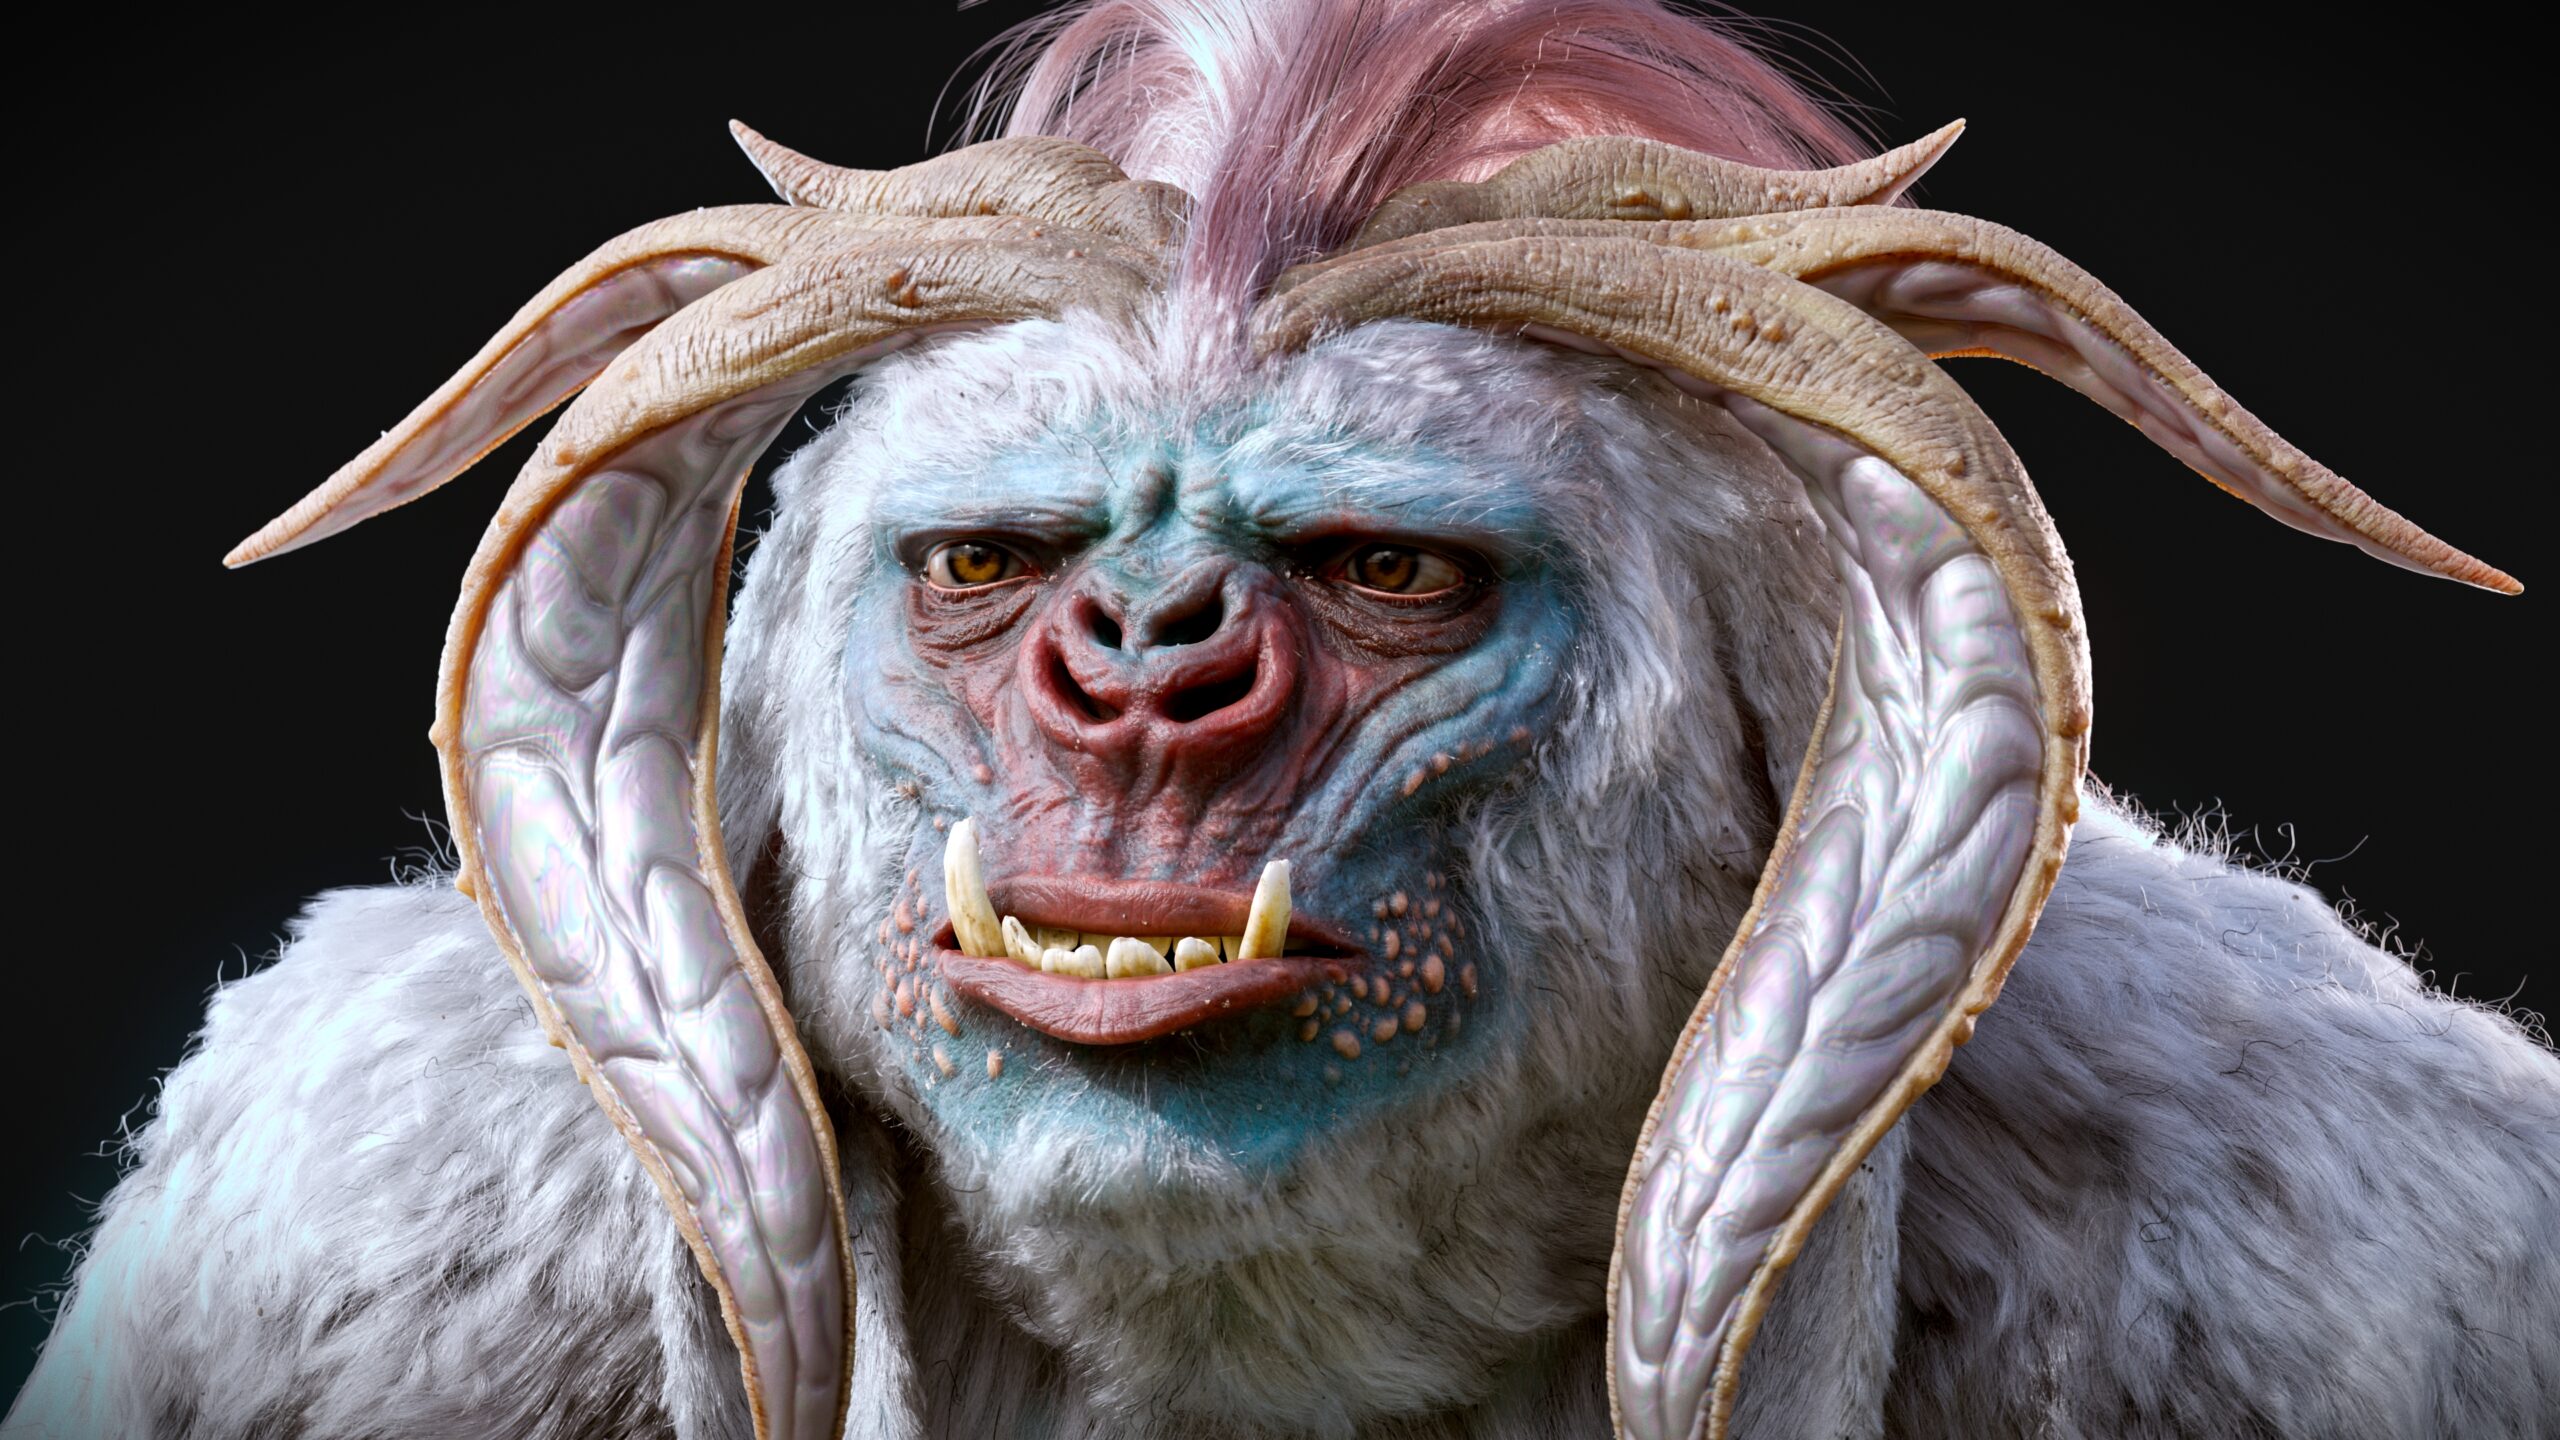
Table of Contents
Blender, ZBrush, Mari, Houdini: a powerhouse of a modern 3D toolbox. Before Brad was a big, hairy fantastical mascot, he was a tool. Bolt Graphics was in need of complex 3D assets and scenes that could be used for benchmarking their path tracing tech against the strongest available graphics products, and Darwesh reached out to me to make it happen.
A detailed hero character was chosen as the first candidate to hit these marks. Aside from several must-have technical features (bezier hair curves, dense geometry, transmissive materials, subsurface scattering, etc) the subject was open-ended. I thought a massive, fur-covered creature would do well to hit these marks and could be placed in interesting environments for large-scale benchmarking scenes down the line.
Blender Hero Character
Concept Research
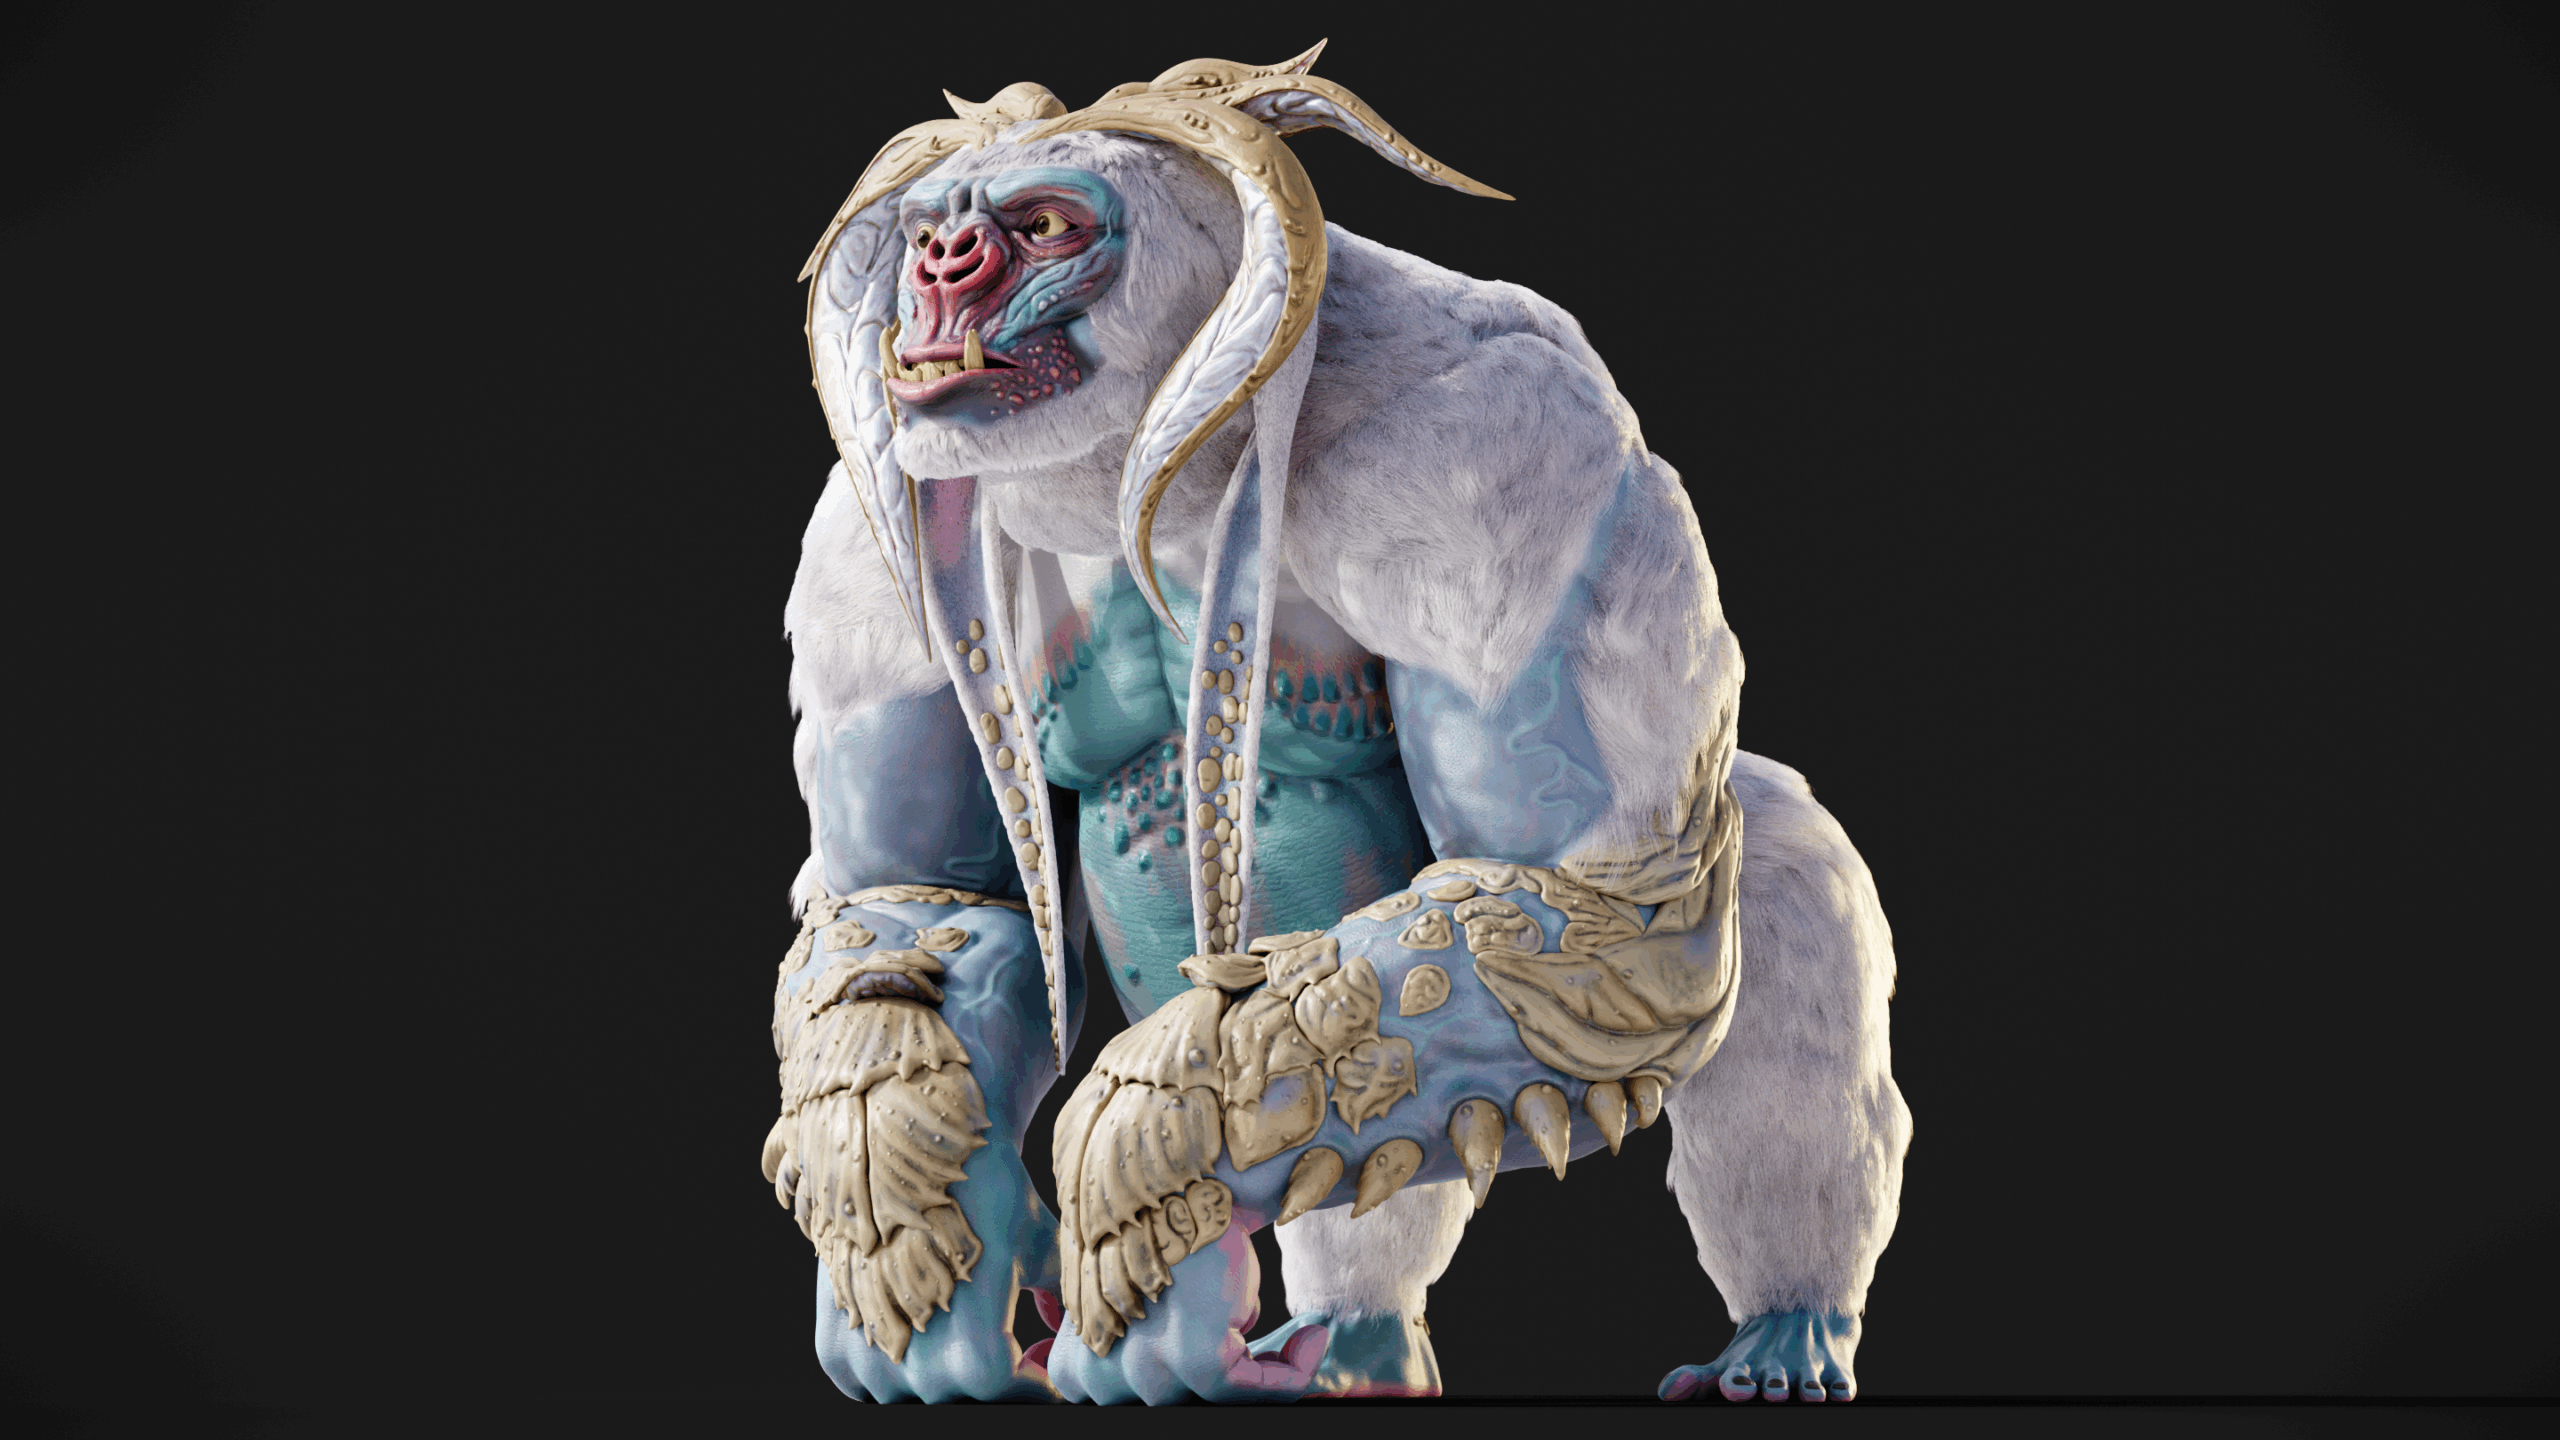
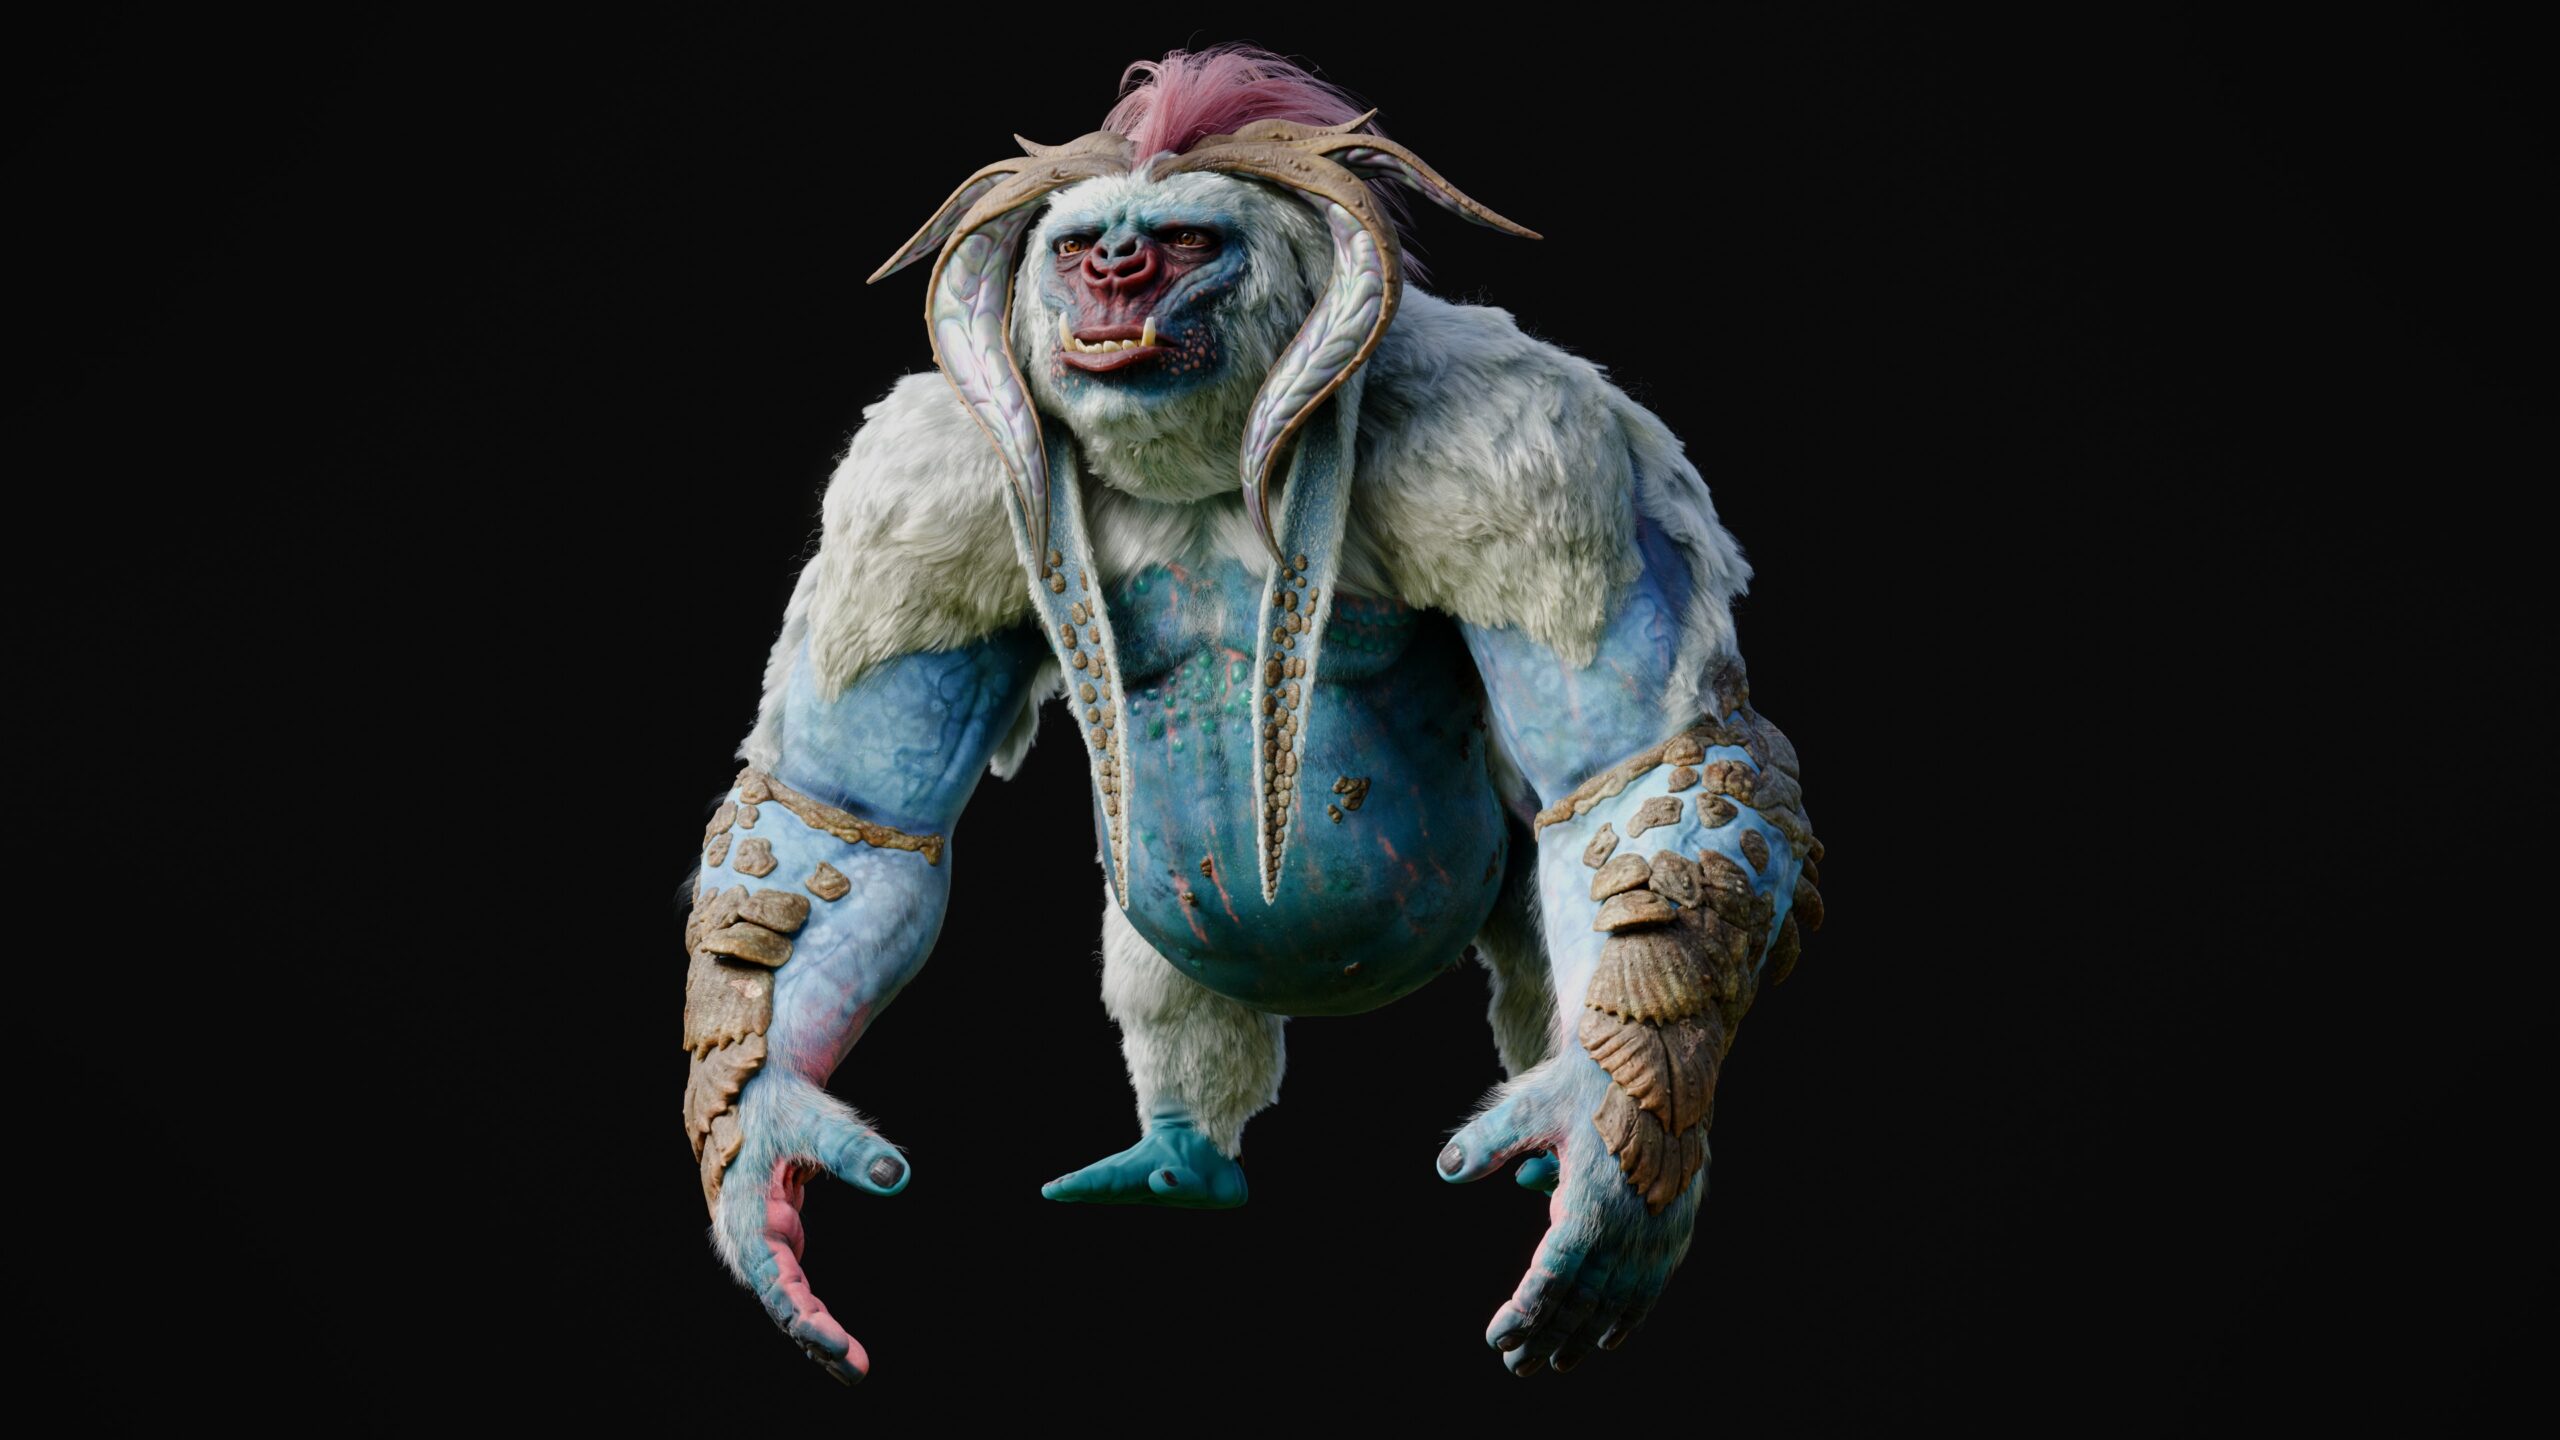
After brainstorming creature designs, backstories, and worlds and browsing concept art pieces from dozens of artists, our favorite inspiration came from a Yeti-like primate by Junseok Kwon.
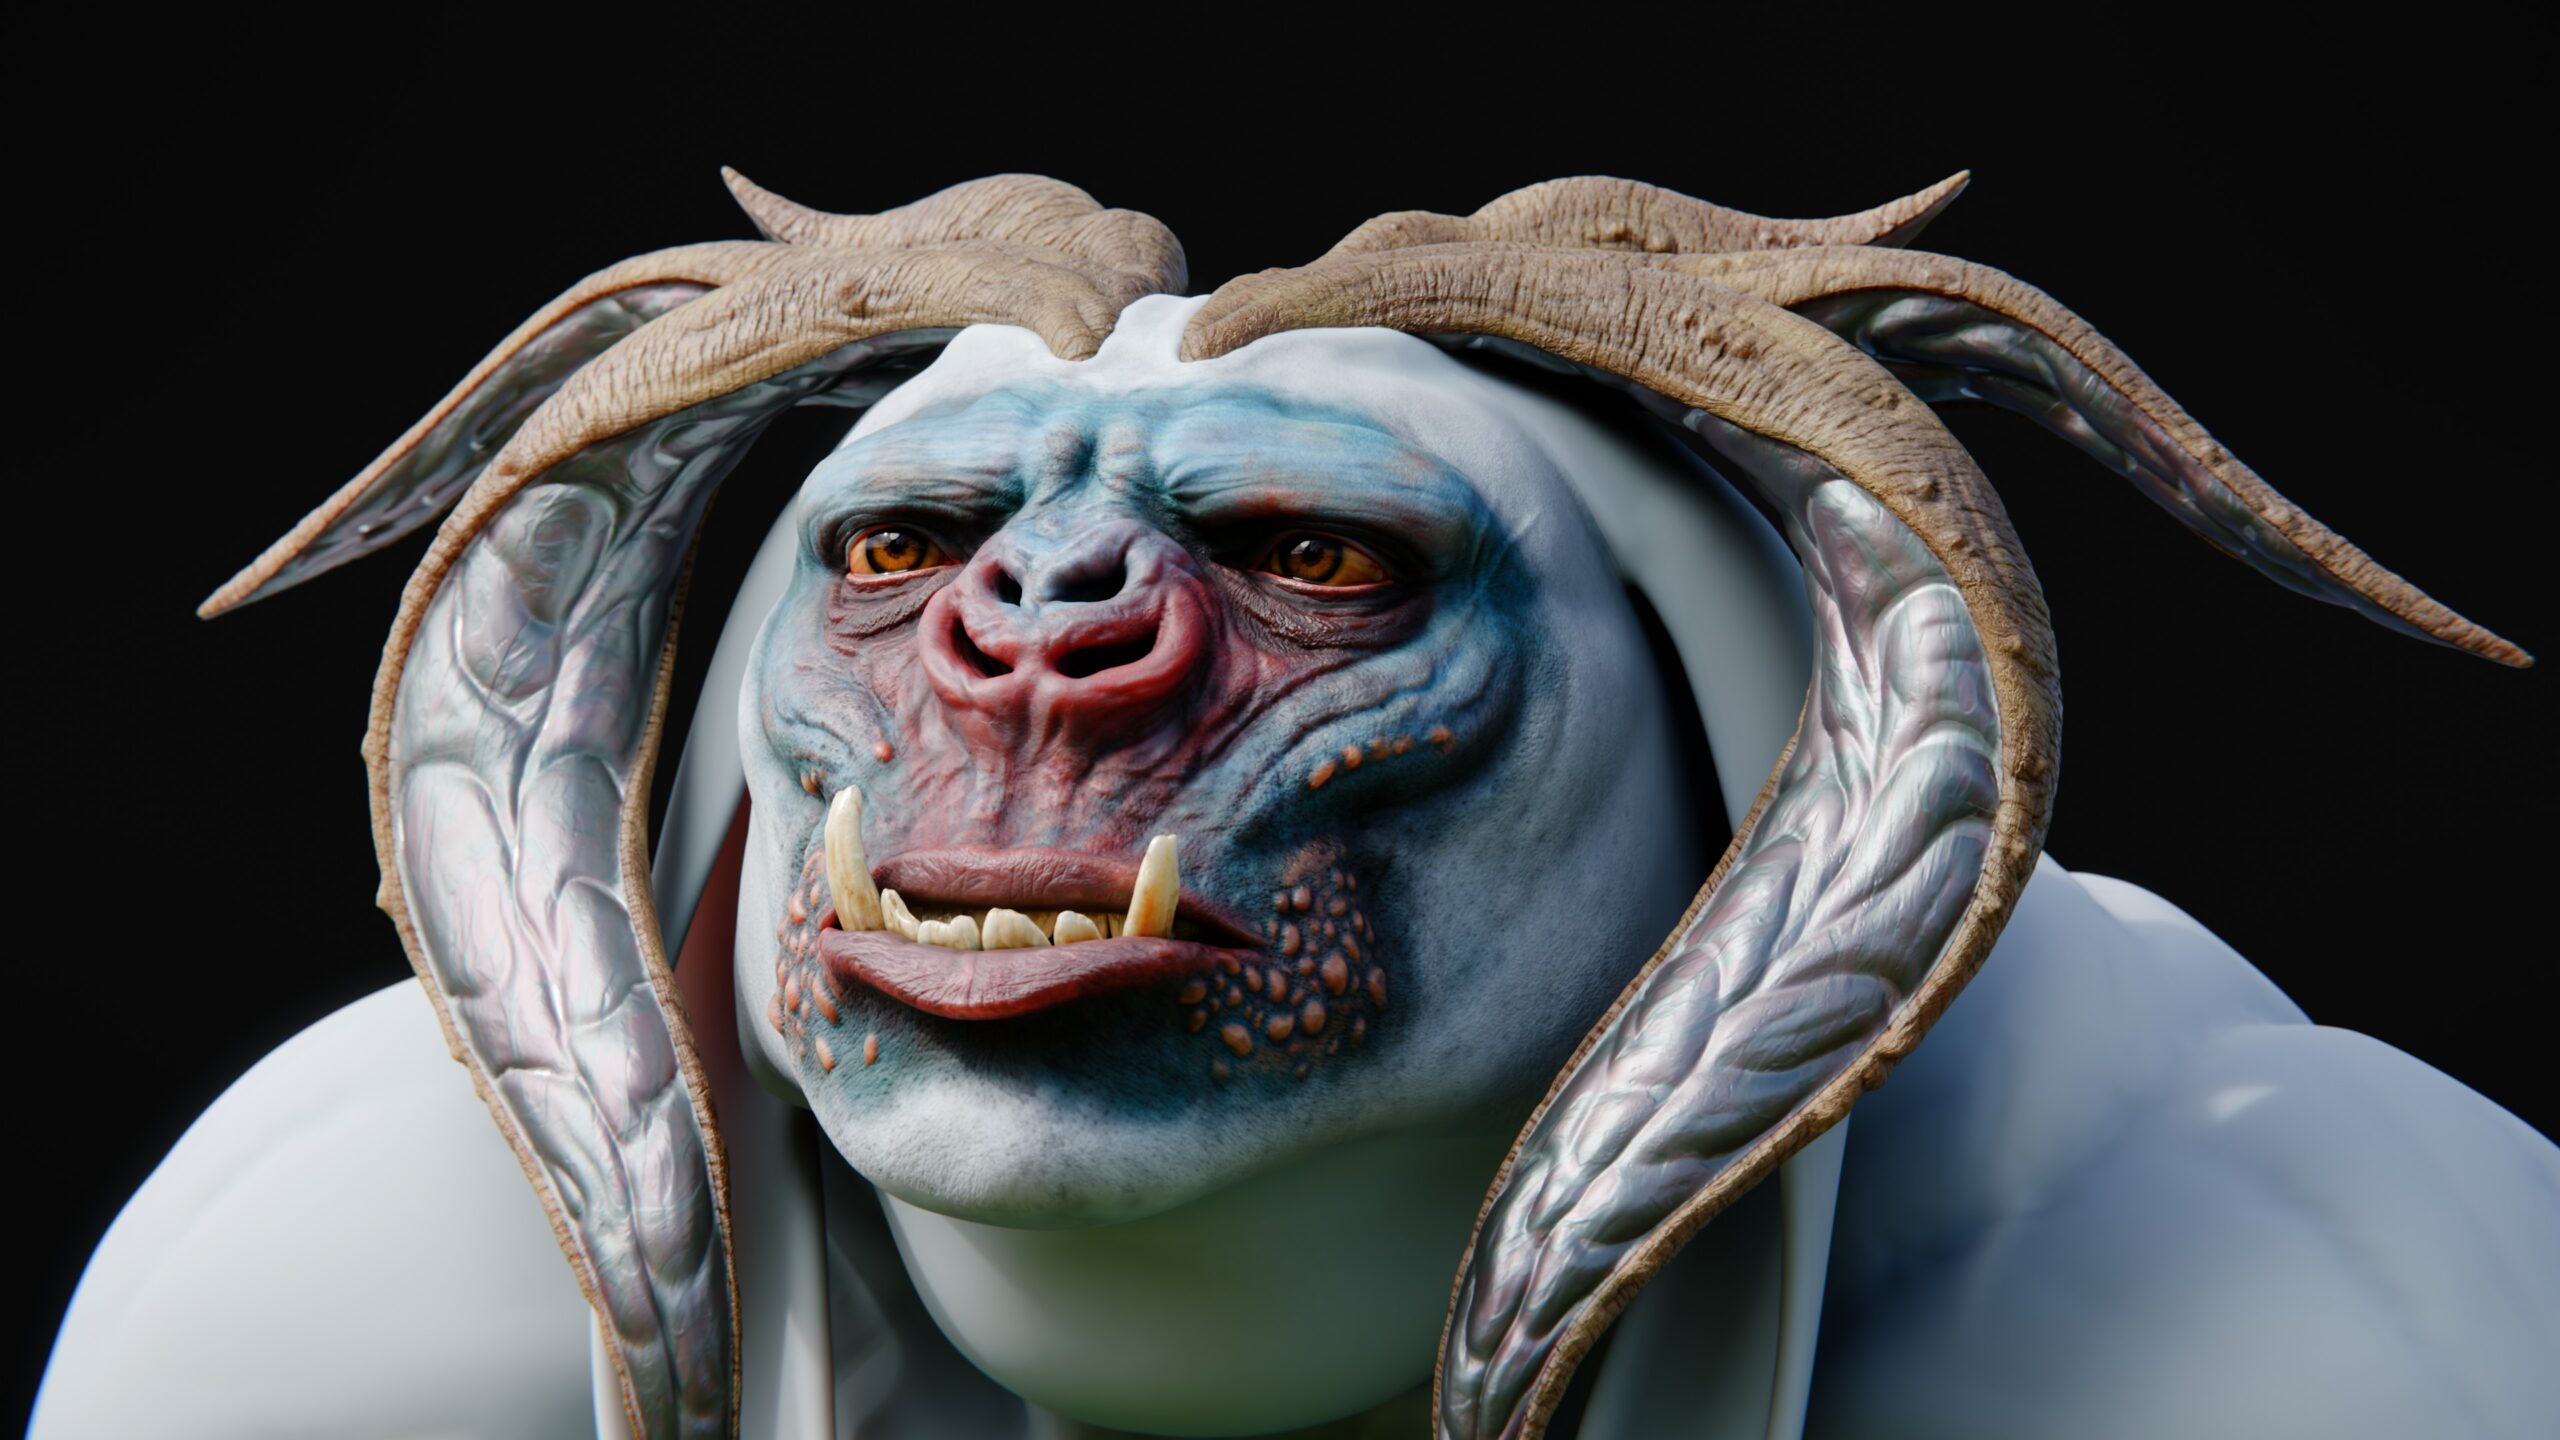
Junseok created an excellent breakdown of anatomy and materials that would prove very useful when modelling and shading Brad. With his towering size and crustaceous armor, I thought a fitting name for a species like this would be Megachitus.
Planning
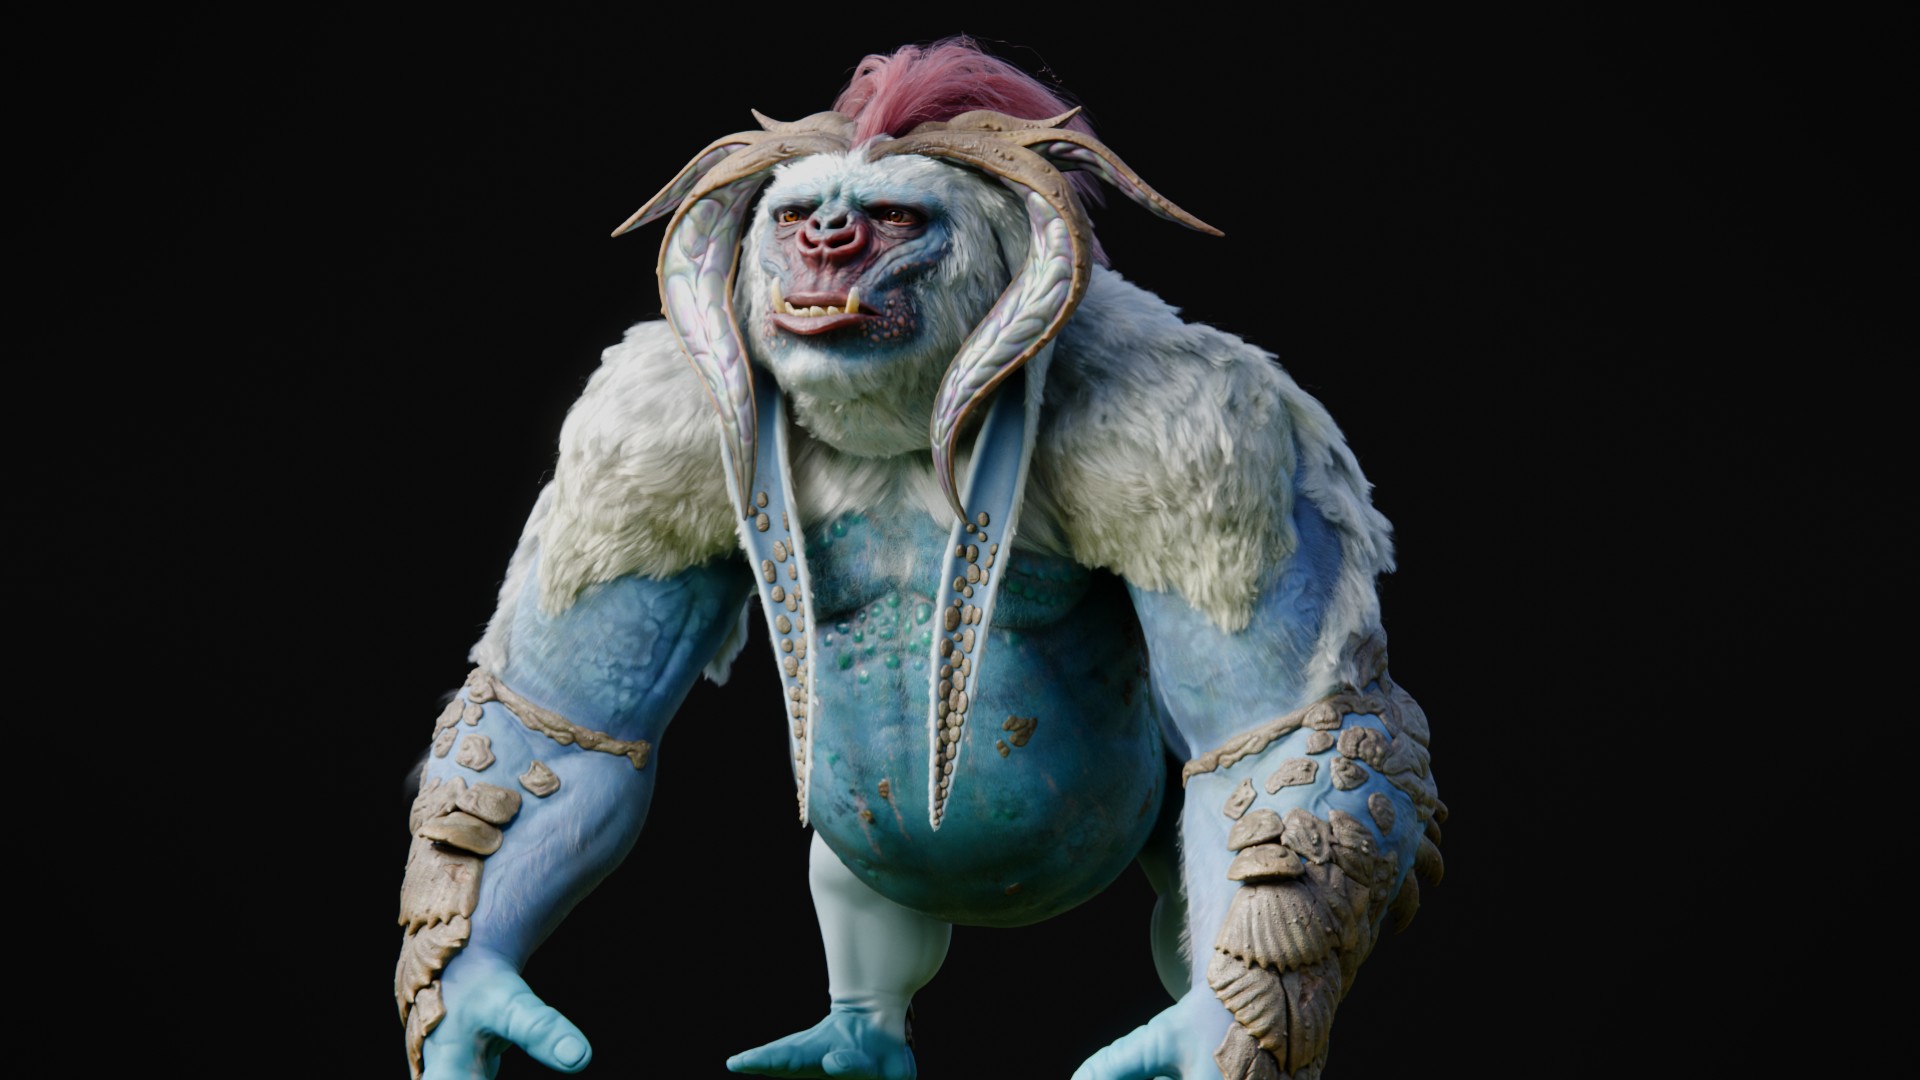
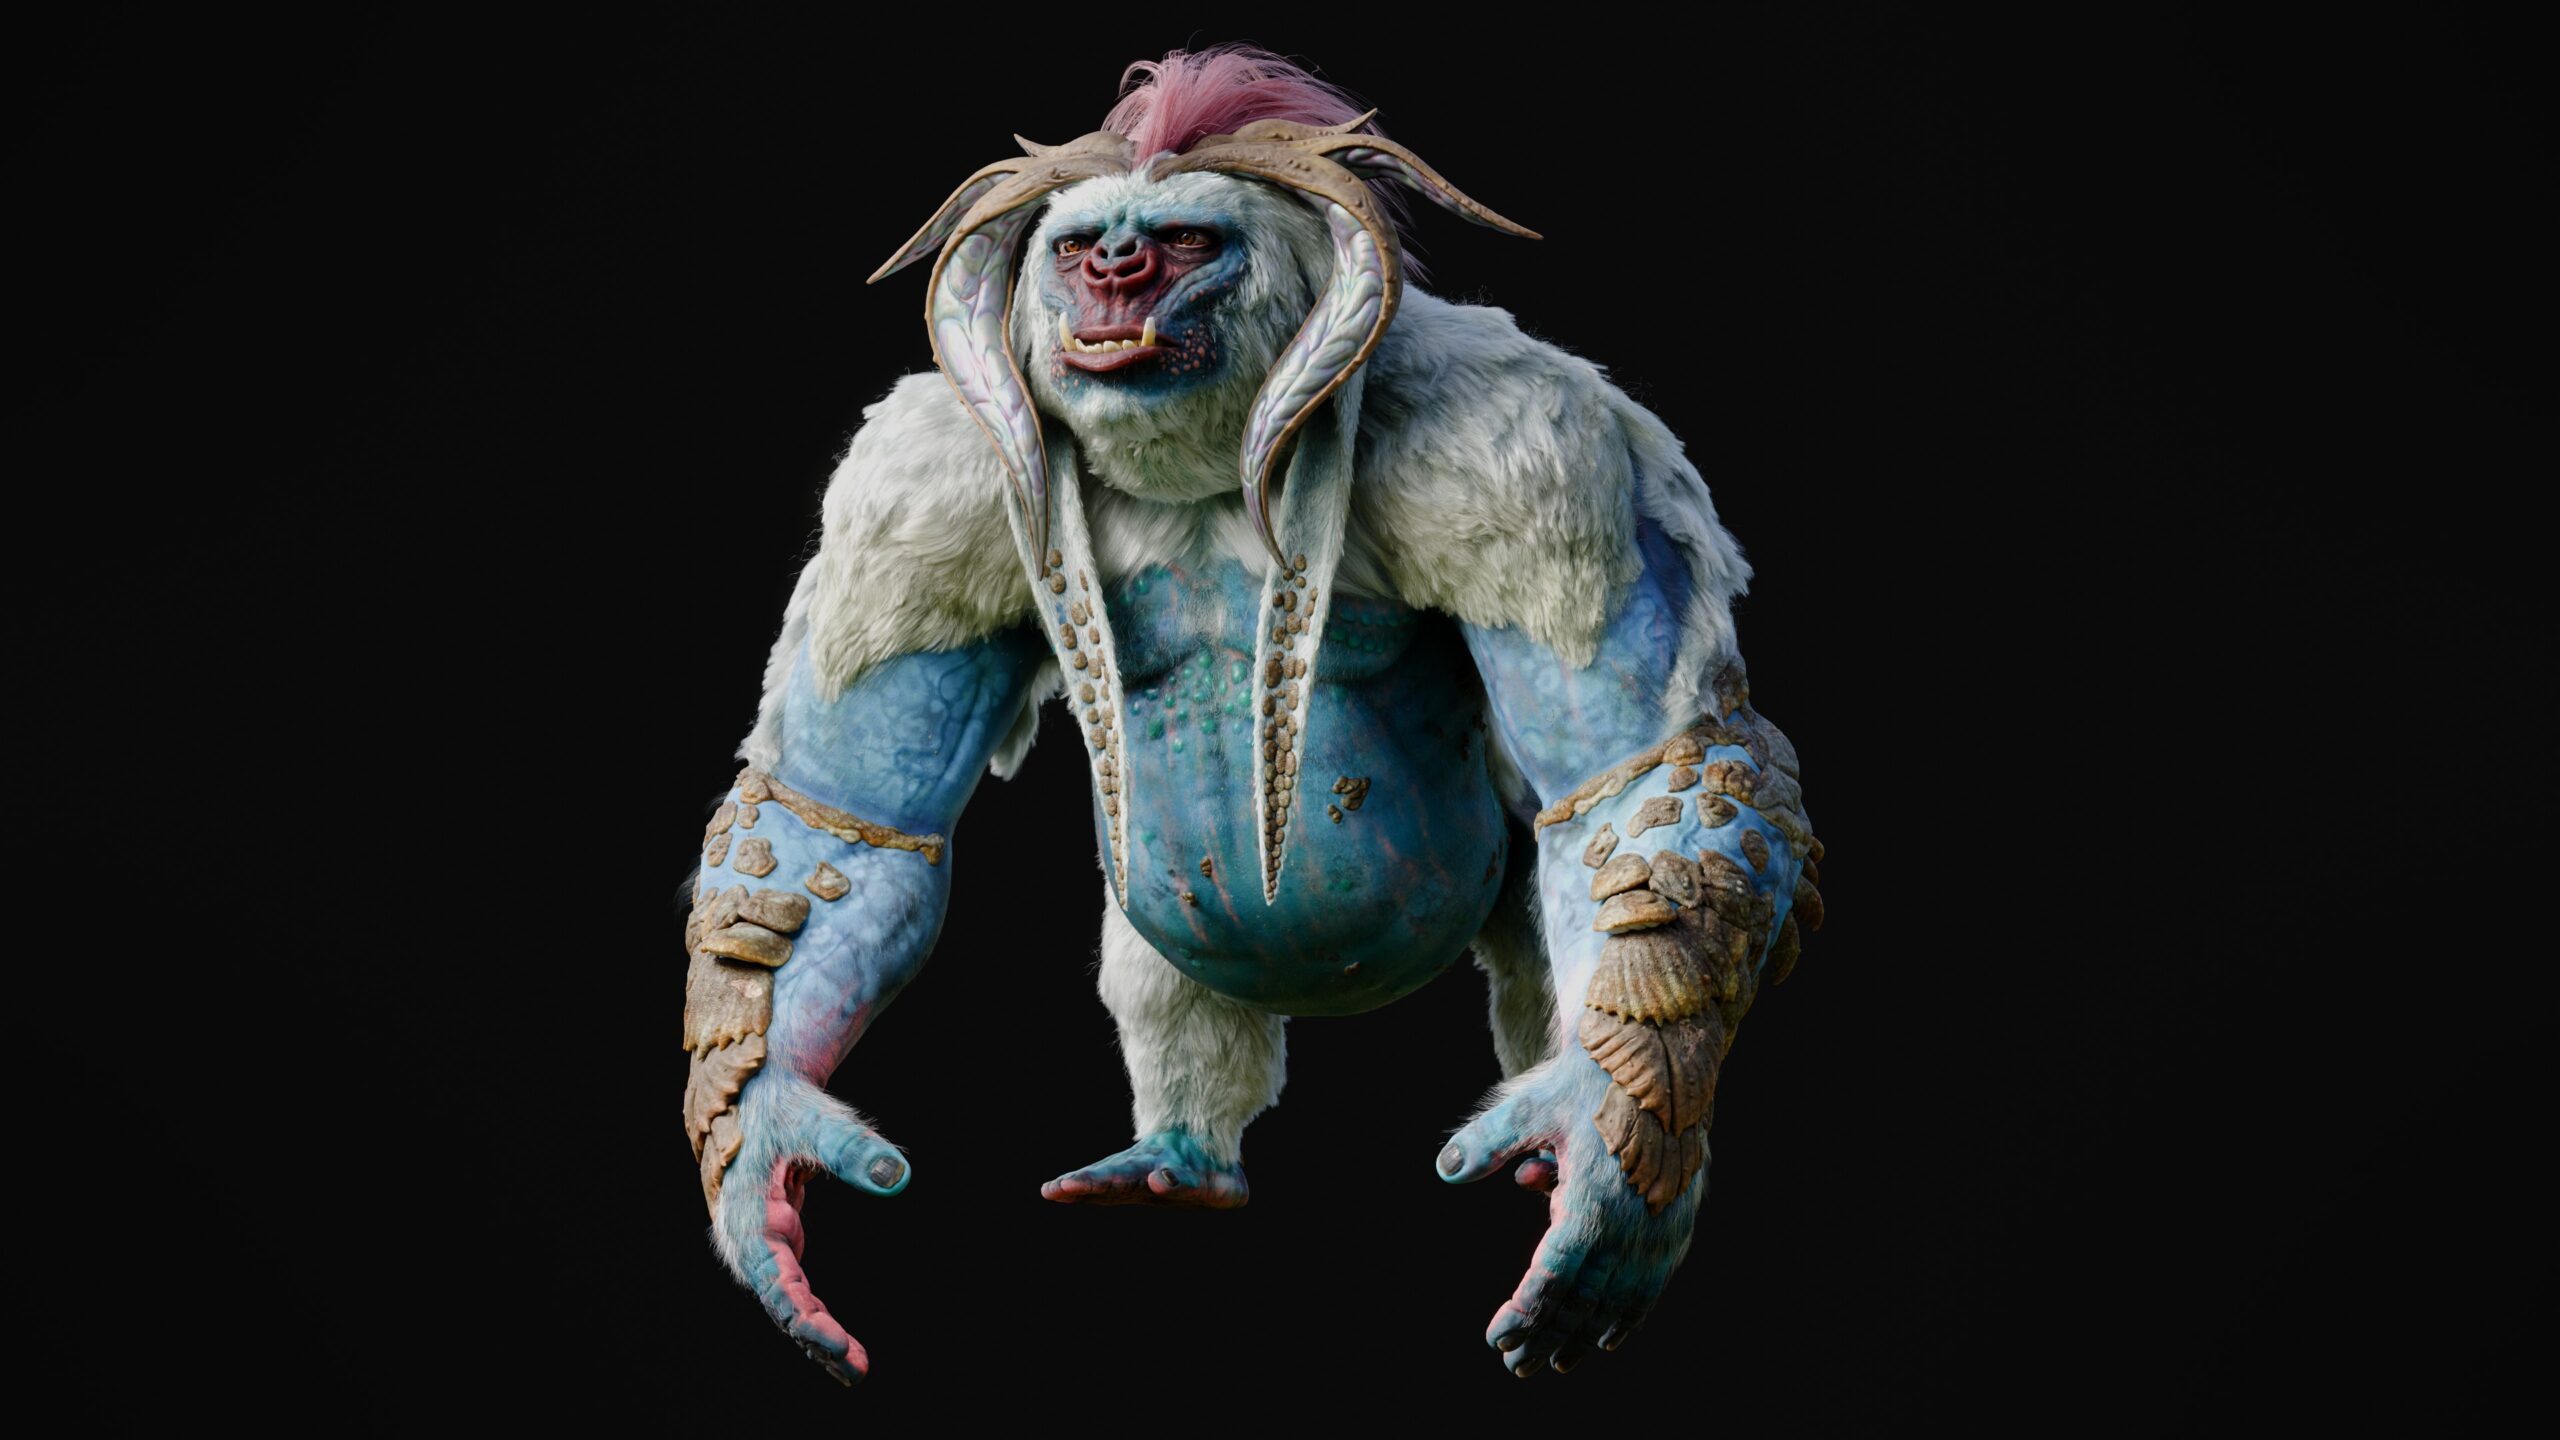
The objective was to make Brad, the Megachitus, into a detailed VFX-hero-style creature, similar to the beasts seen in films like Pacific Rim. While this was no groundbreaking feat on its own, creating this character as a single artist with no studio team or established pipeline made it much more interesting.
The Bolt team had built their benchmarking around USD and Blender Cycles as powerful open tools while they worked on development of their own path tracer, Glowstick. Blender is also the DCC I’m most comfortable working in and provides a fantastic all-in-one solution for asset creation on a smaller budget.
Creating the Assets
I developed the first version of our beloved Megachitus over the span of roughly two months back in 2022. After reconnecting with Darwesh and Bolt in 2024, I reworked Brad from the ground up to drastically improve both his look and level of detail for future benchmarking purposes.
This production breakdown will highlight both the original and updated versions of Brad as I took him through each step of my 3D pipeline. As part of our initial showcase of Brad’s new and improved form, I put together a short “idle” animation as well as a small patch of coastal environment to render him in.
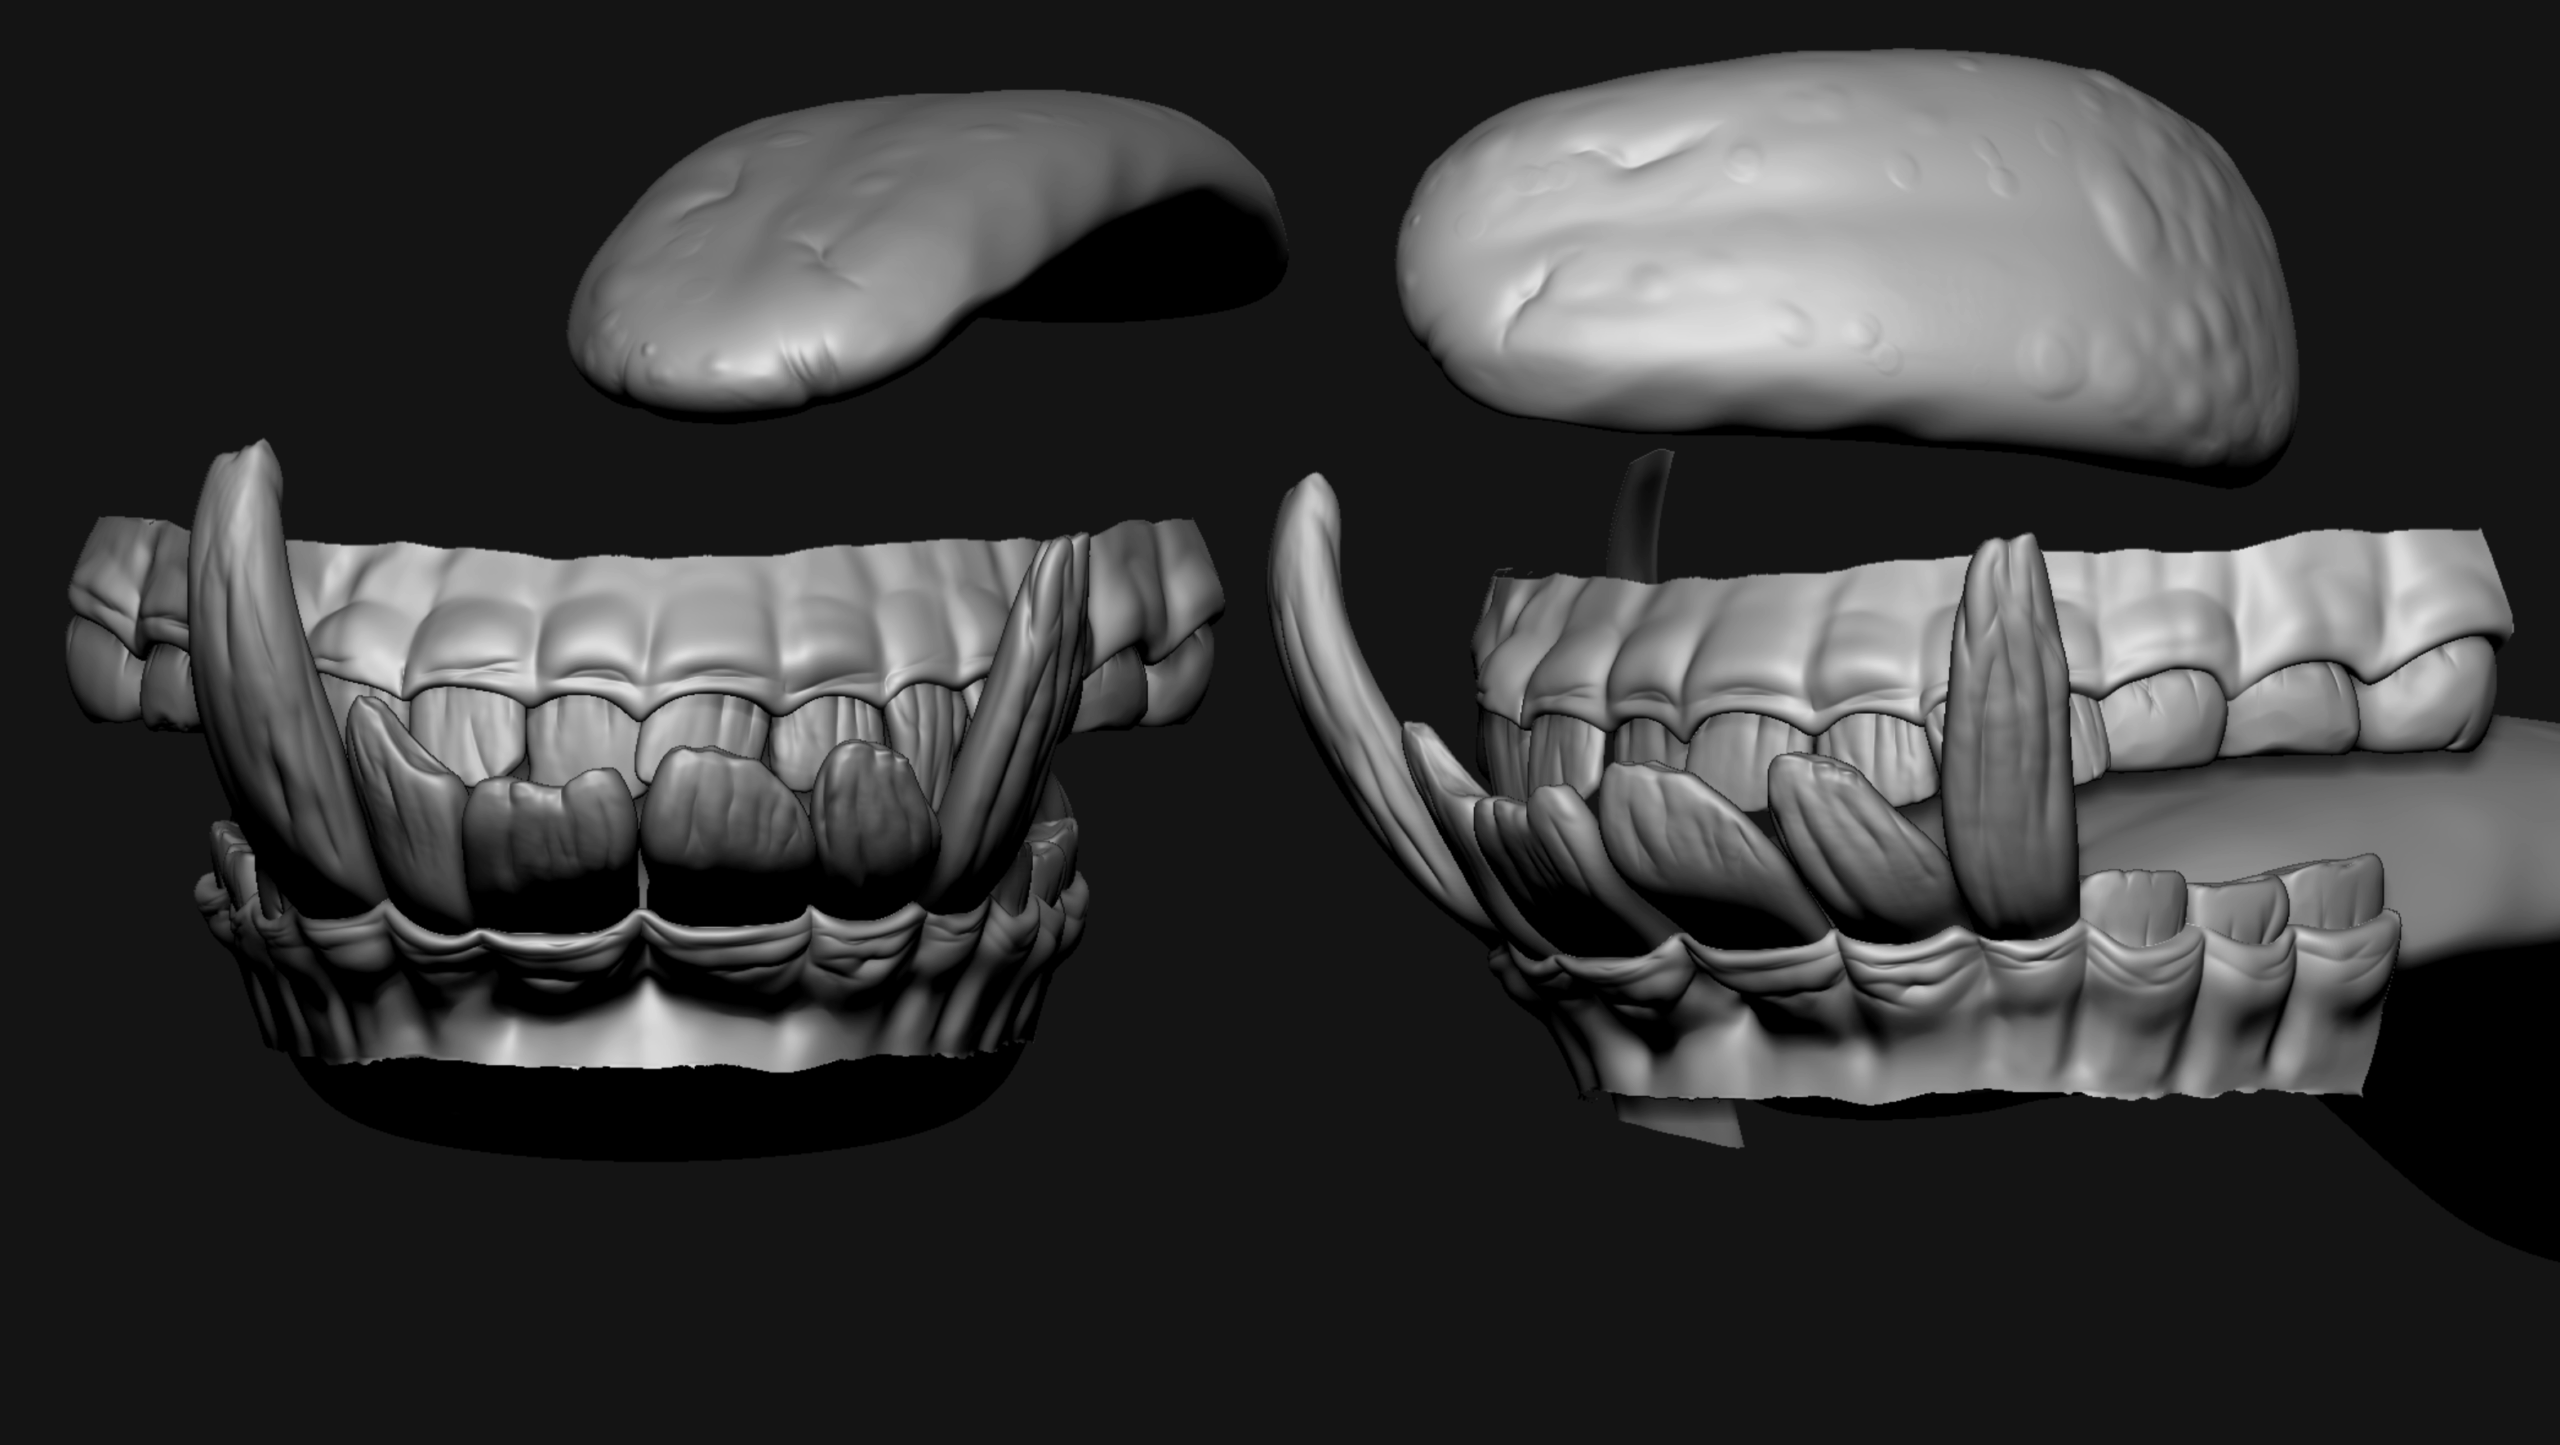
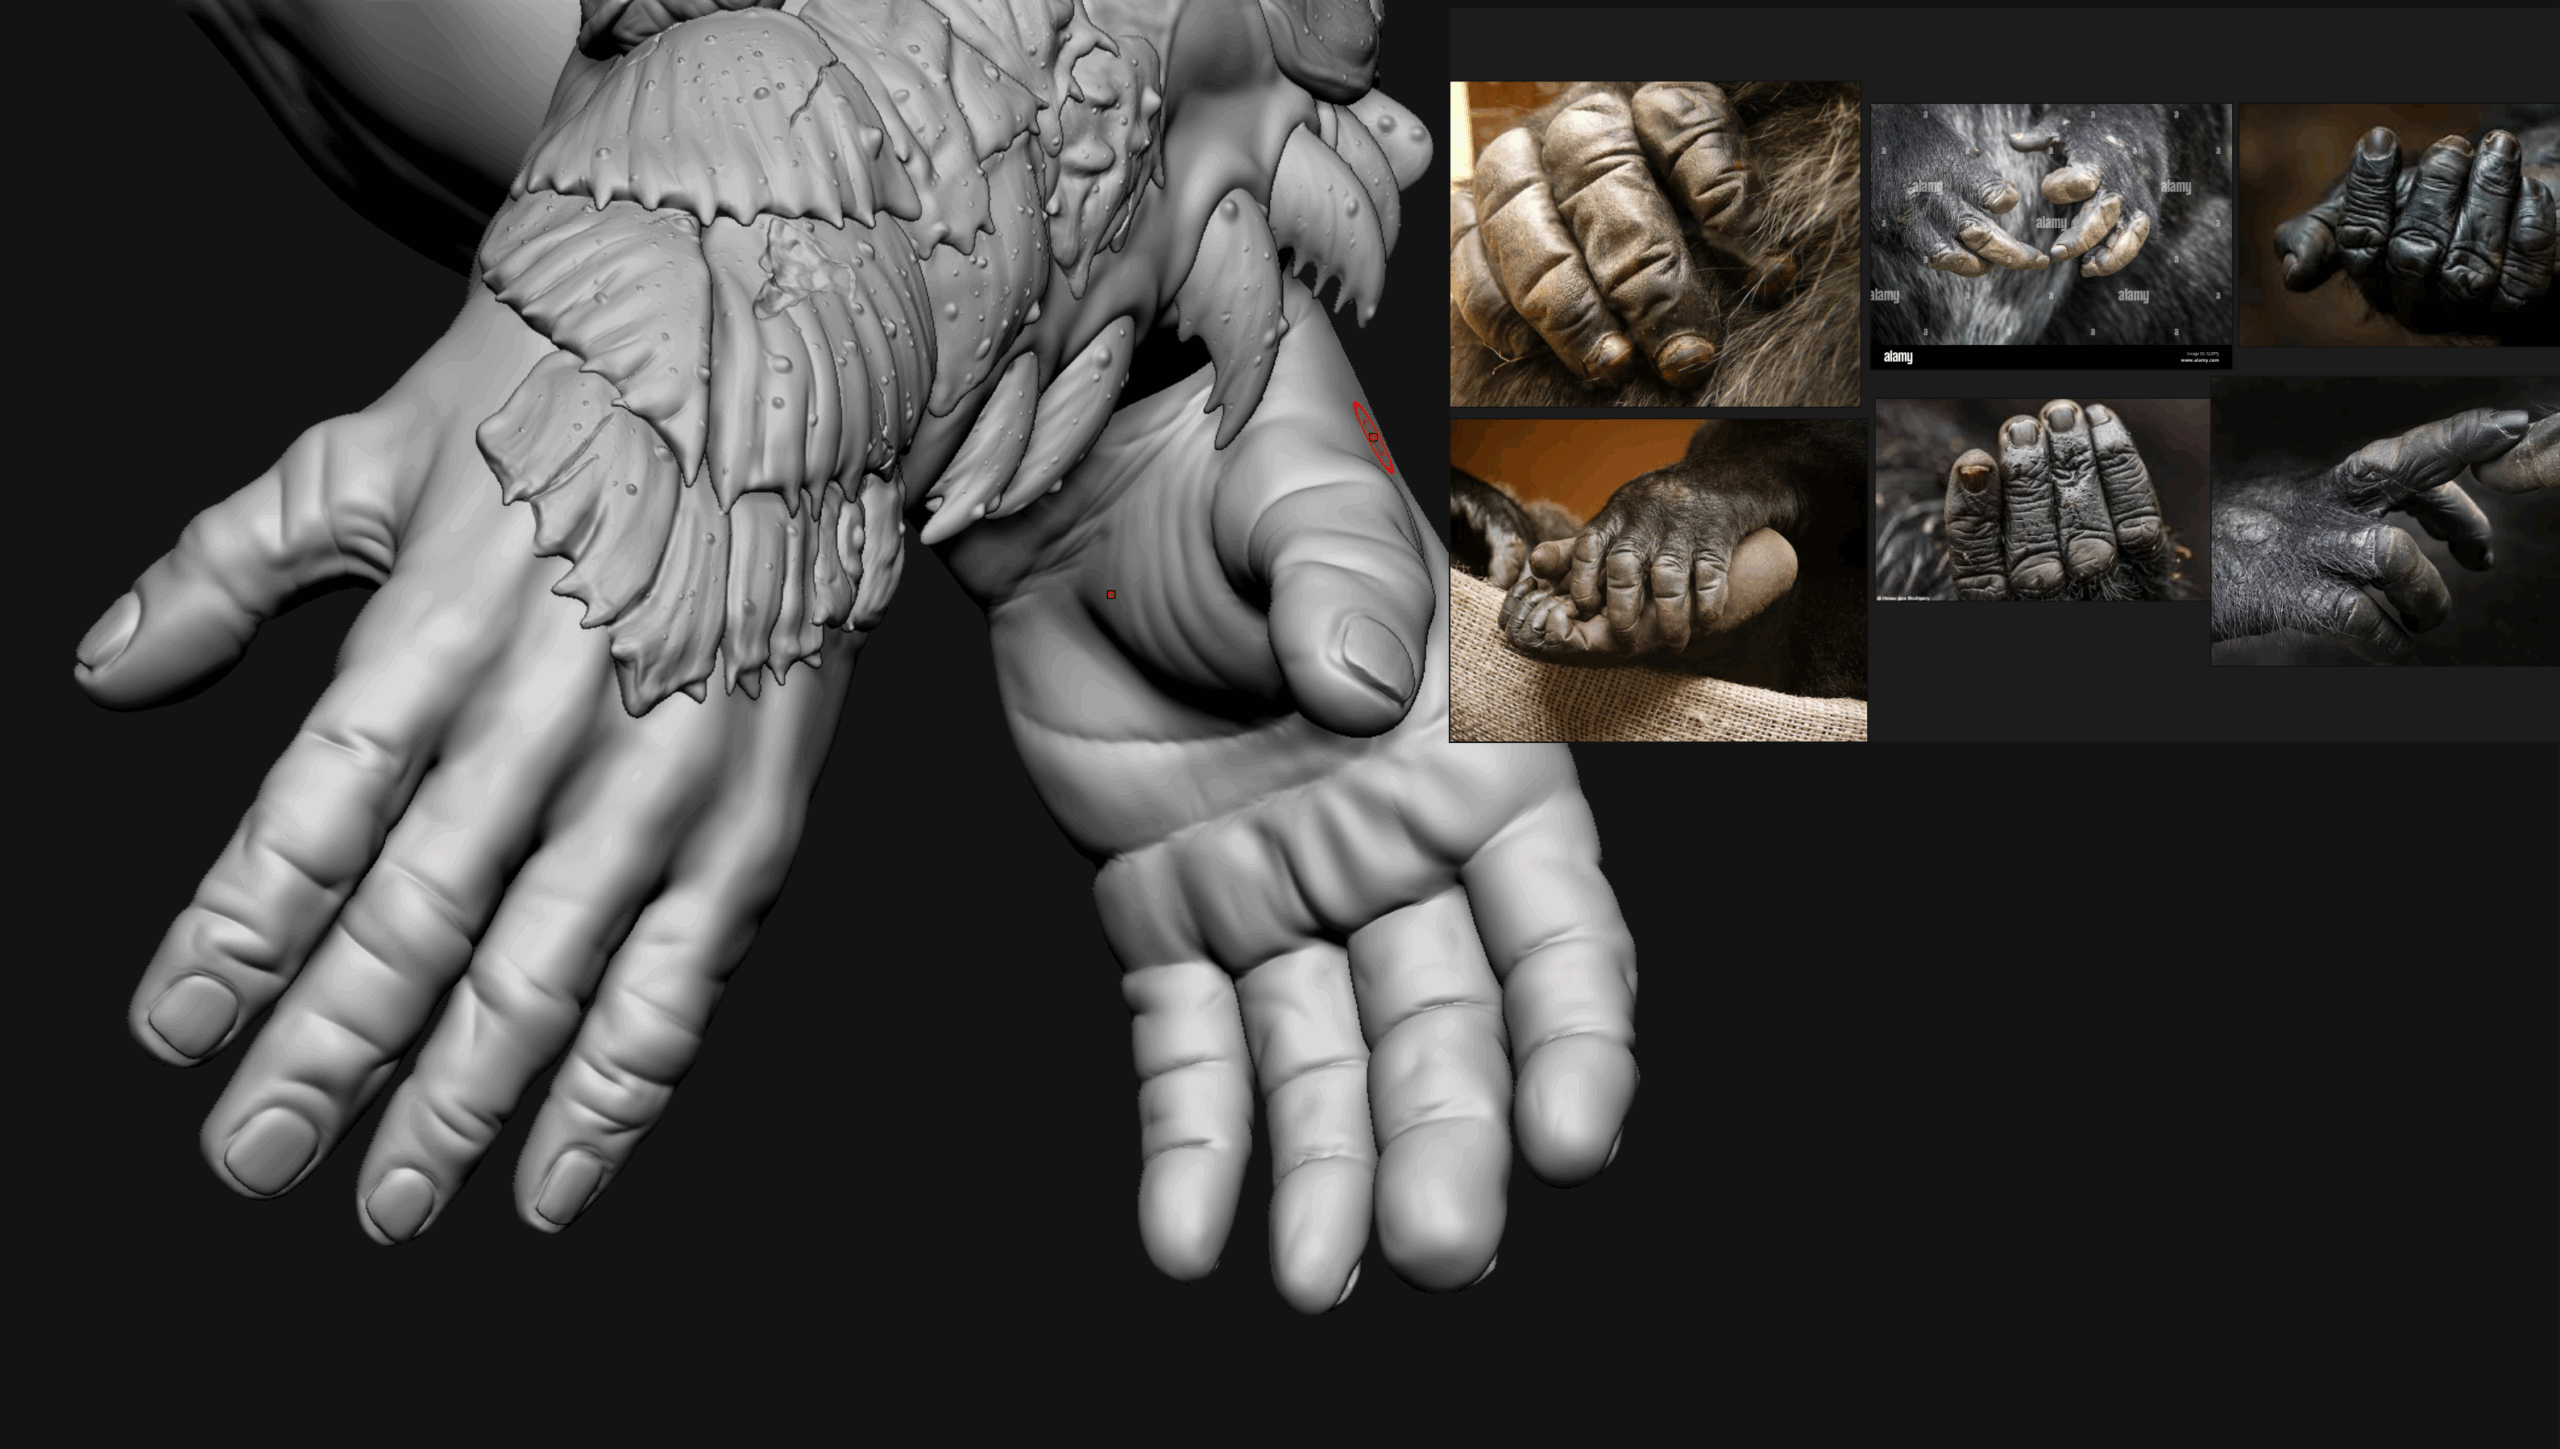
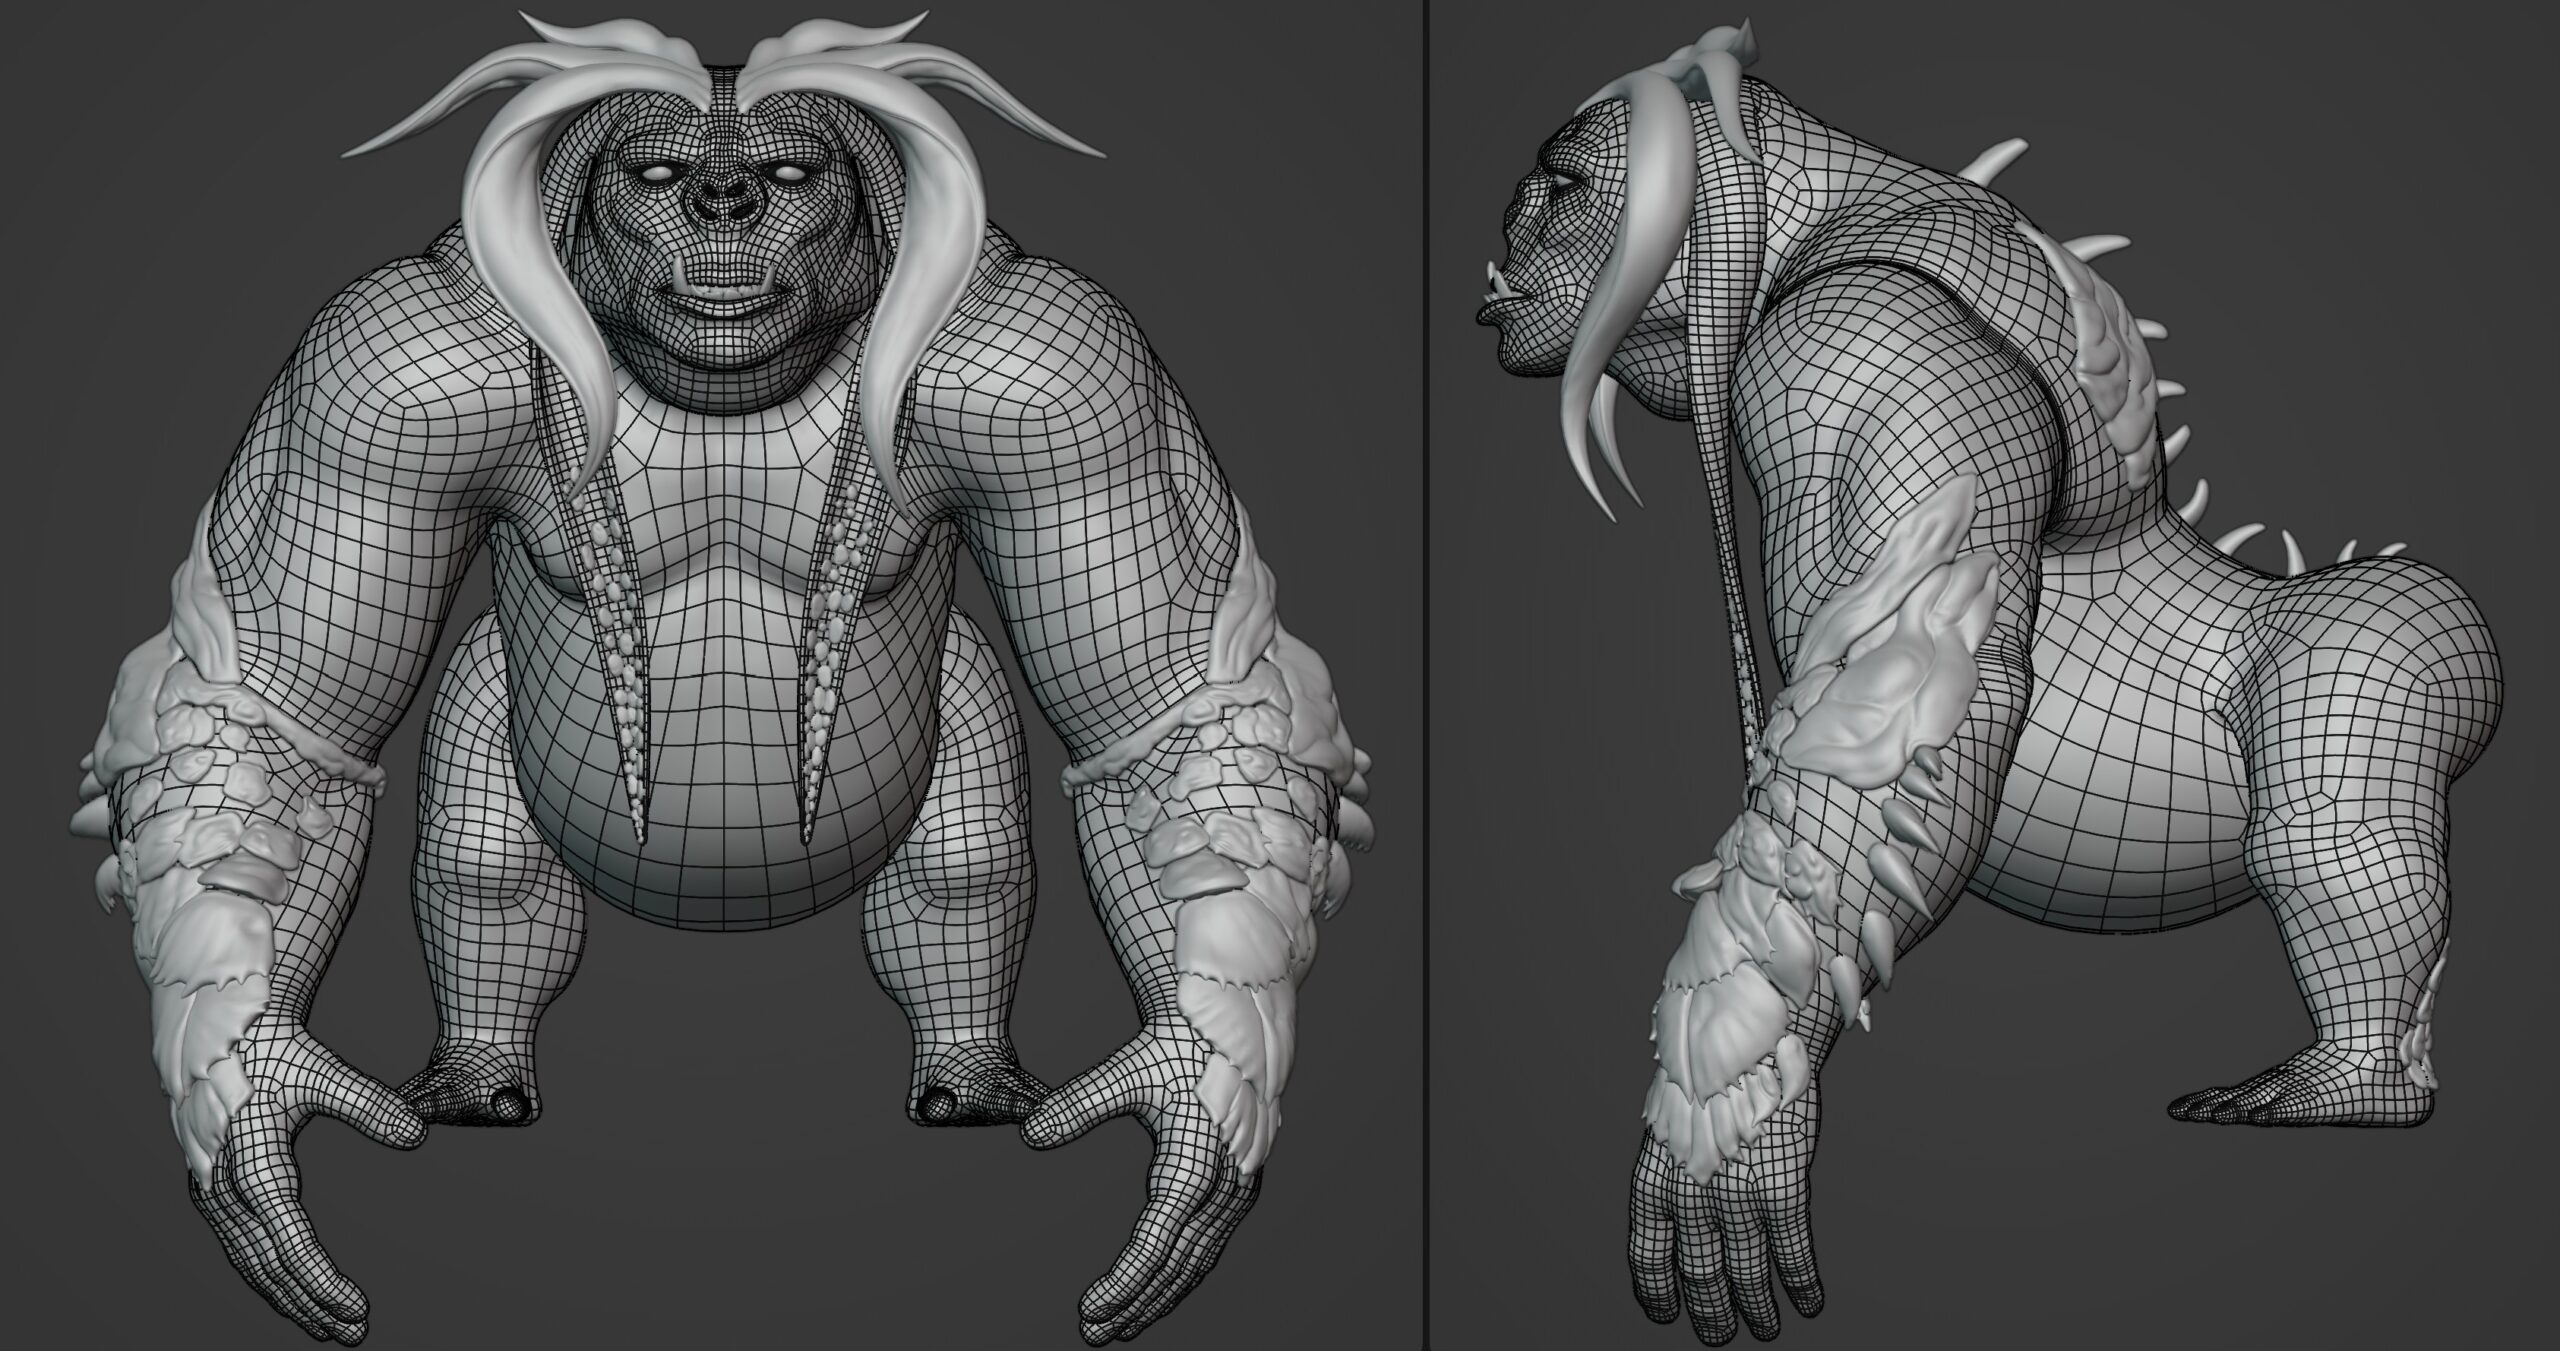
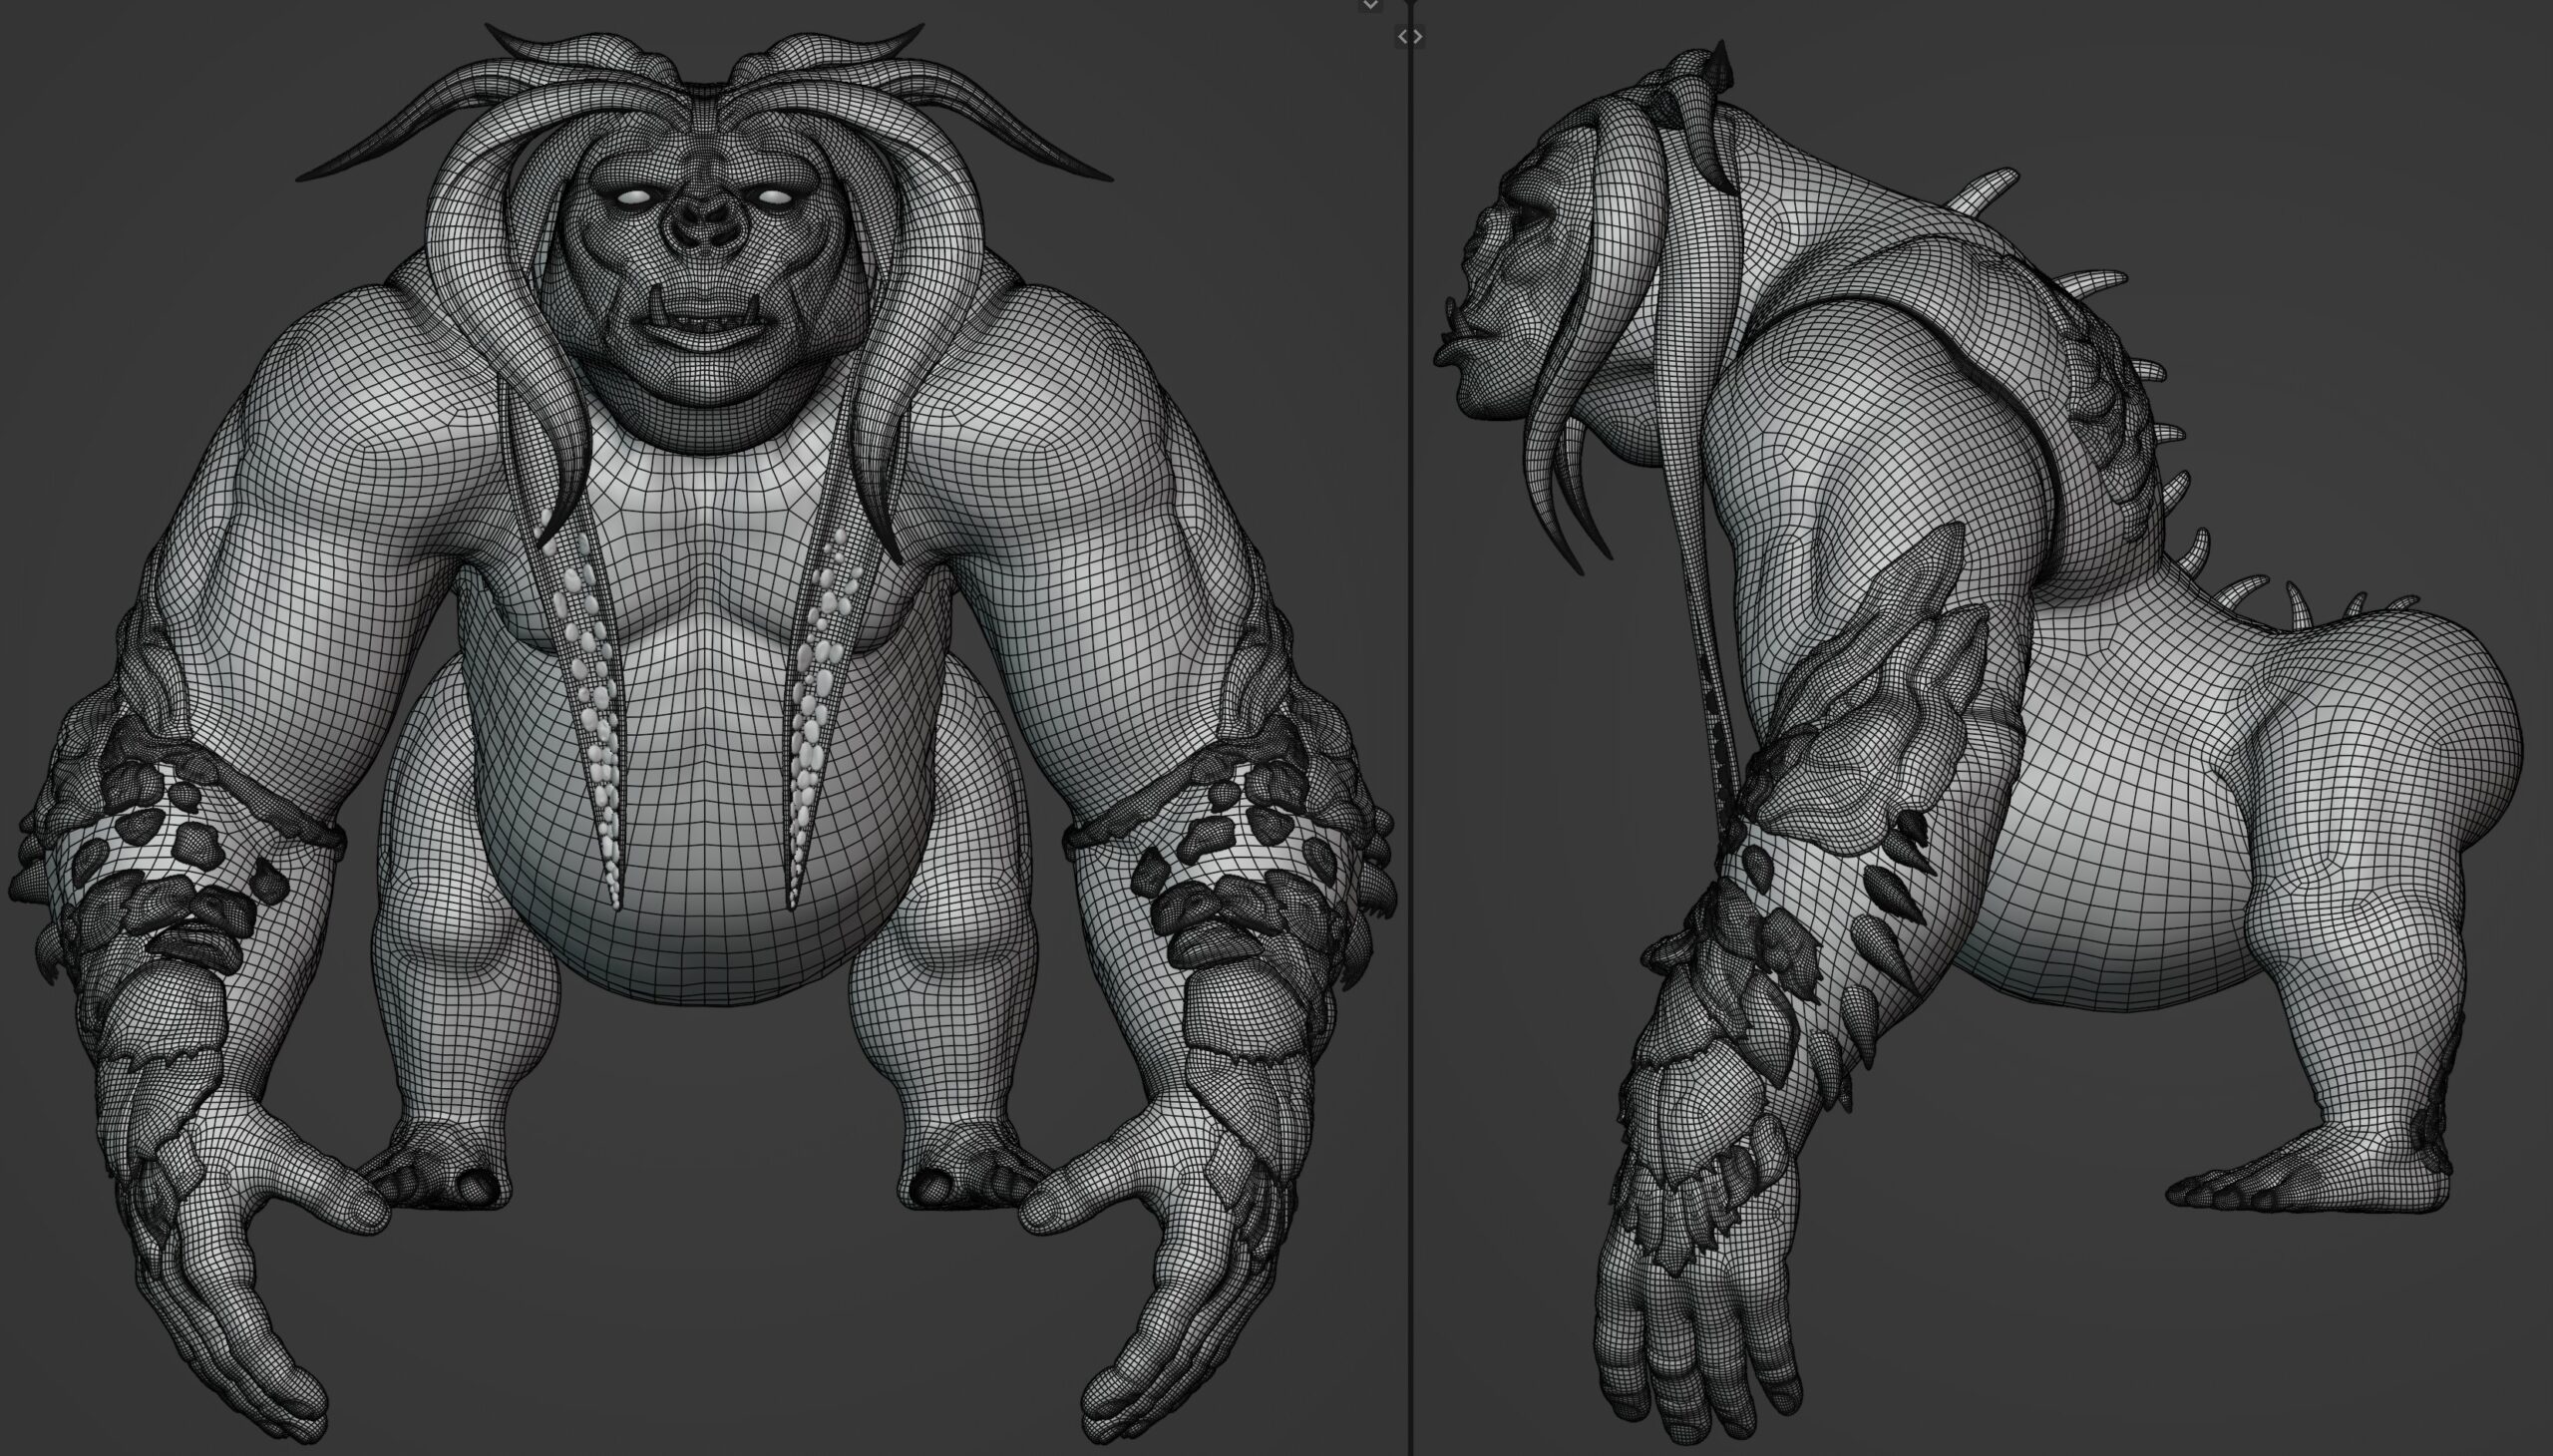
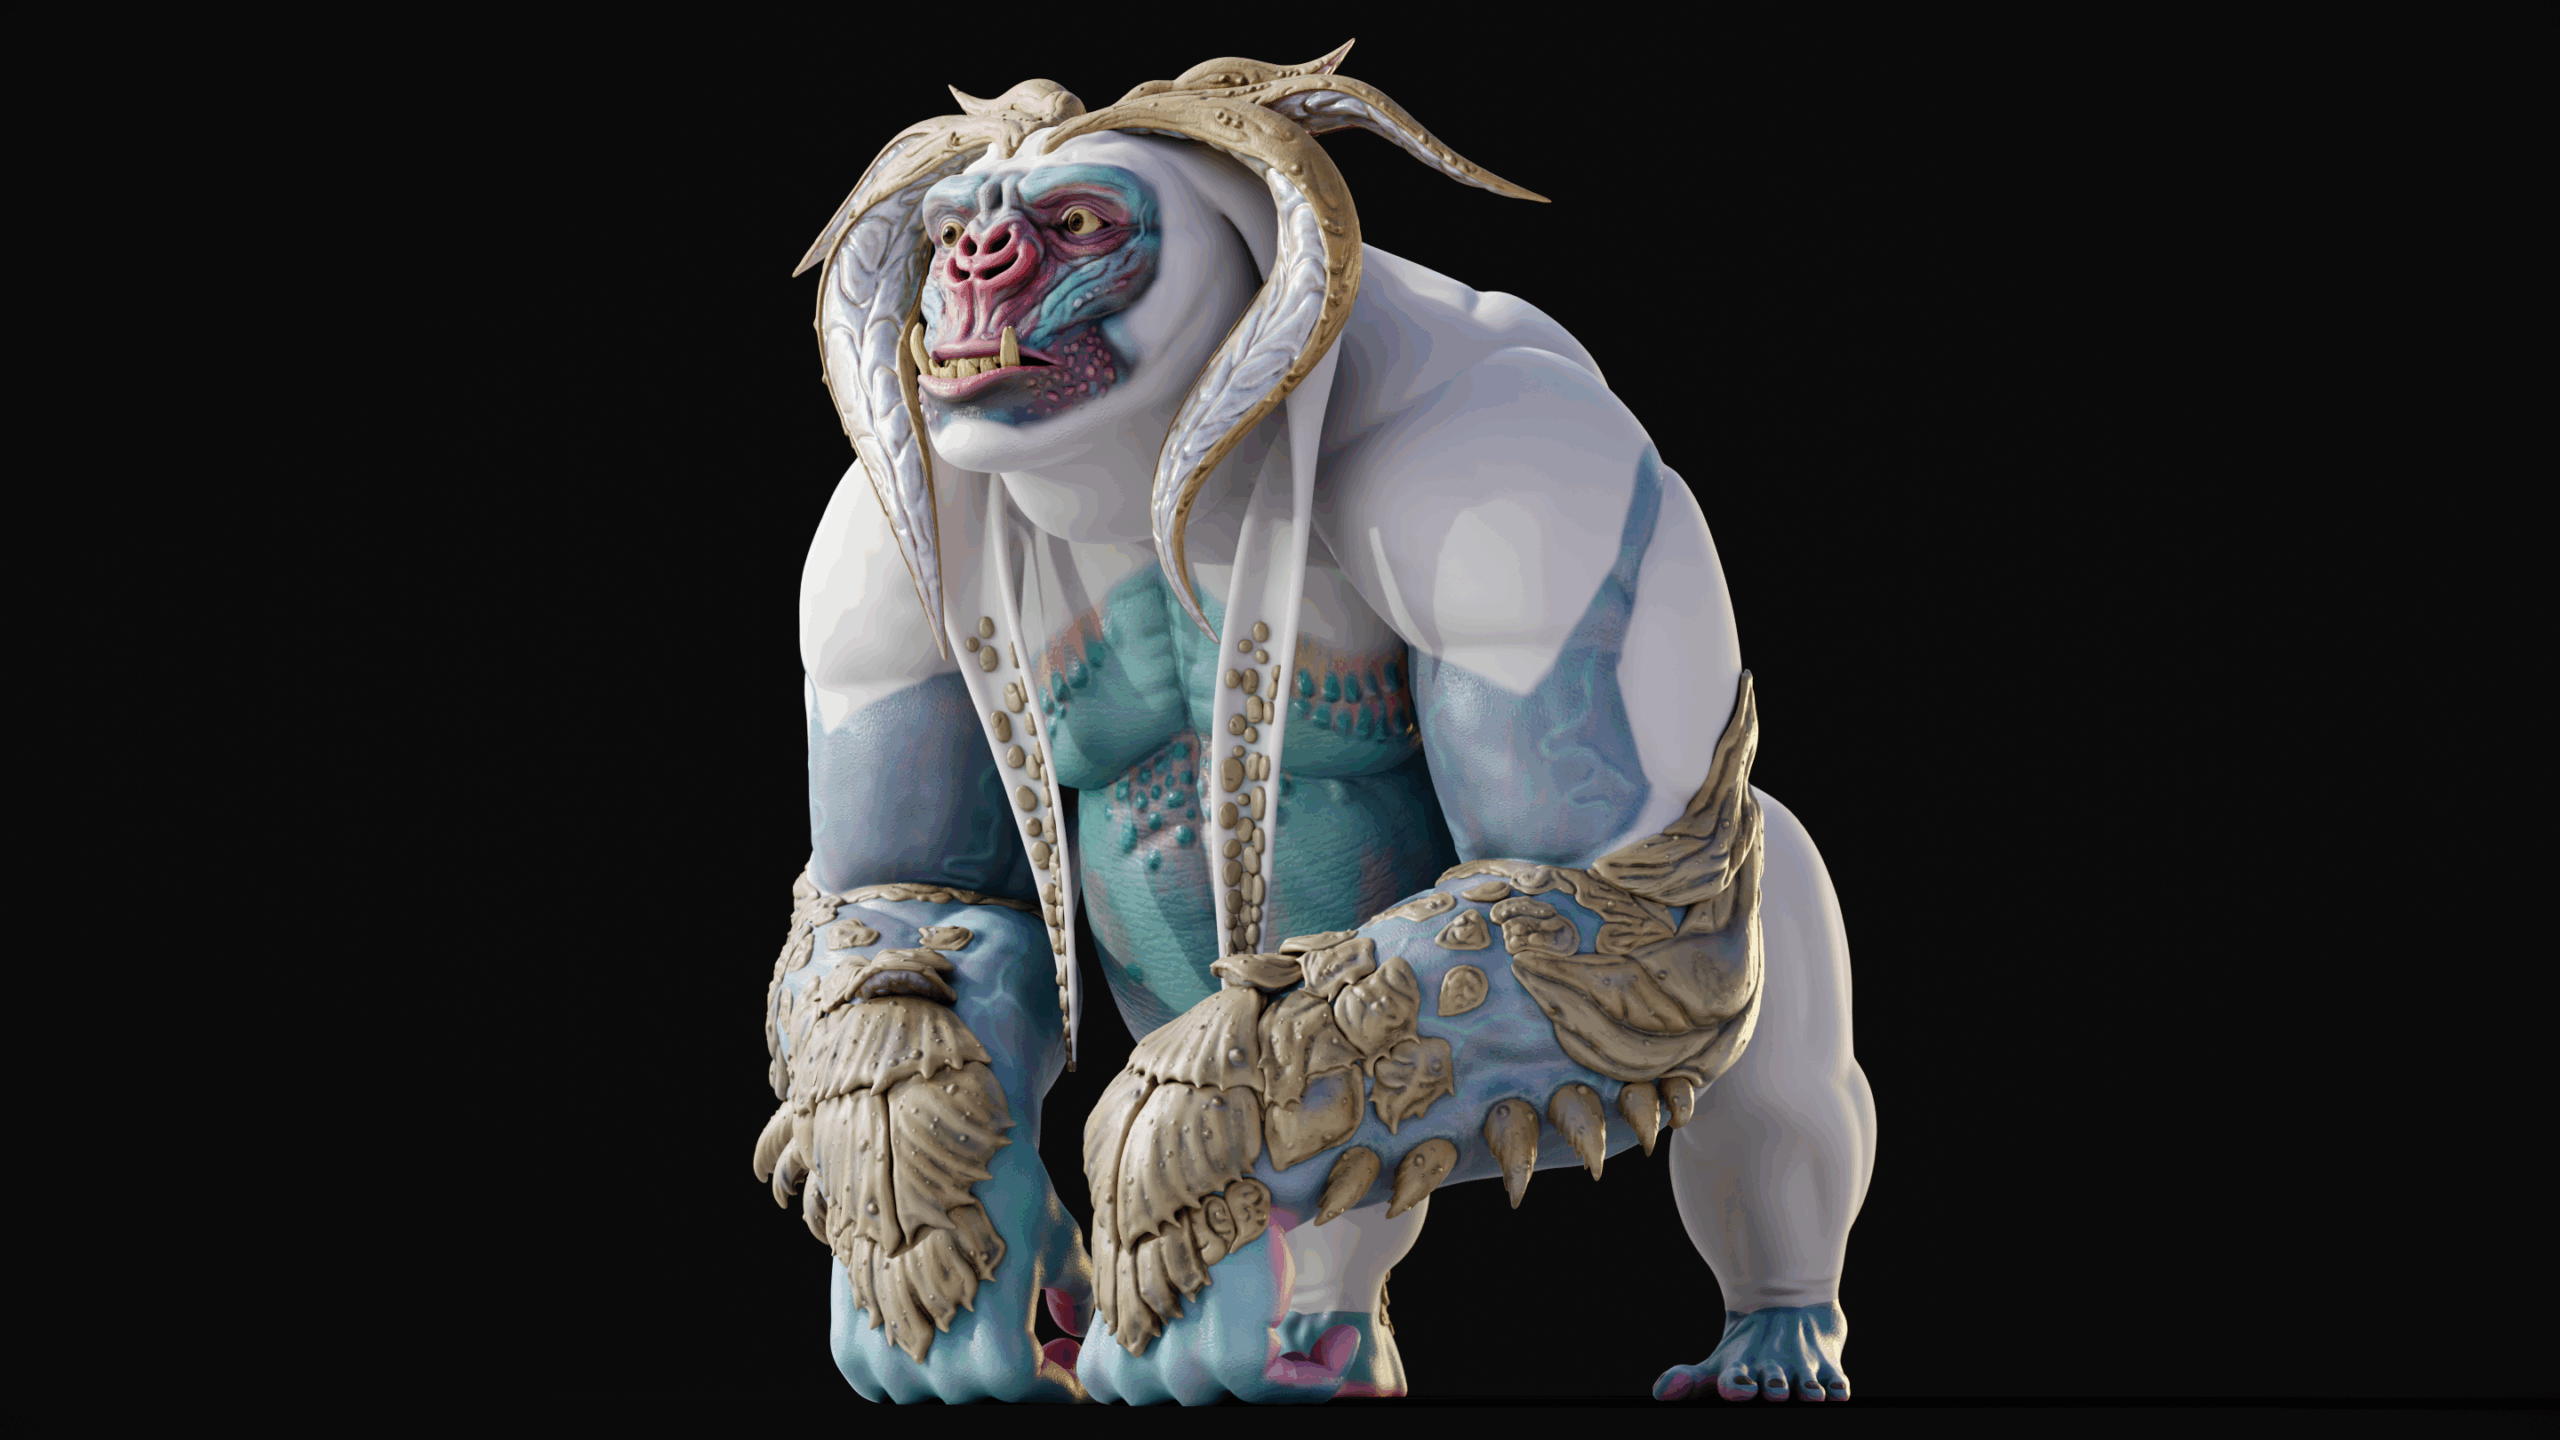
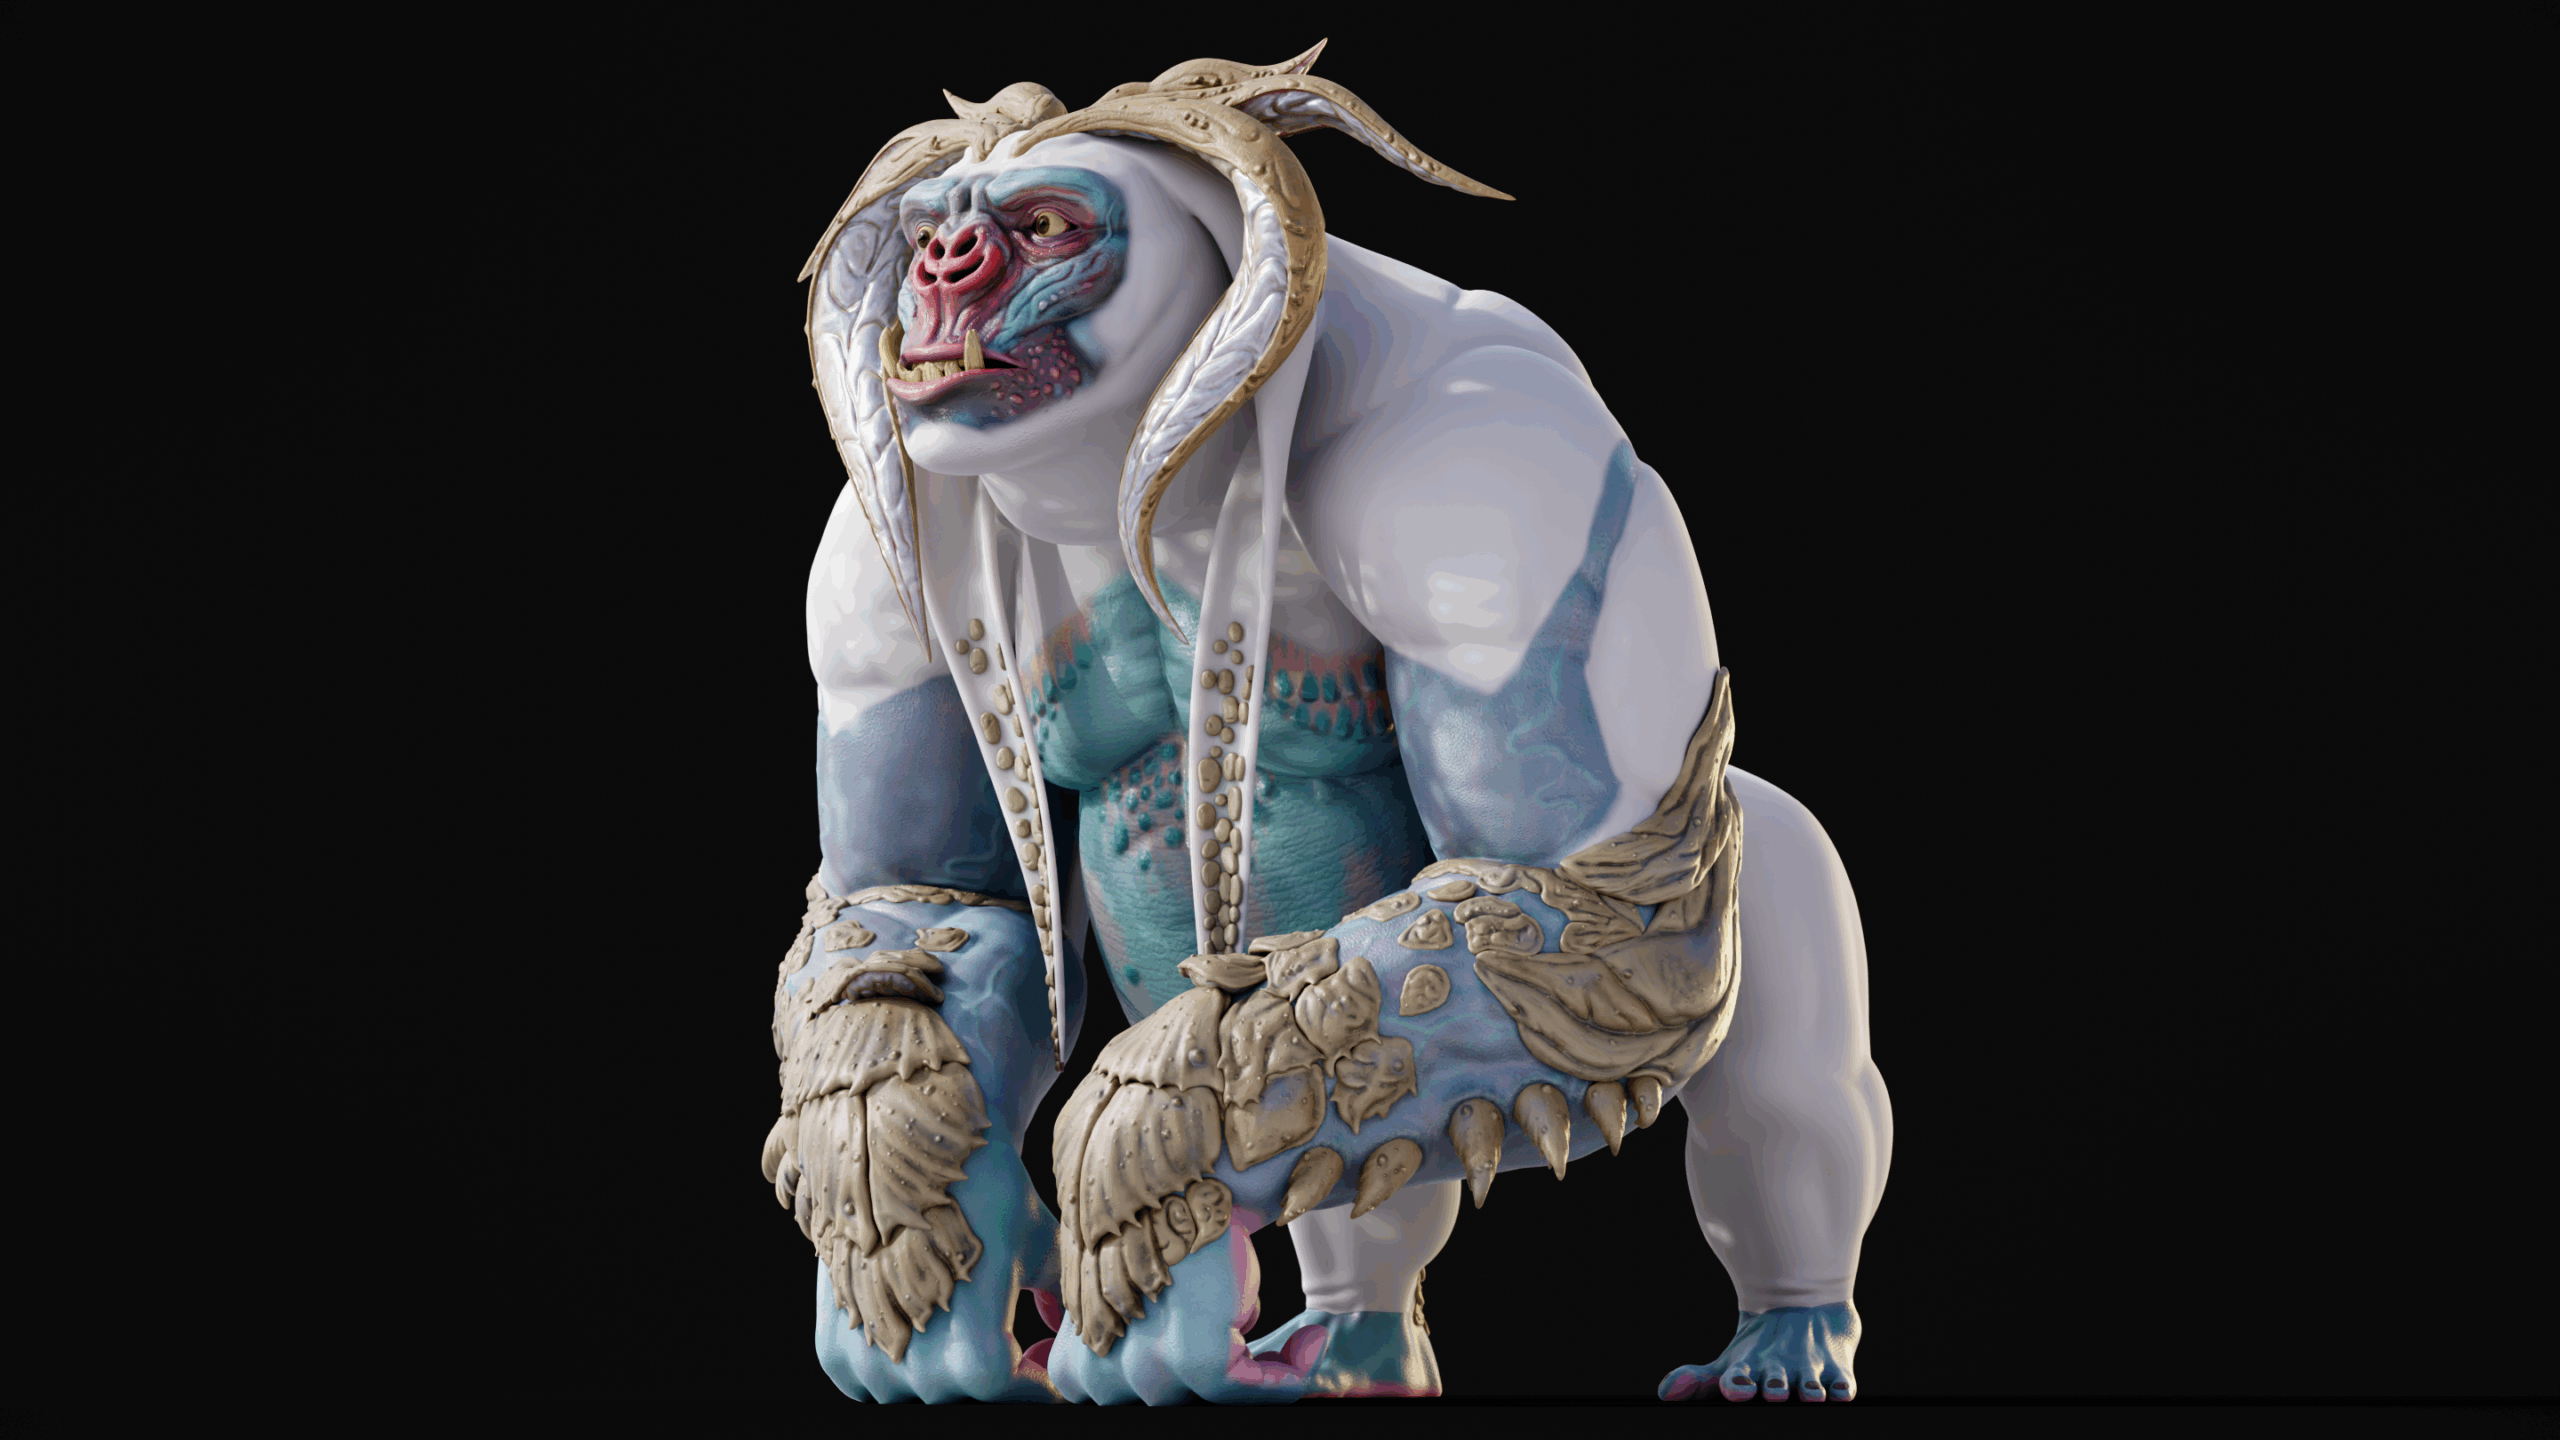
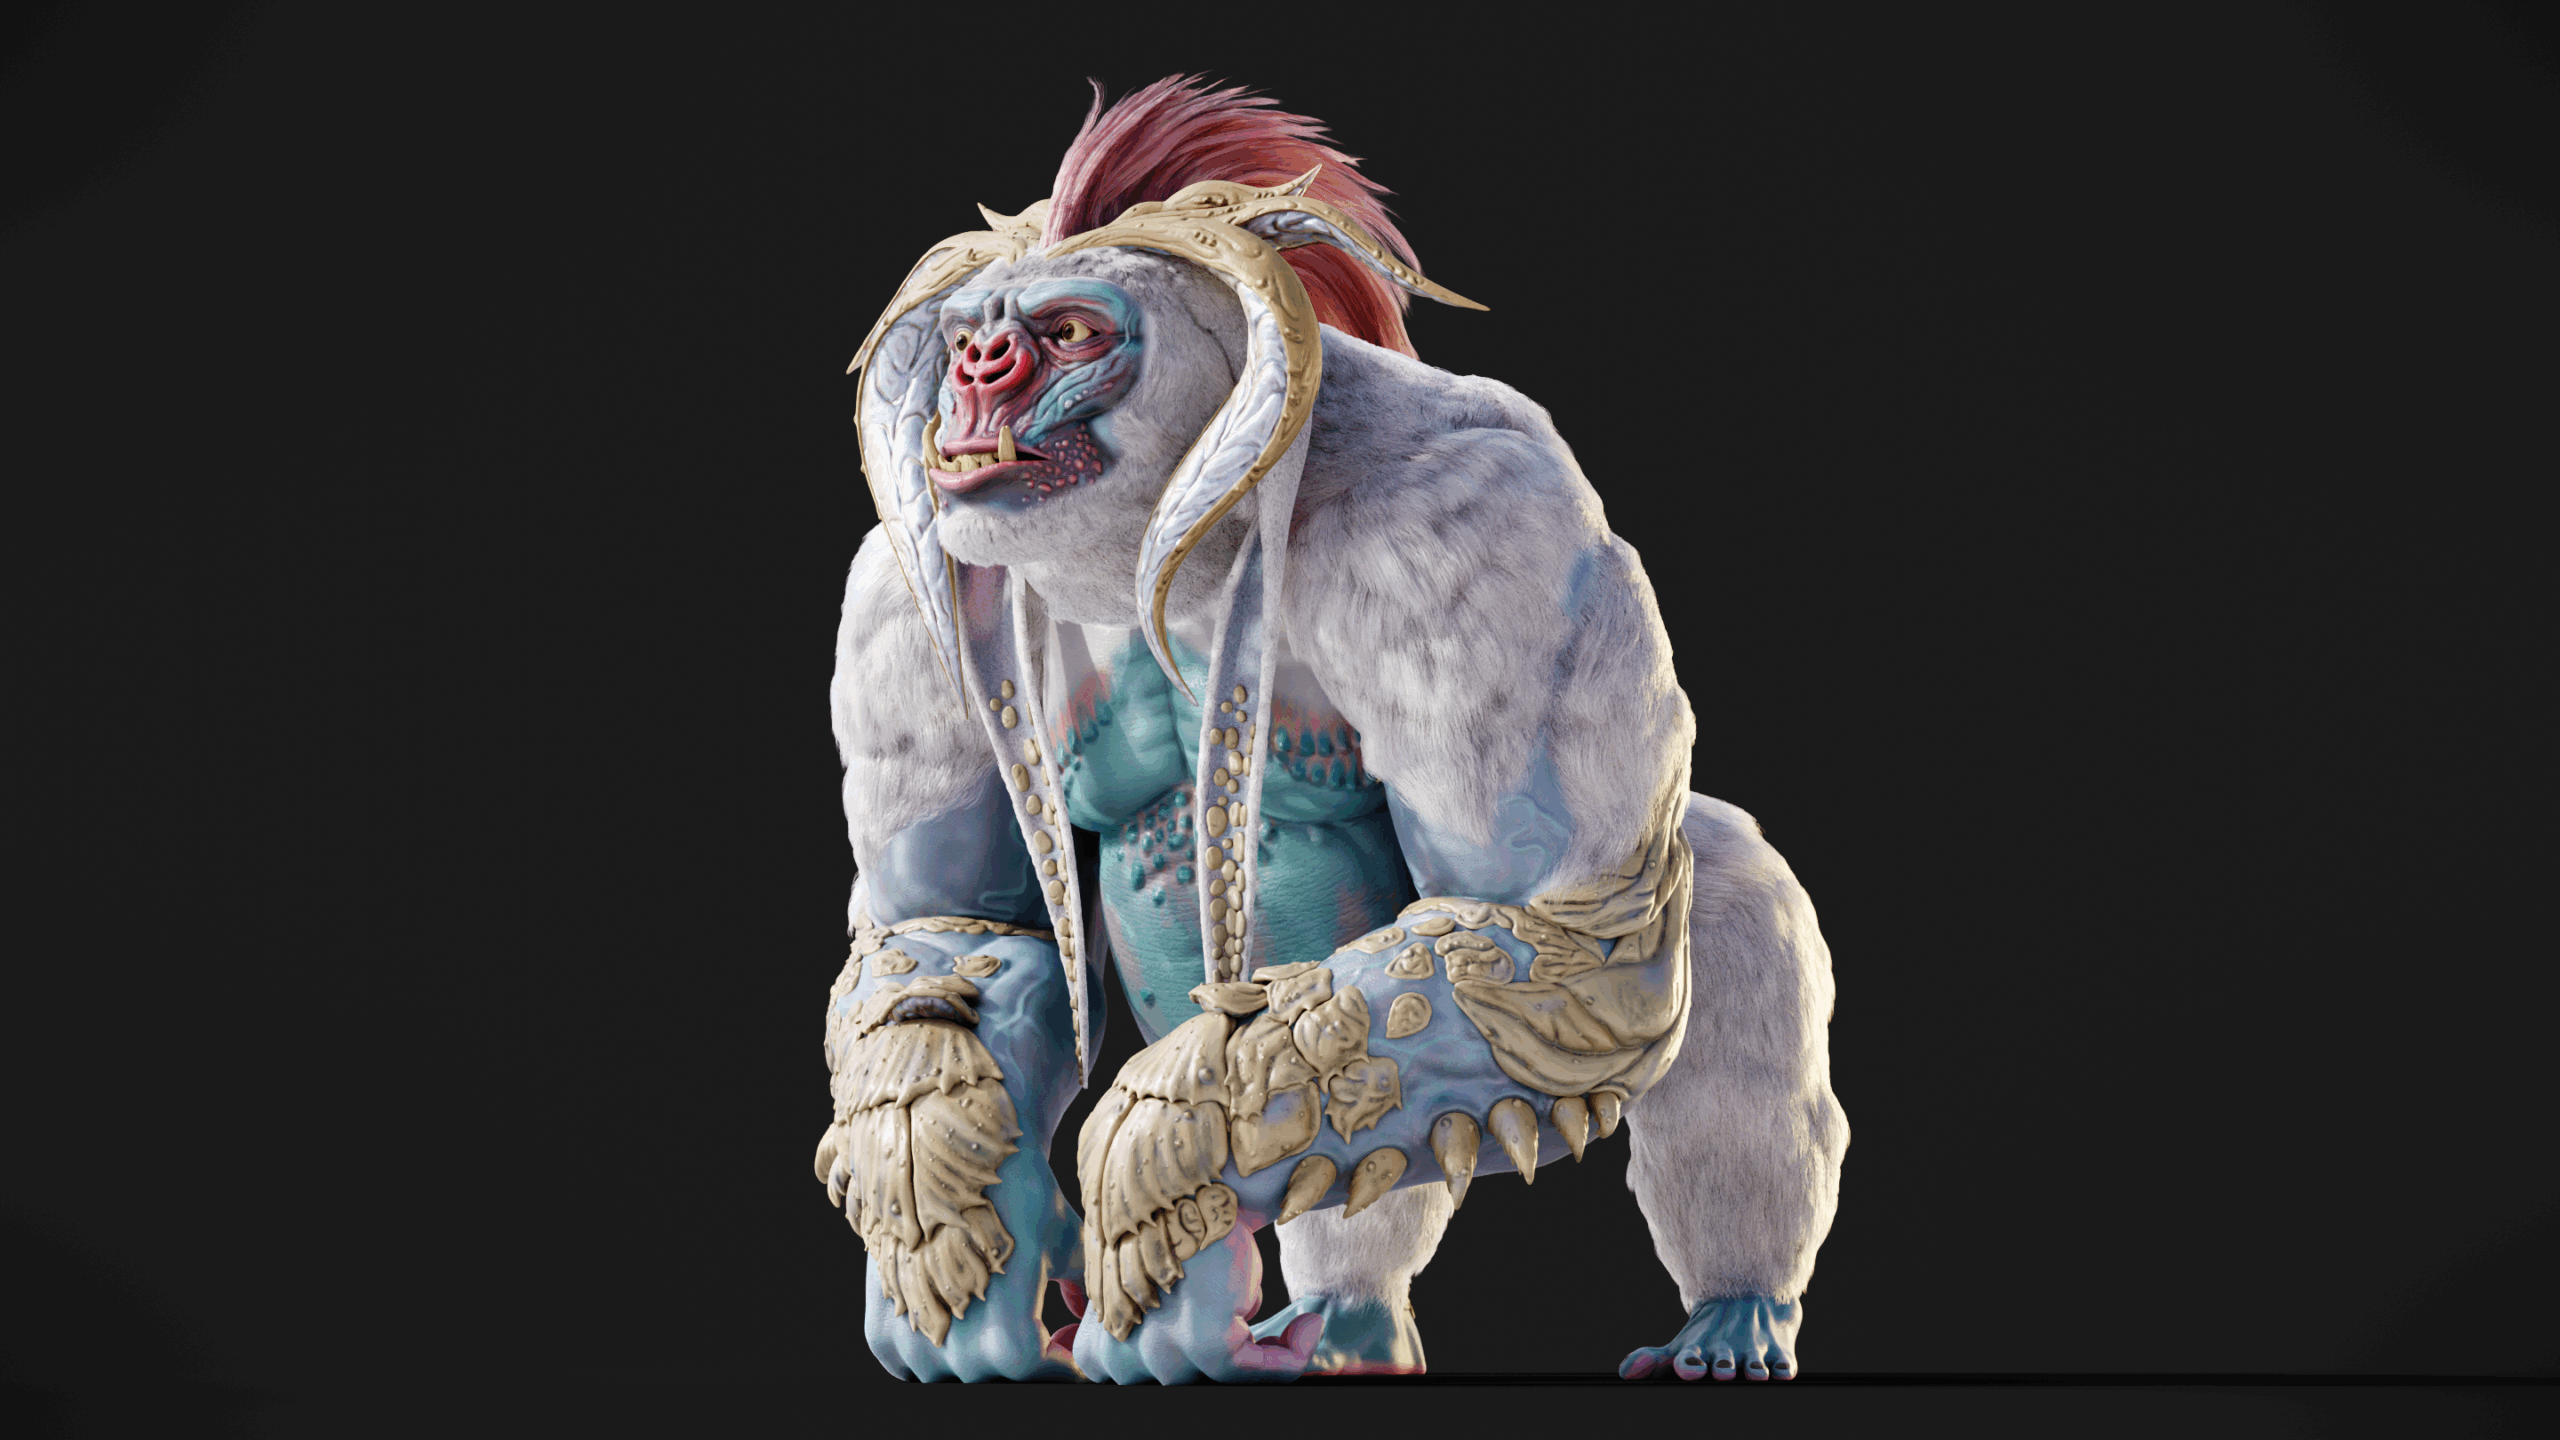
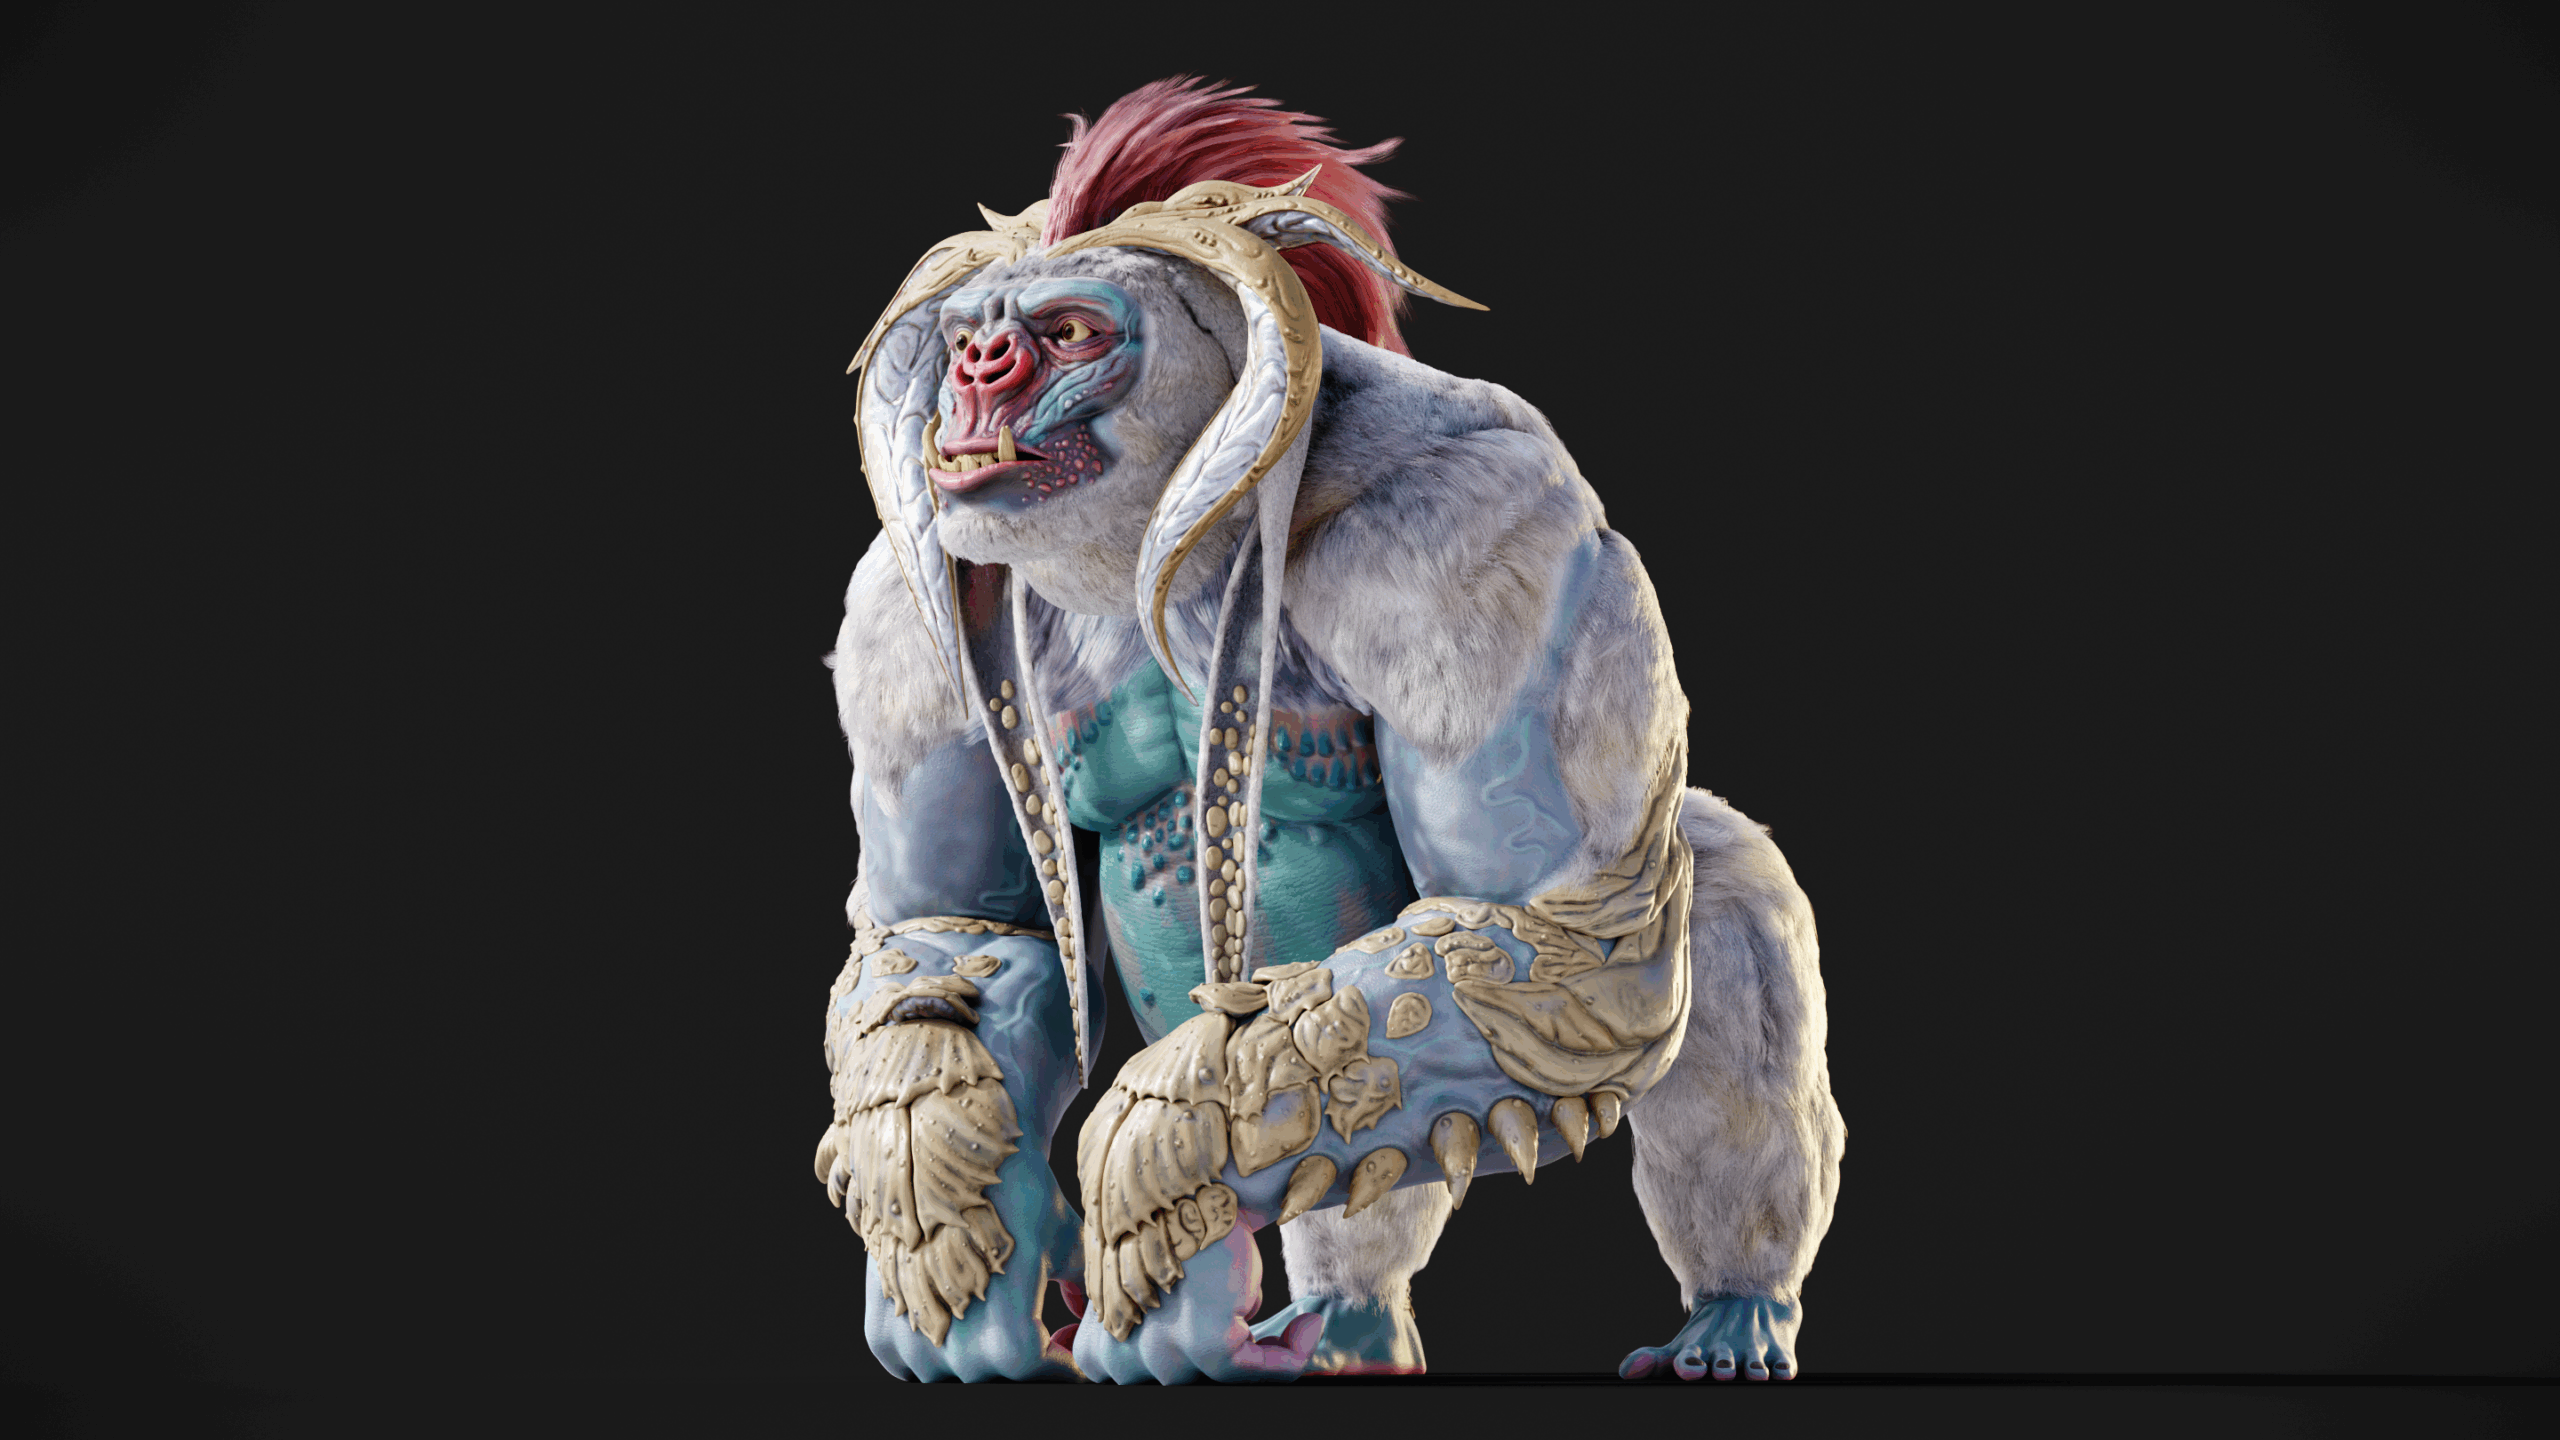
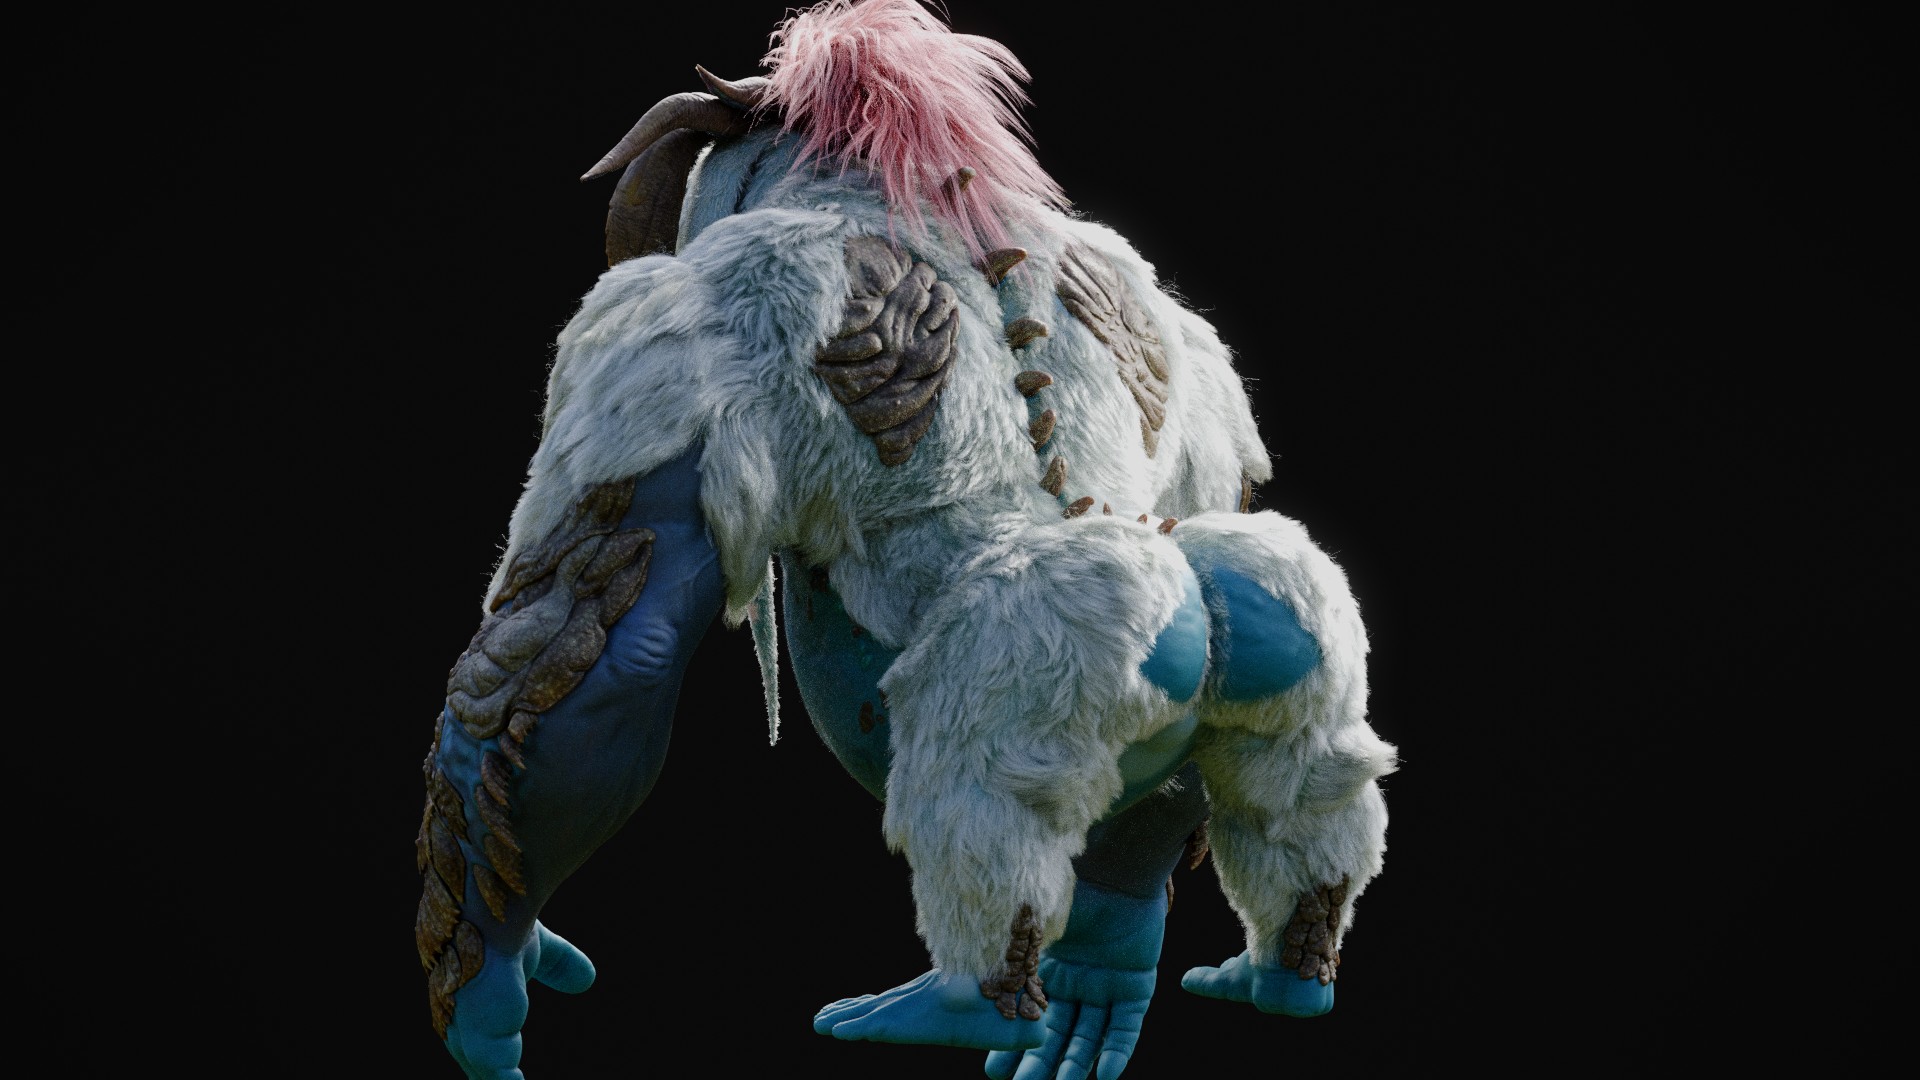
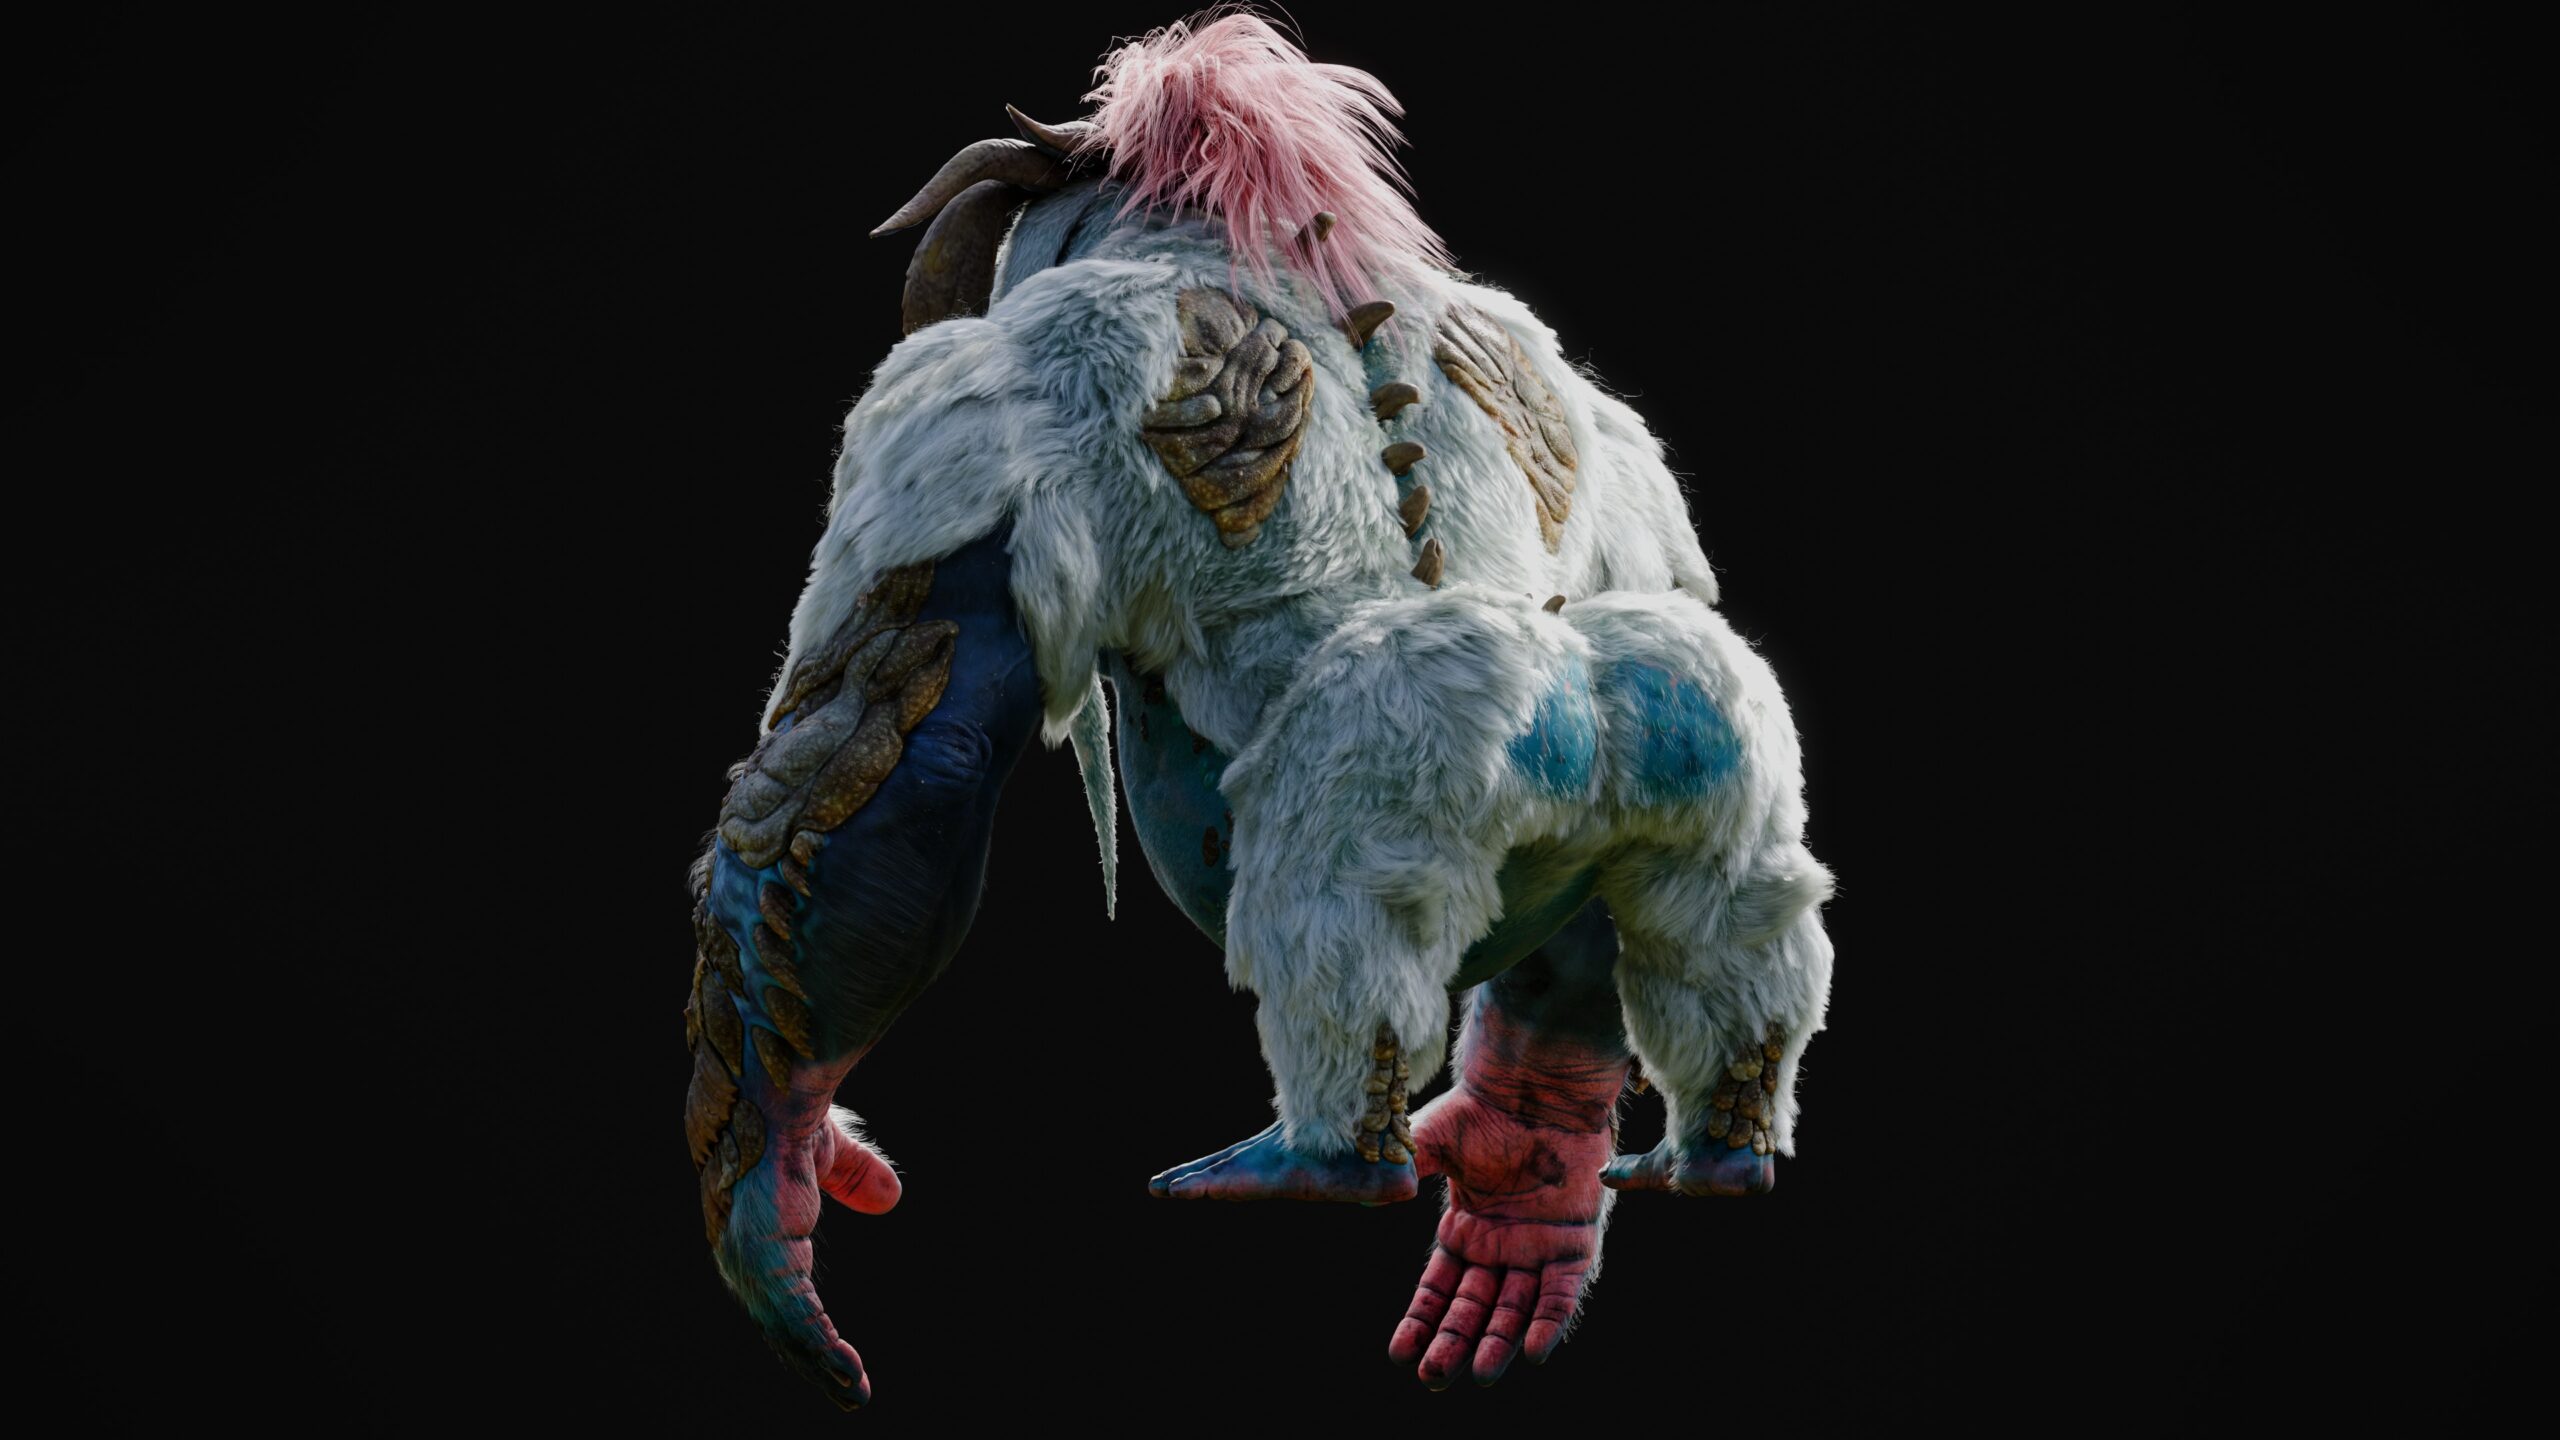
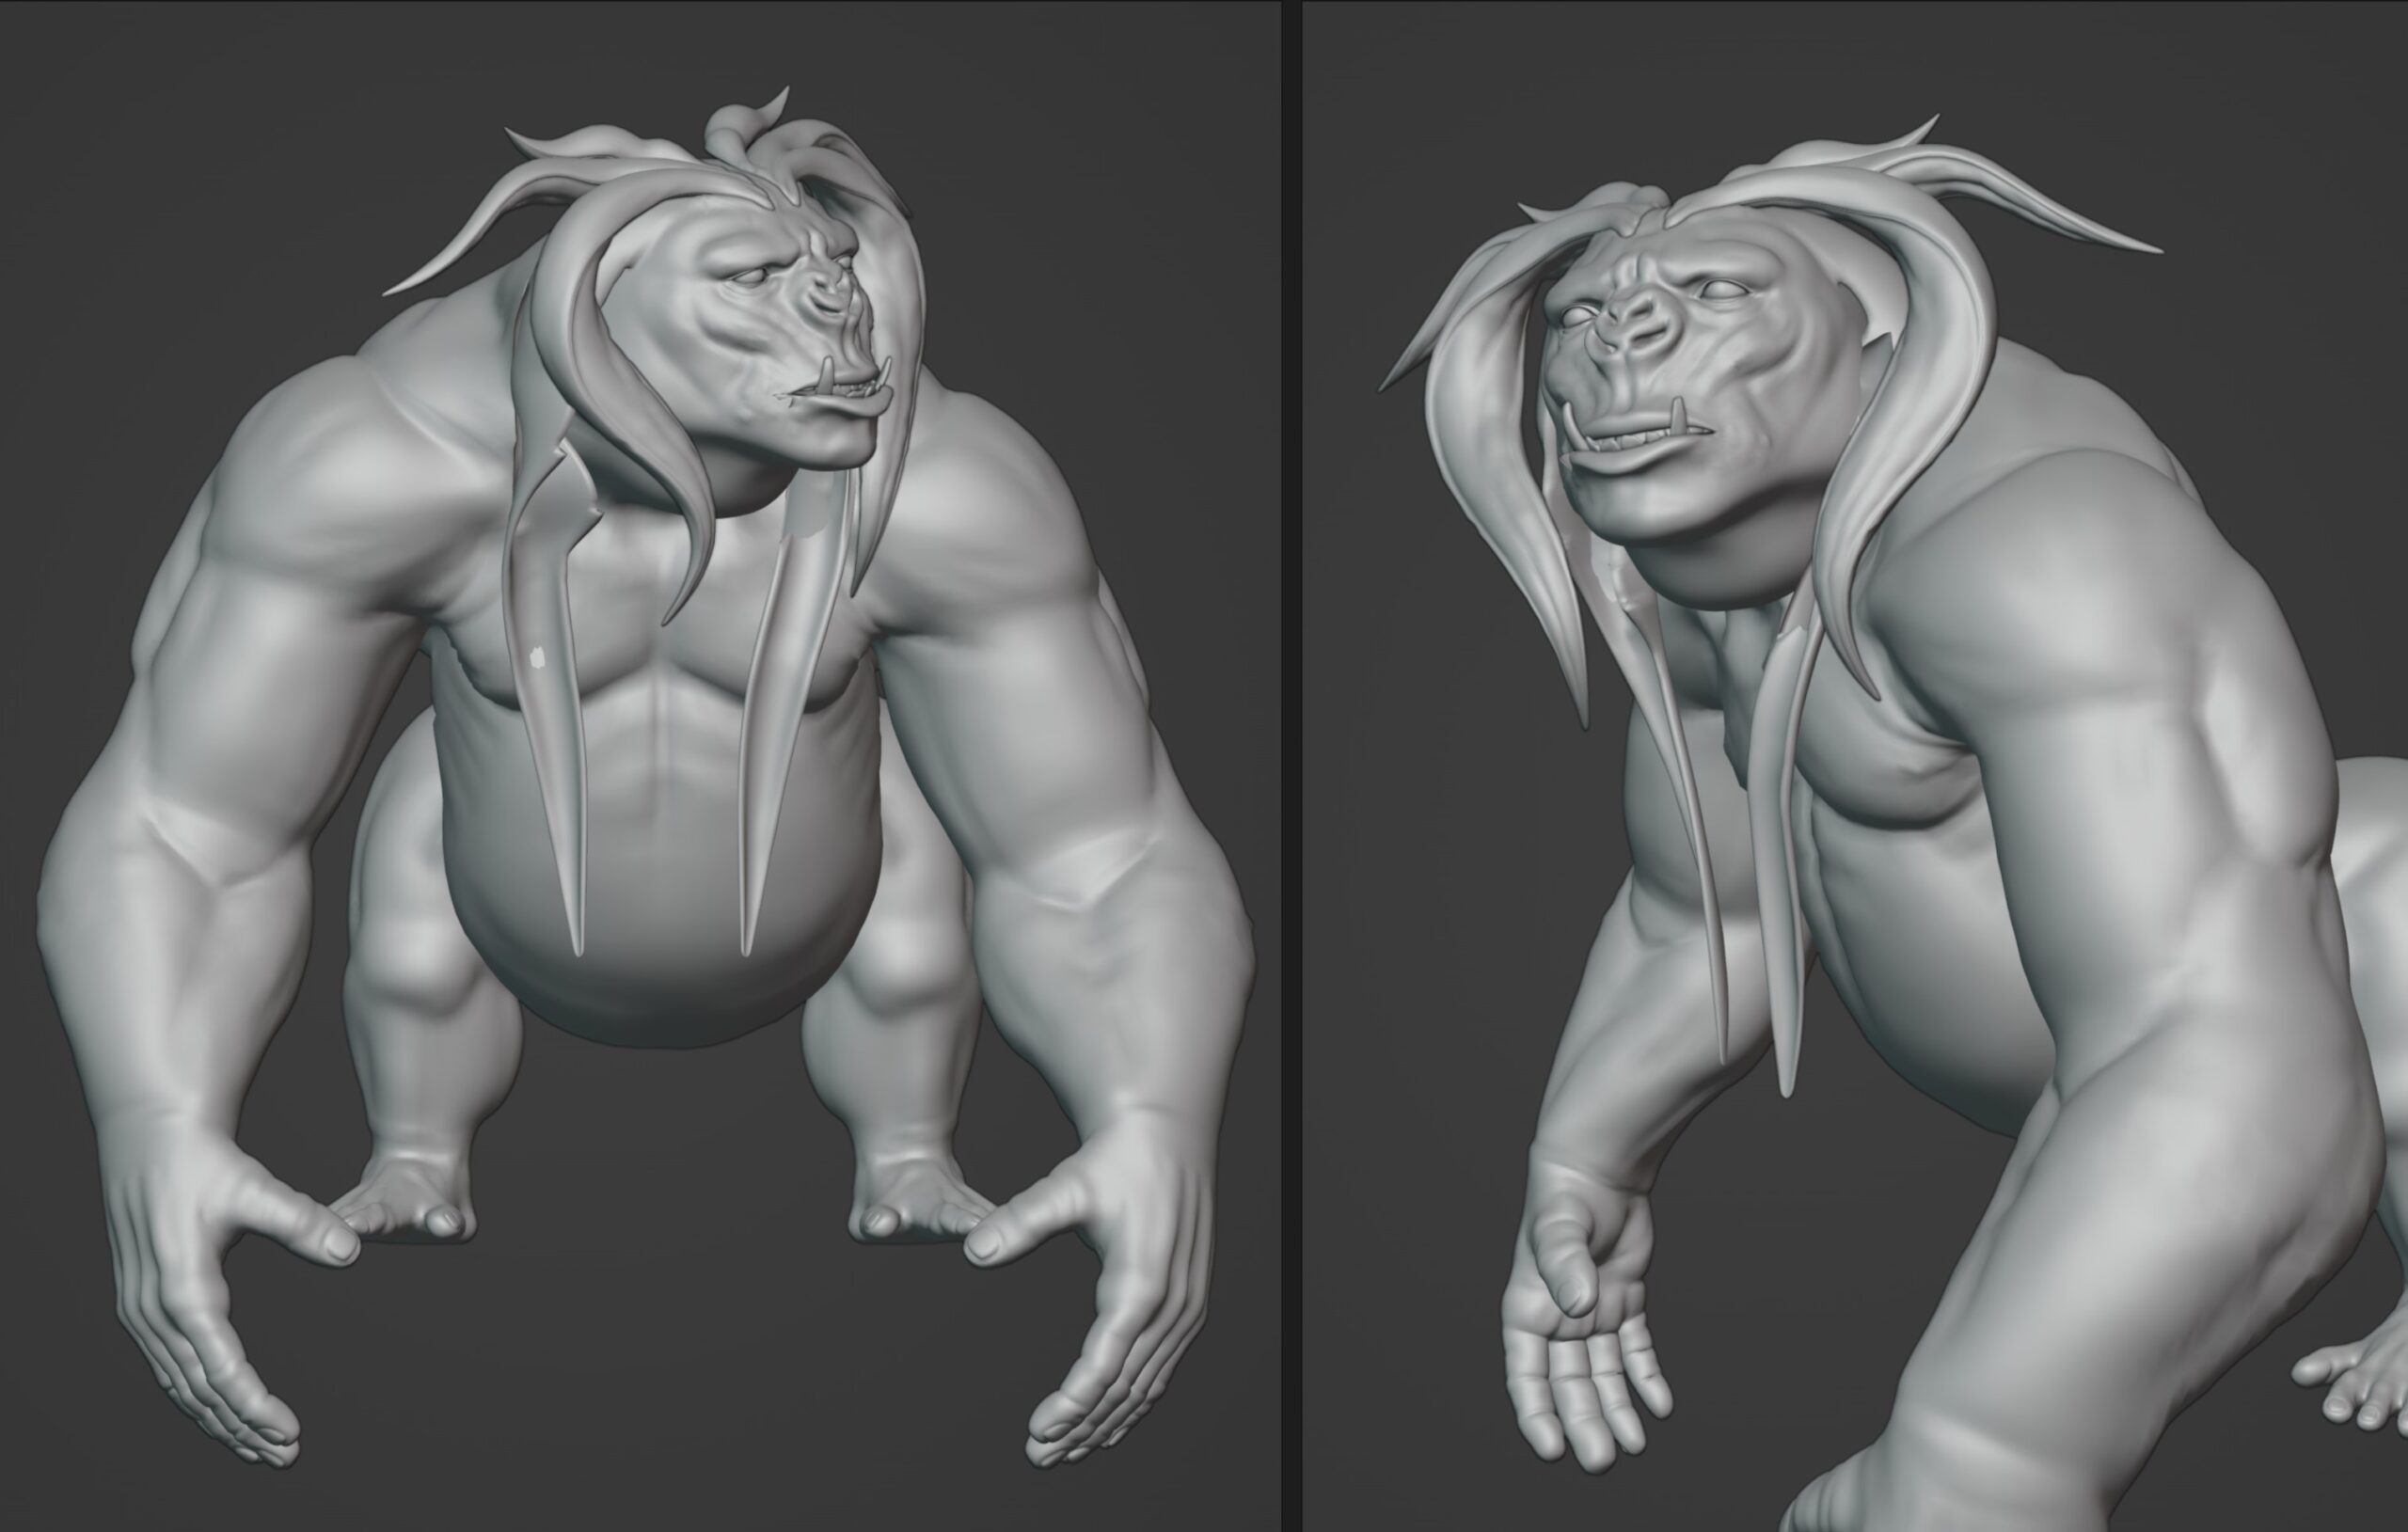
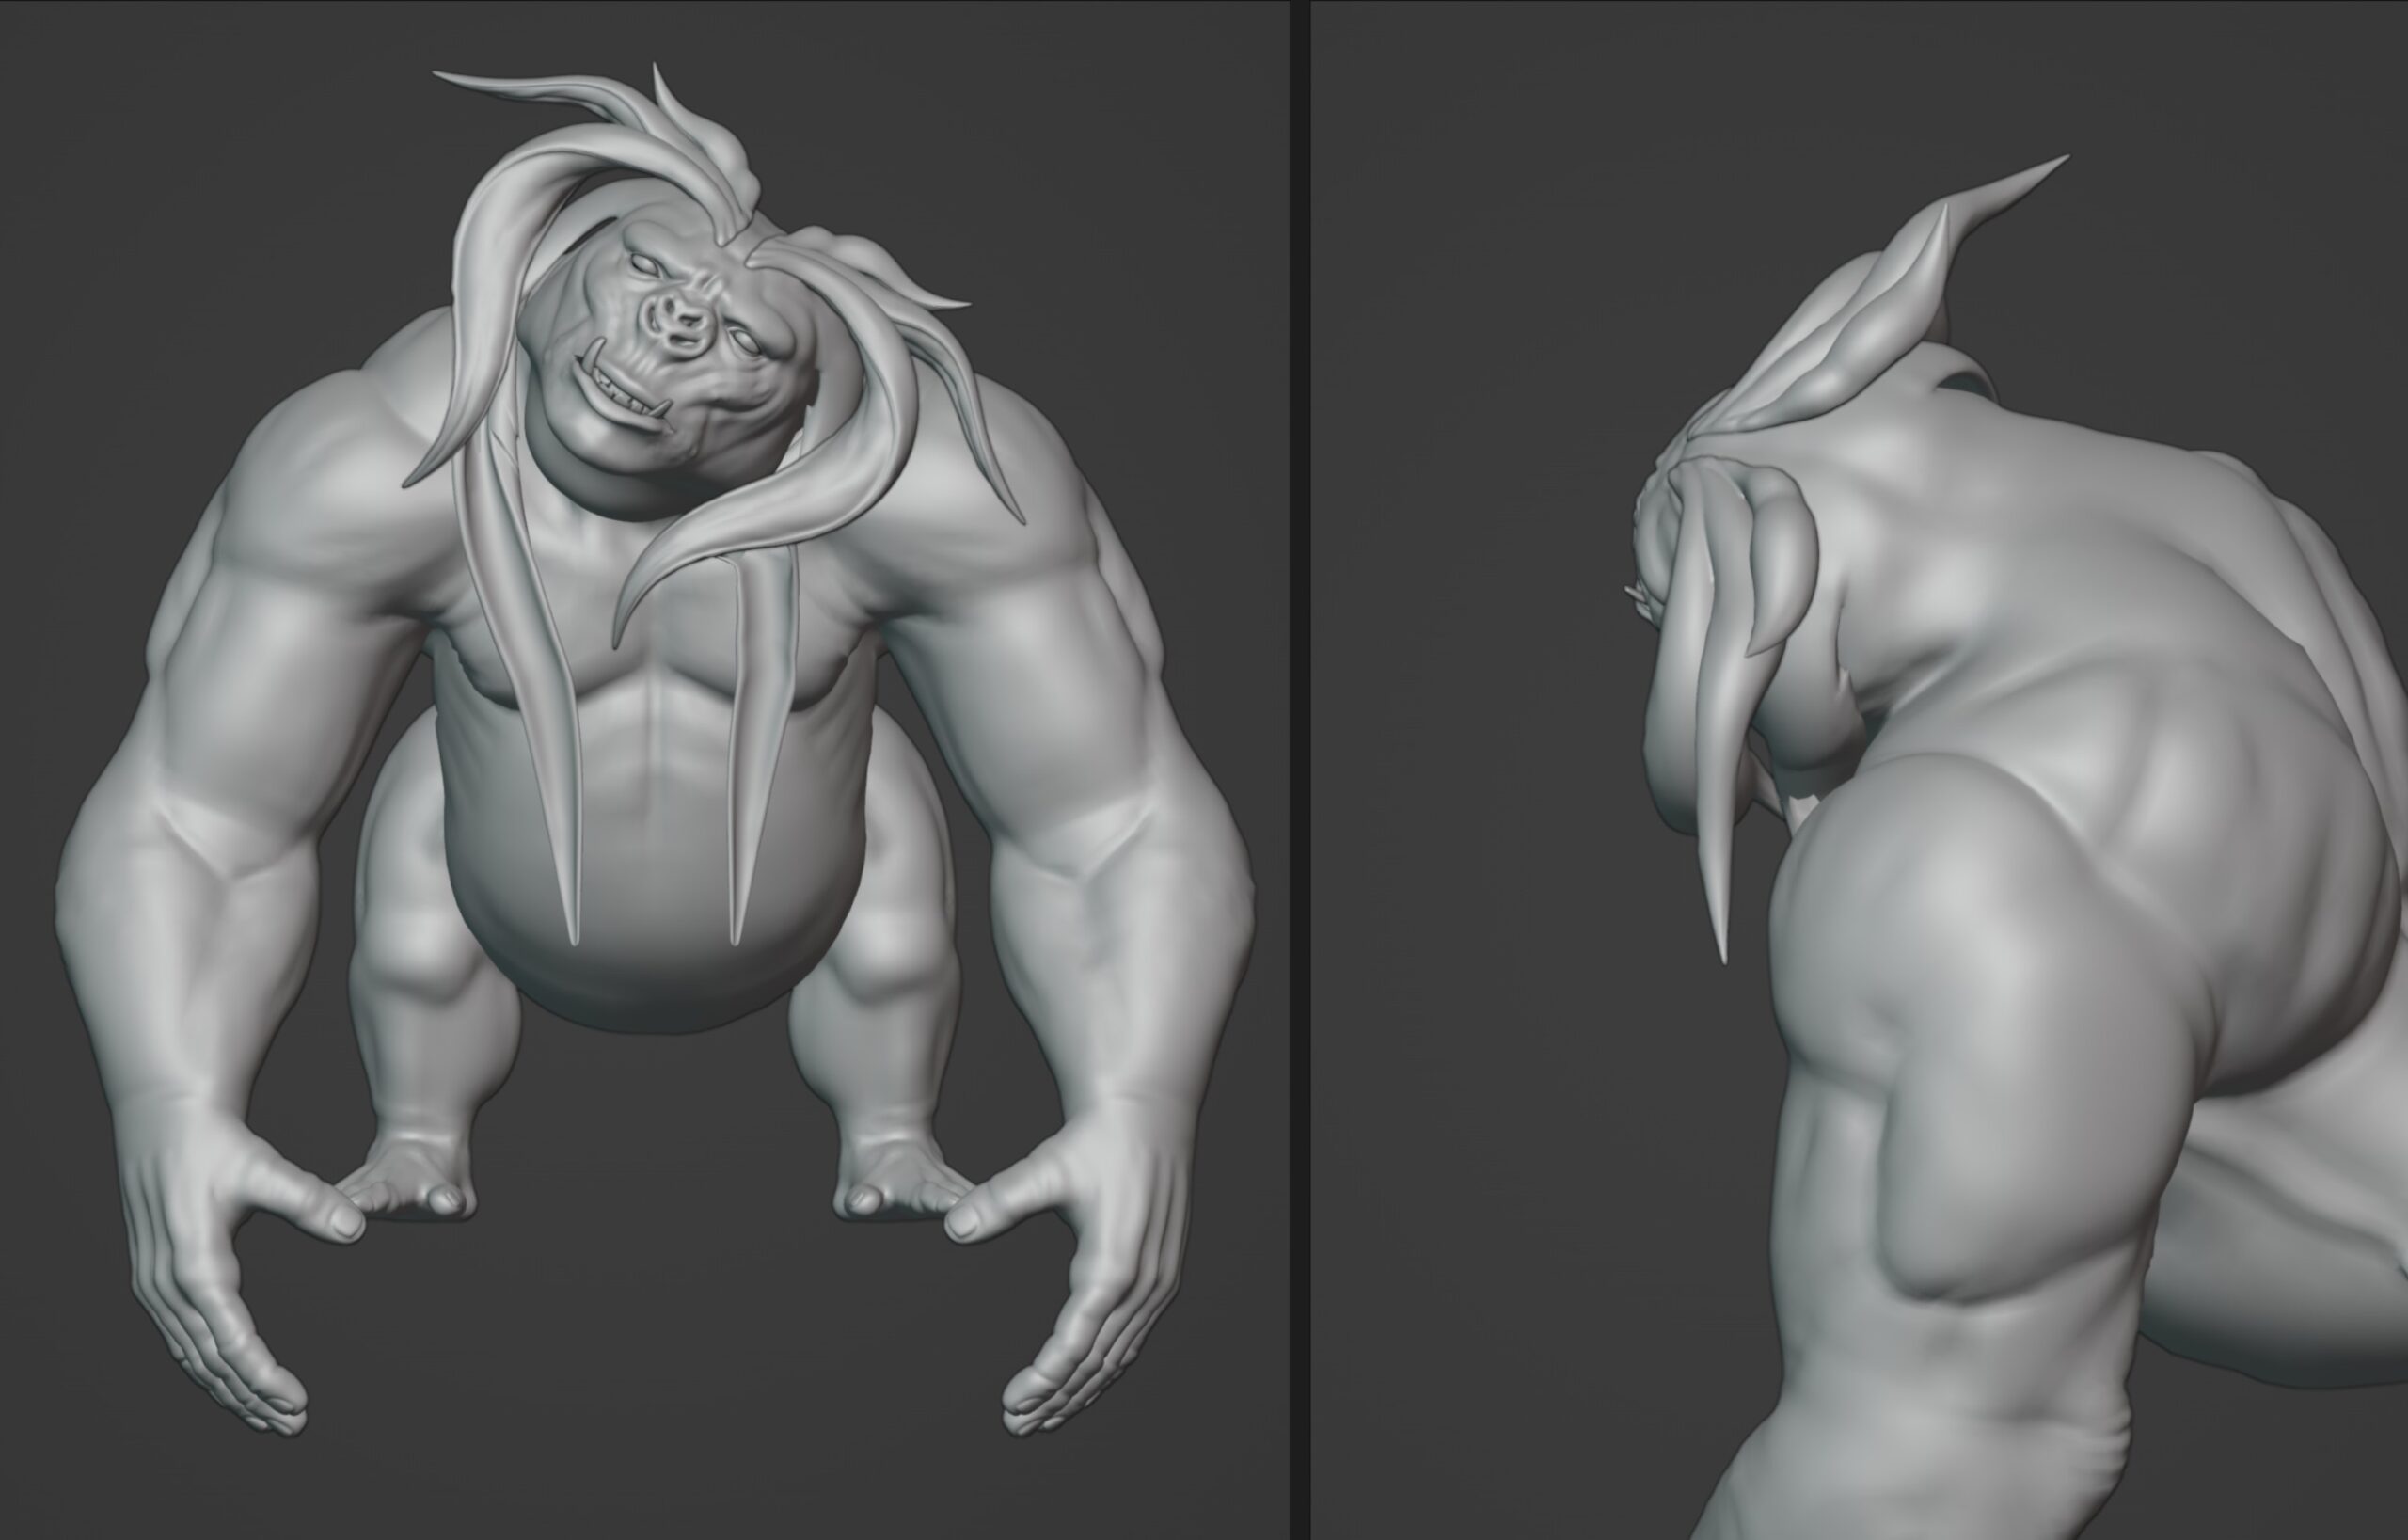
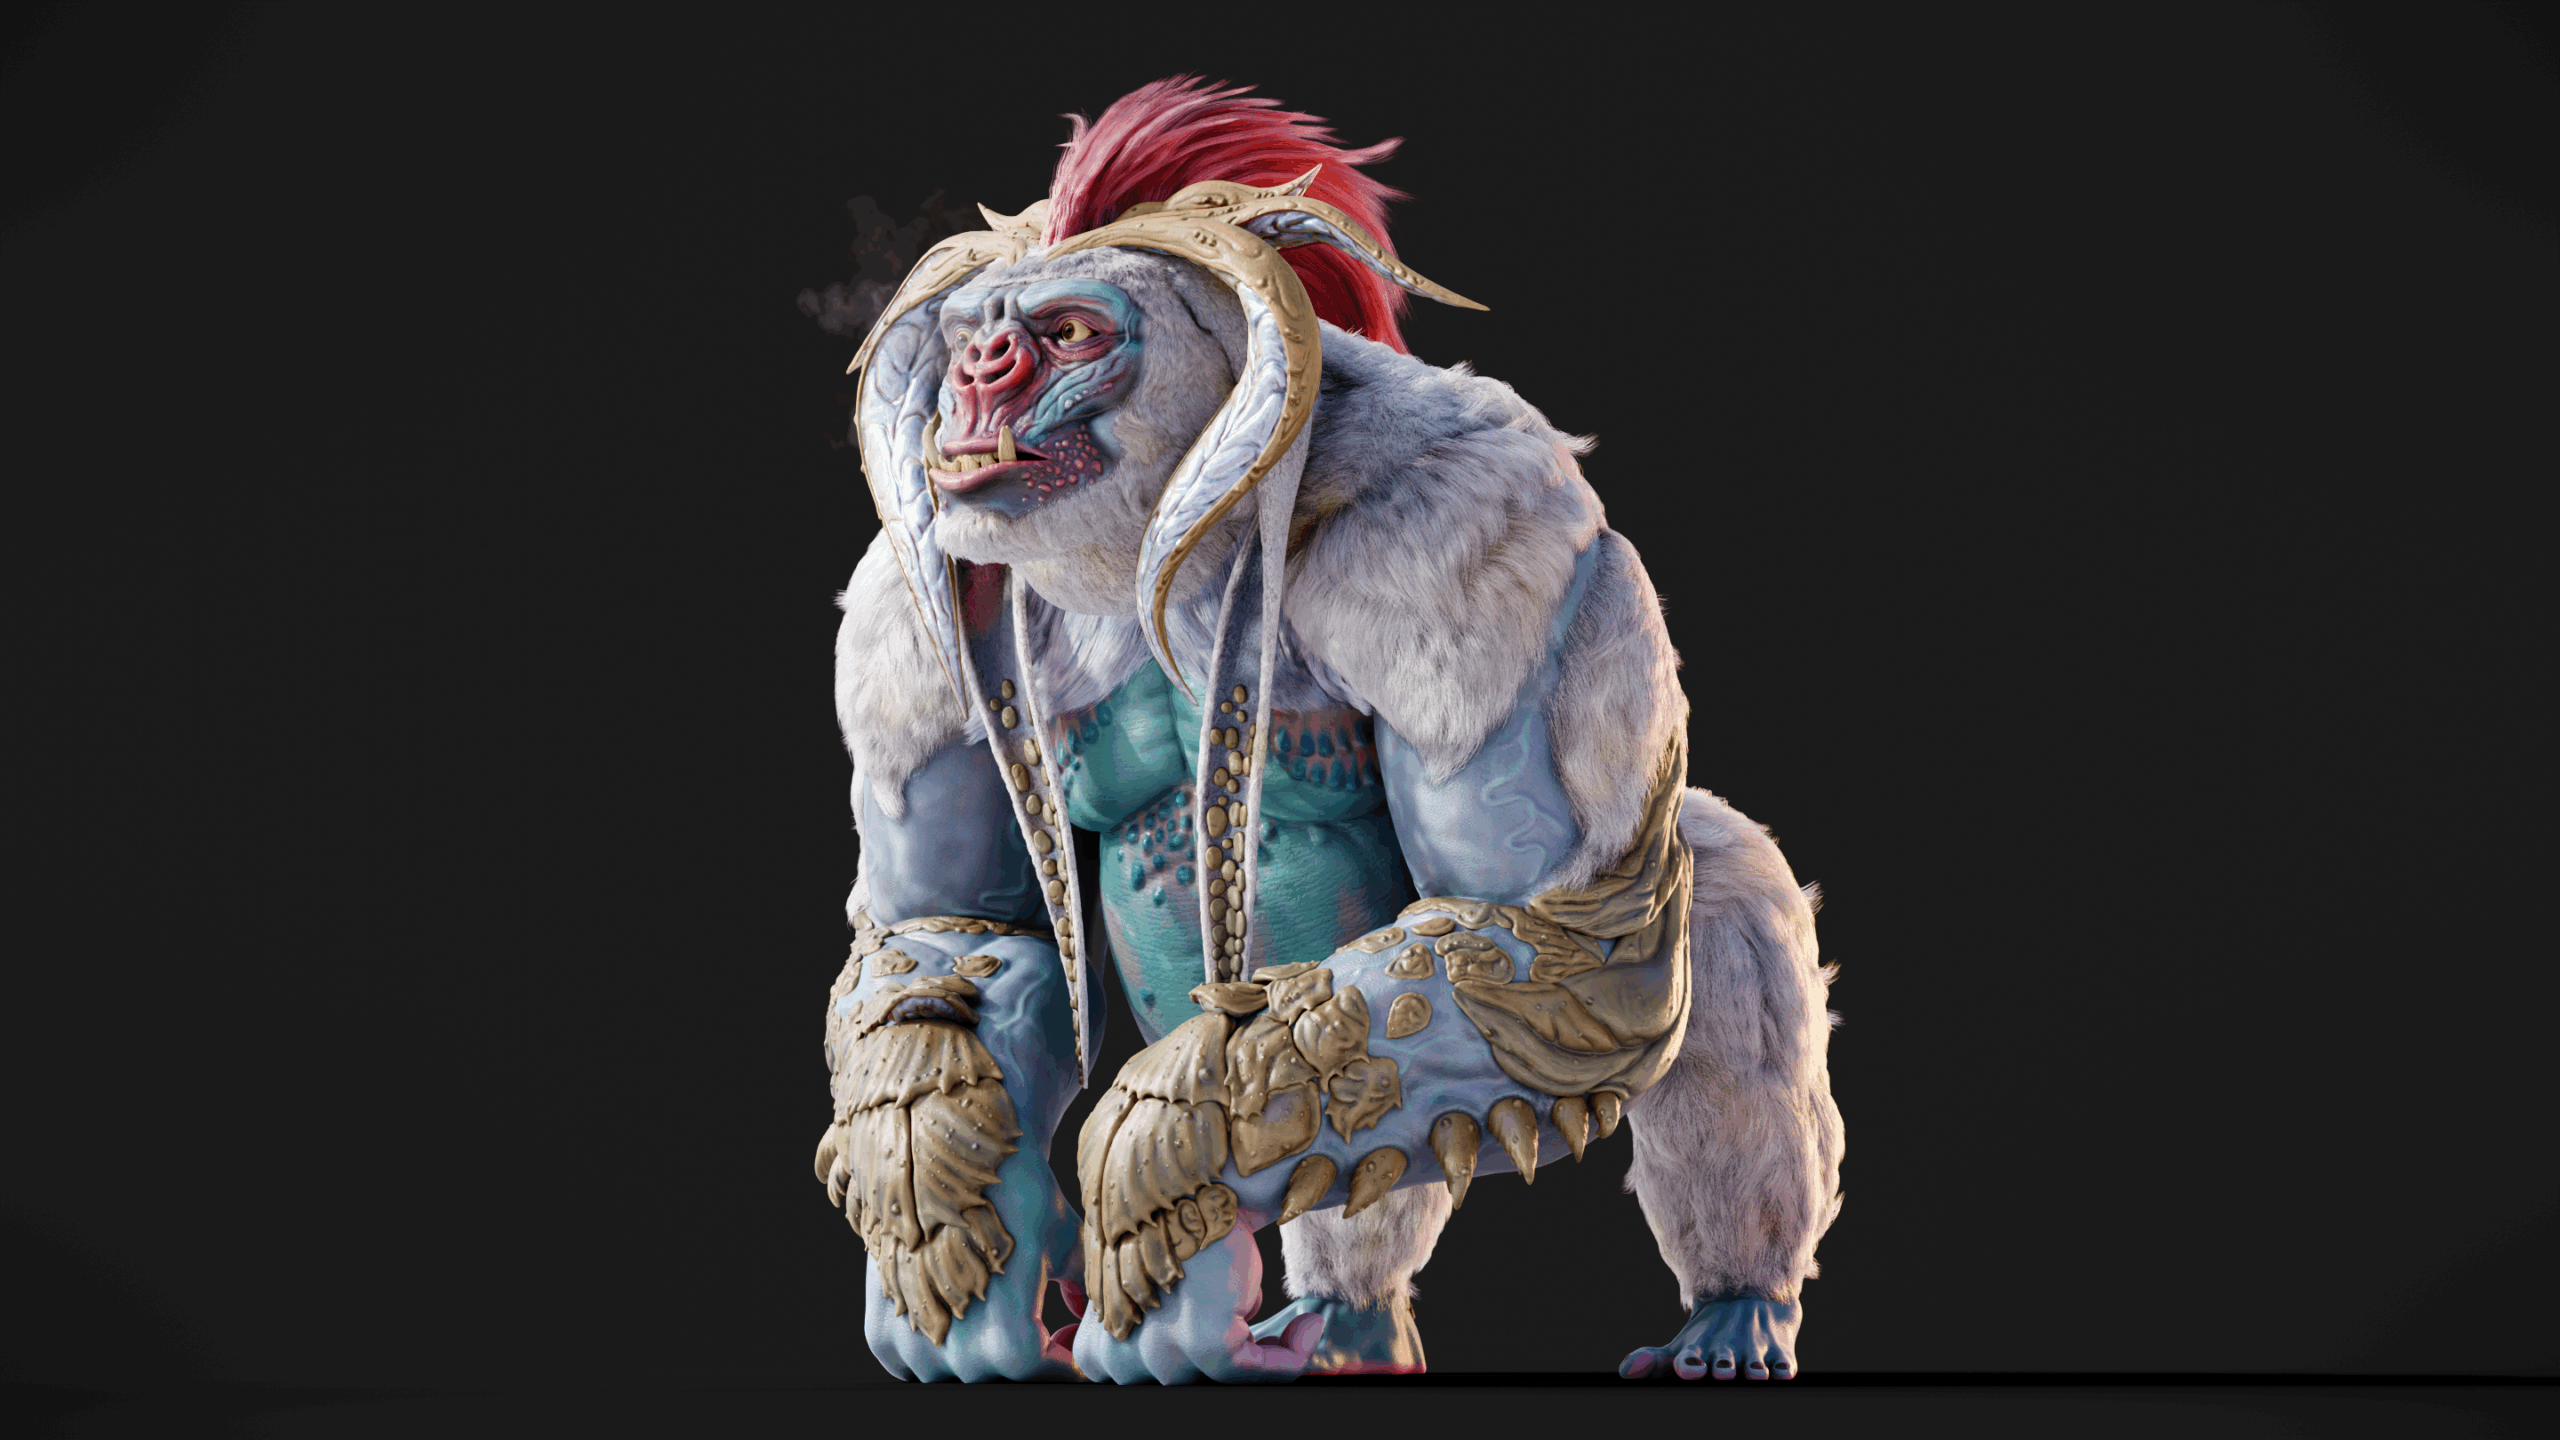
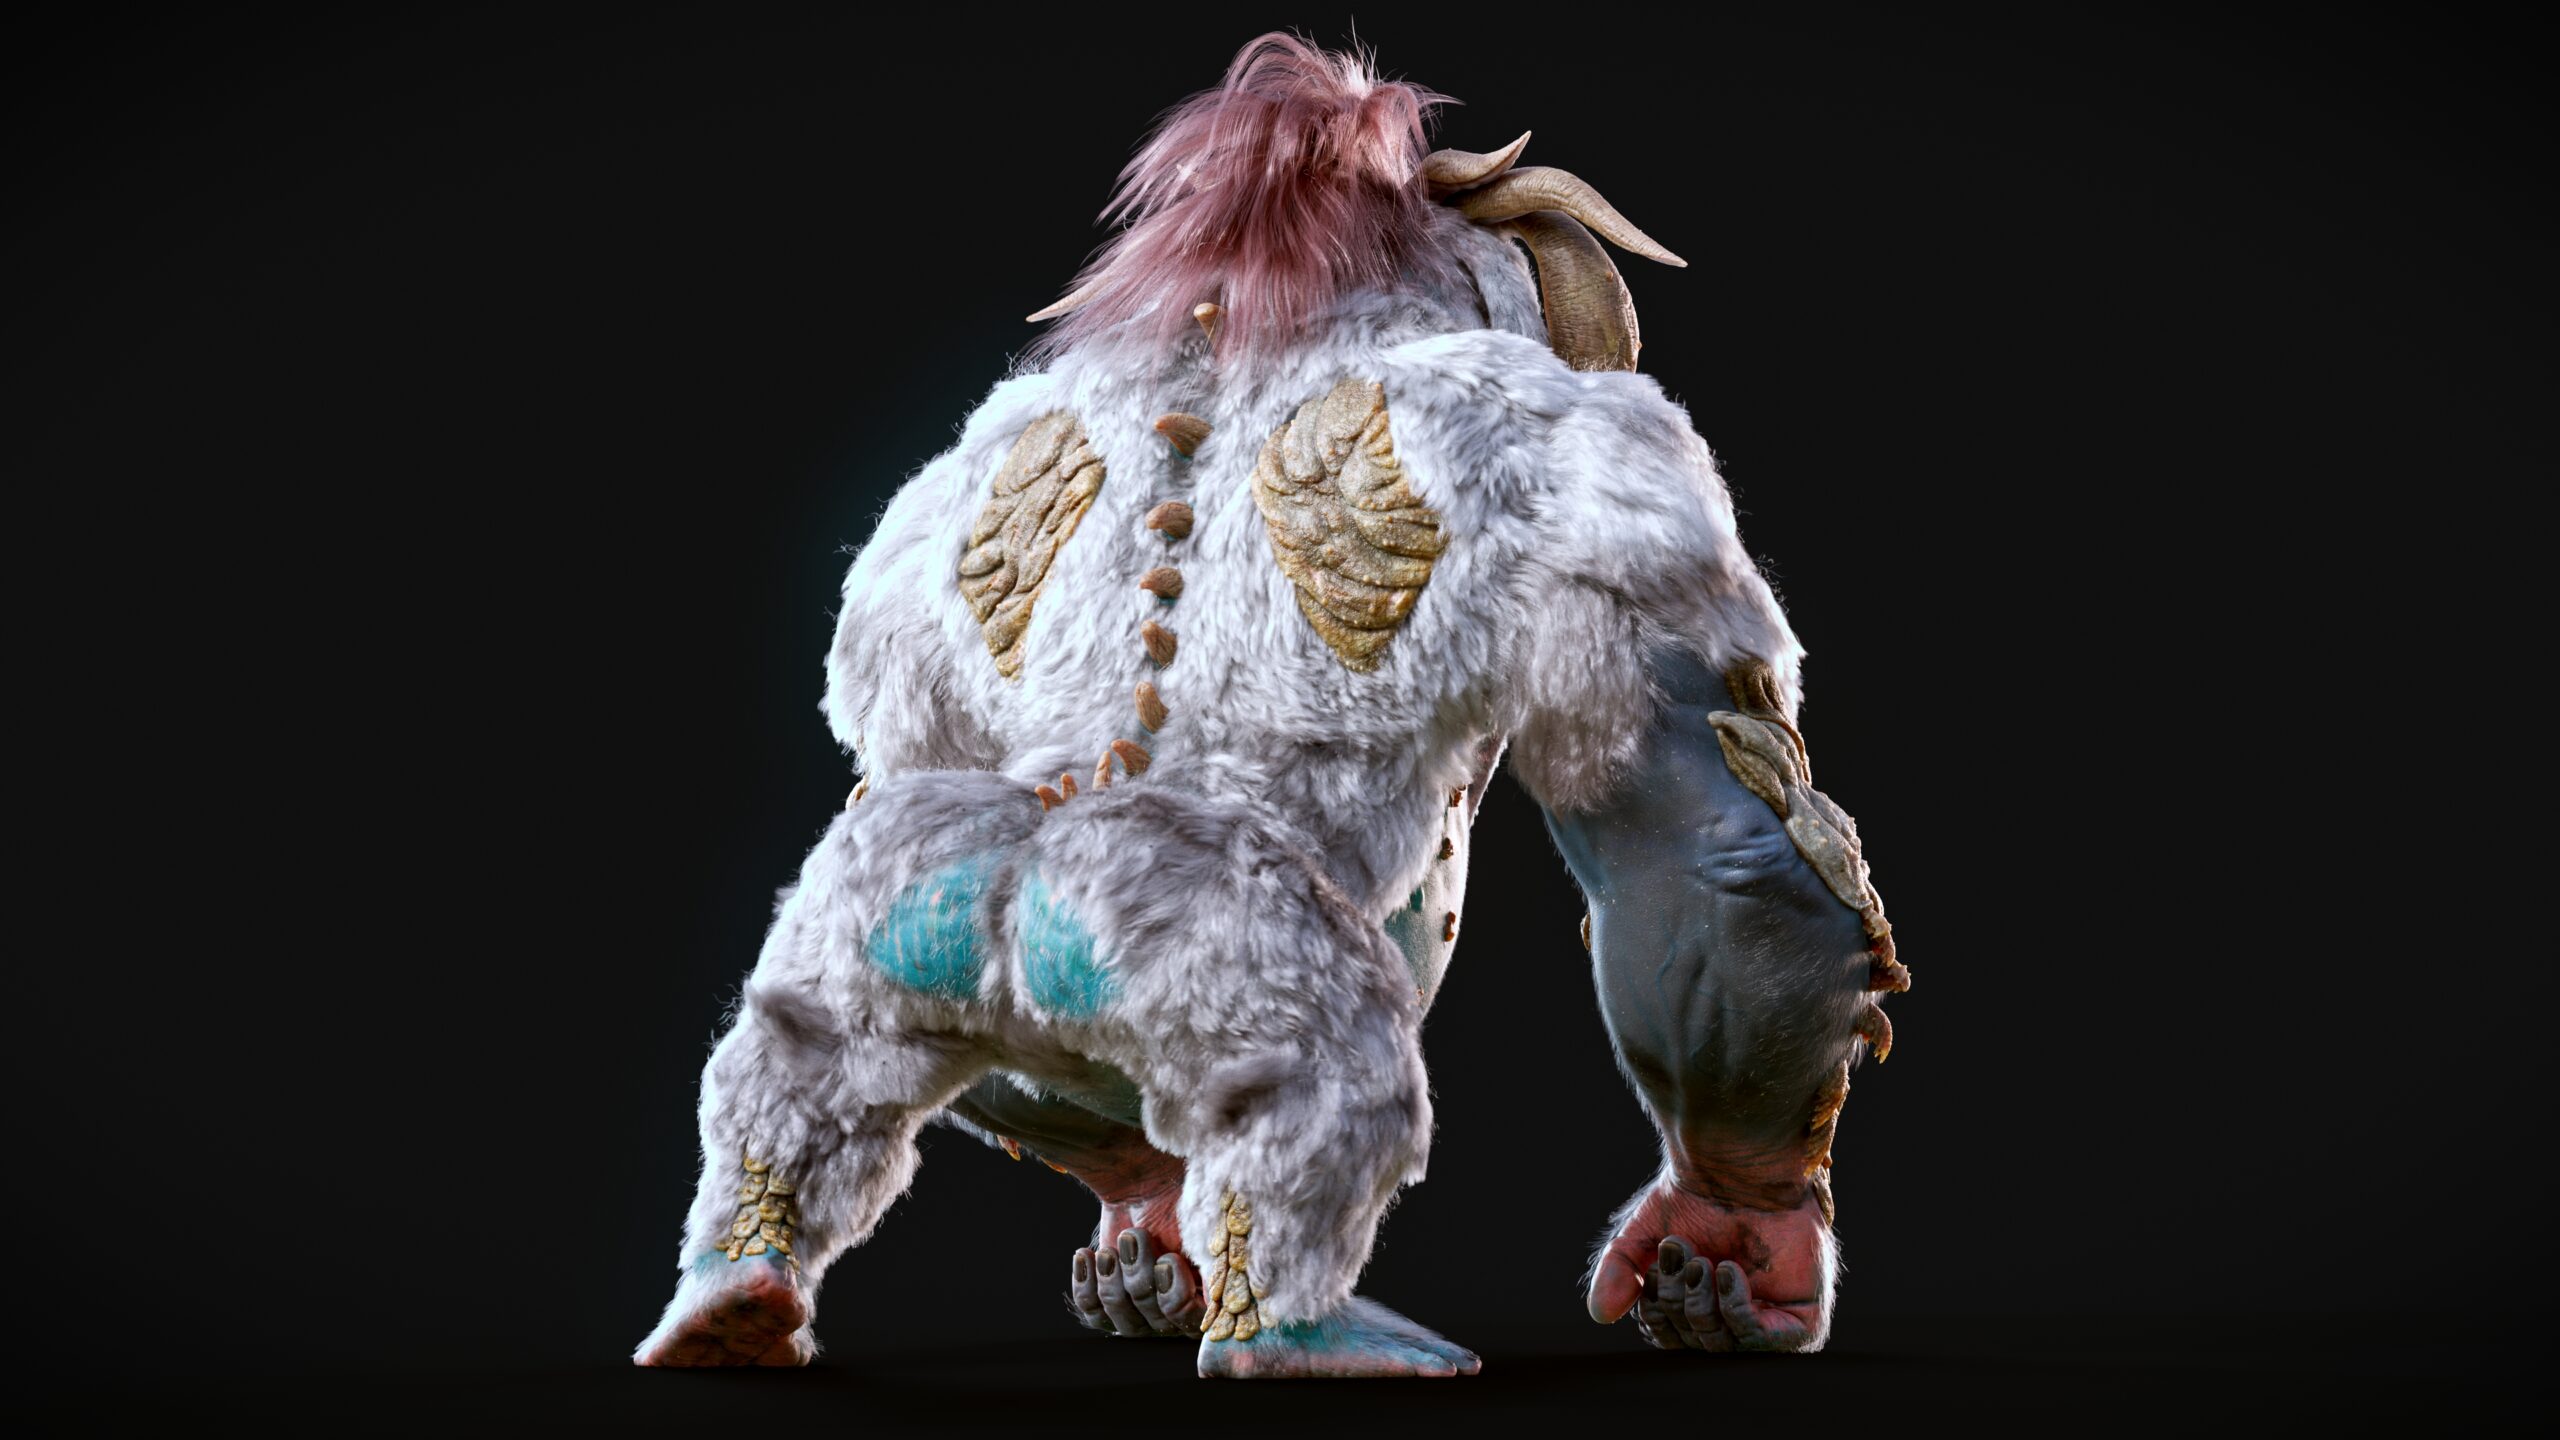
Model & Sculpt
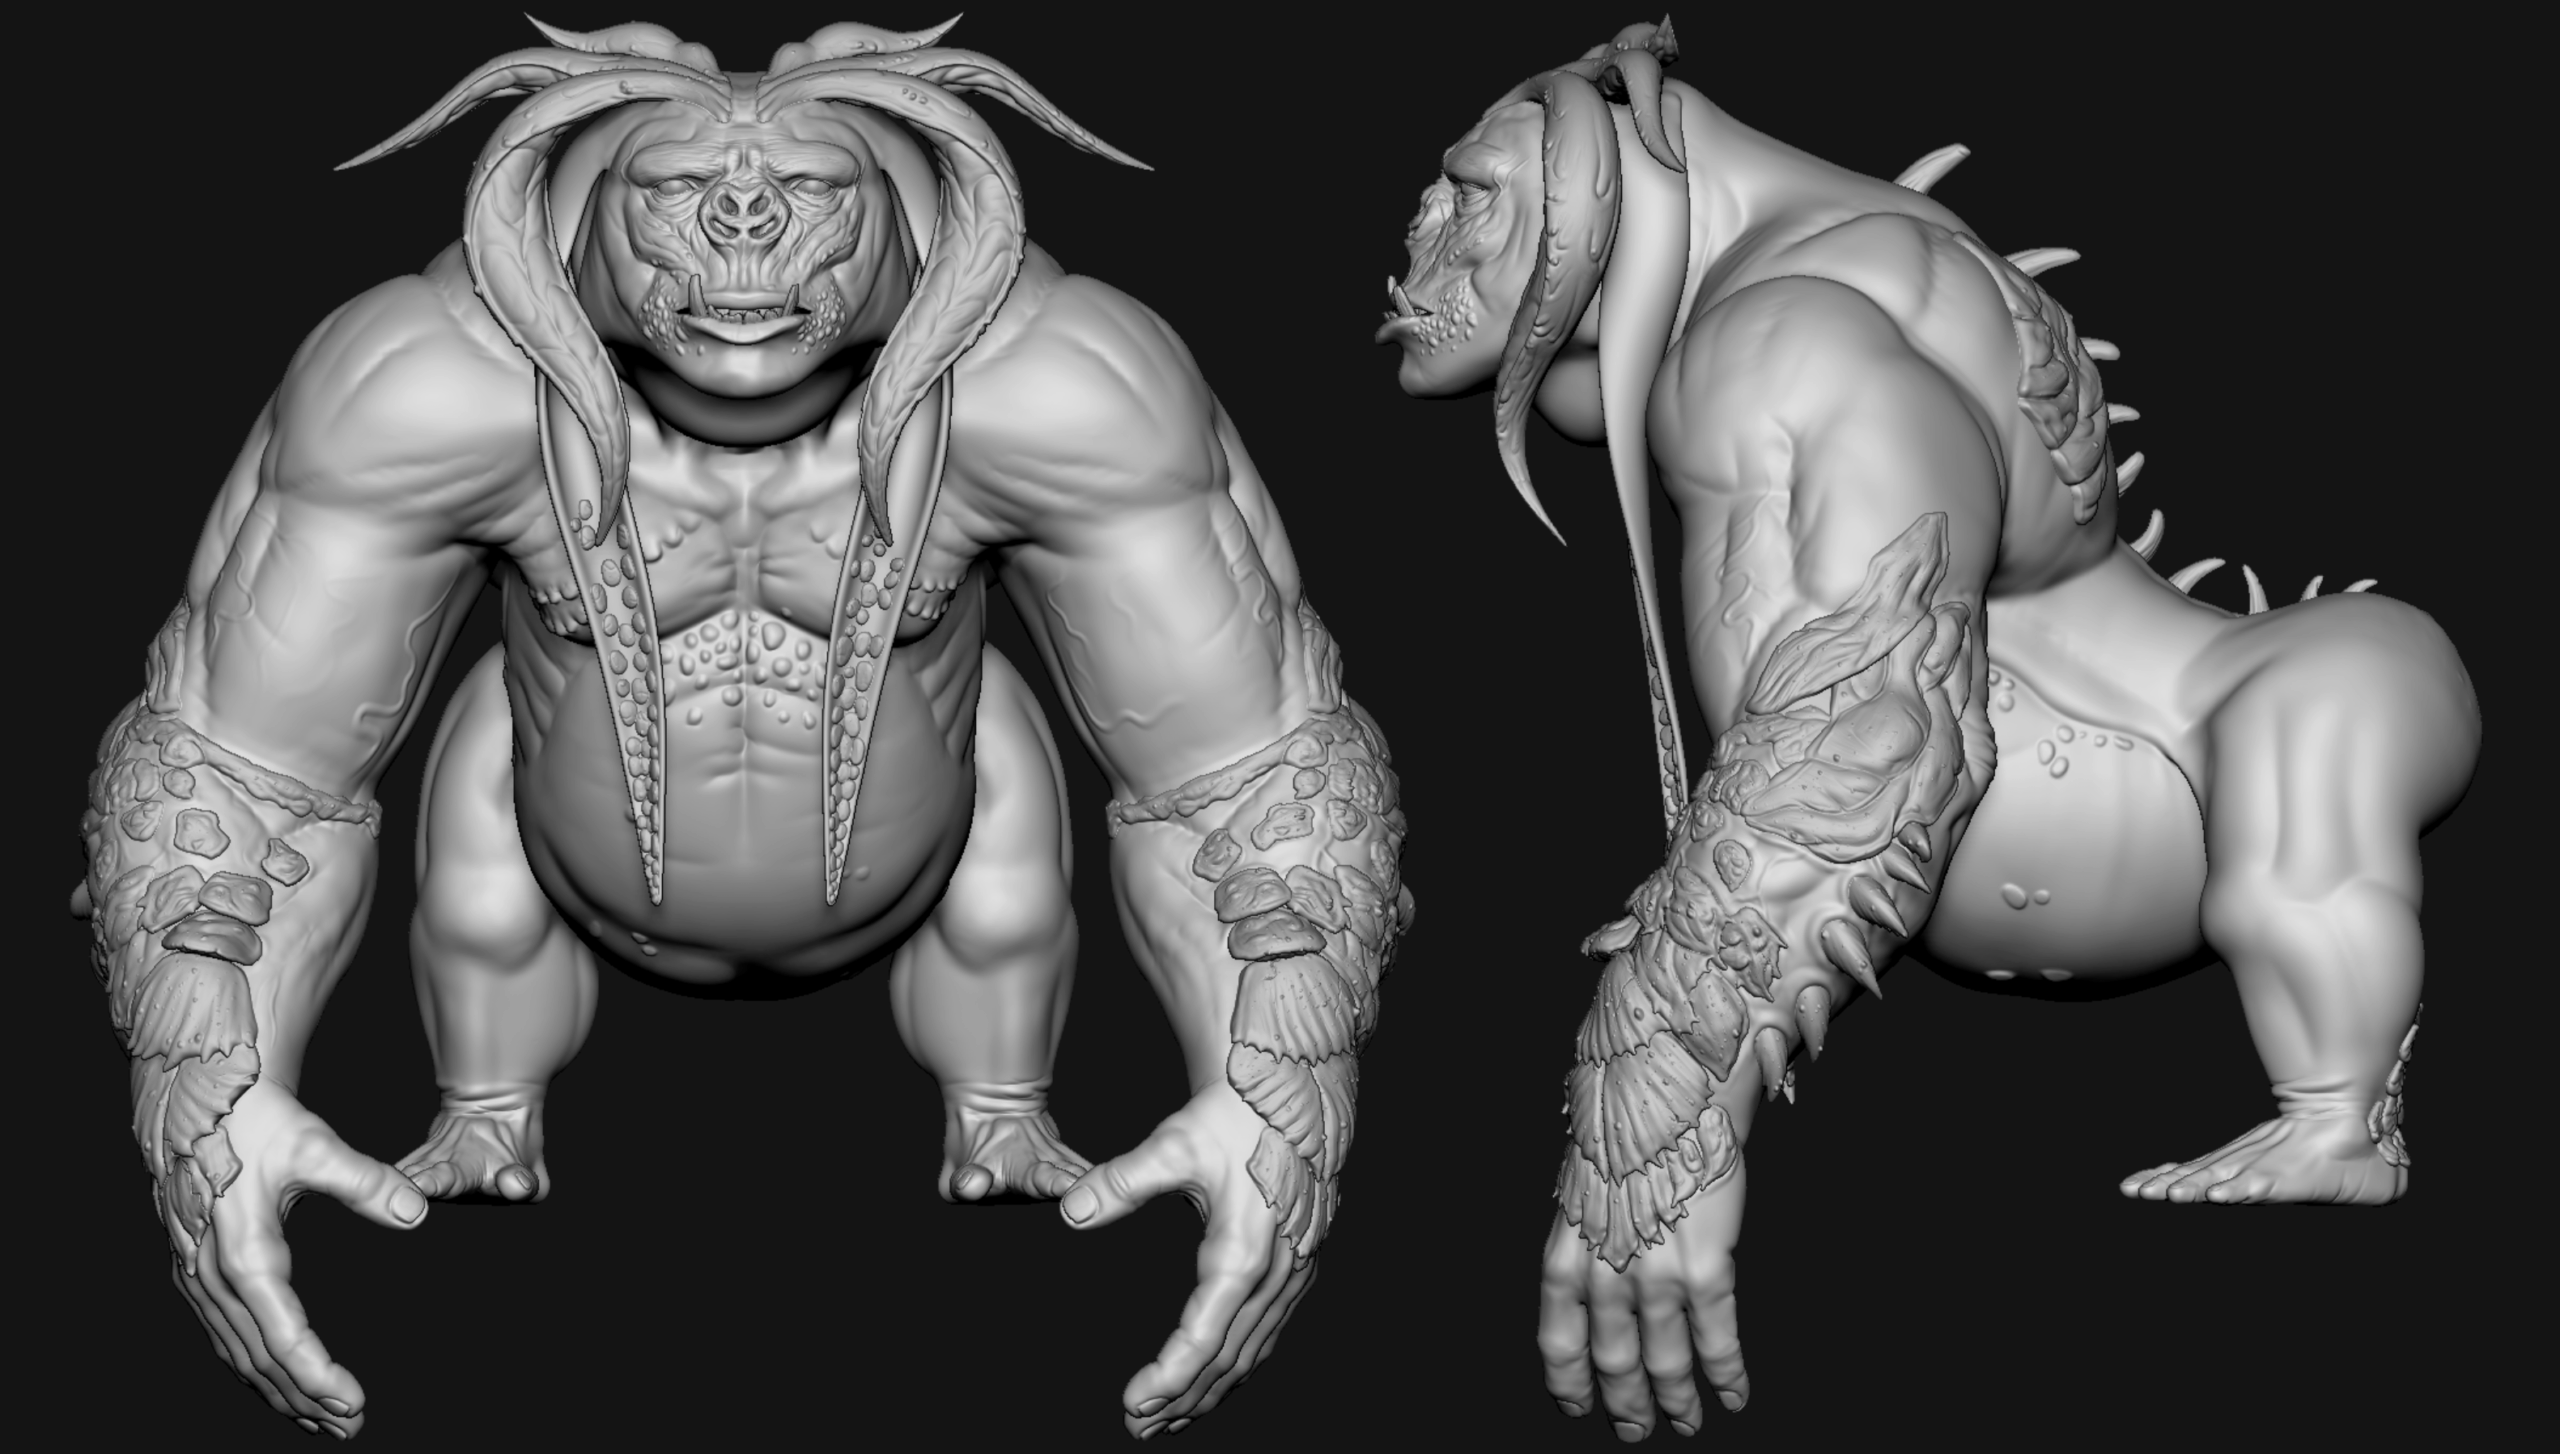
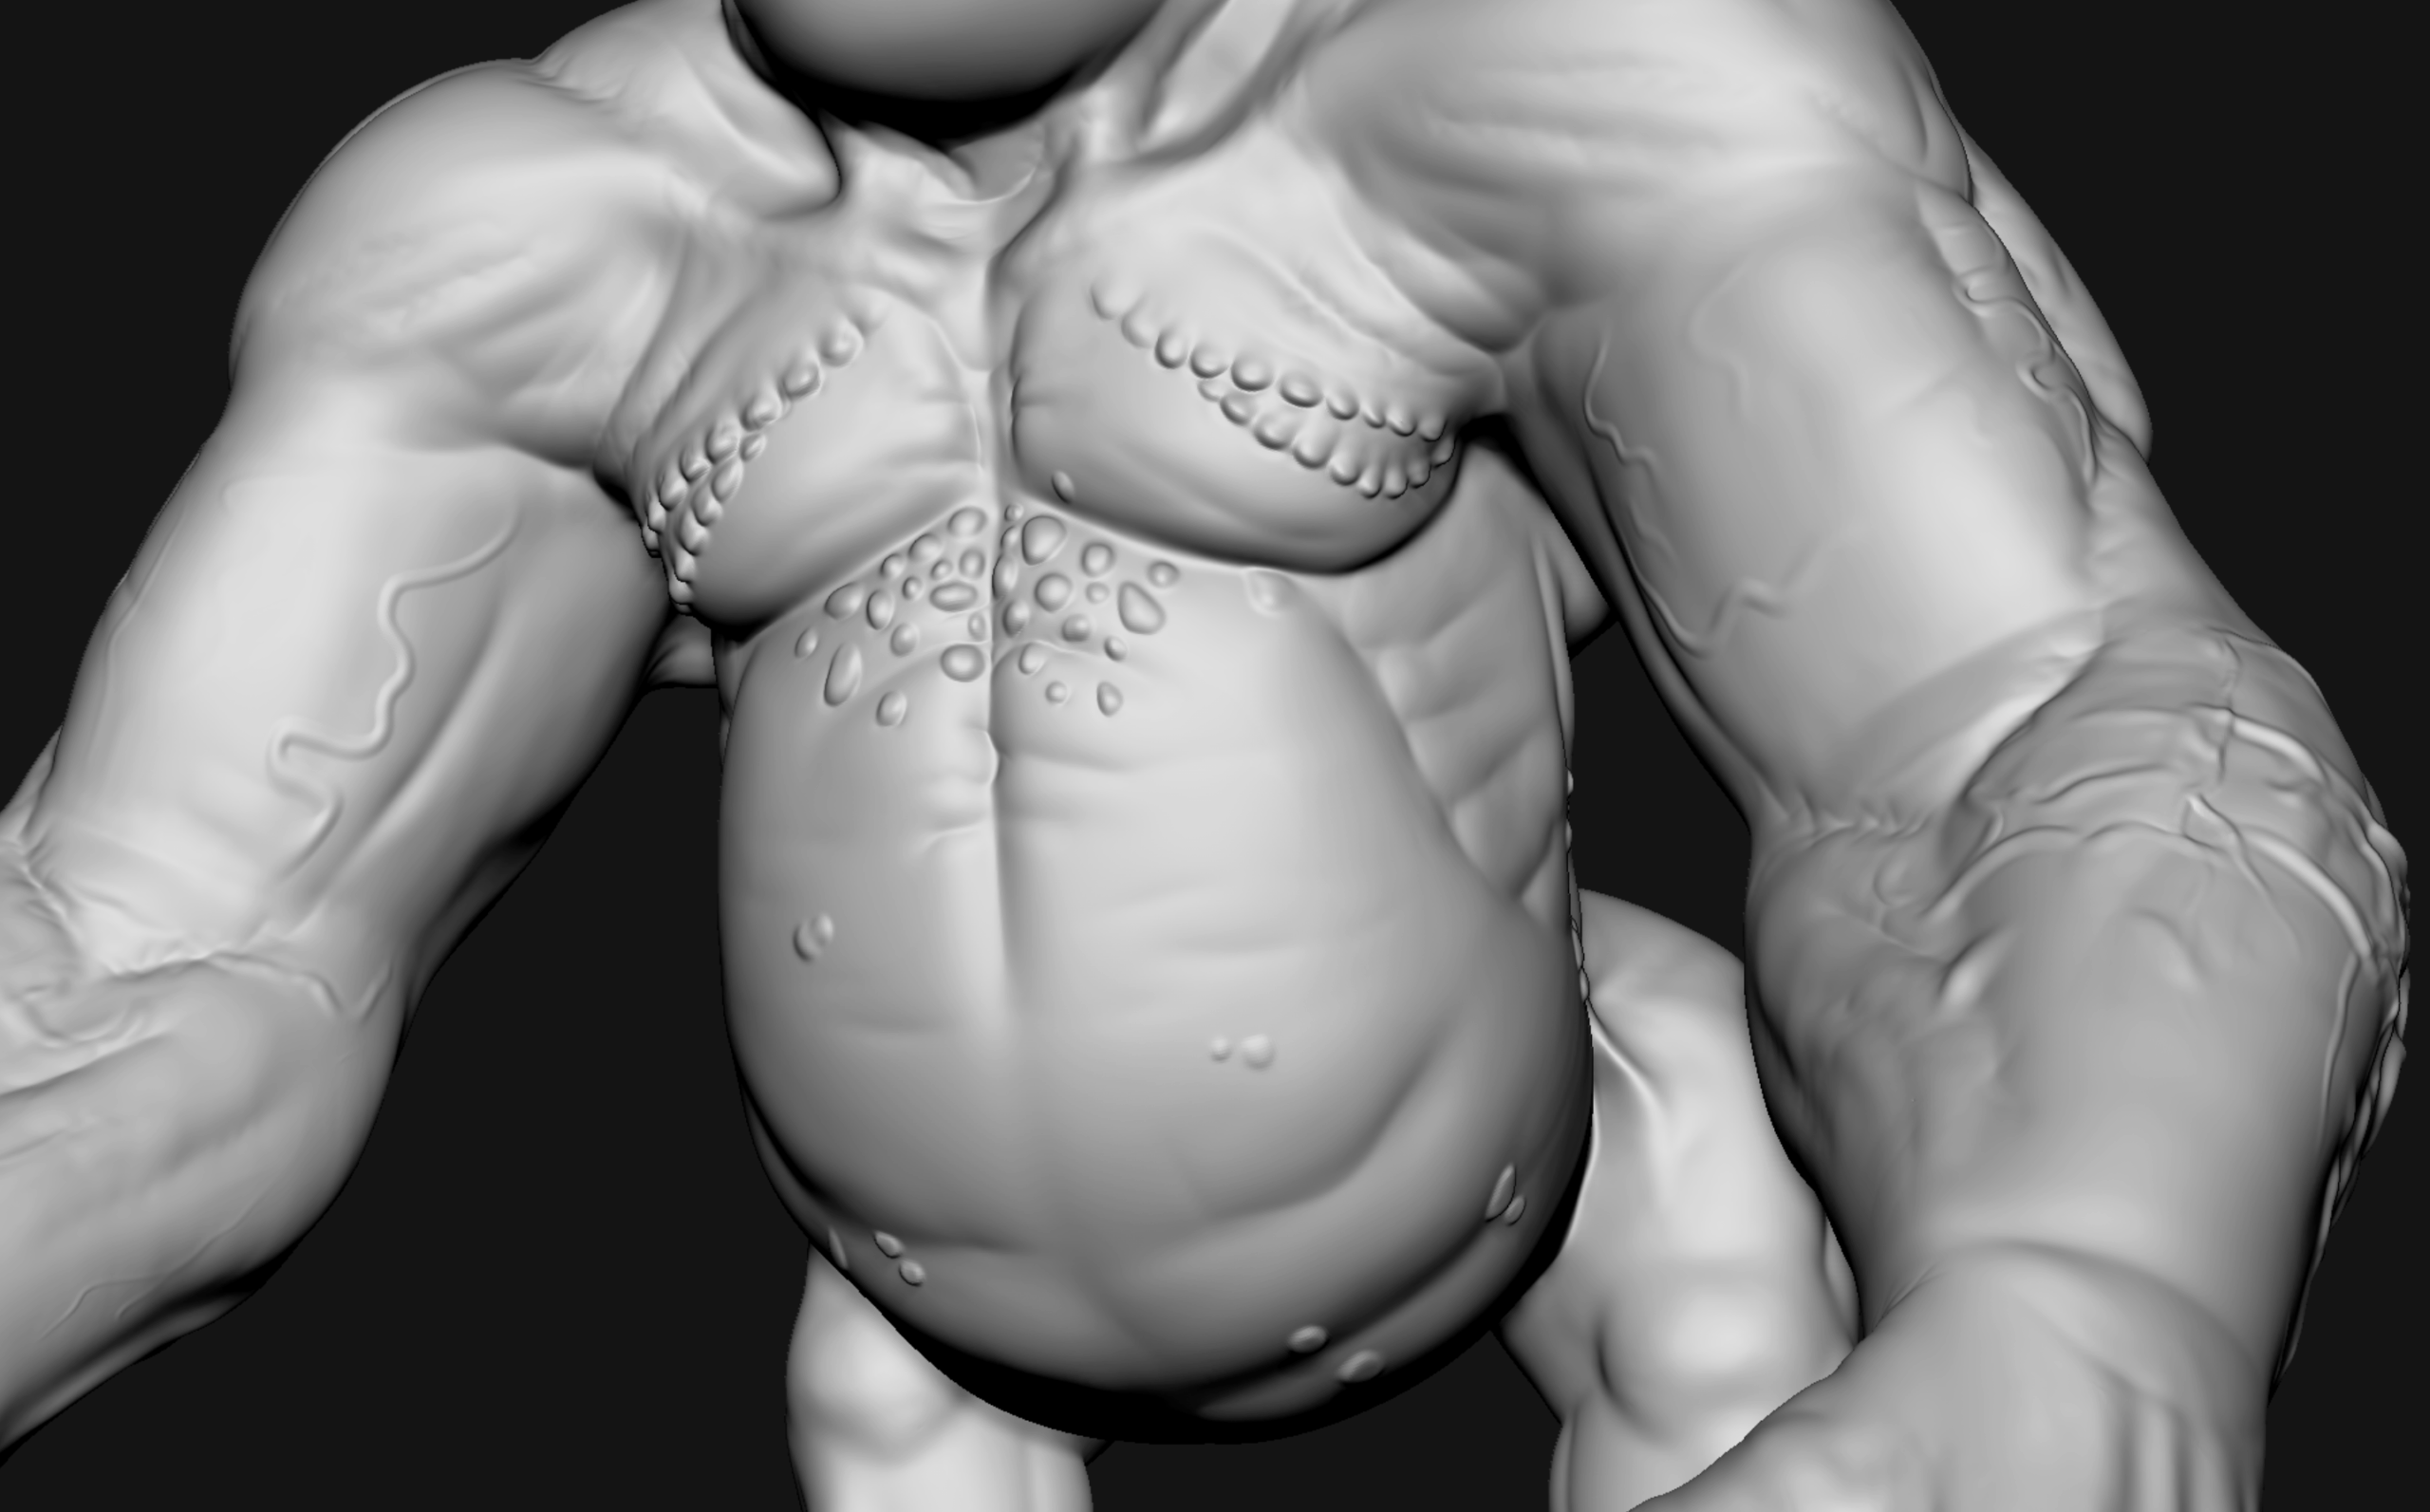
Blocking in Brad’s primary forms was the first crucial step in defining his powerful appearance. Gorillas and crustaceans provided the bulk of the anatomical reference, and because I knew that his hair and crabshell armor would hide much of his muscular definition down the line, the anatomy was intentionally exaggerated almost to the point of stylization. This would help his major forms show through under his thick coat.
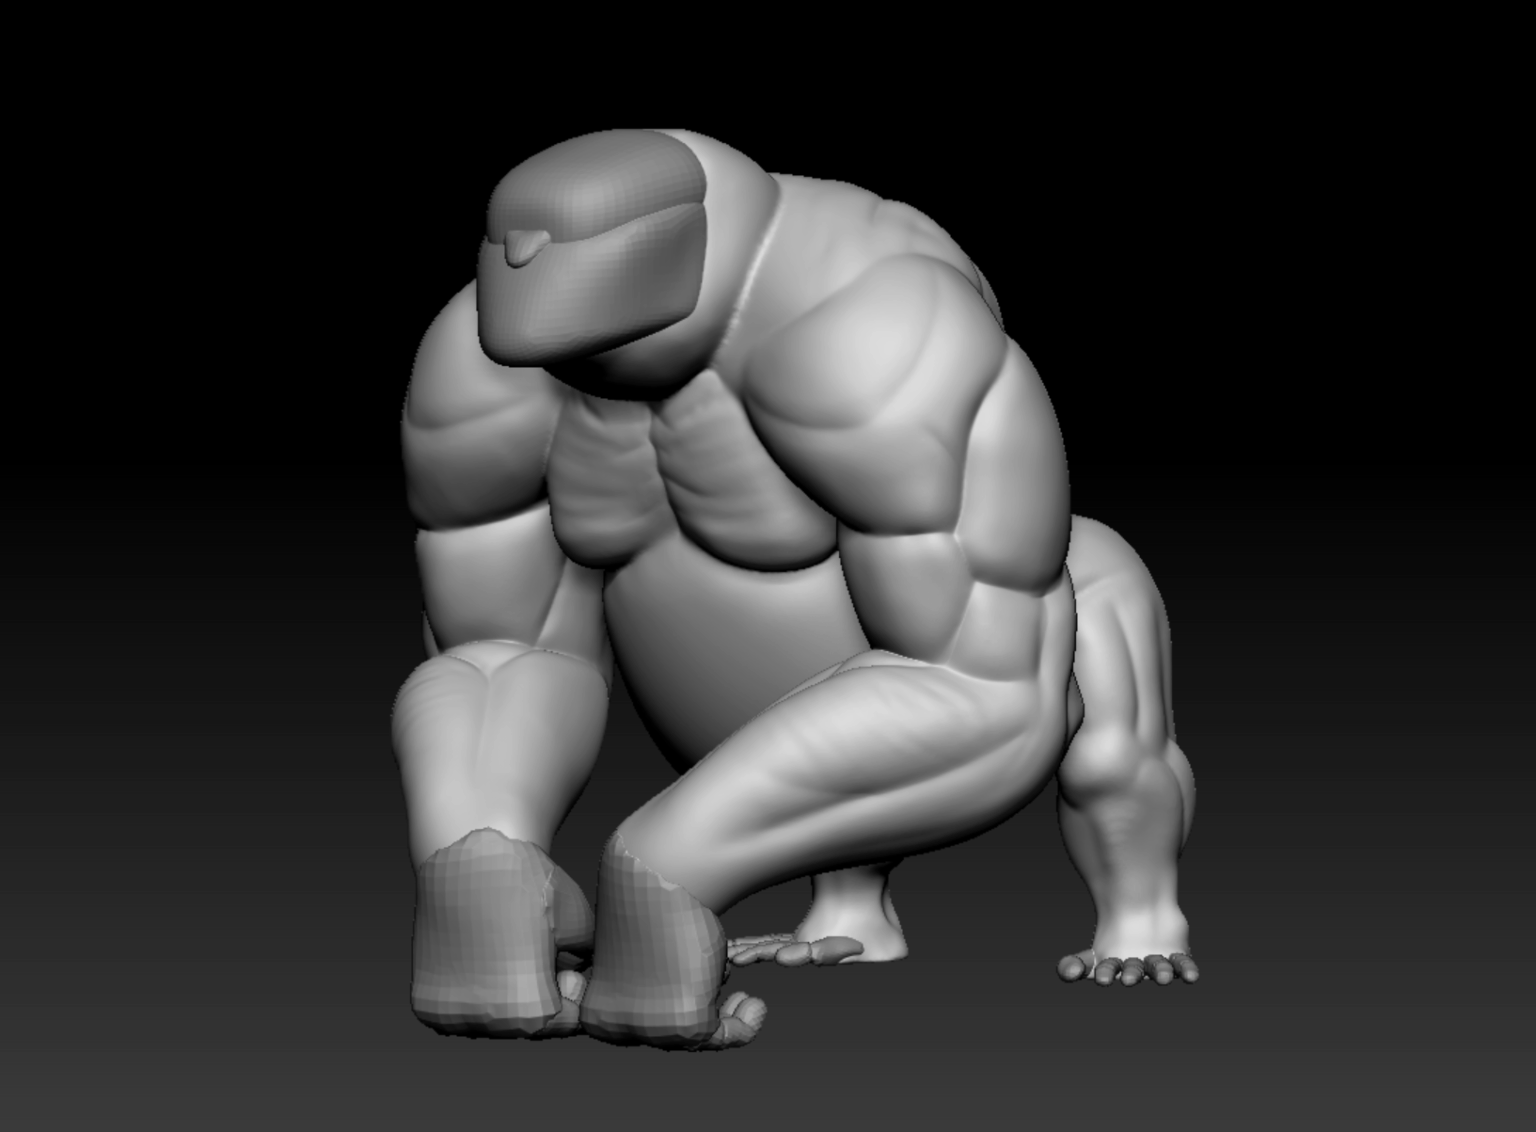
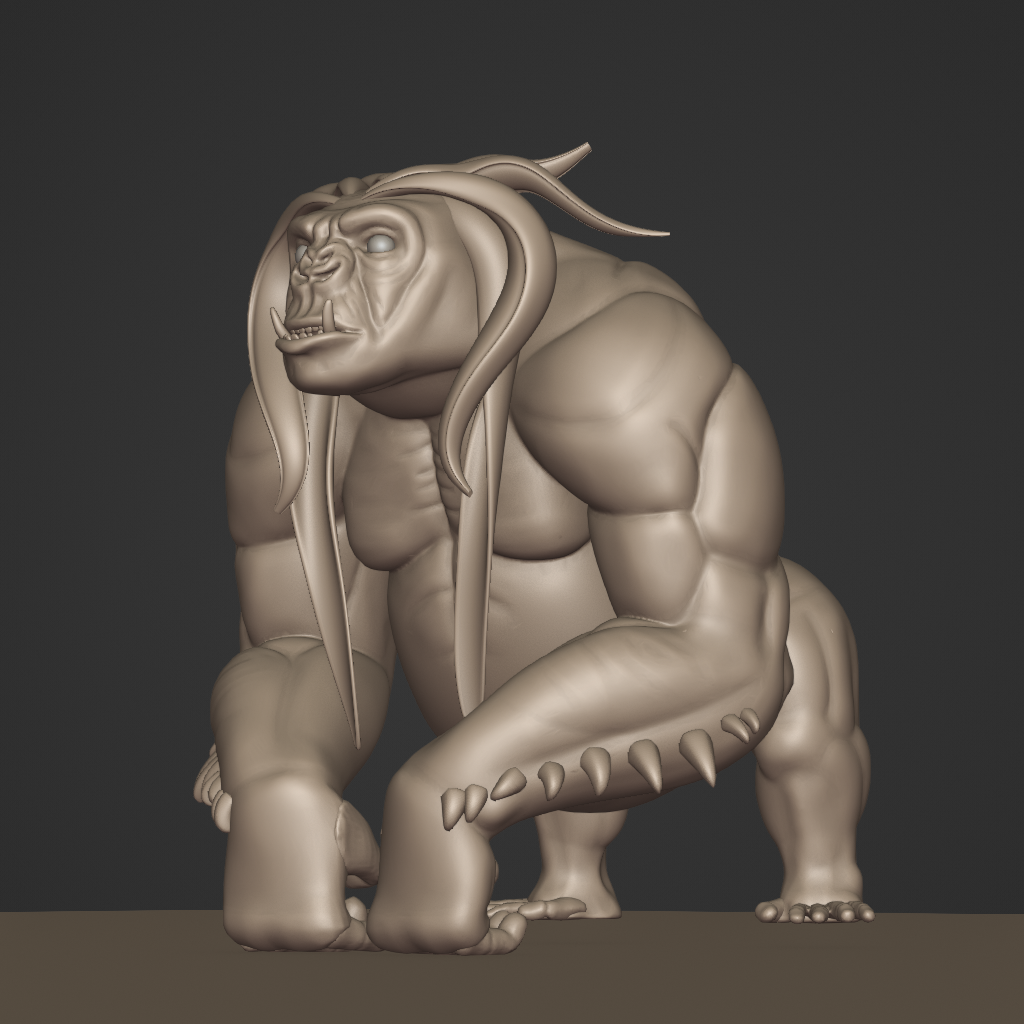
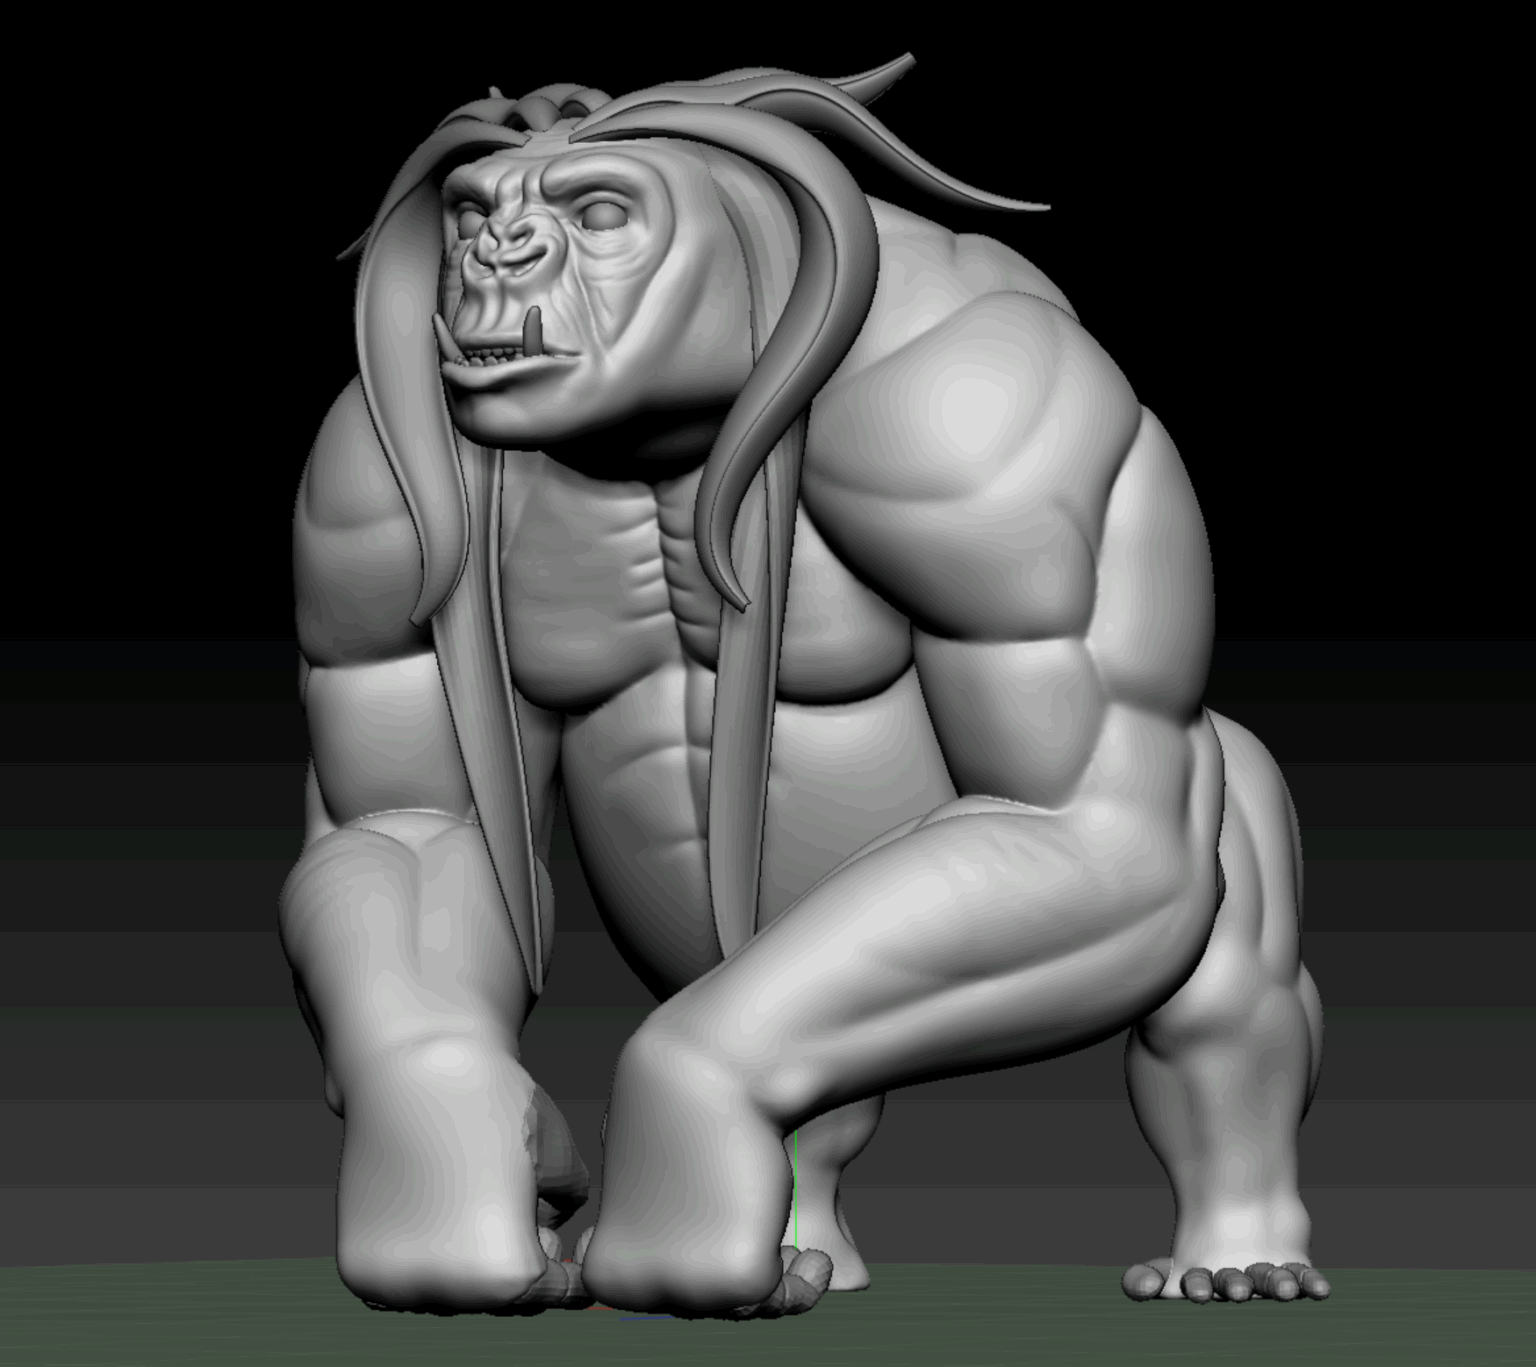
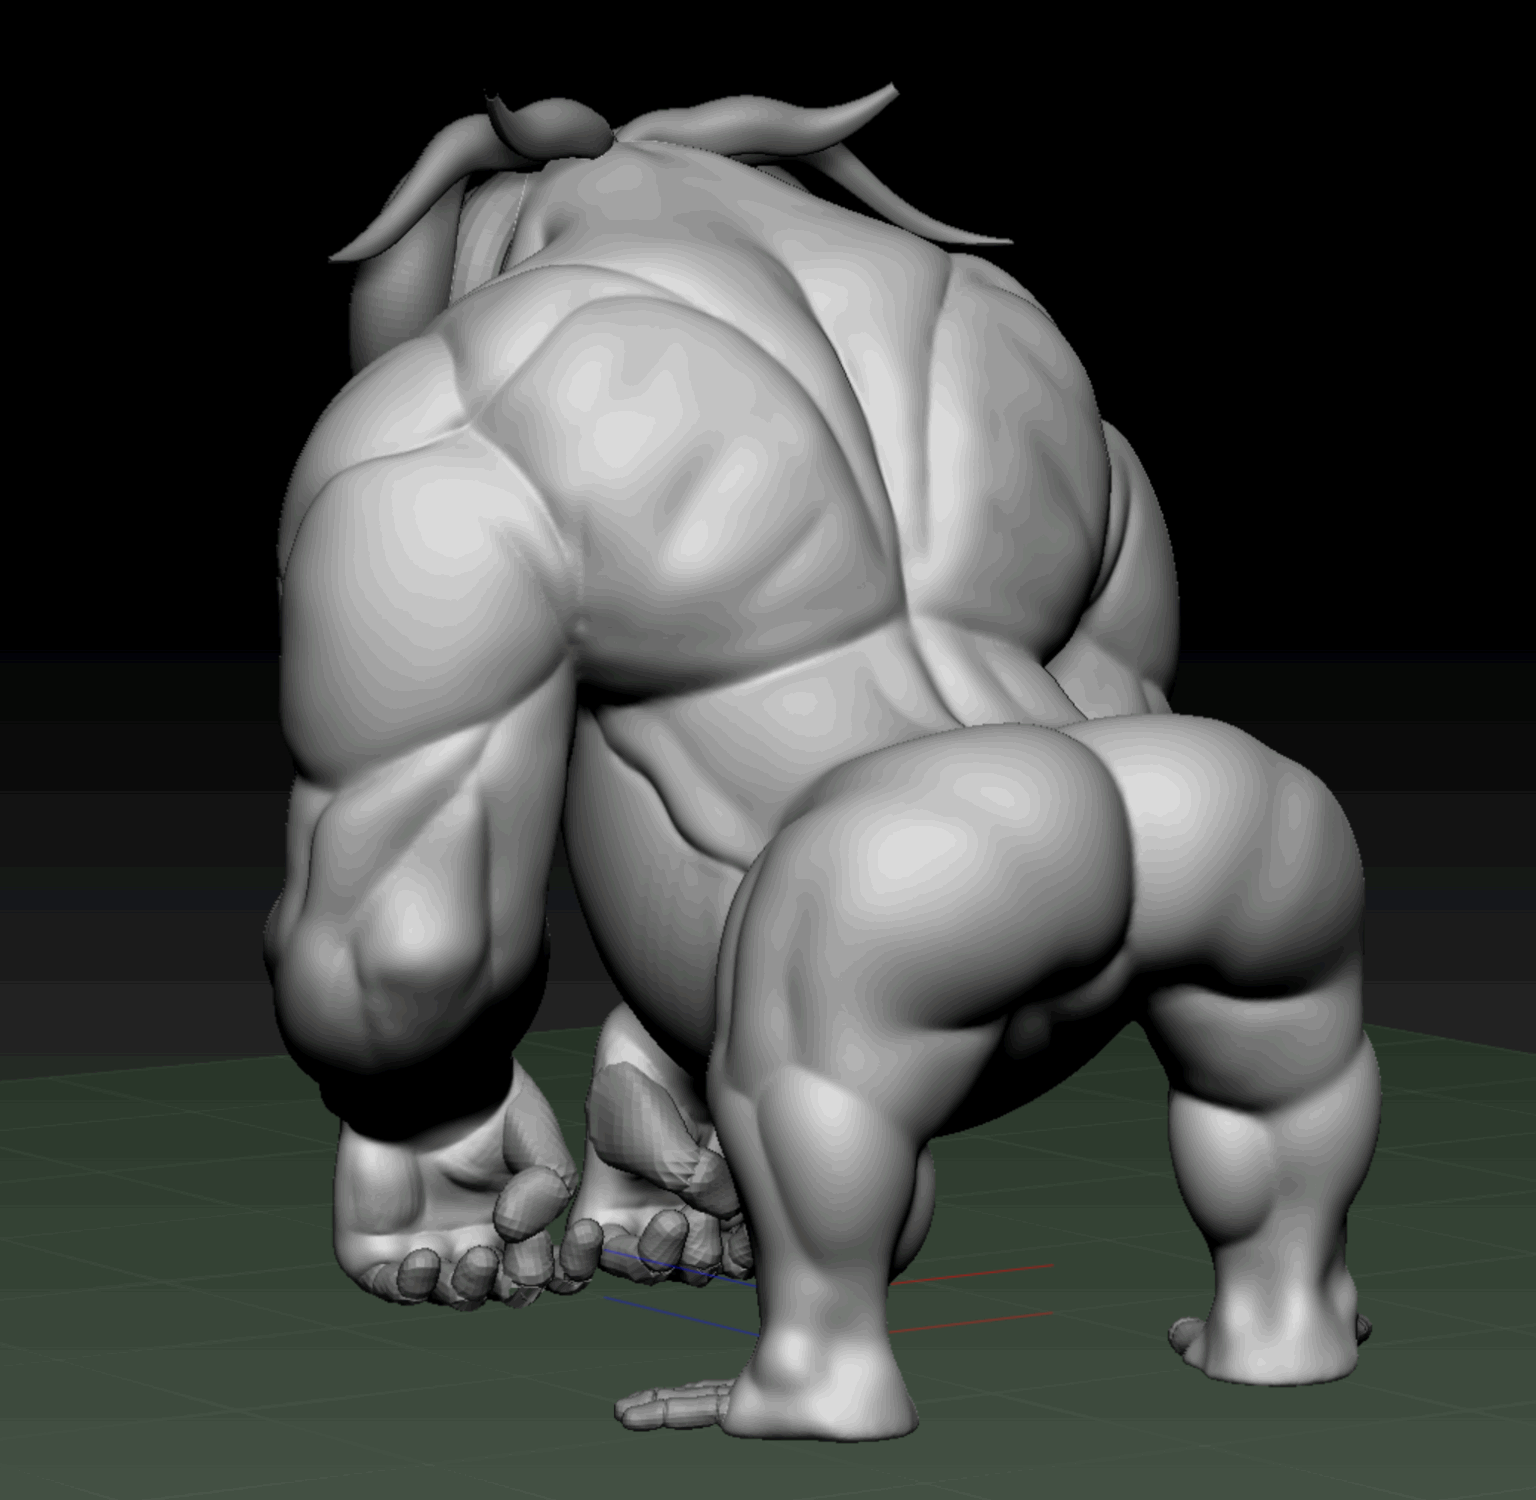
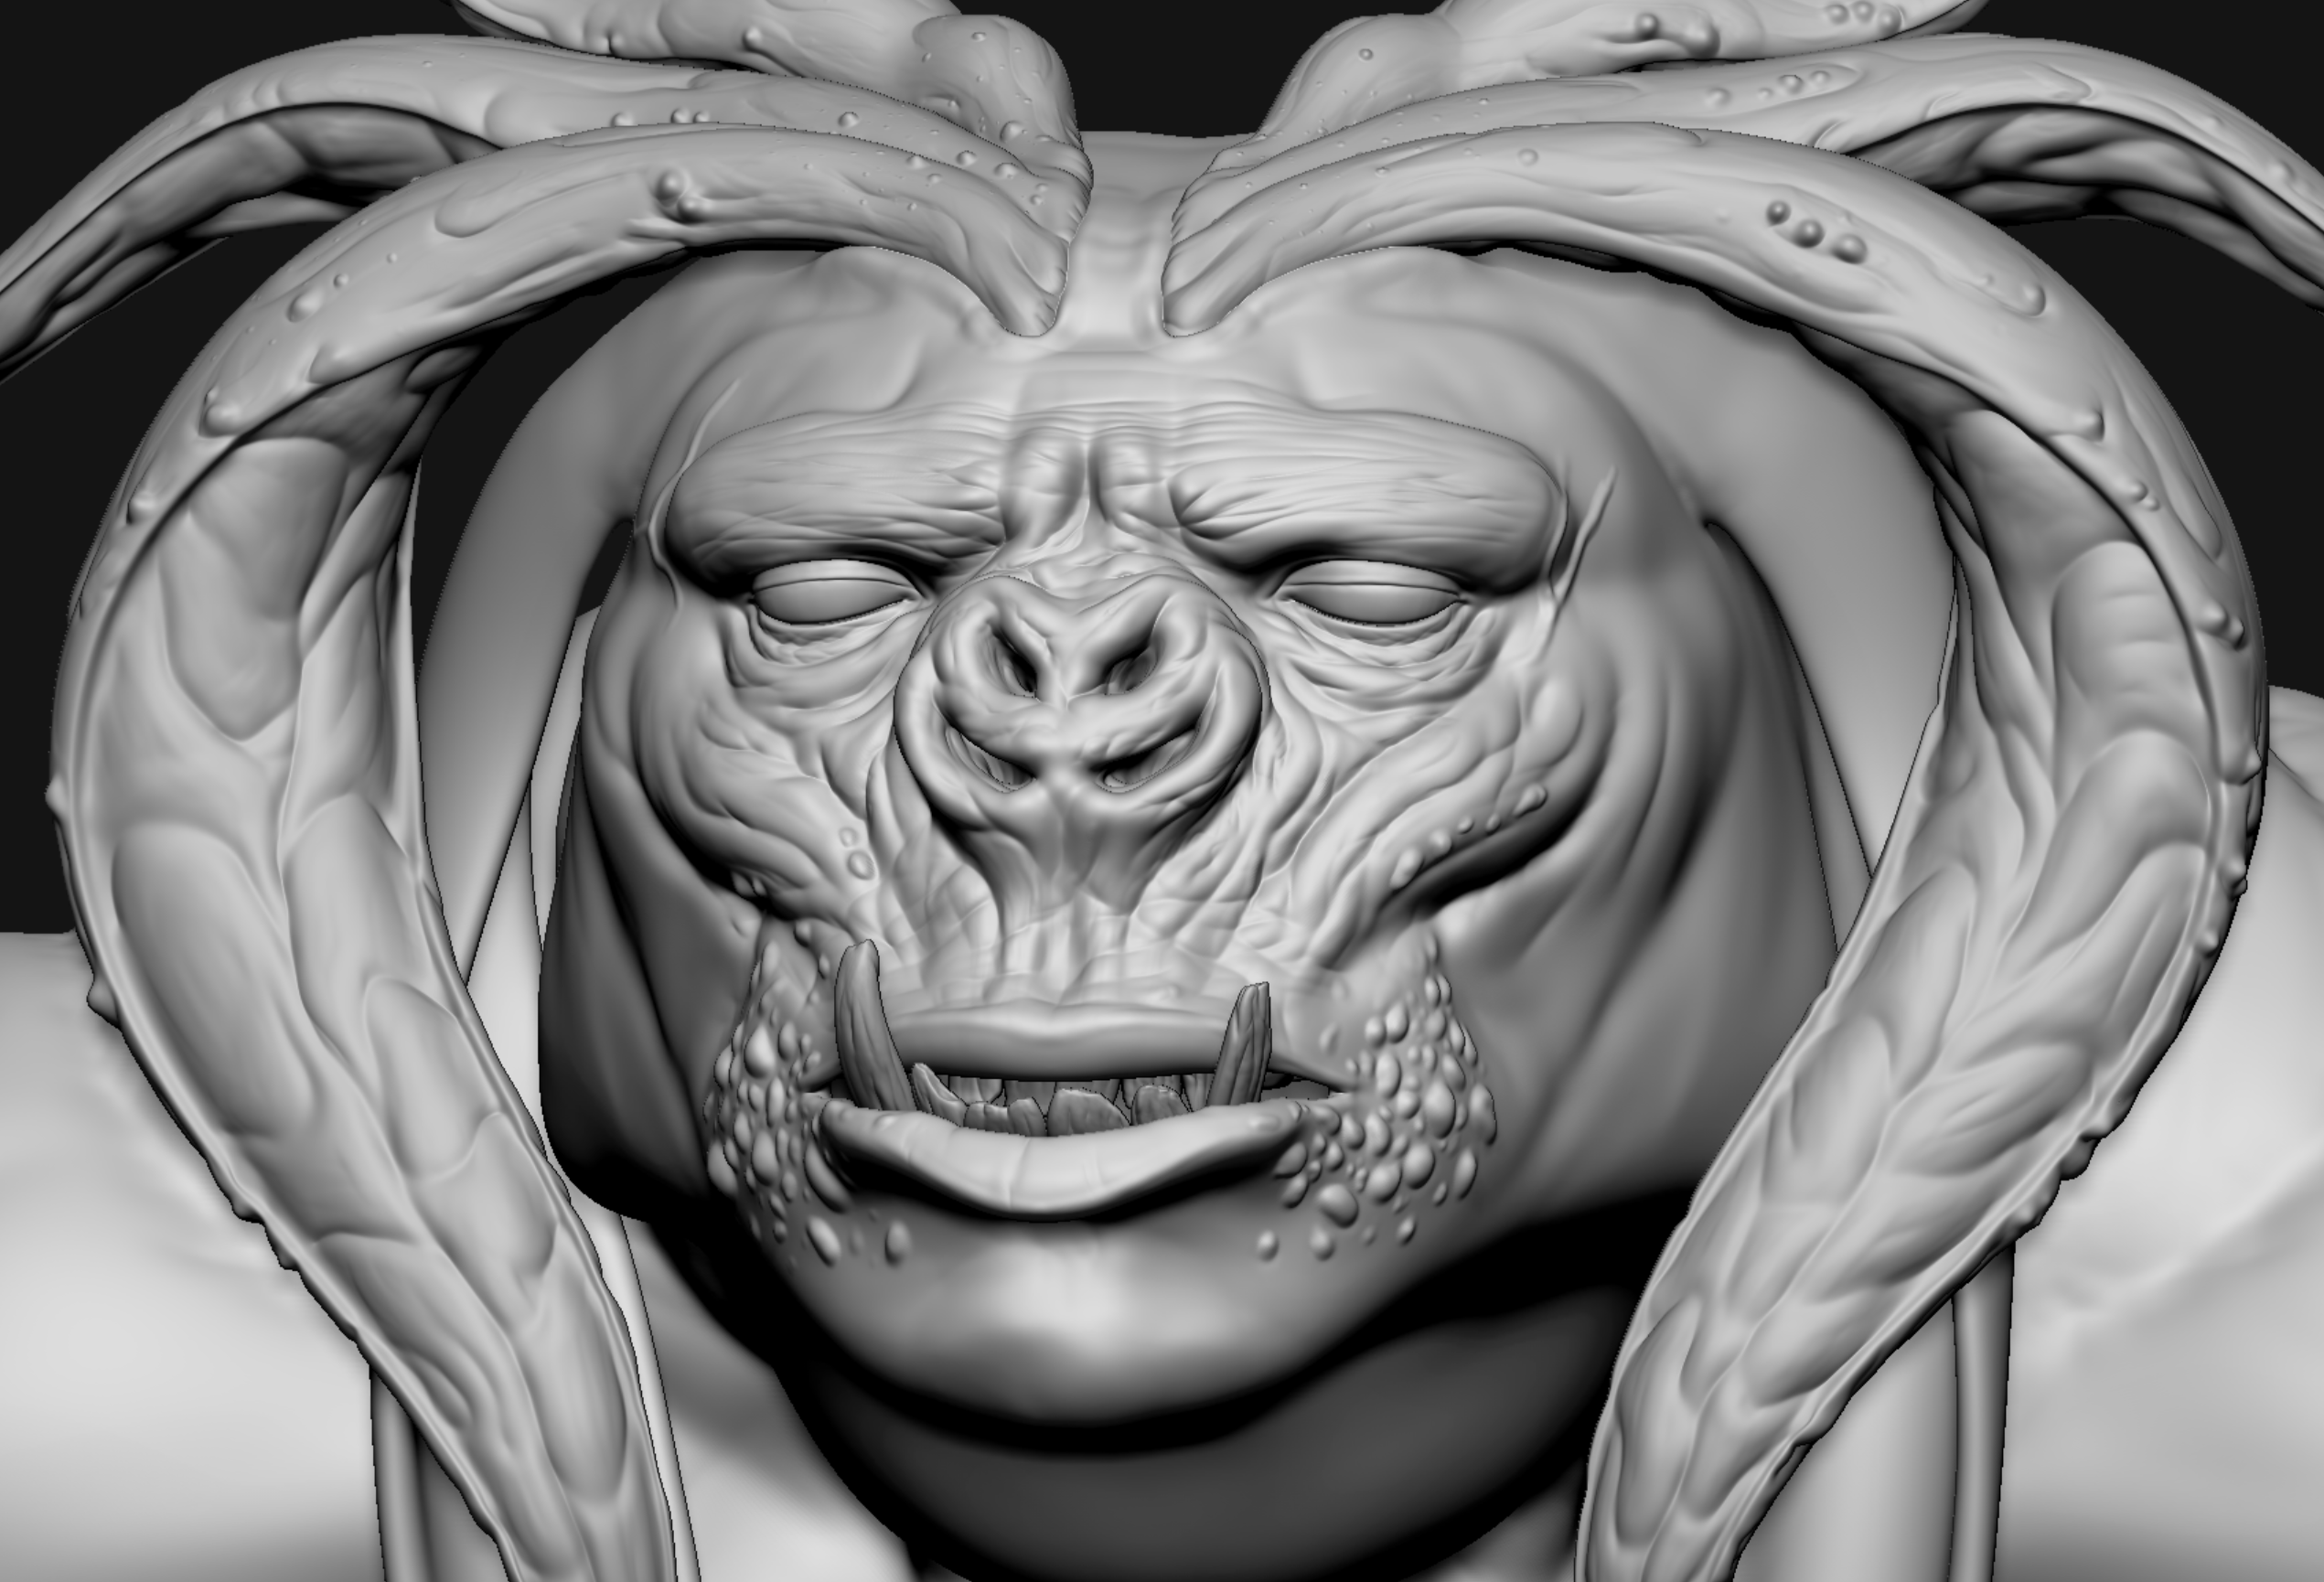
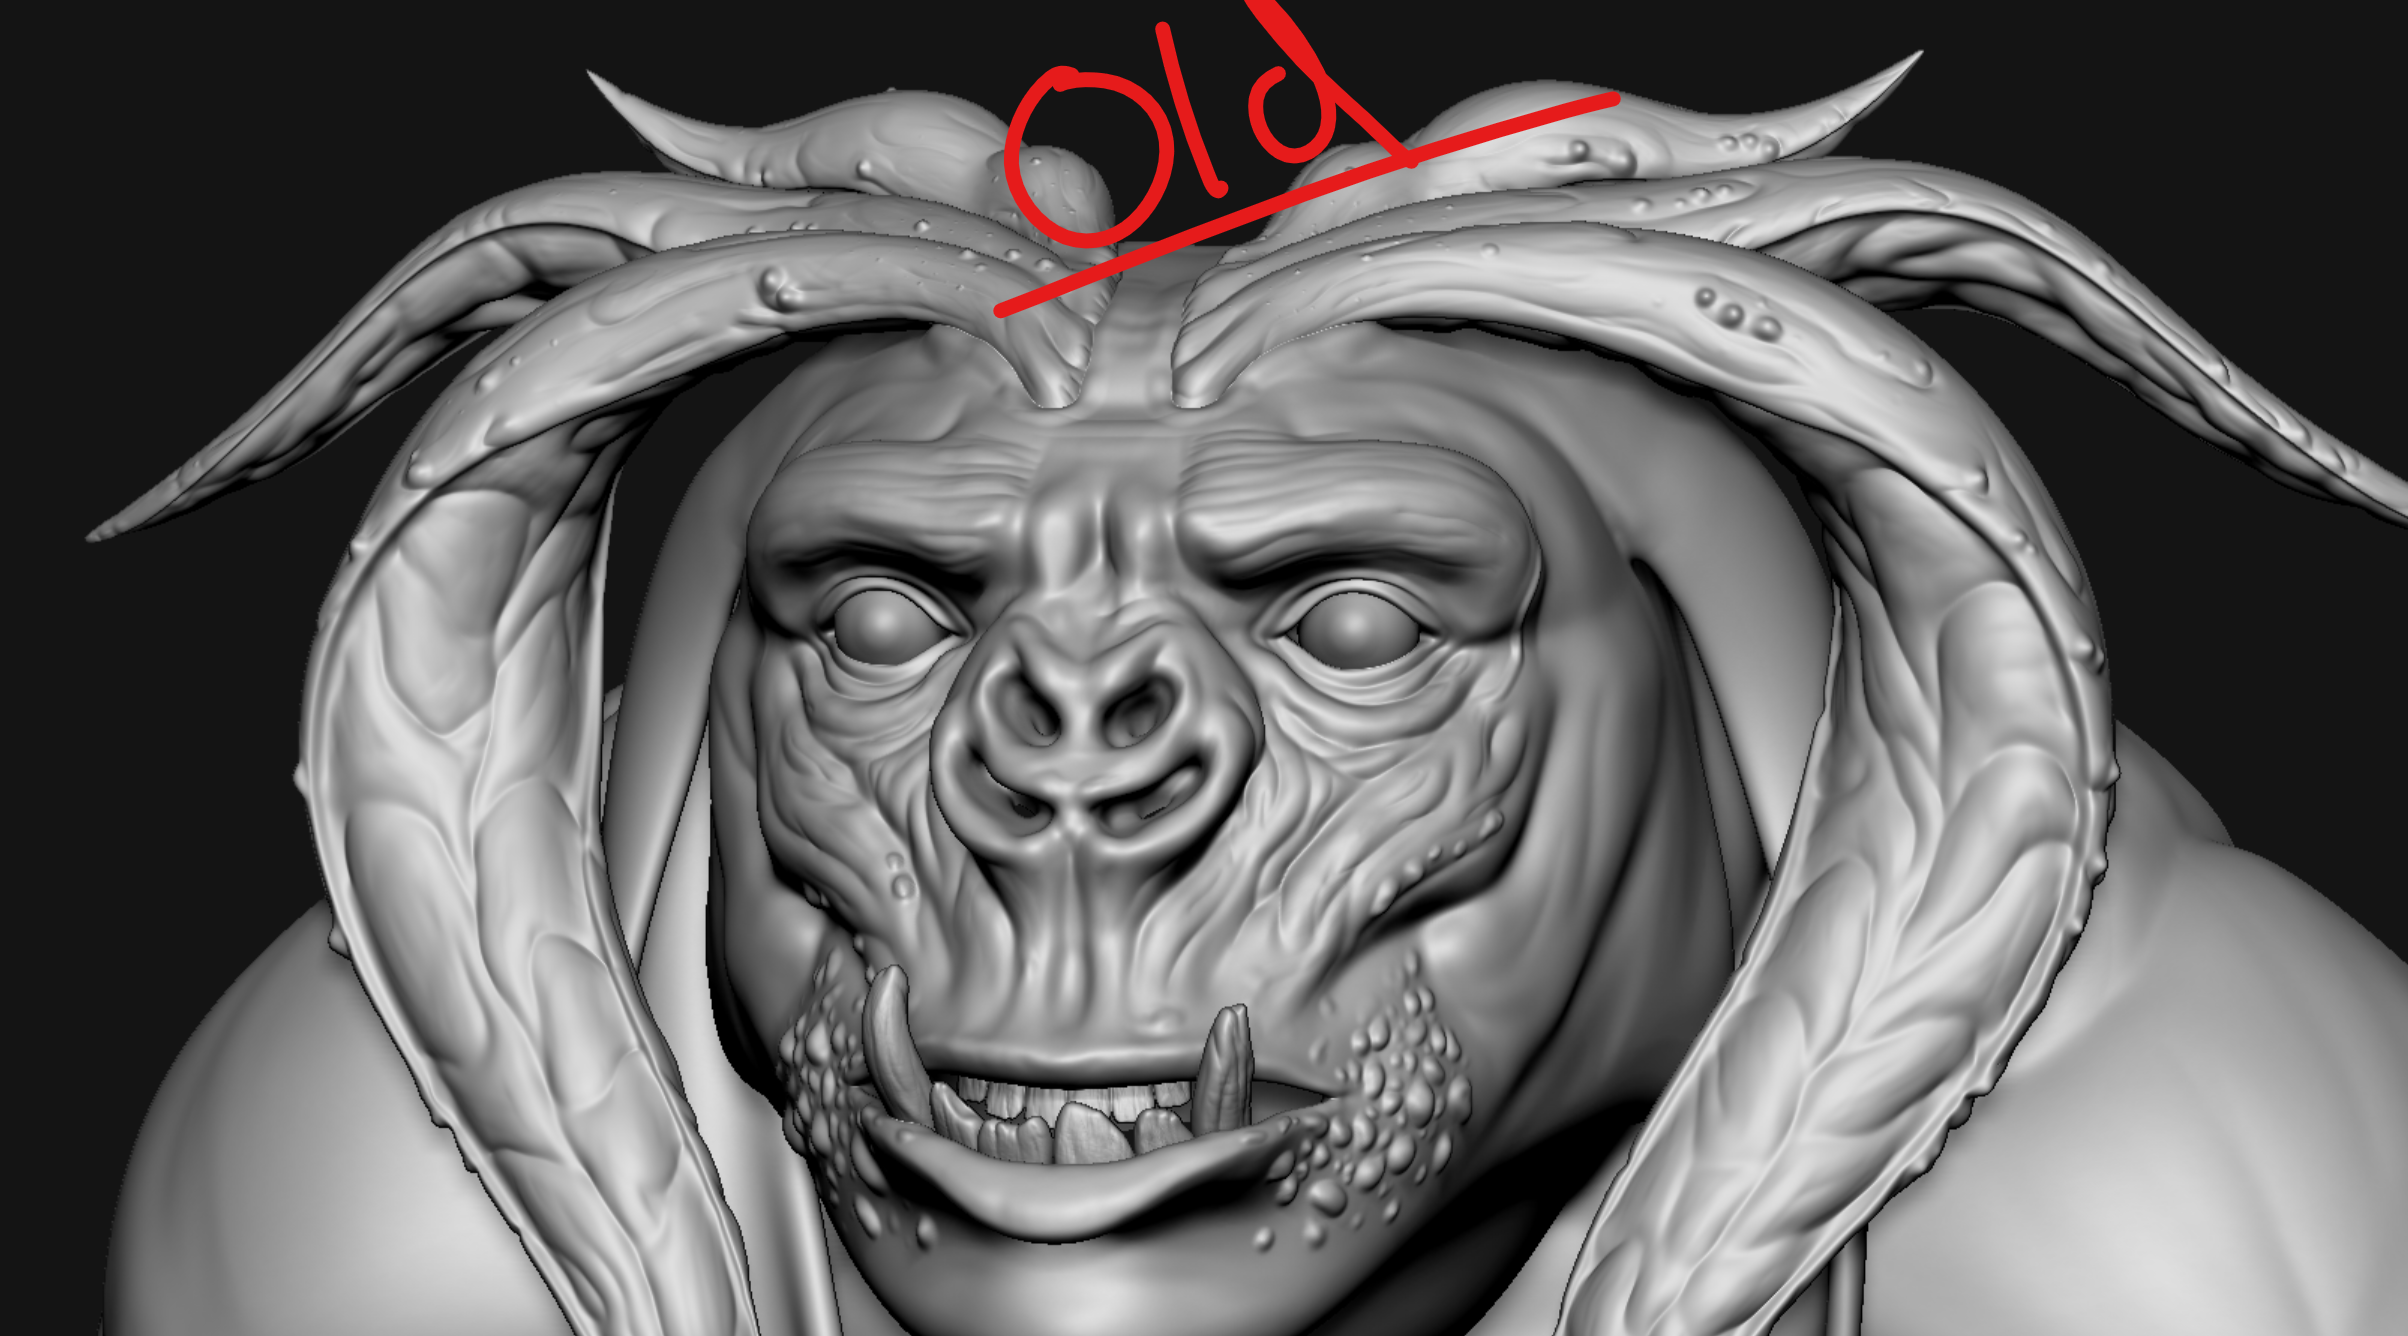
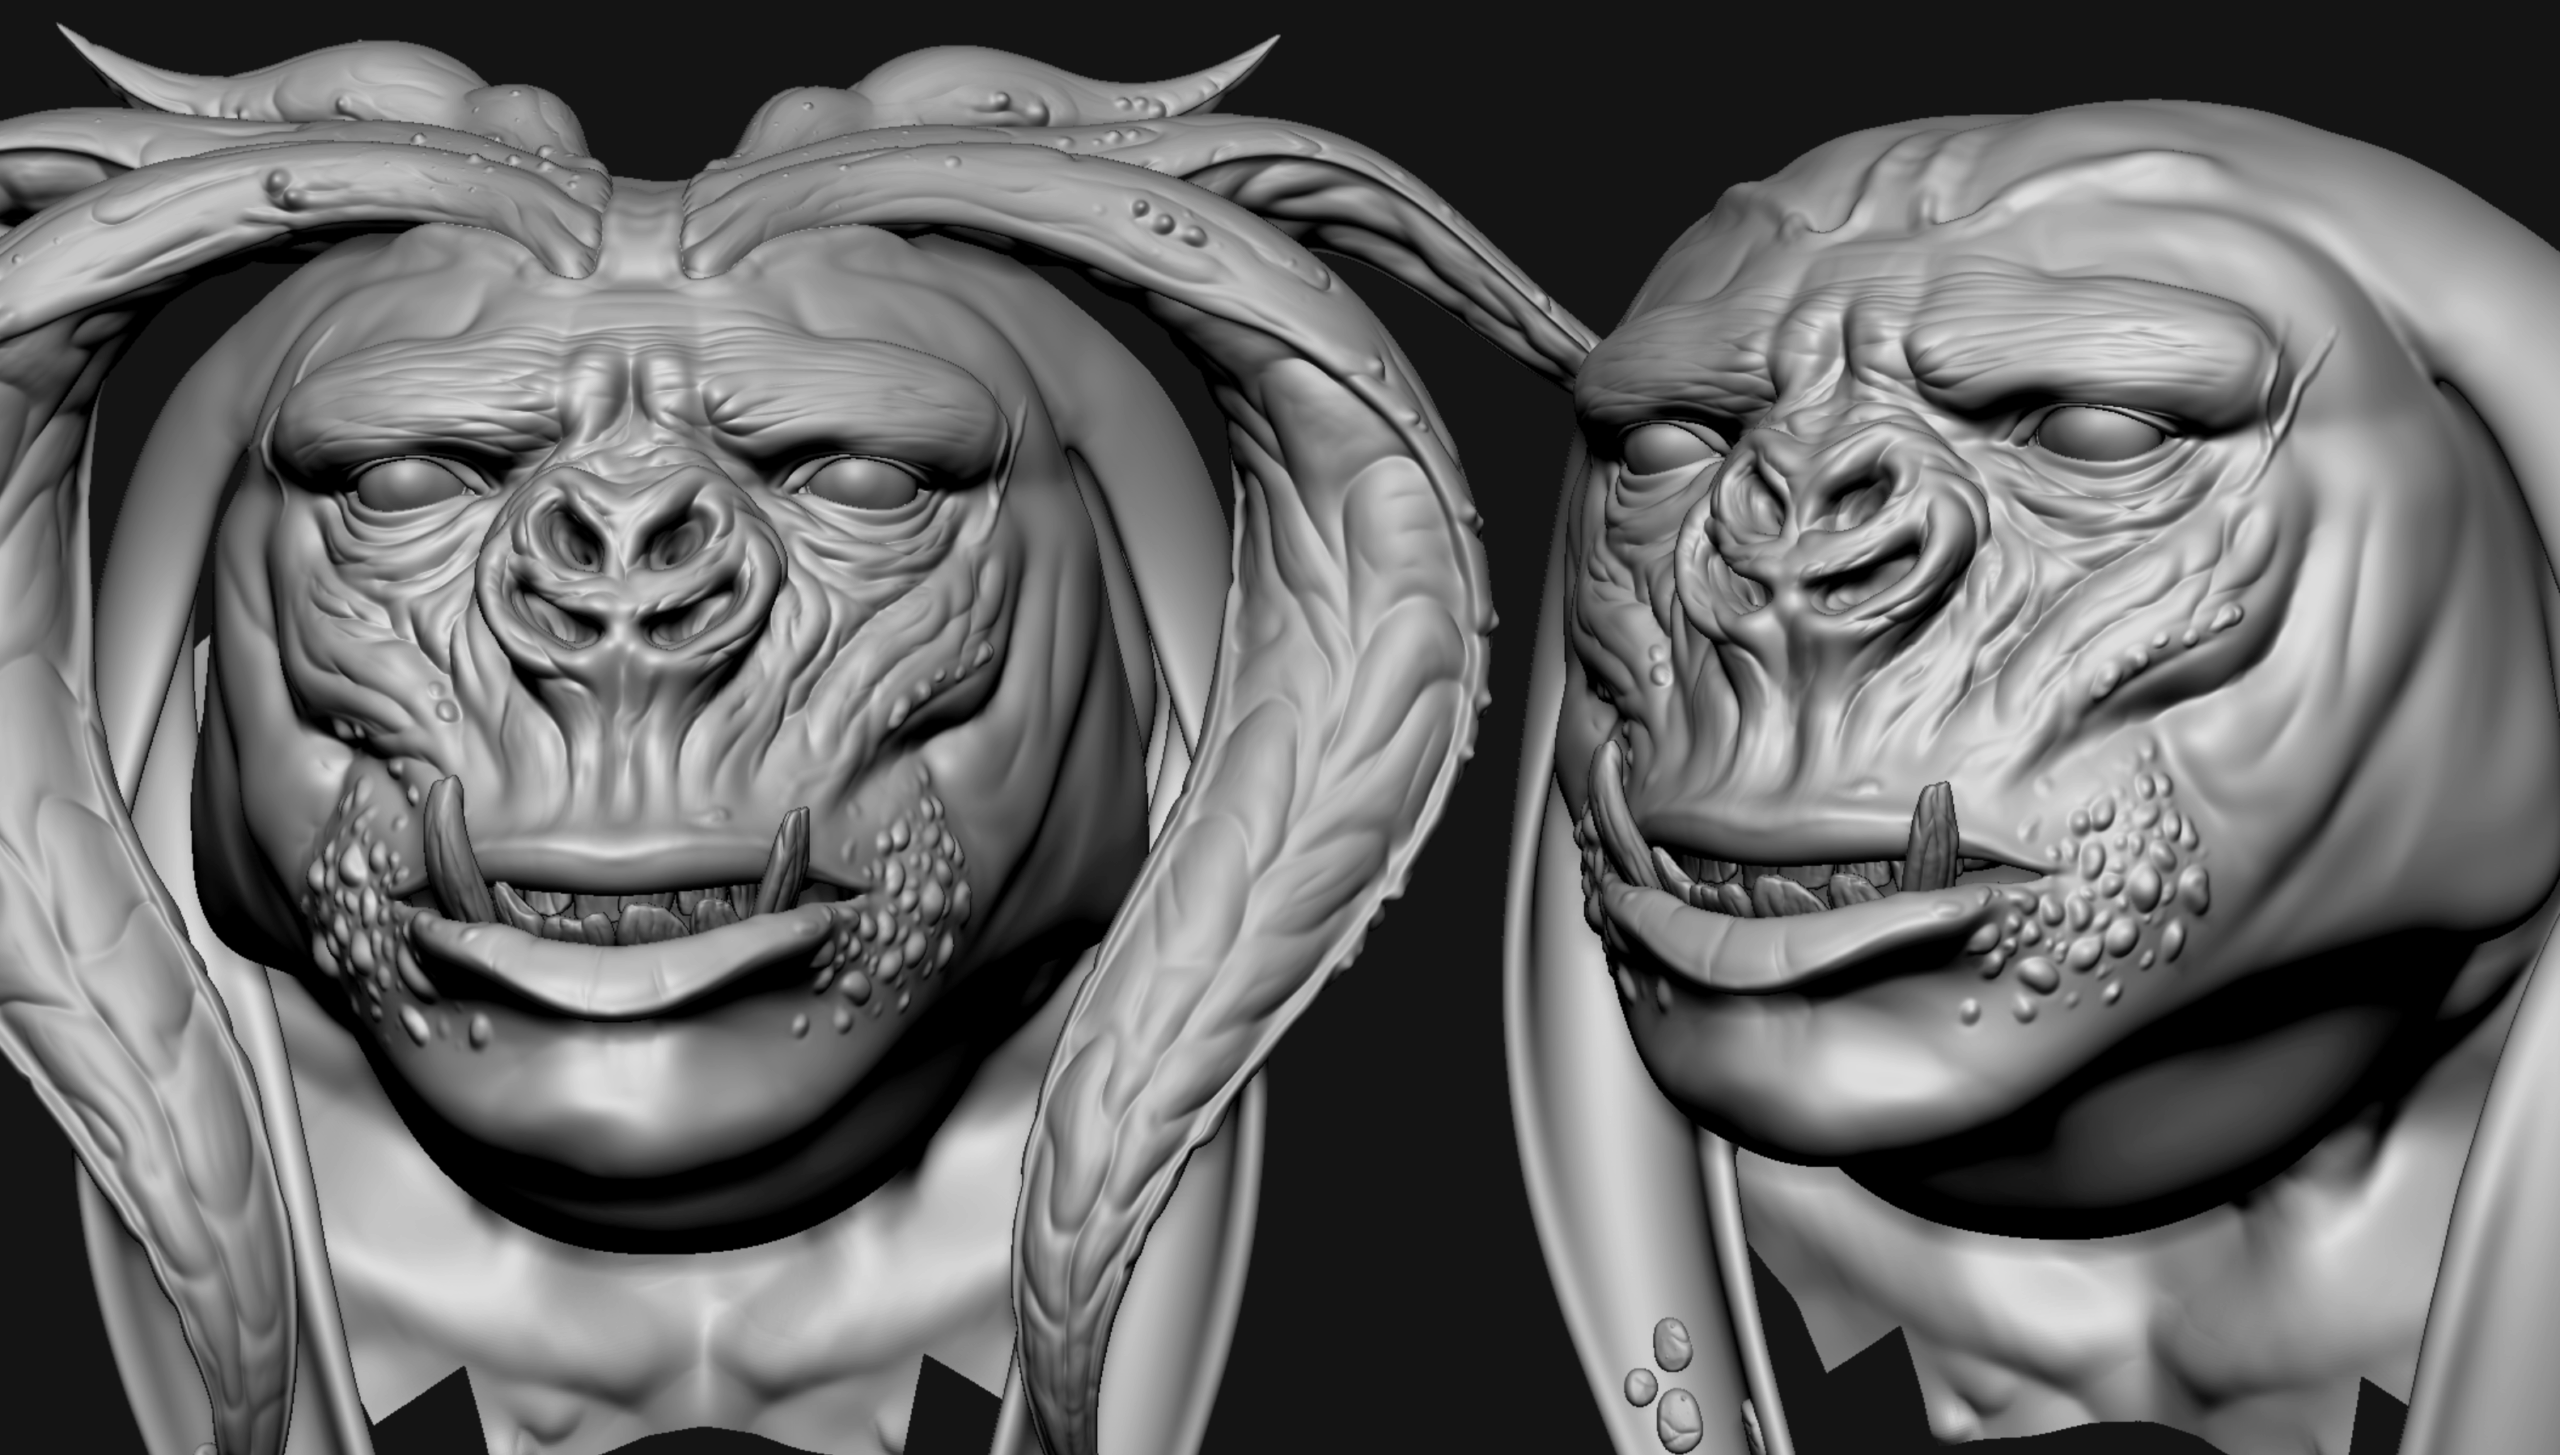
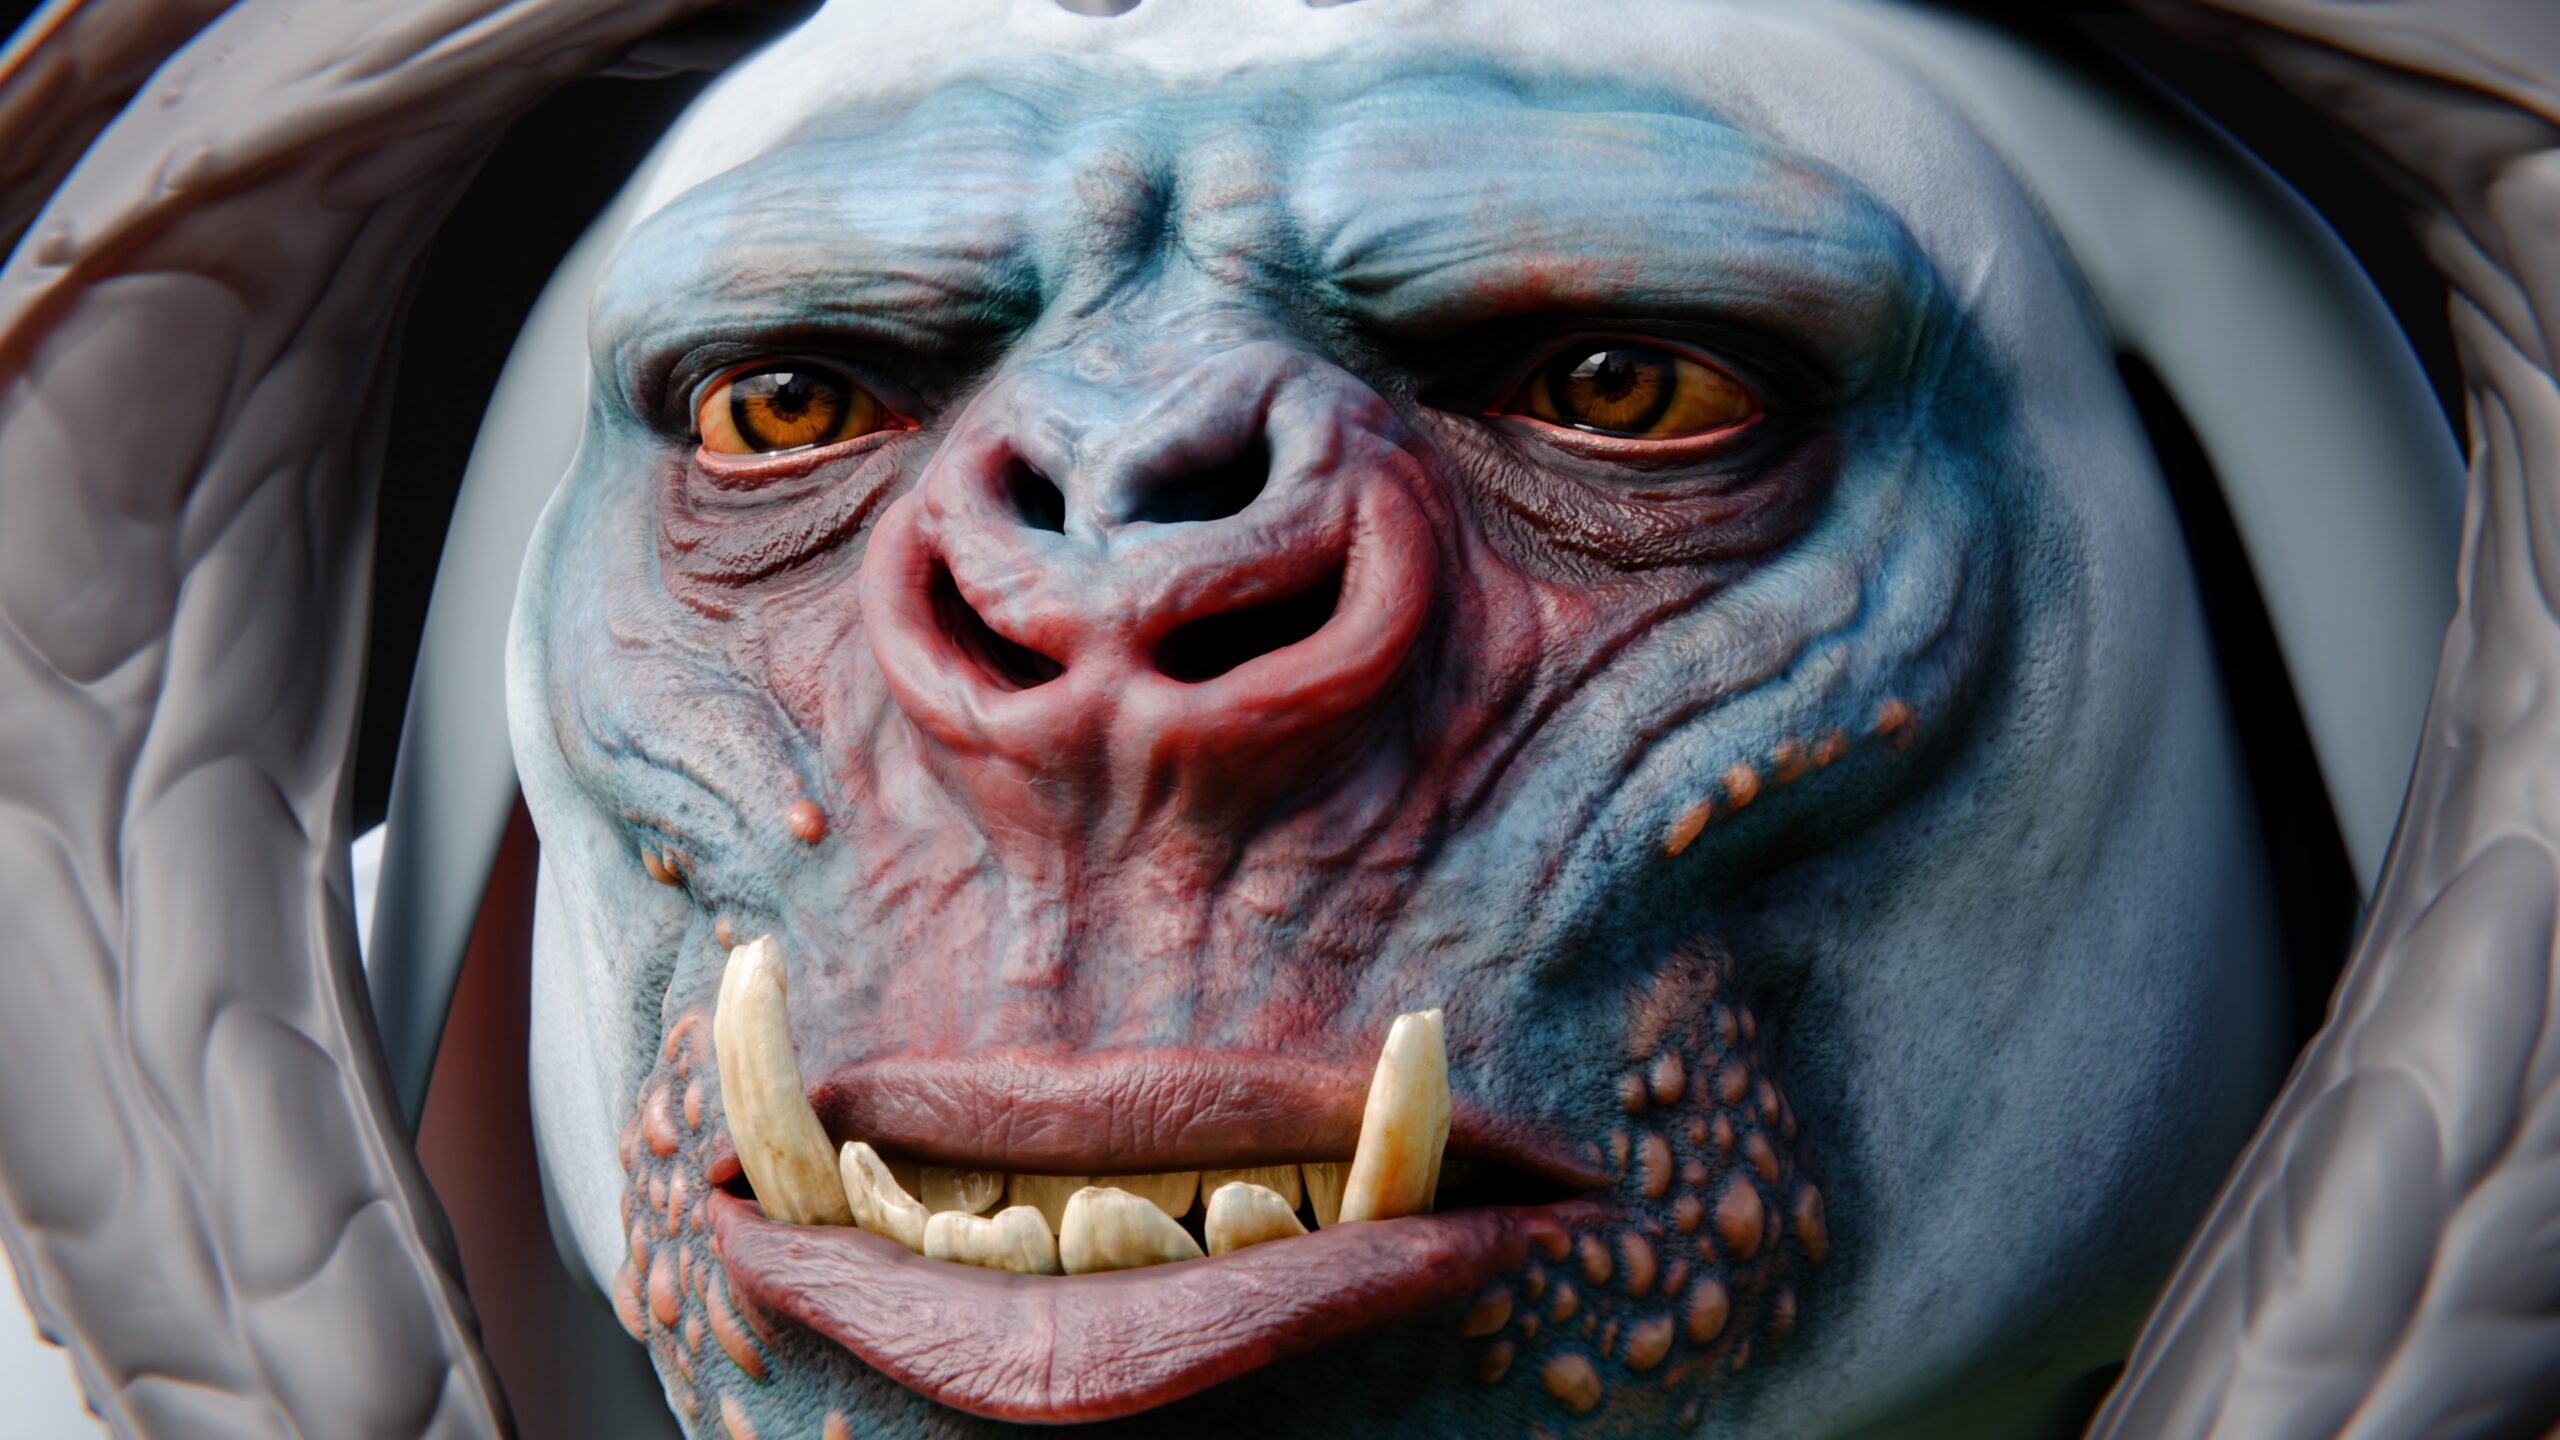
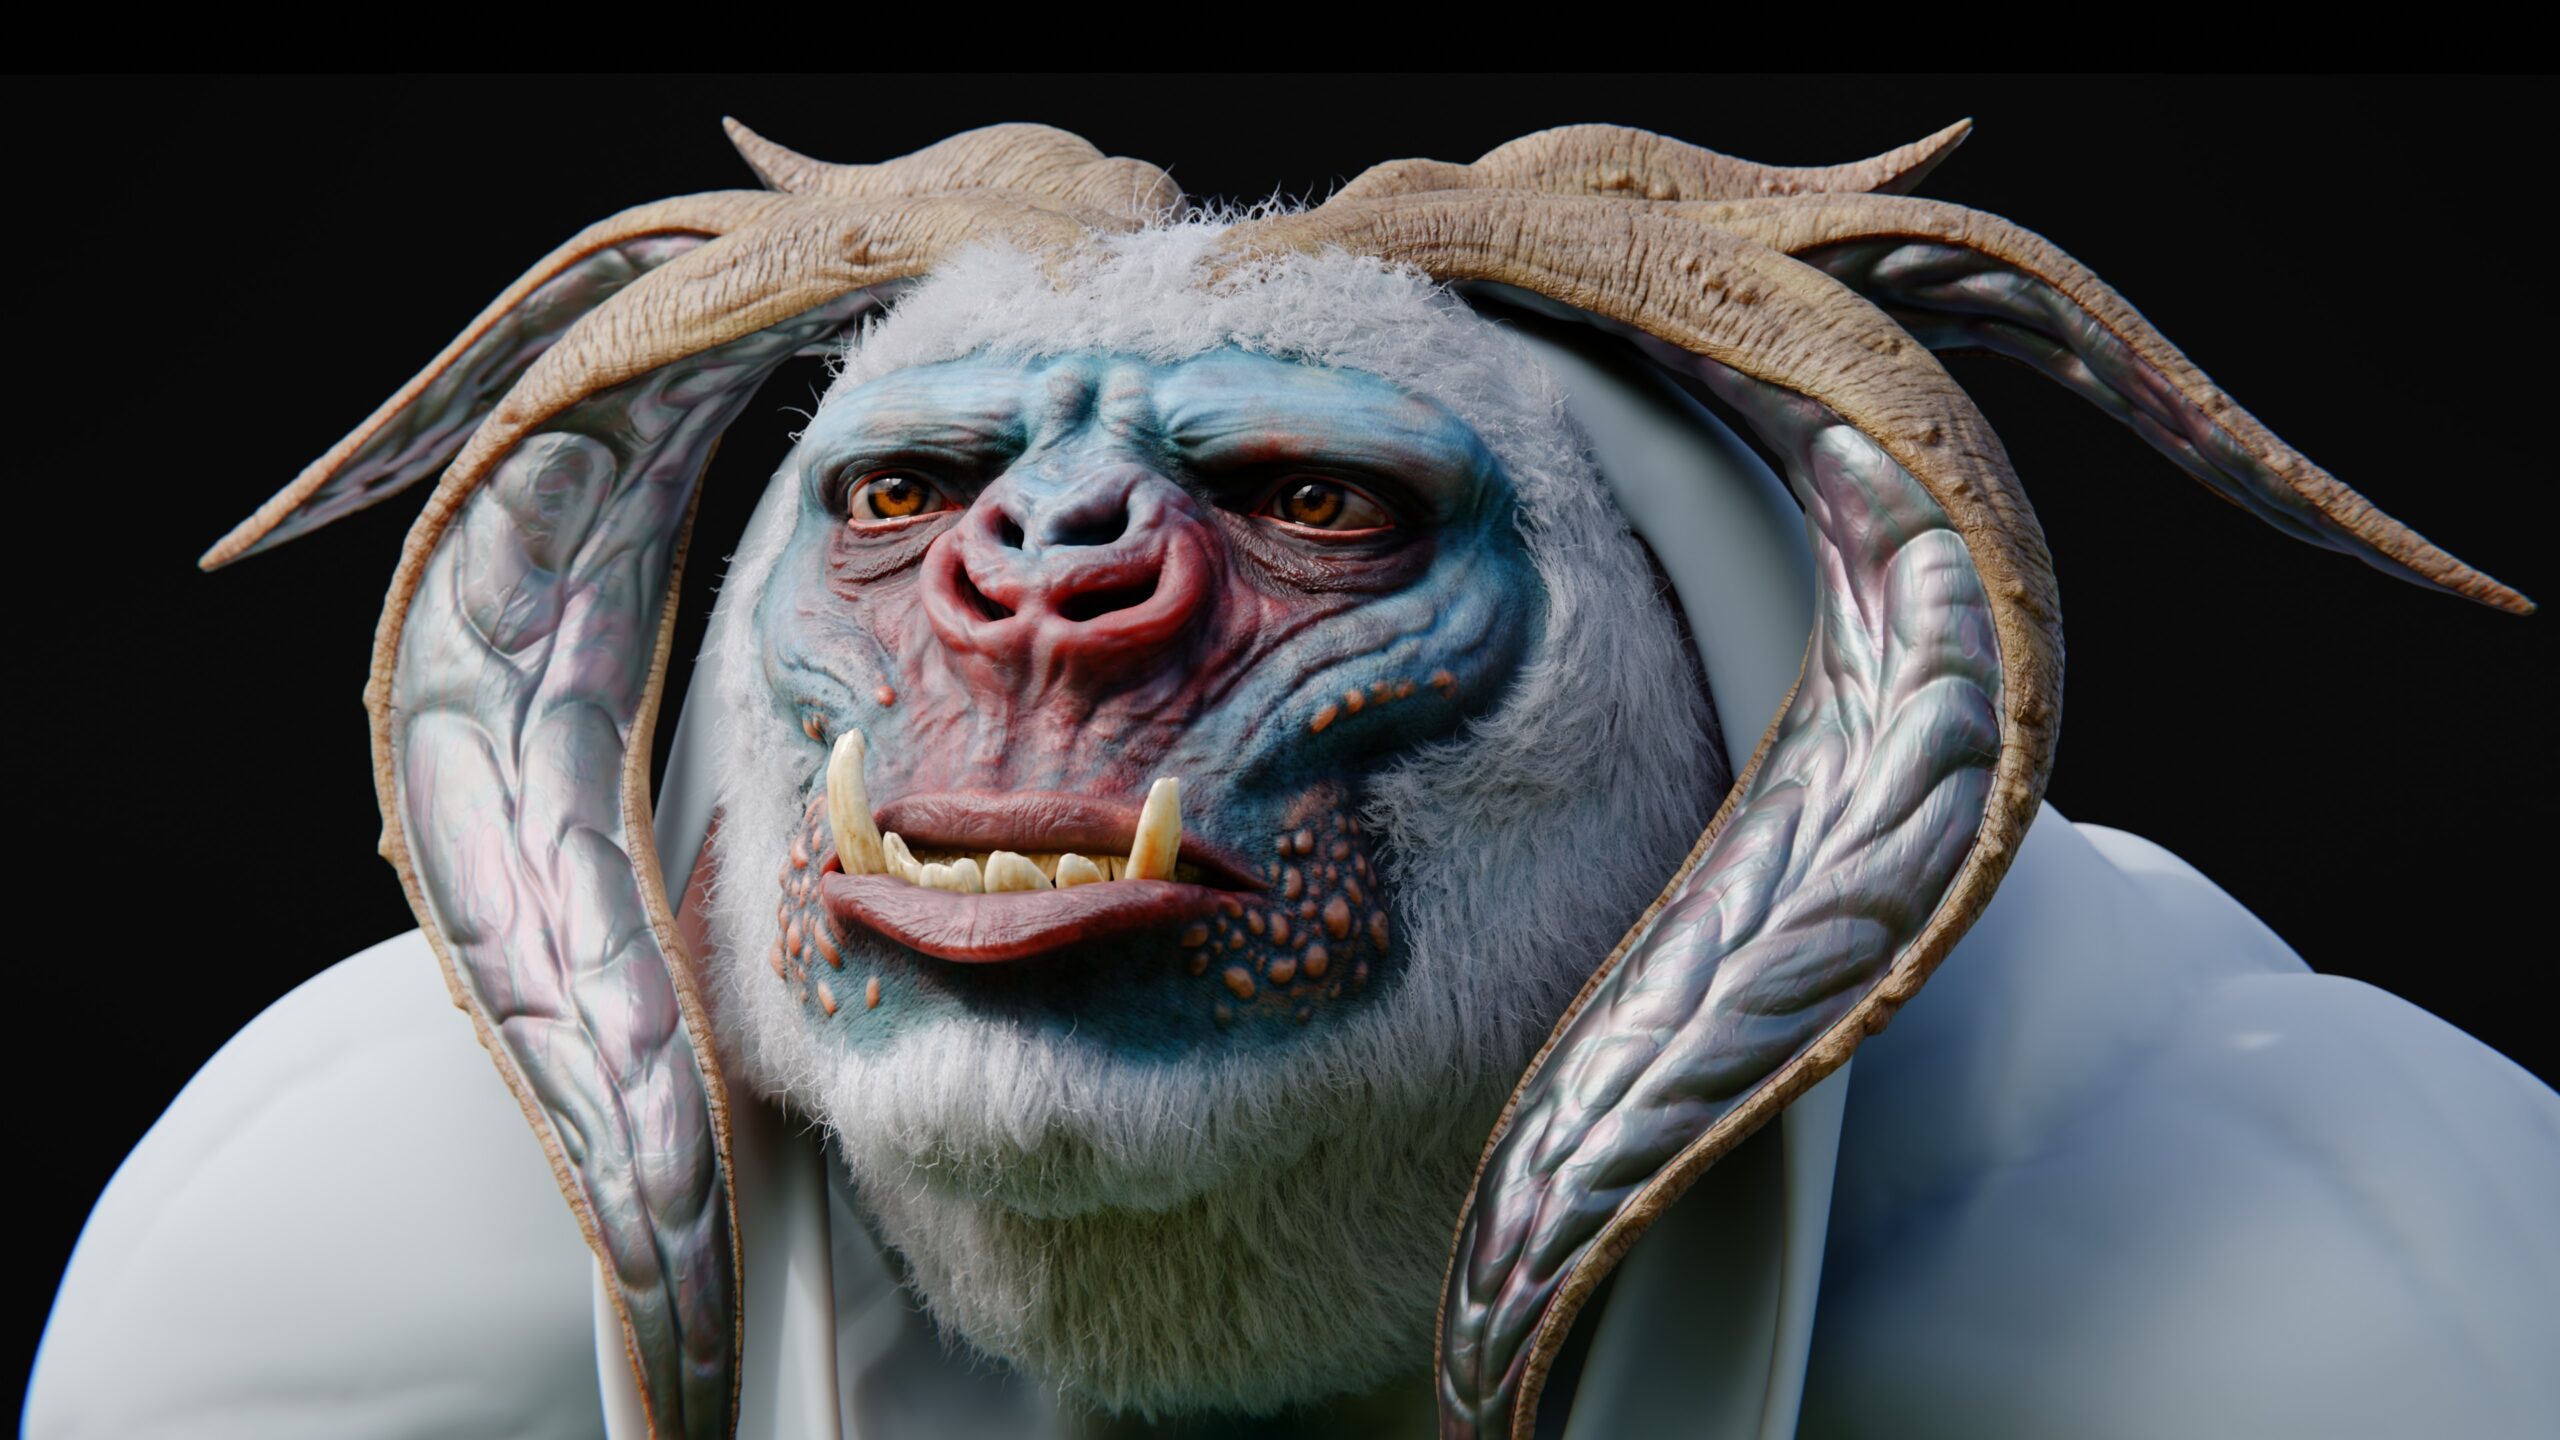
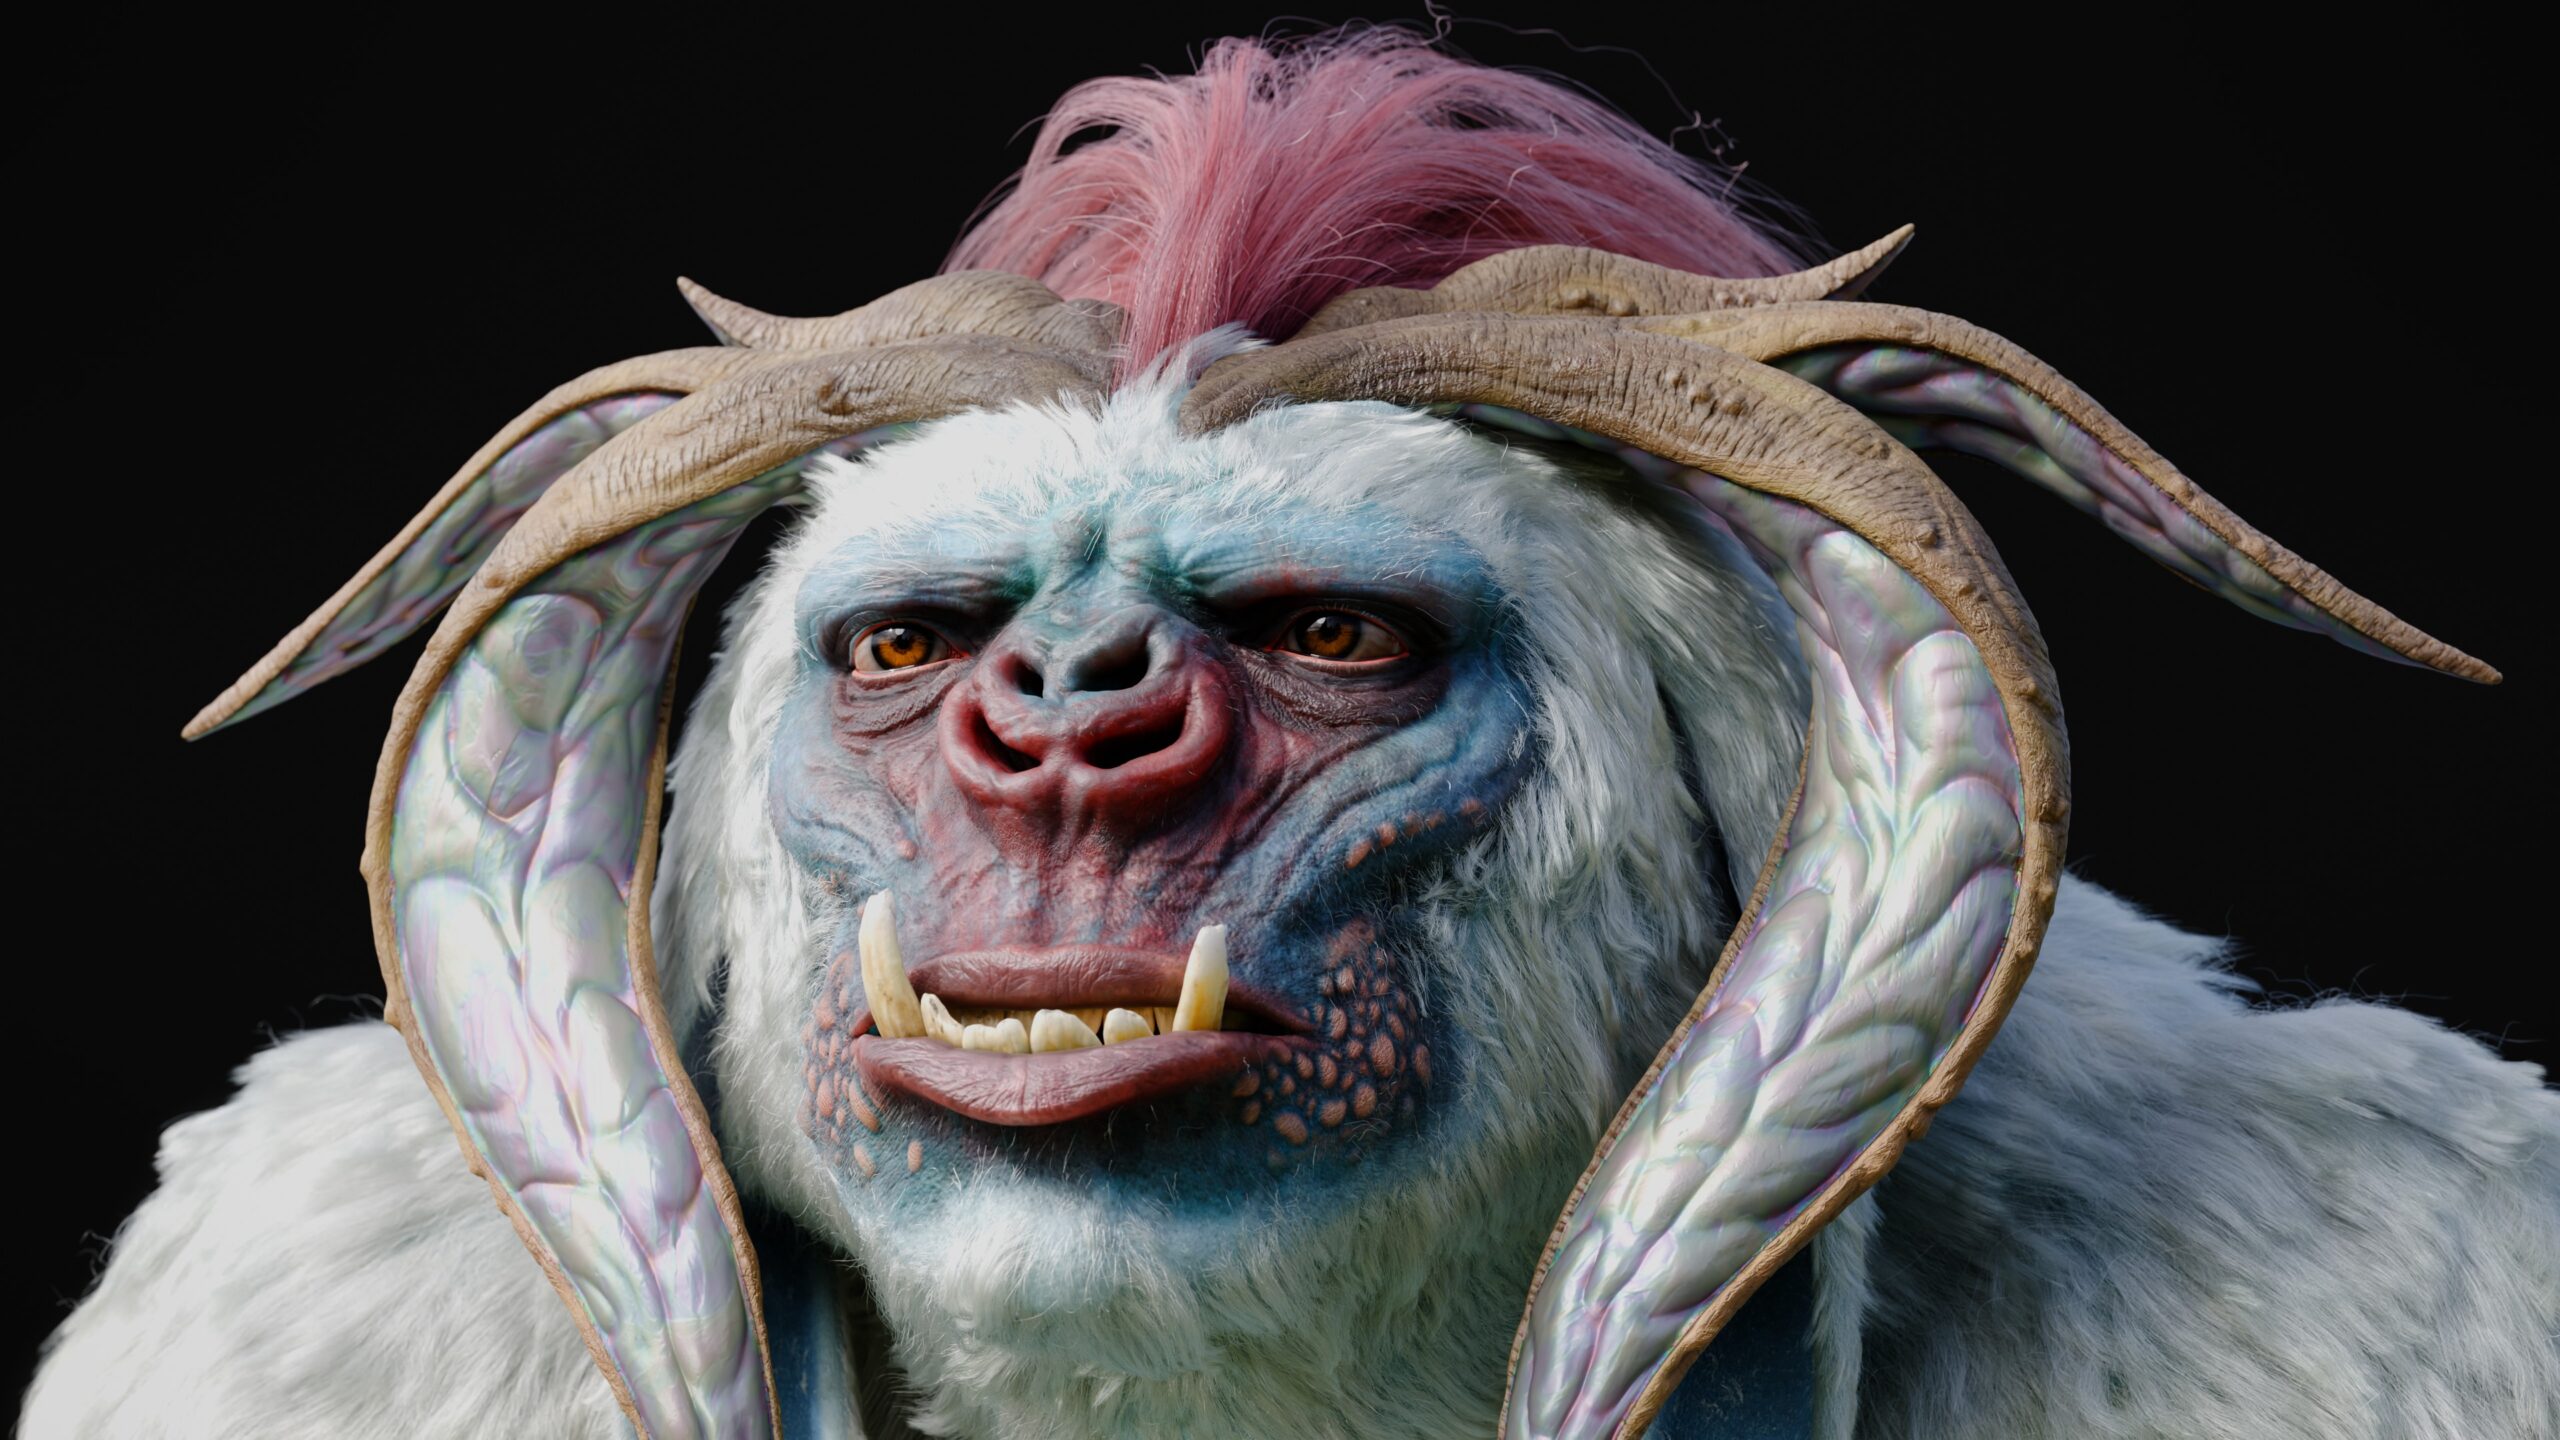
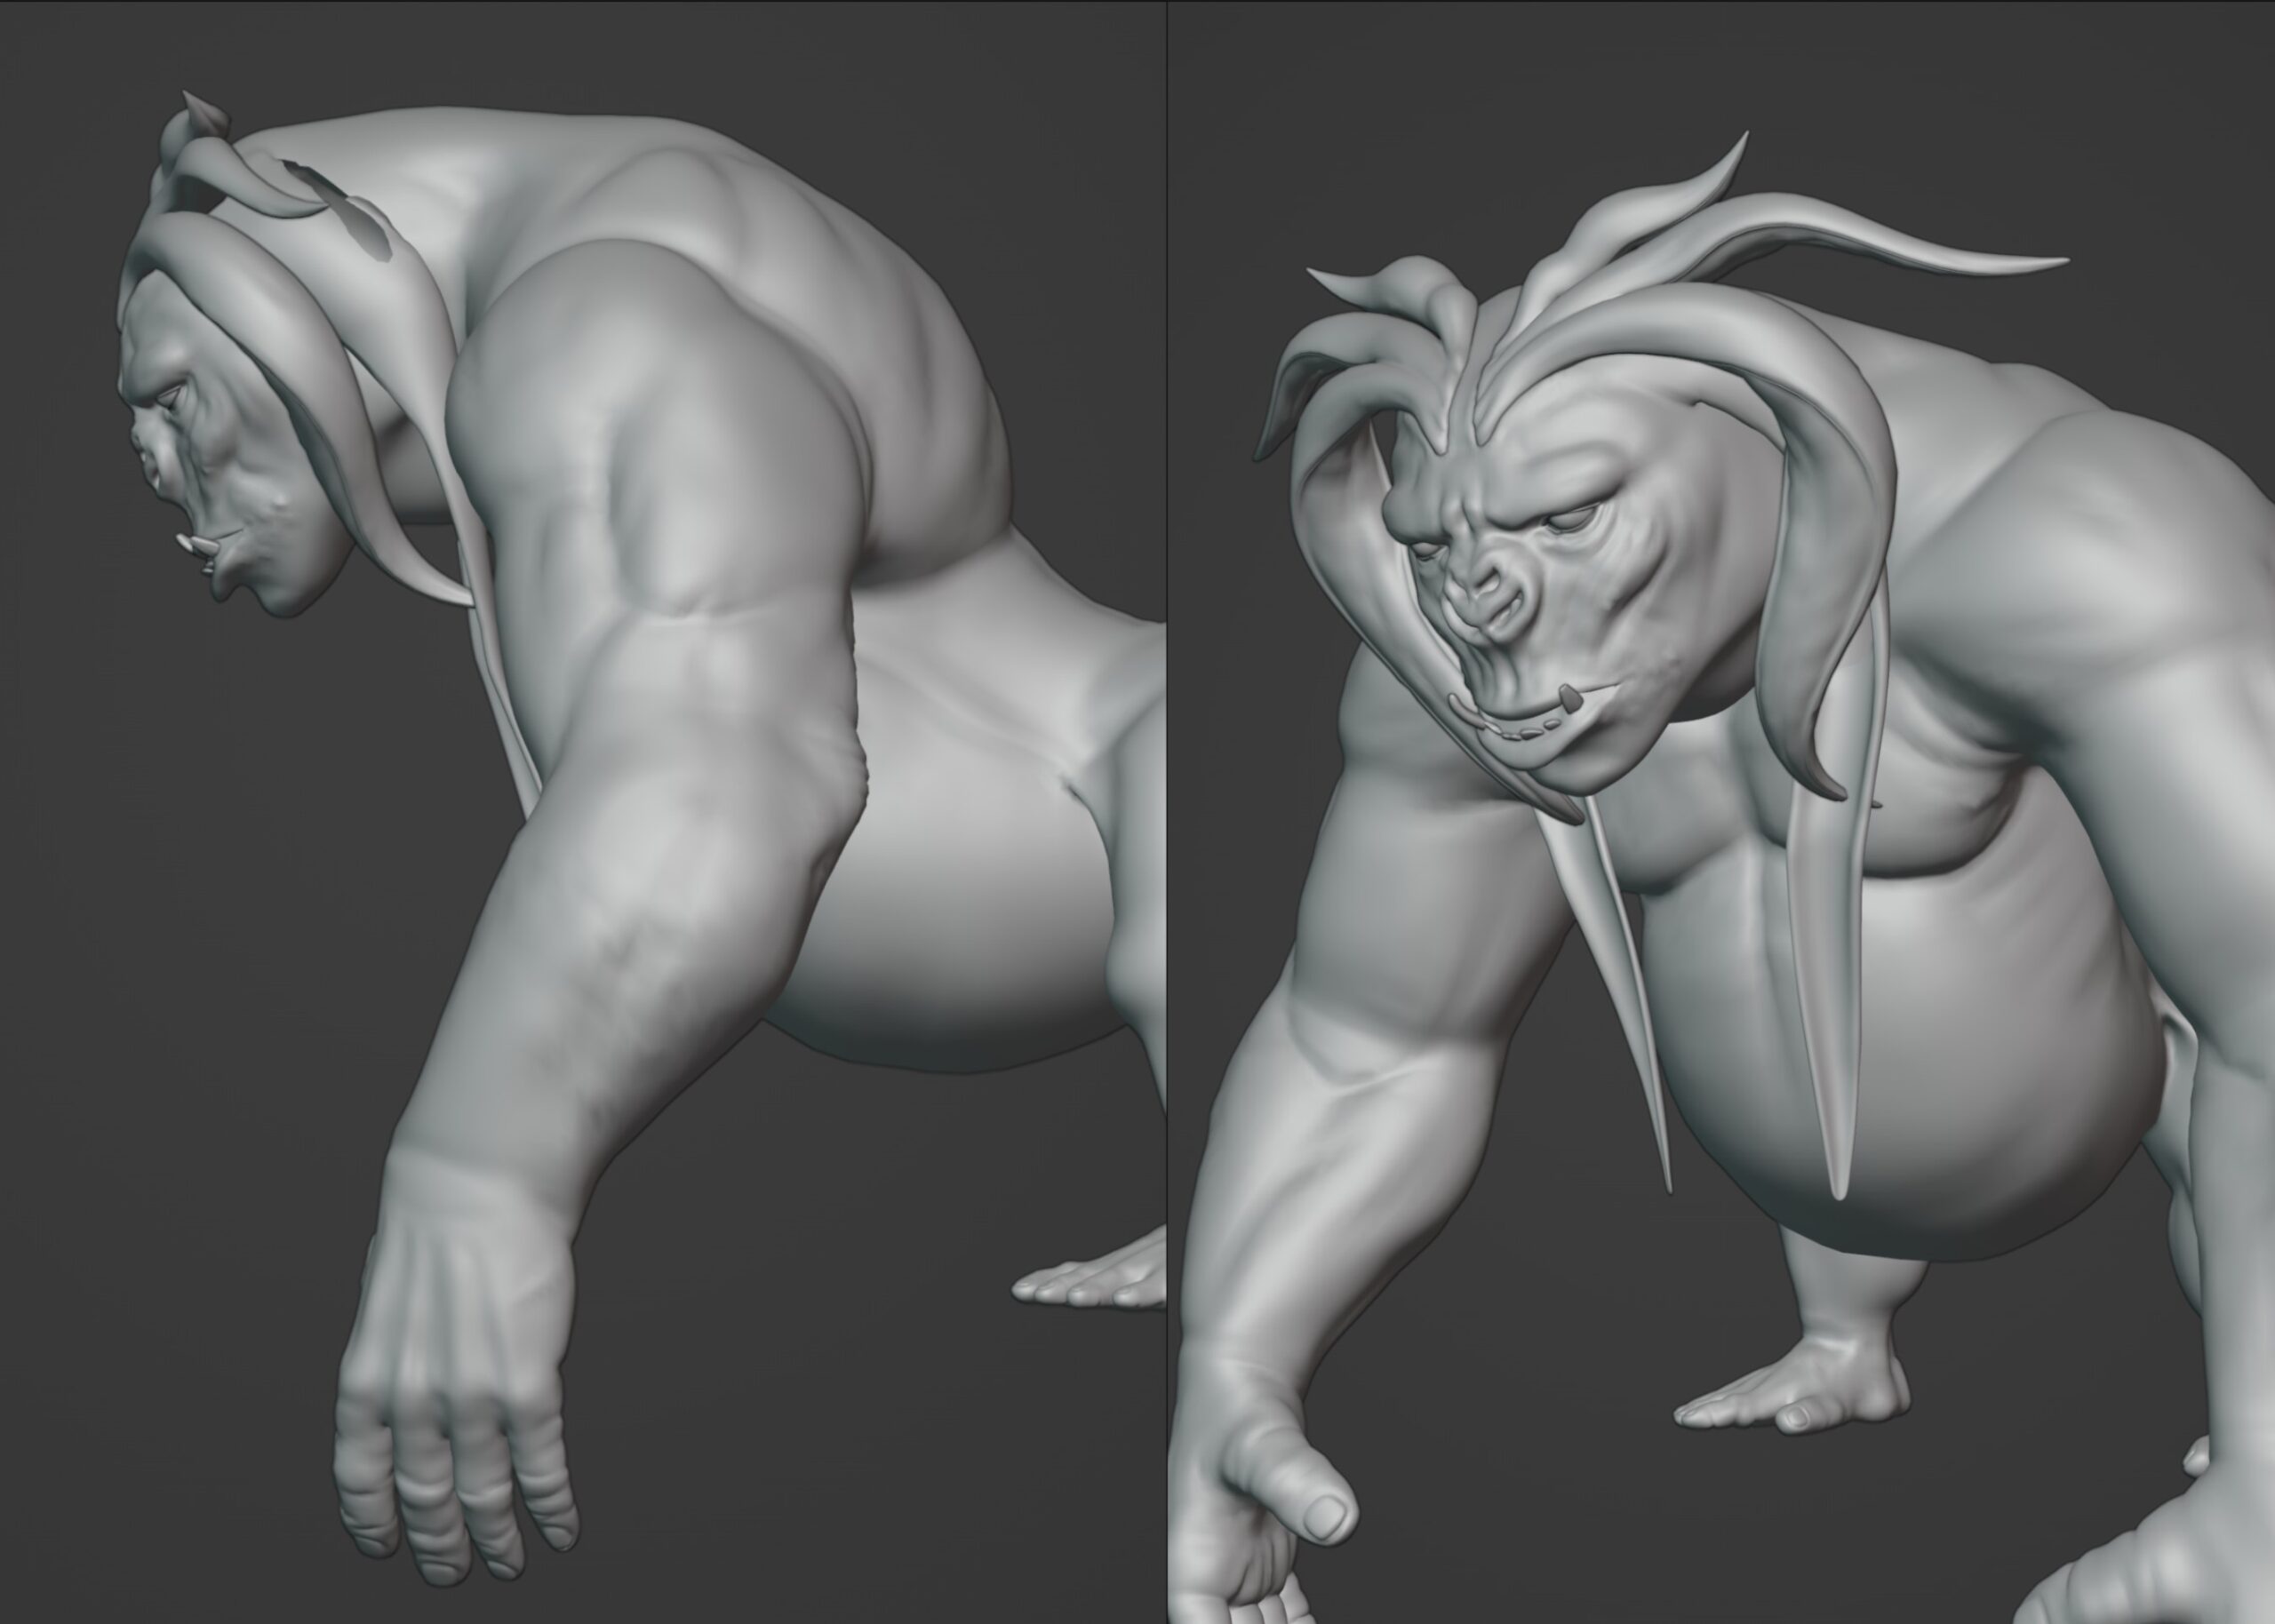
The secondary forms were where he really diverged from a unique ape into a truly otherworldly creature, and also where most of the model improvements would be made in his second iteration. The facial and eye anatomy was particularly lacking in Brad’s initial geometry, which I was eager to amend with the 2024 rework.
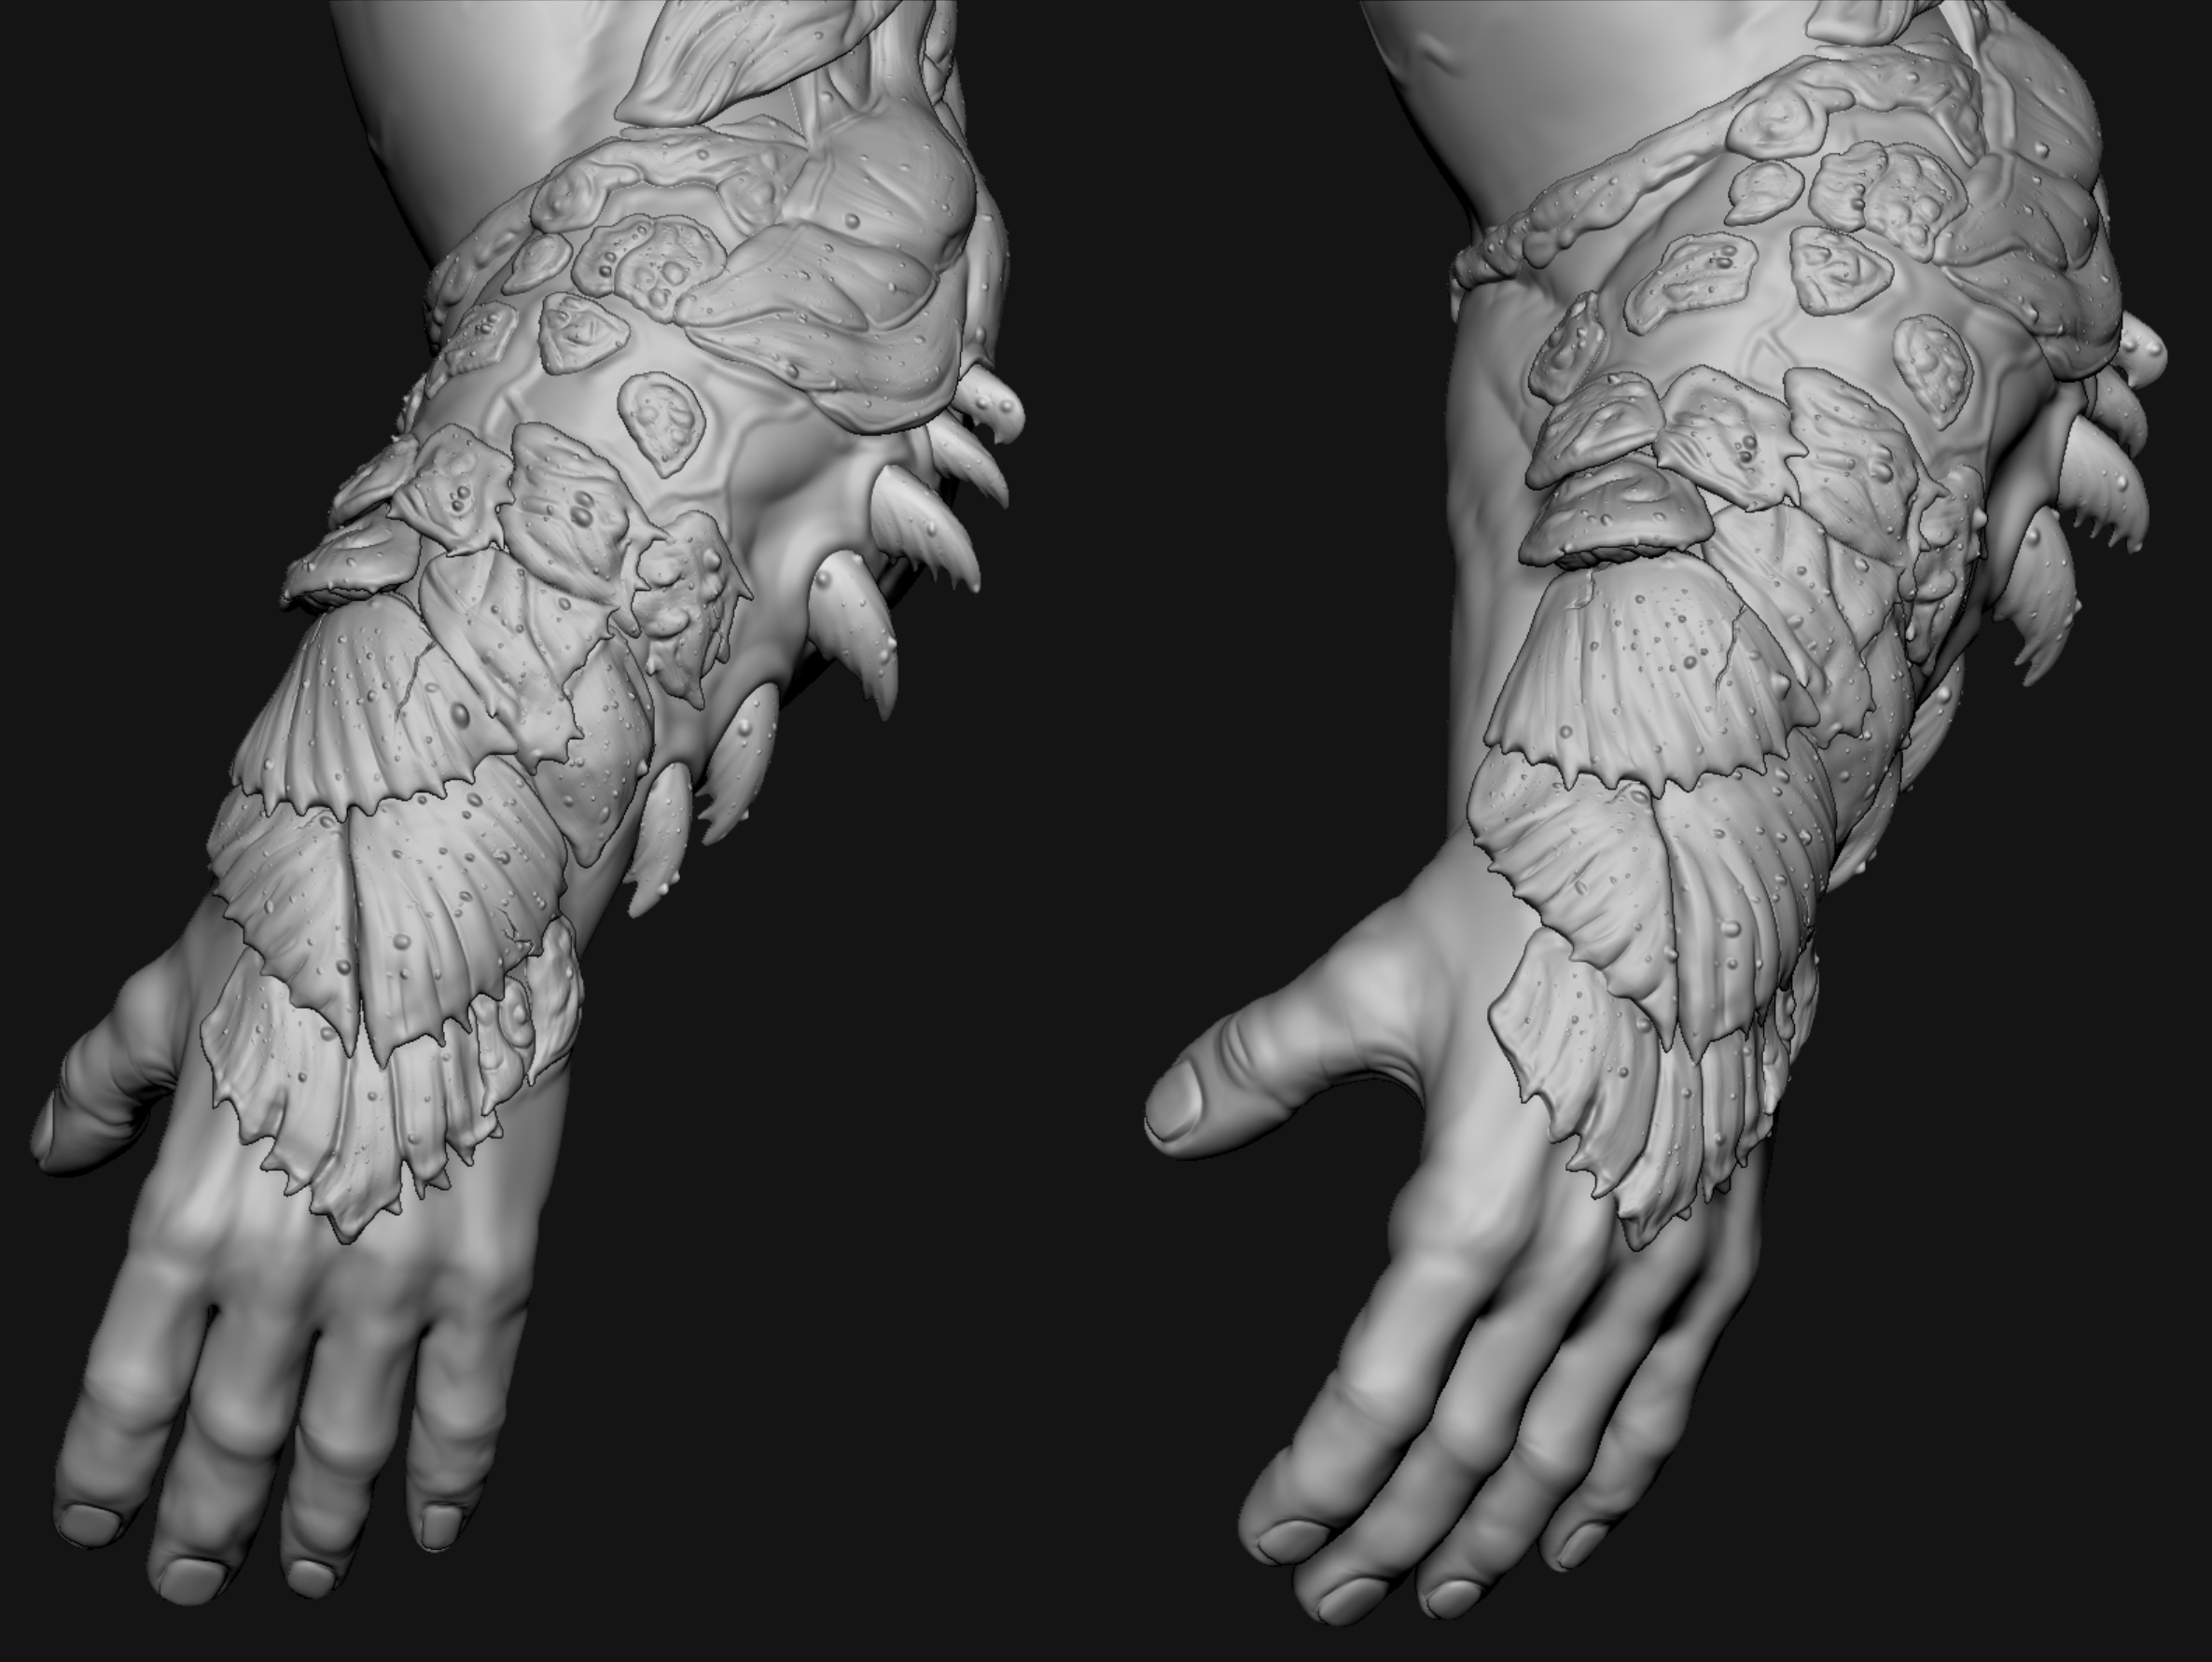
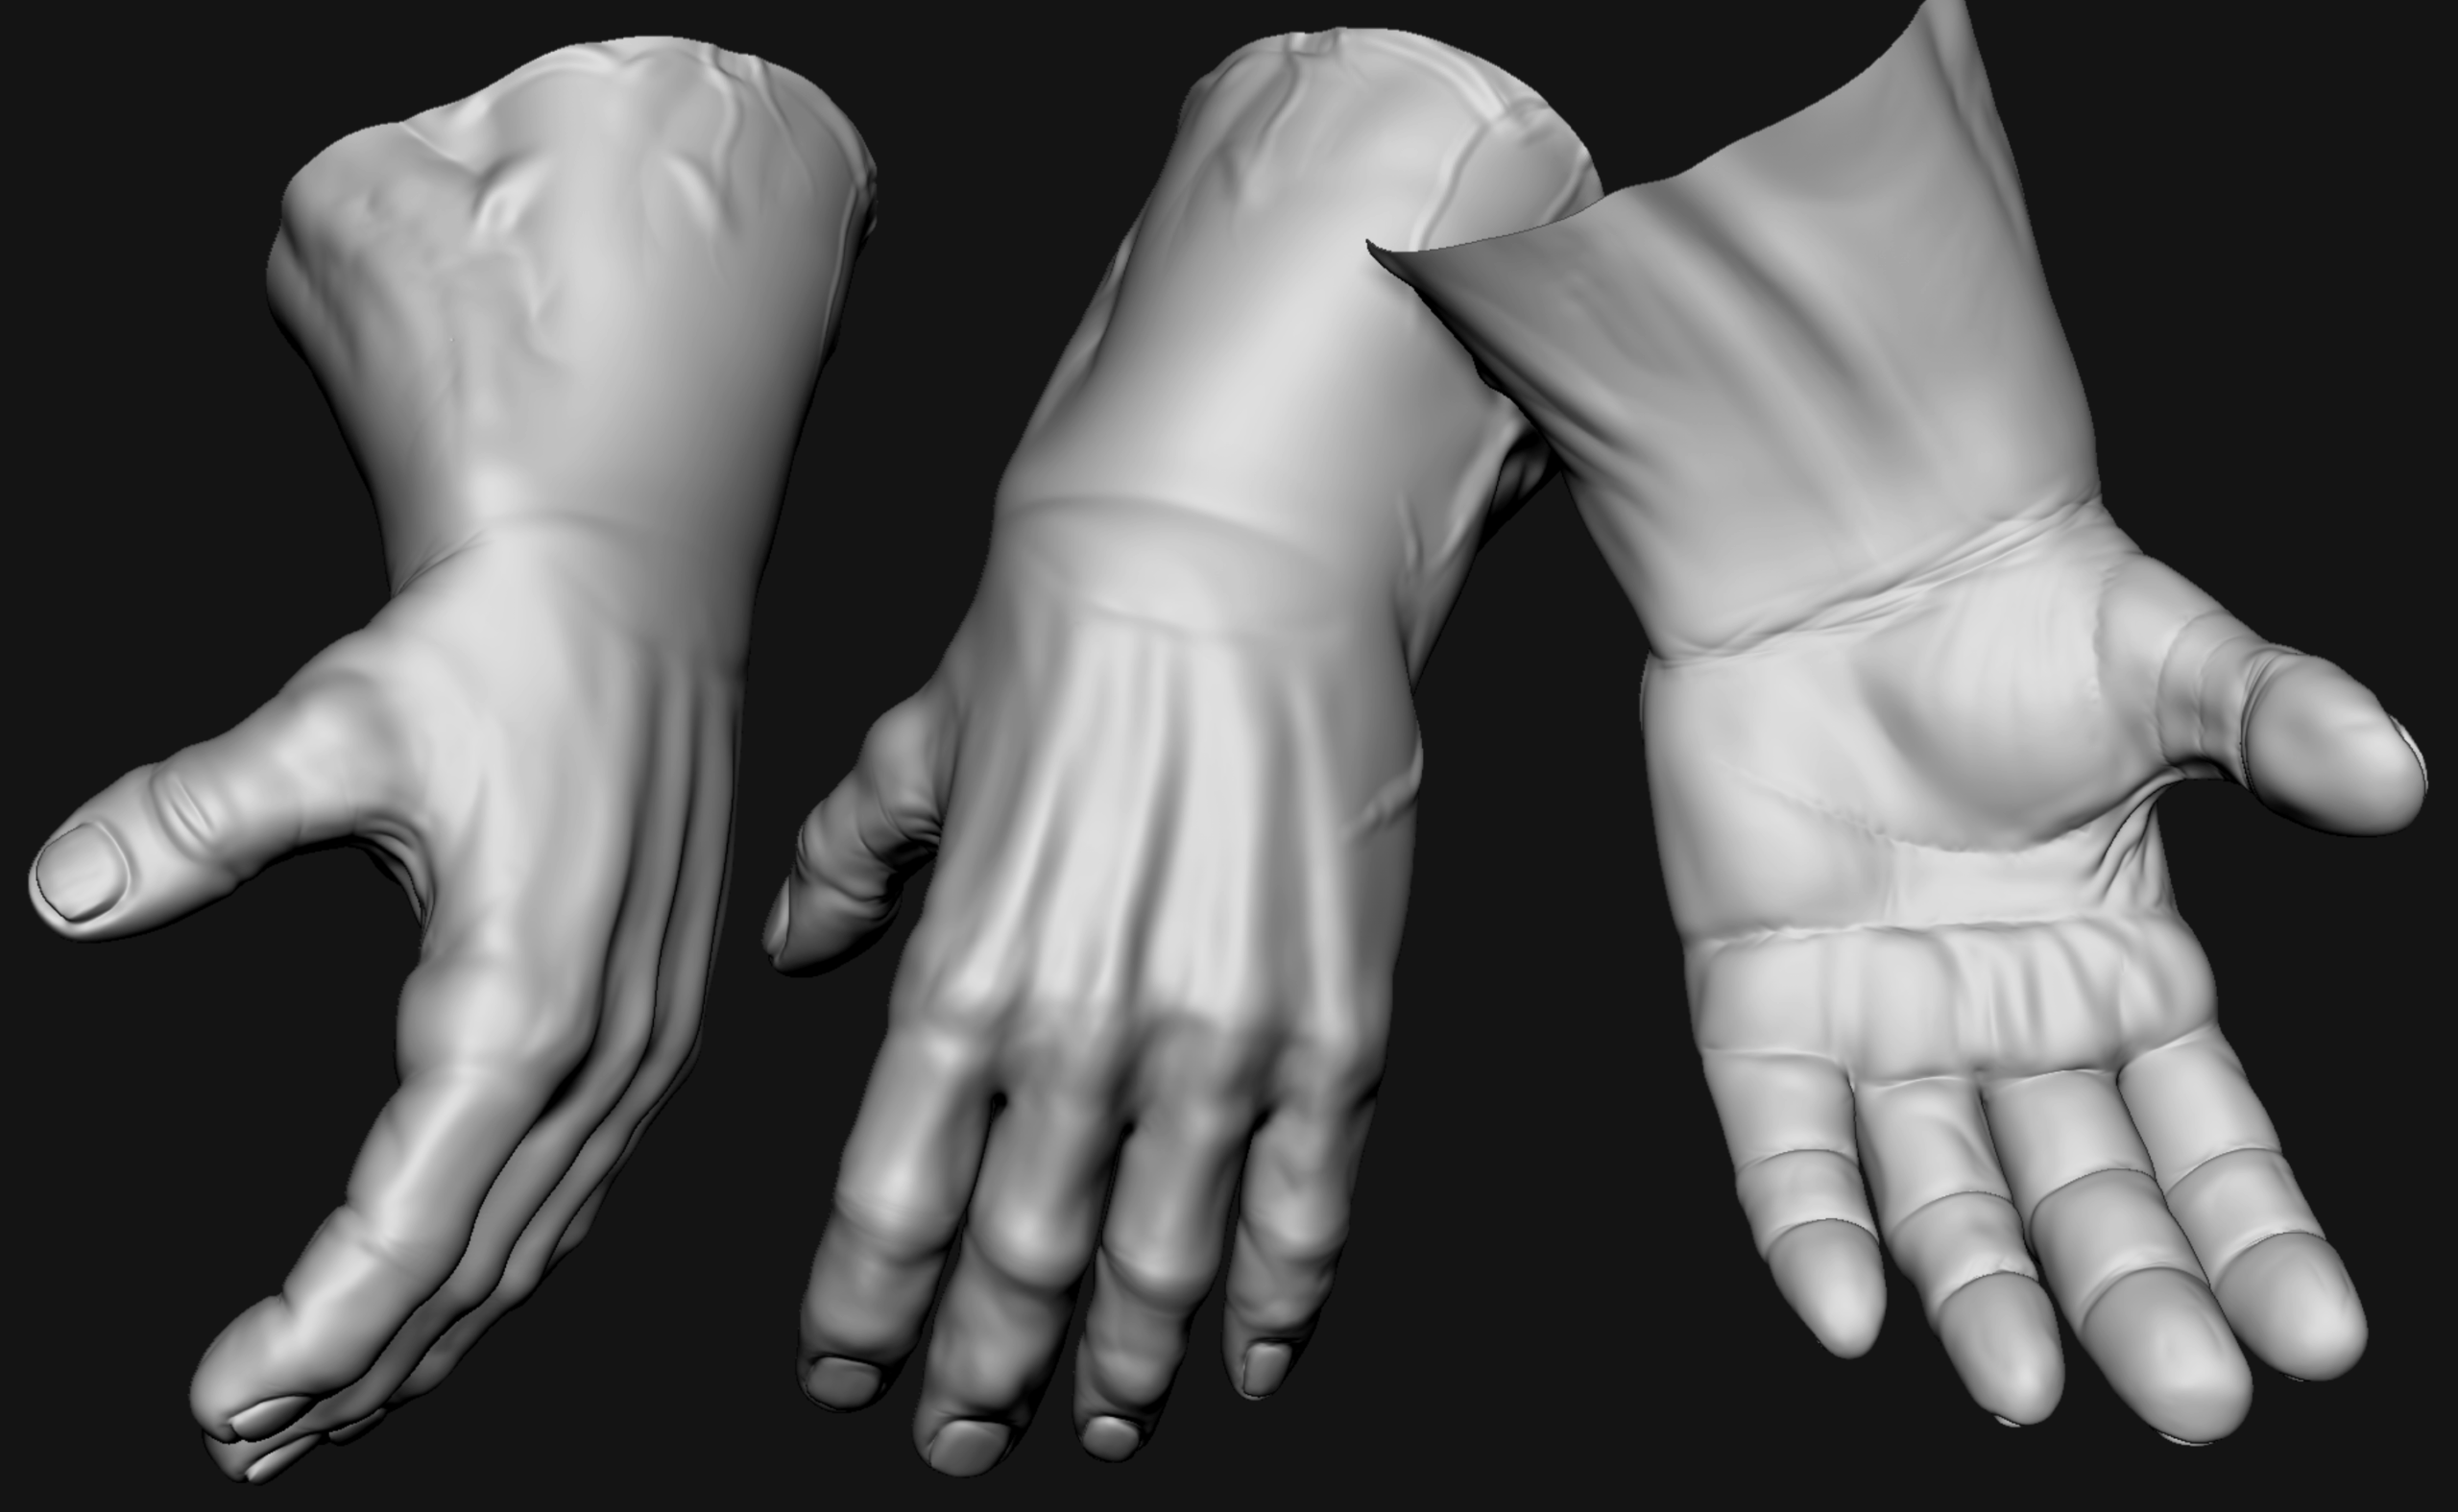

For final retopology I used a fairly standard workflow, laying out quad flows with deformations, unwrapping, and subdivision displacement in mind. On the limbs and face I did choose to let the harsh muscular features influence the topology rather than relying fully on displacement to capture those large details, but still kept clean, complete loops around key areas like joints and transitions.
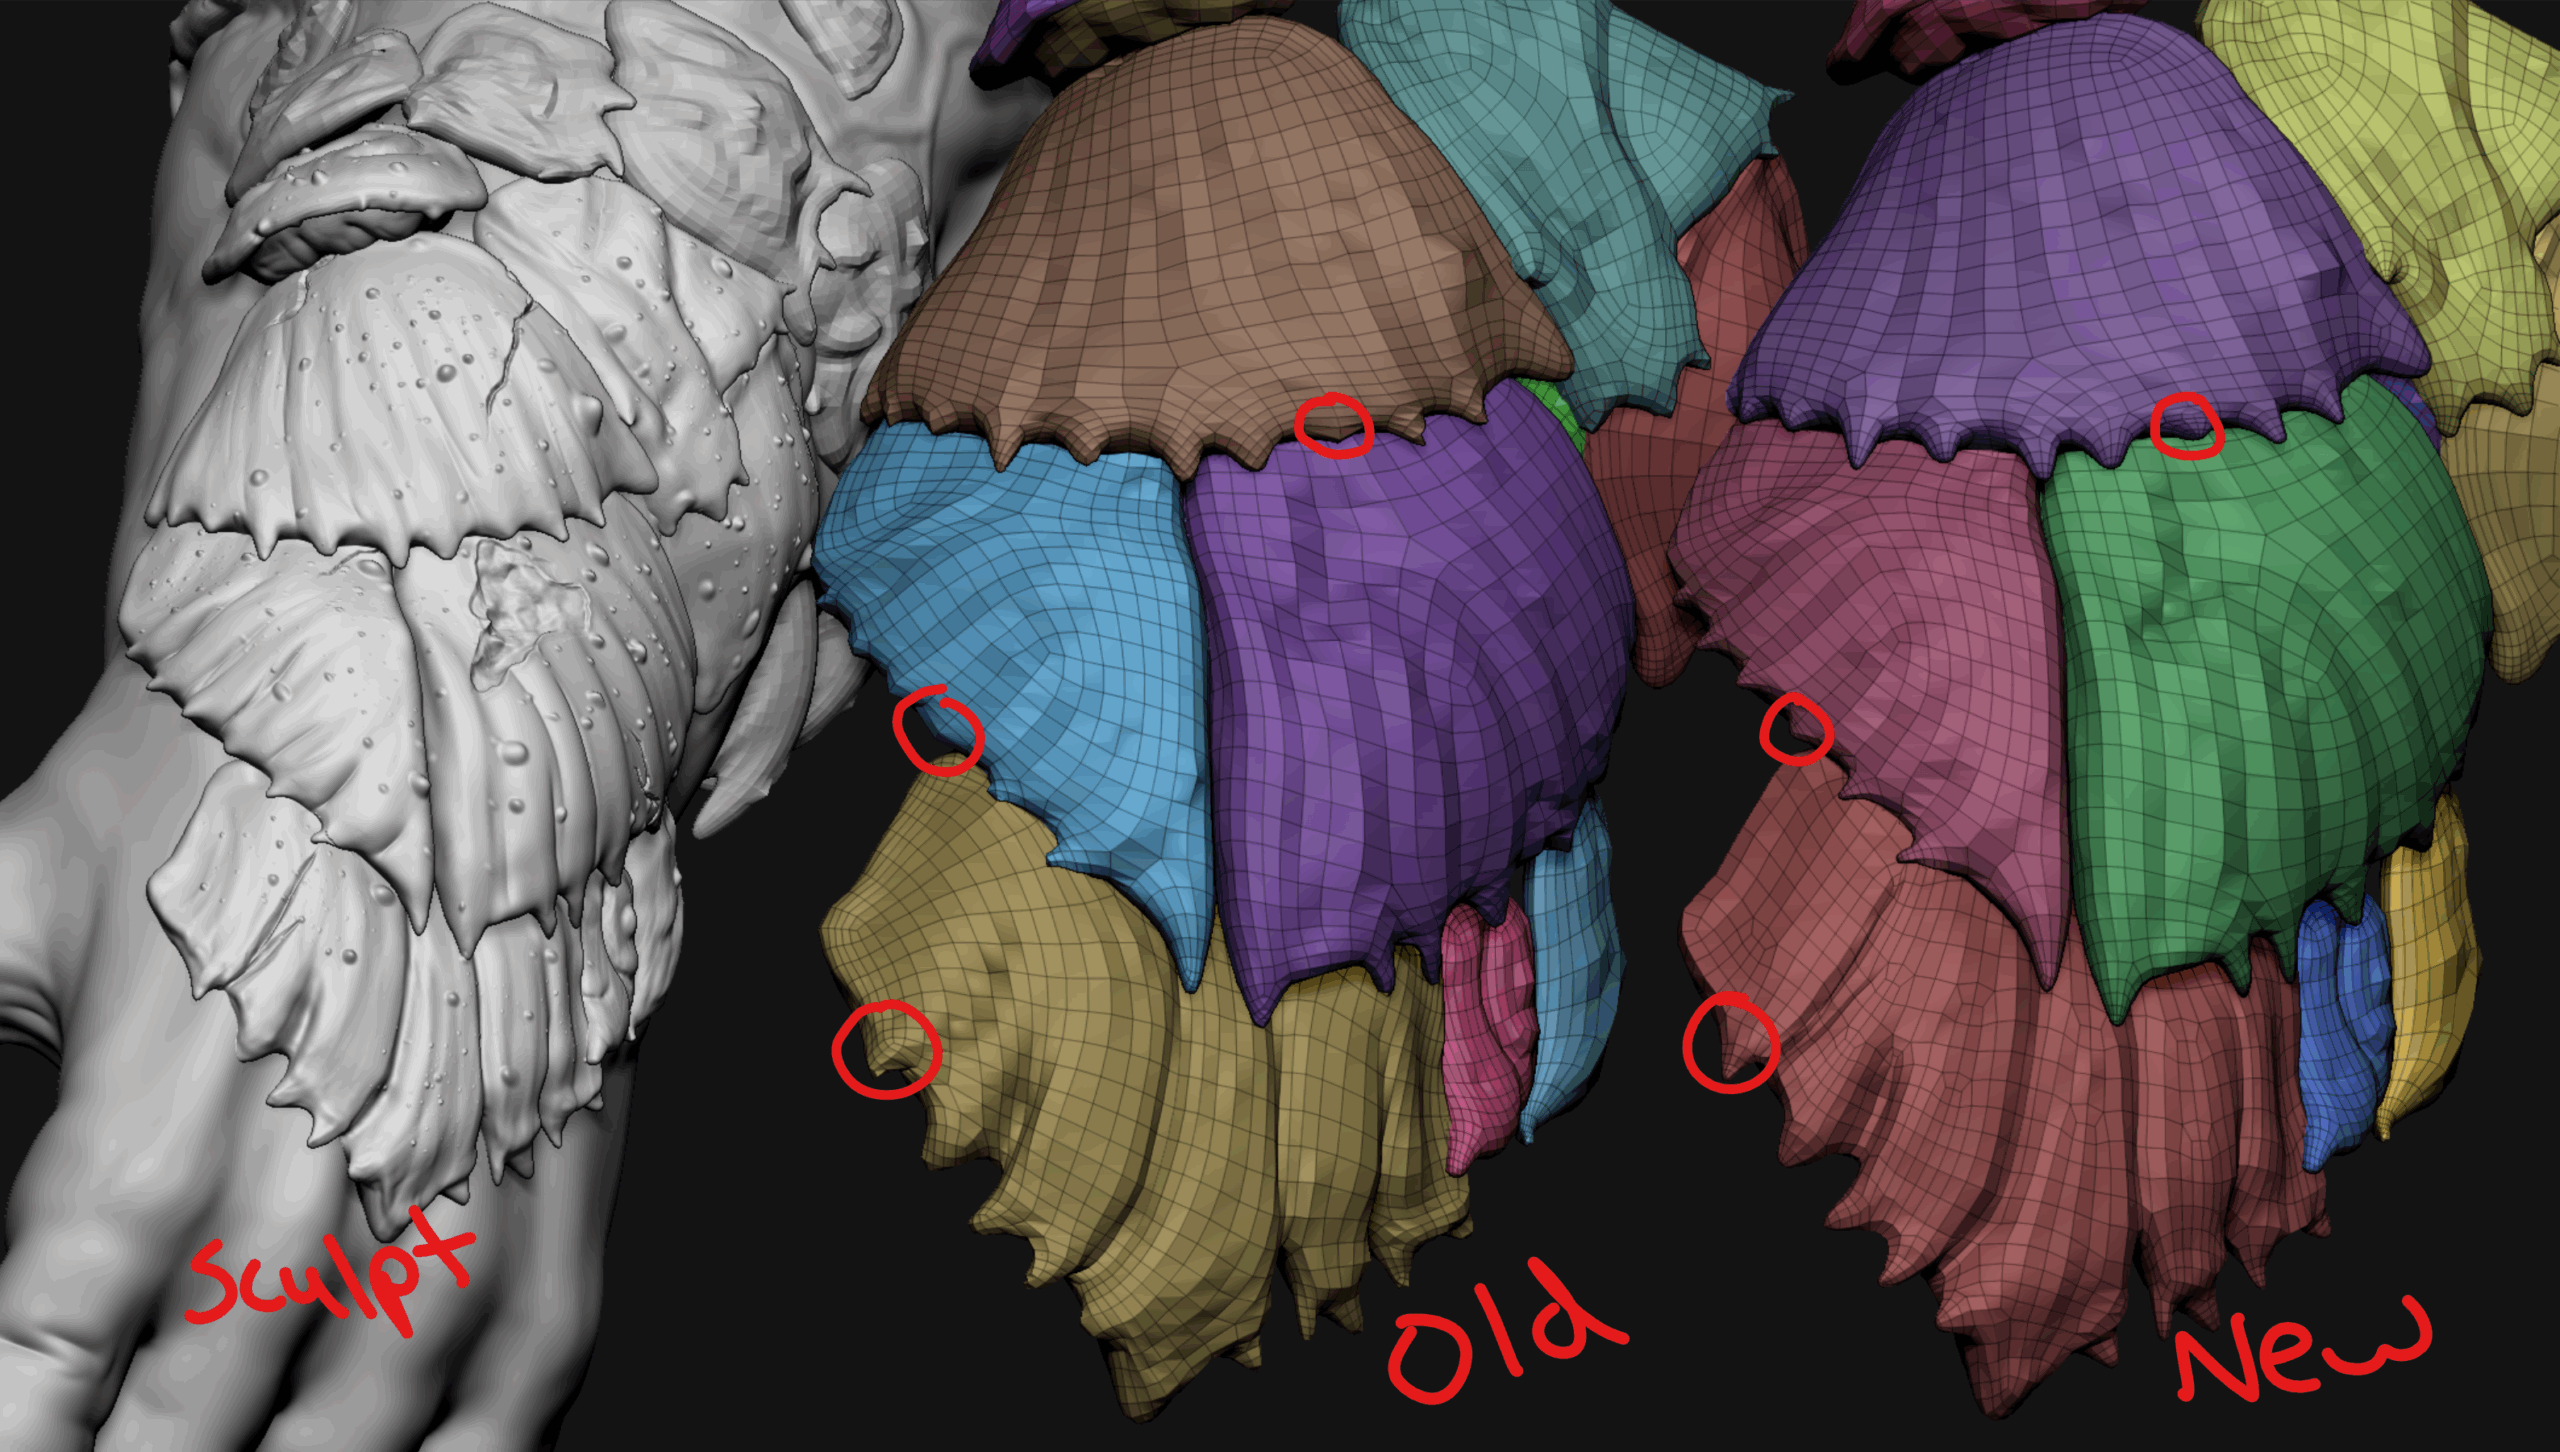
The density of the initial retopology was quite low for ease of unwrapping and skinning, but I ended up using a version with one subdivision for the final deformations and to match the density of the crab shell pieces.
With the number of unique crabshell pieces and not having another artist to assign retopology, I decided not to go the route of full manual retopology on them, but did return to them later to improve silhouette and deformation on some key features.
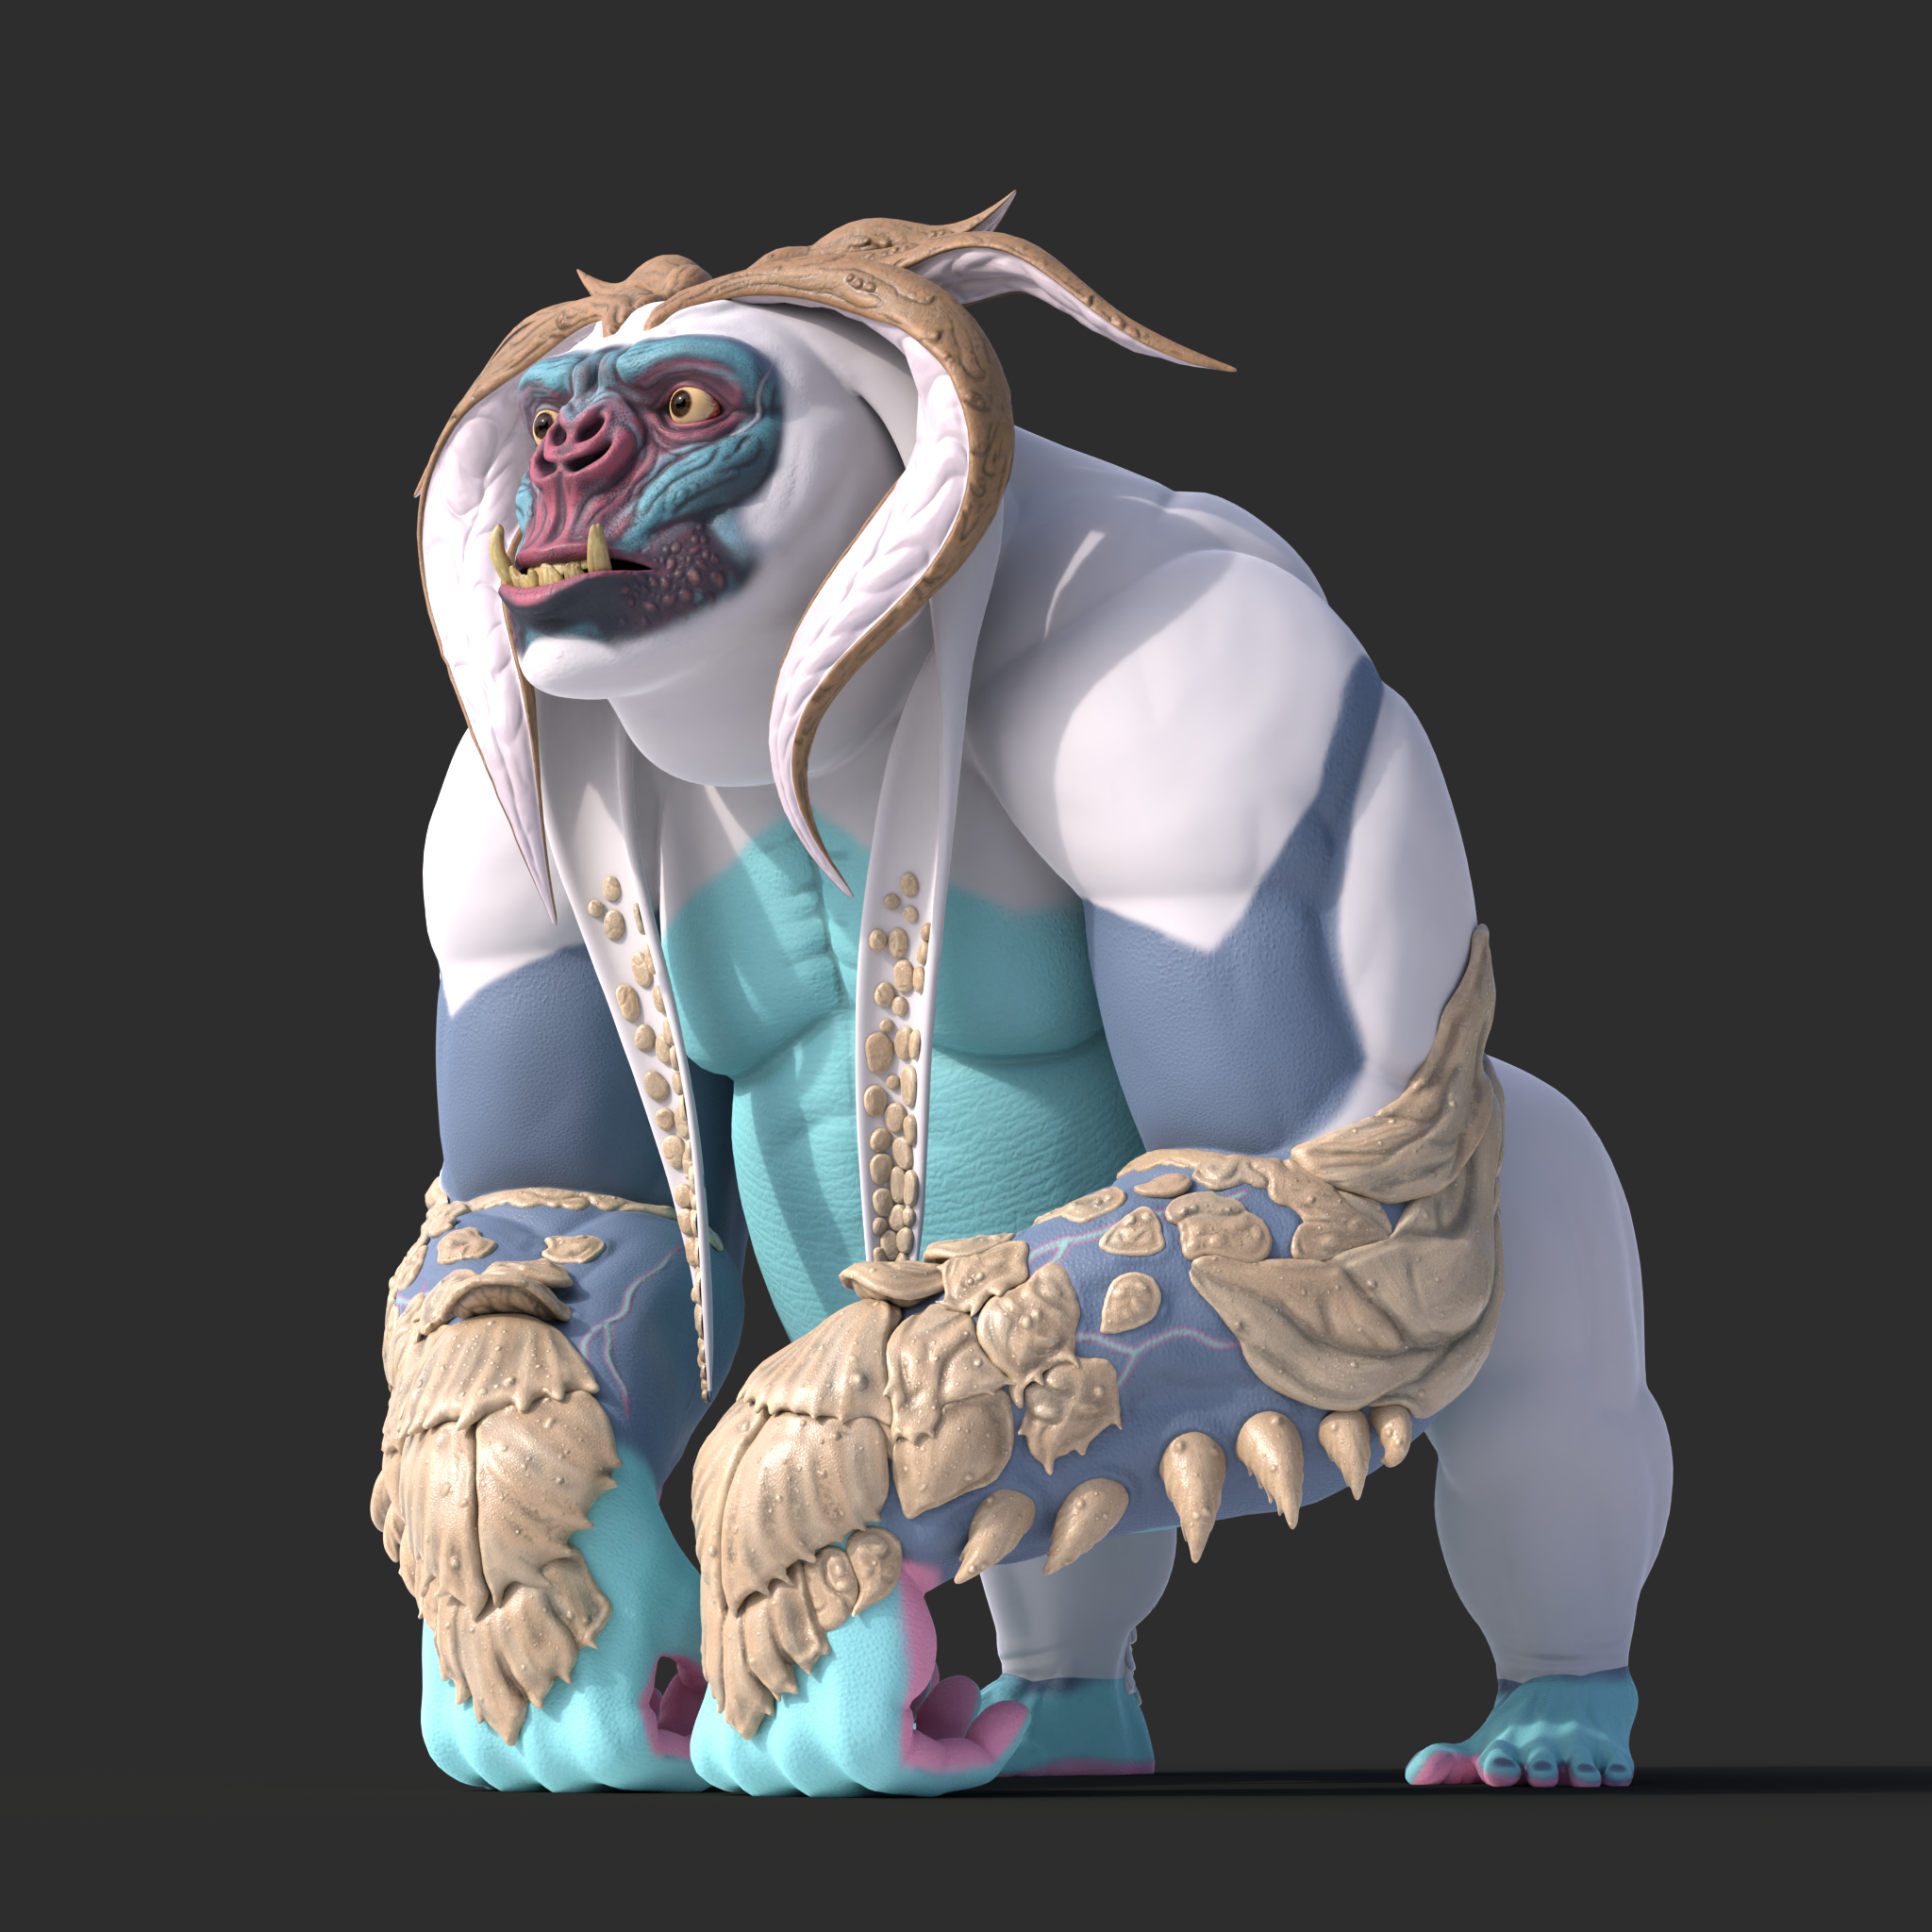
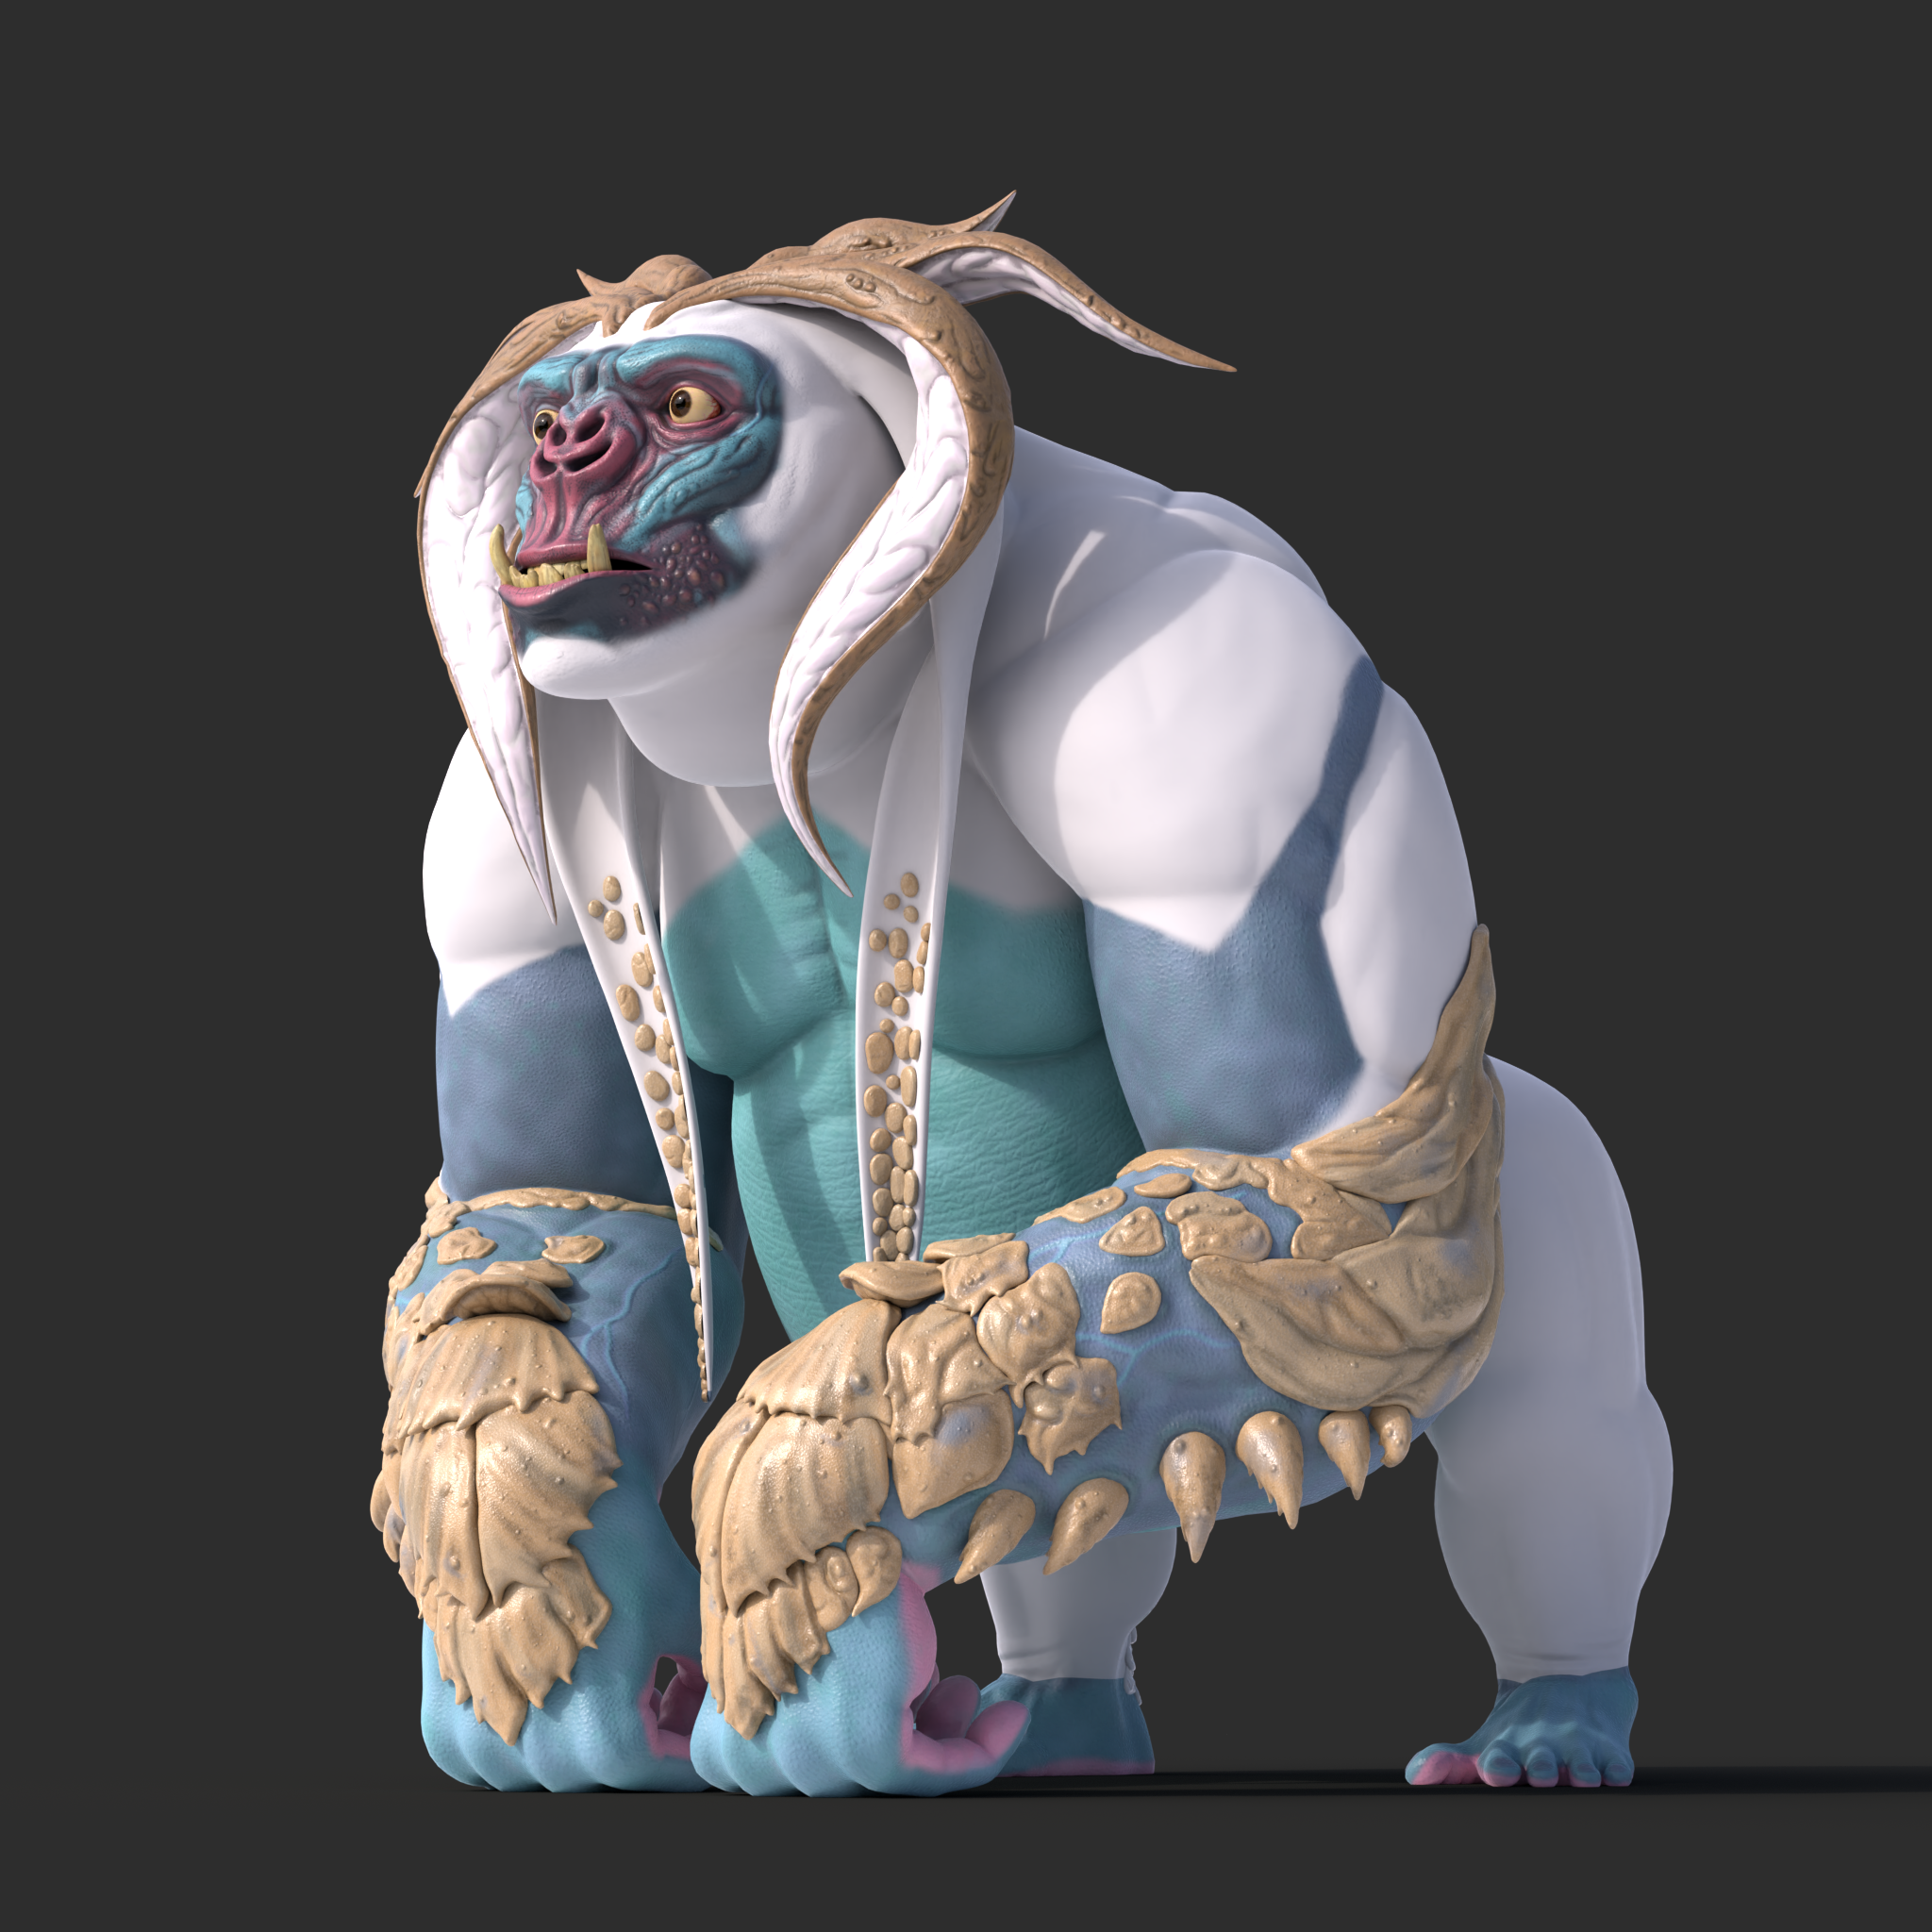
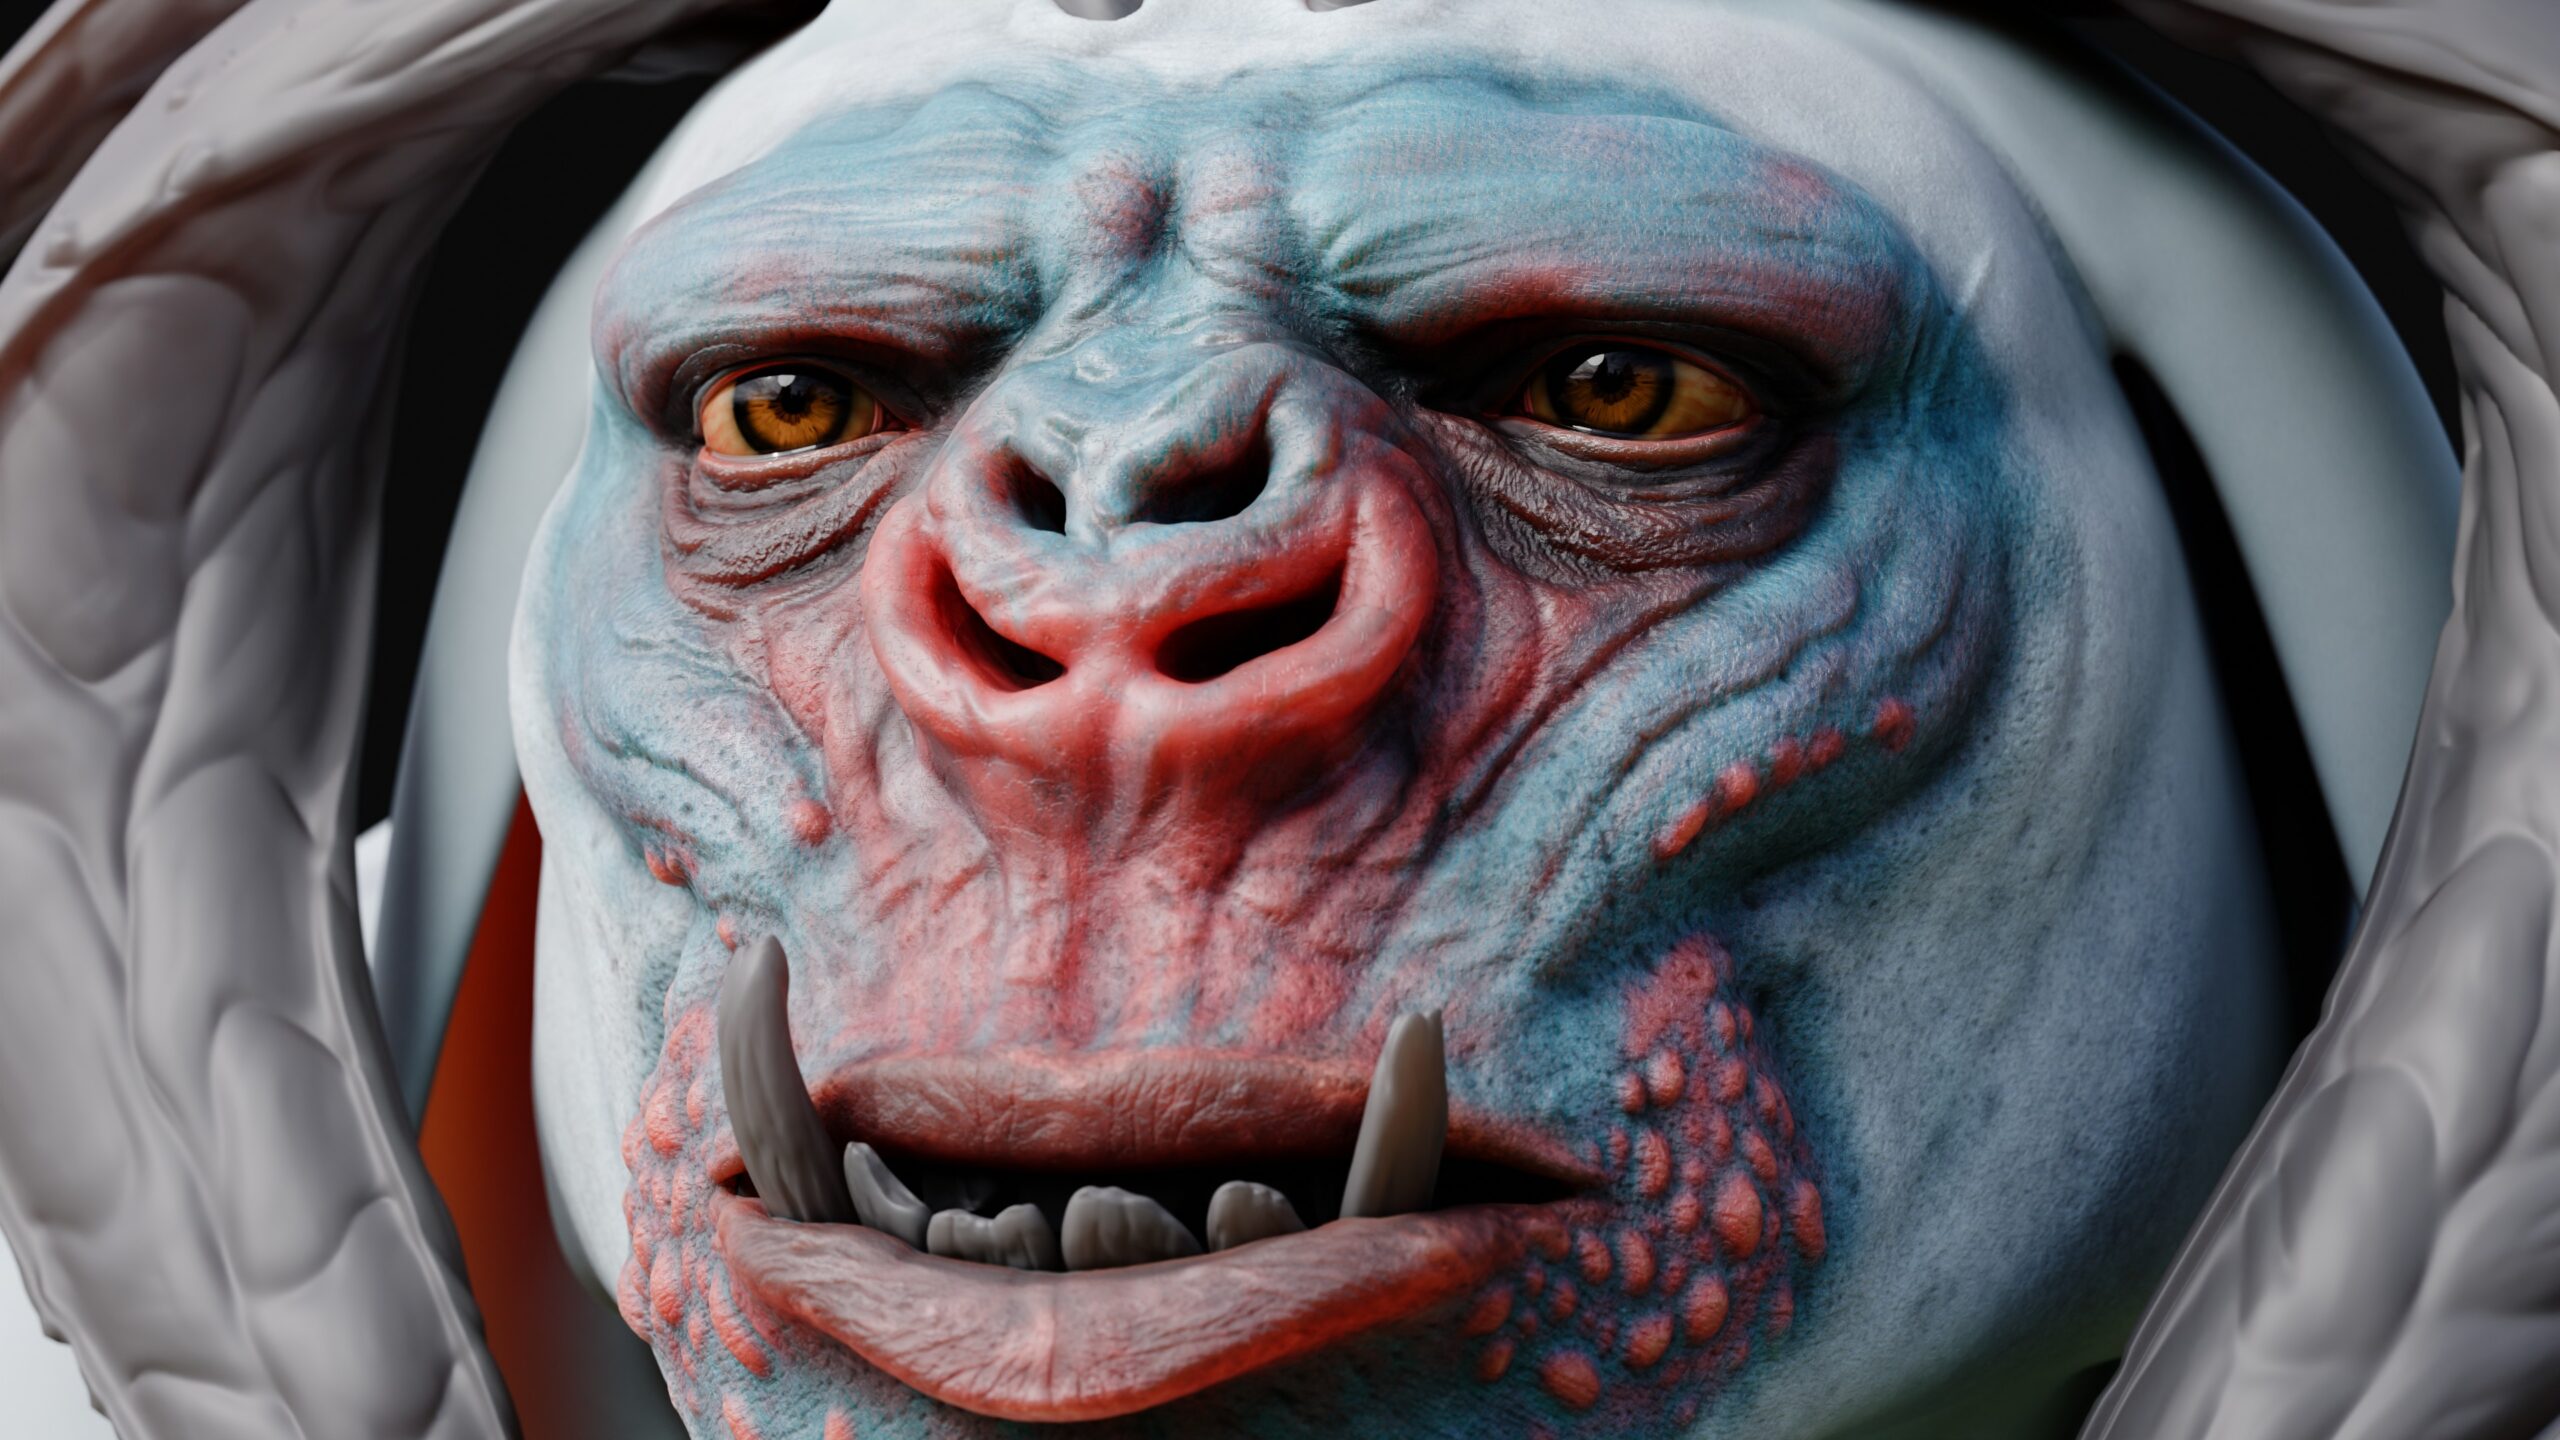
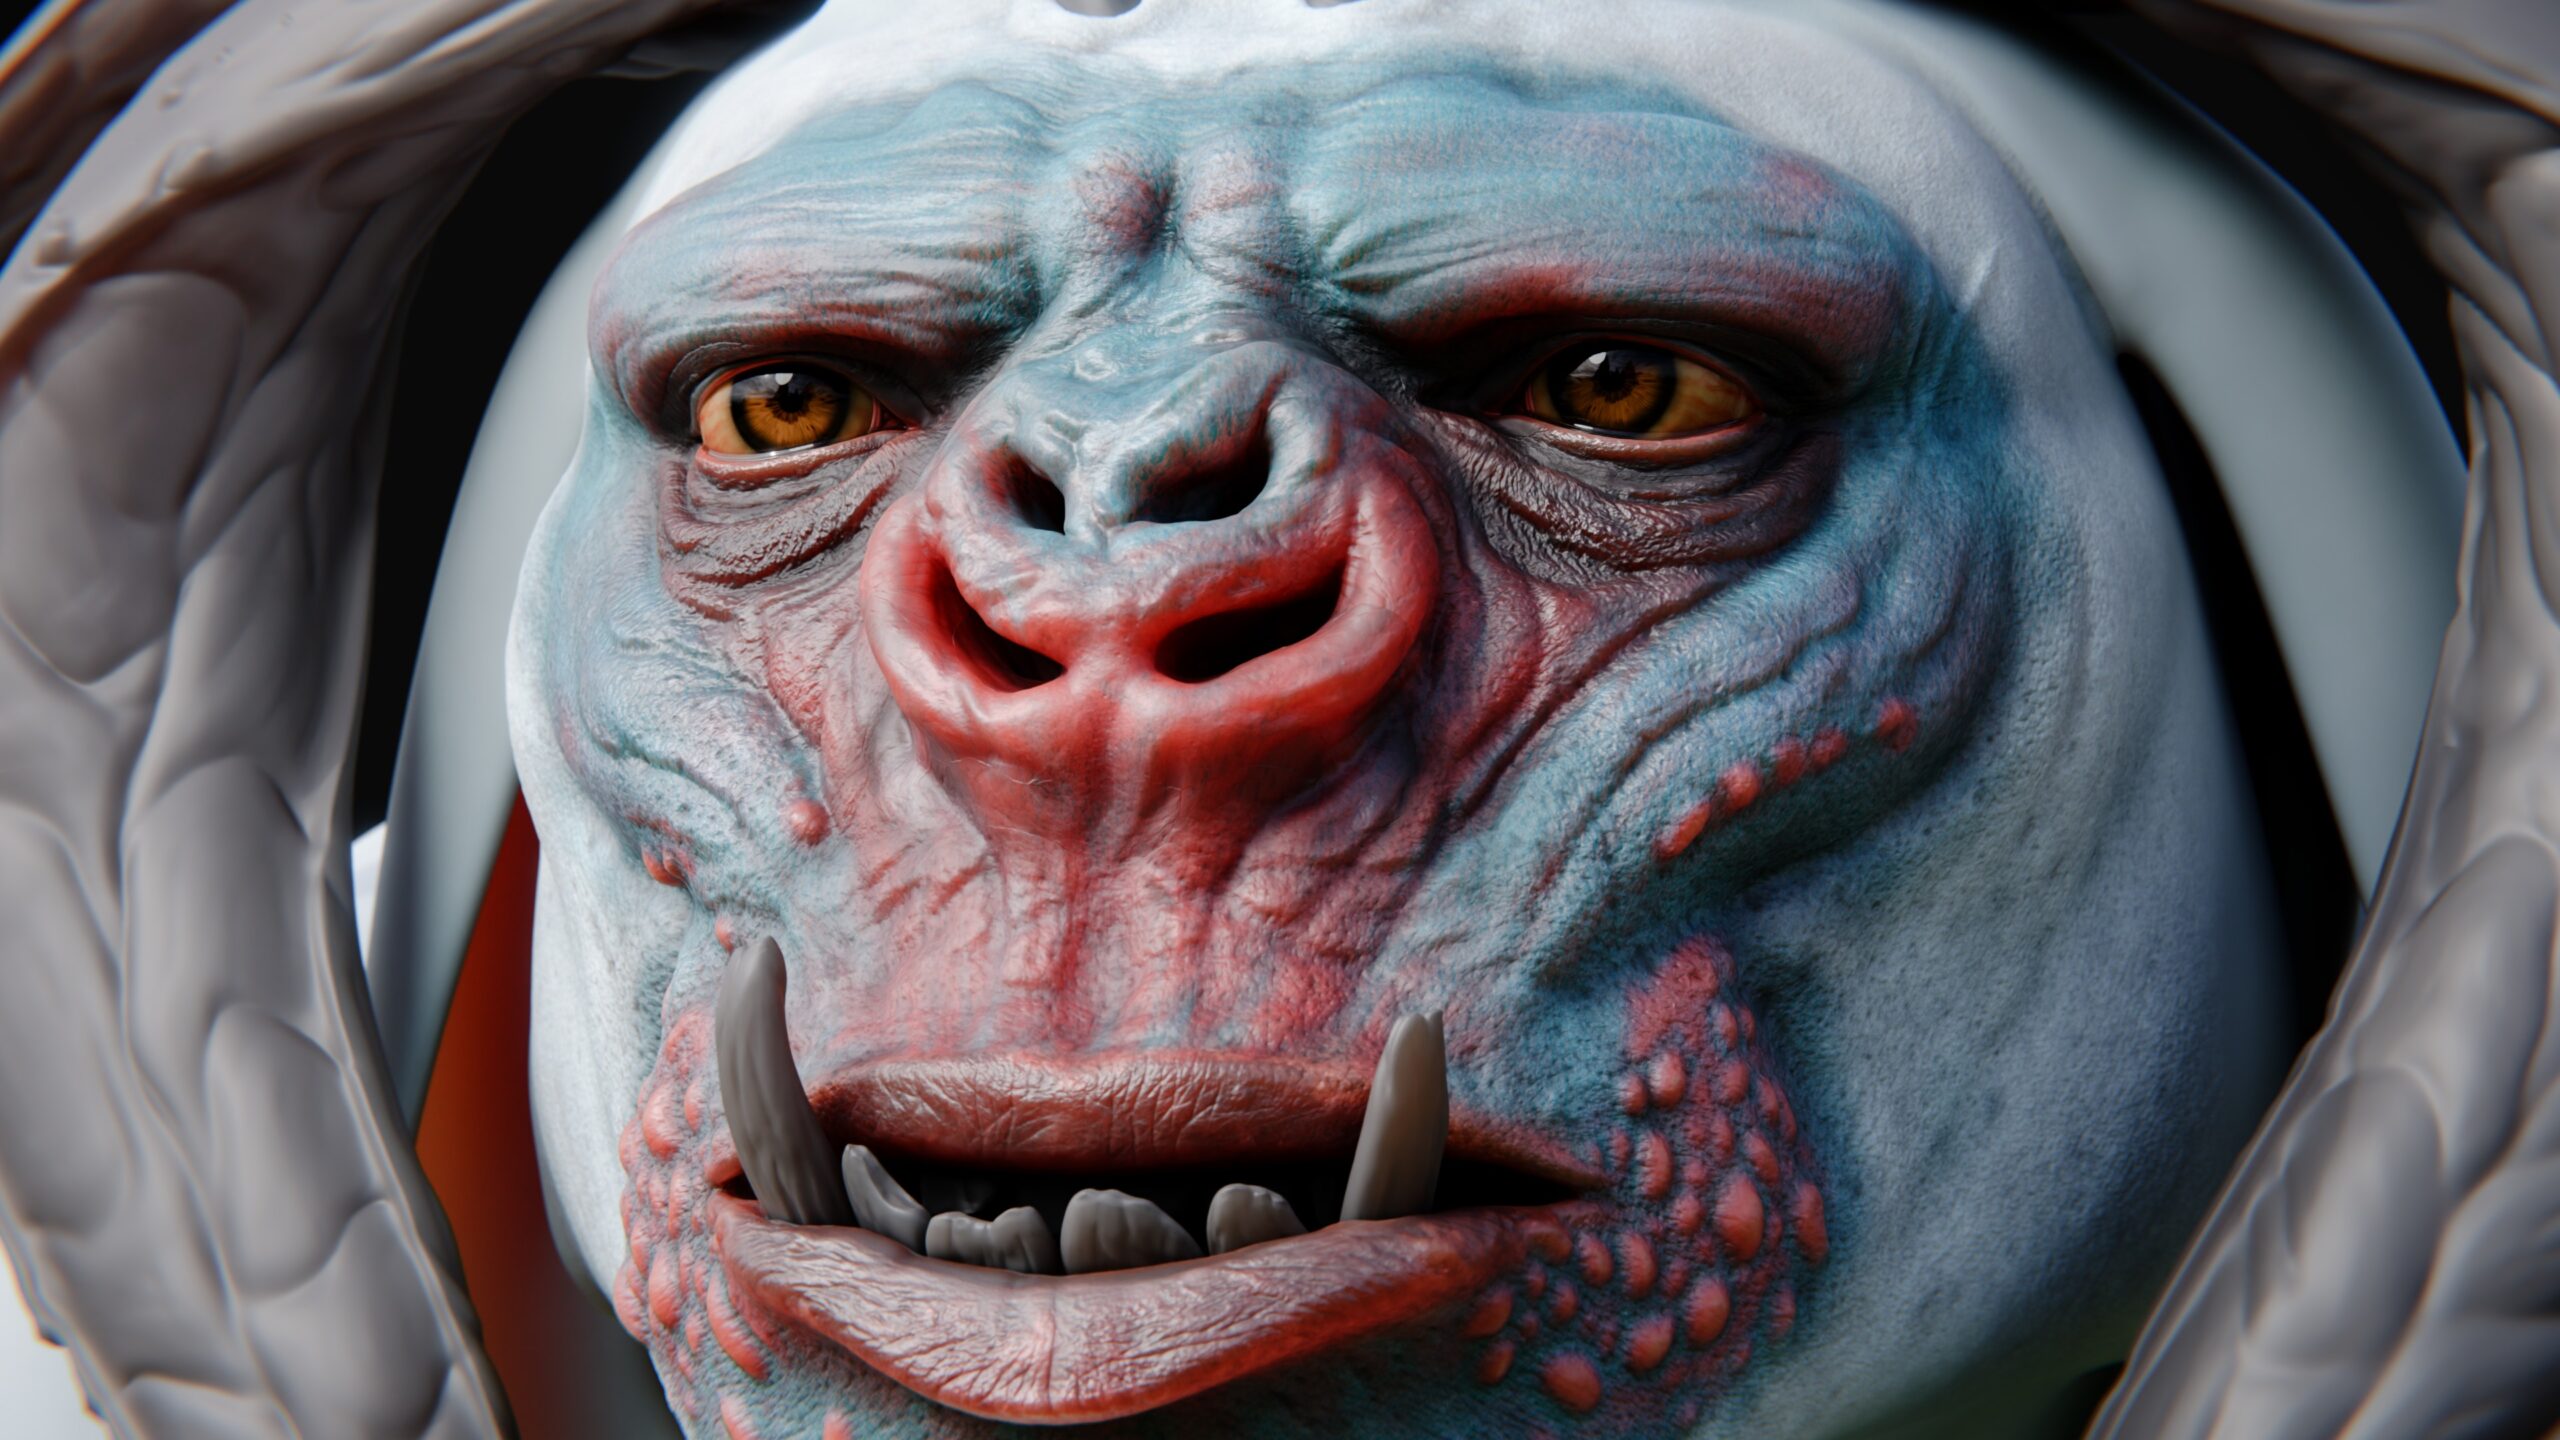
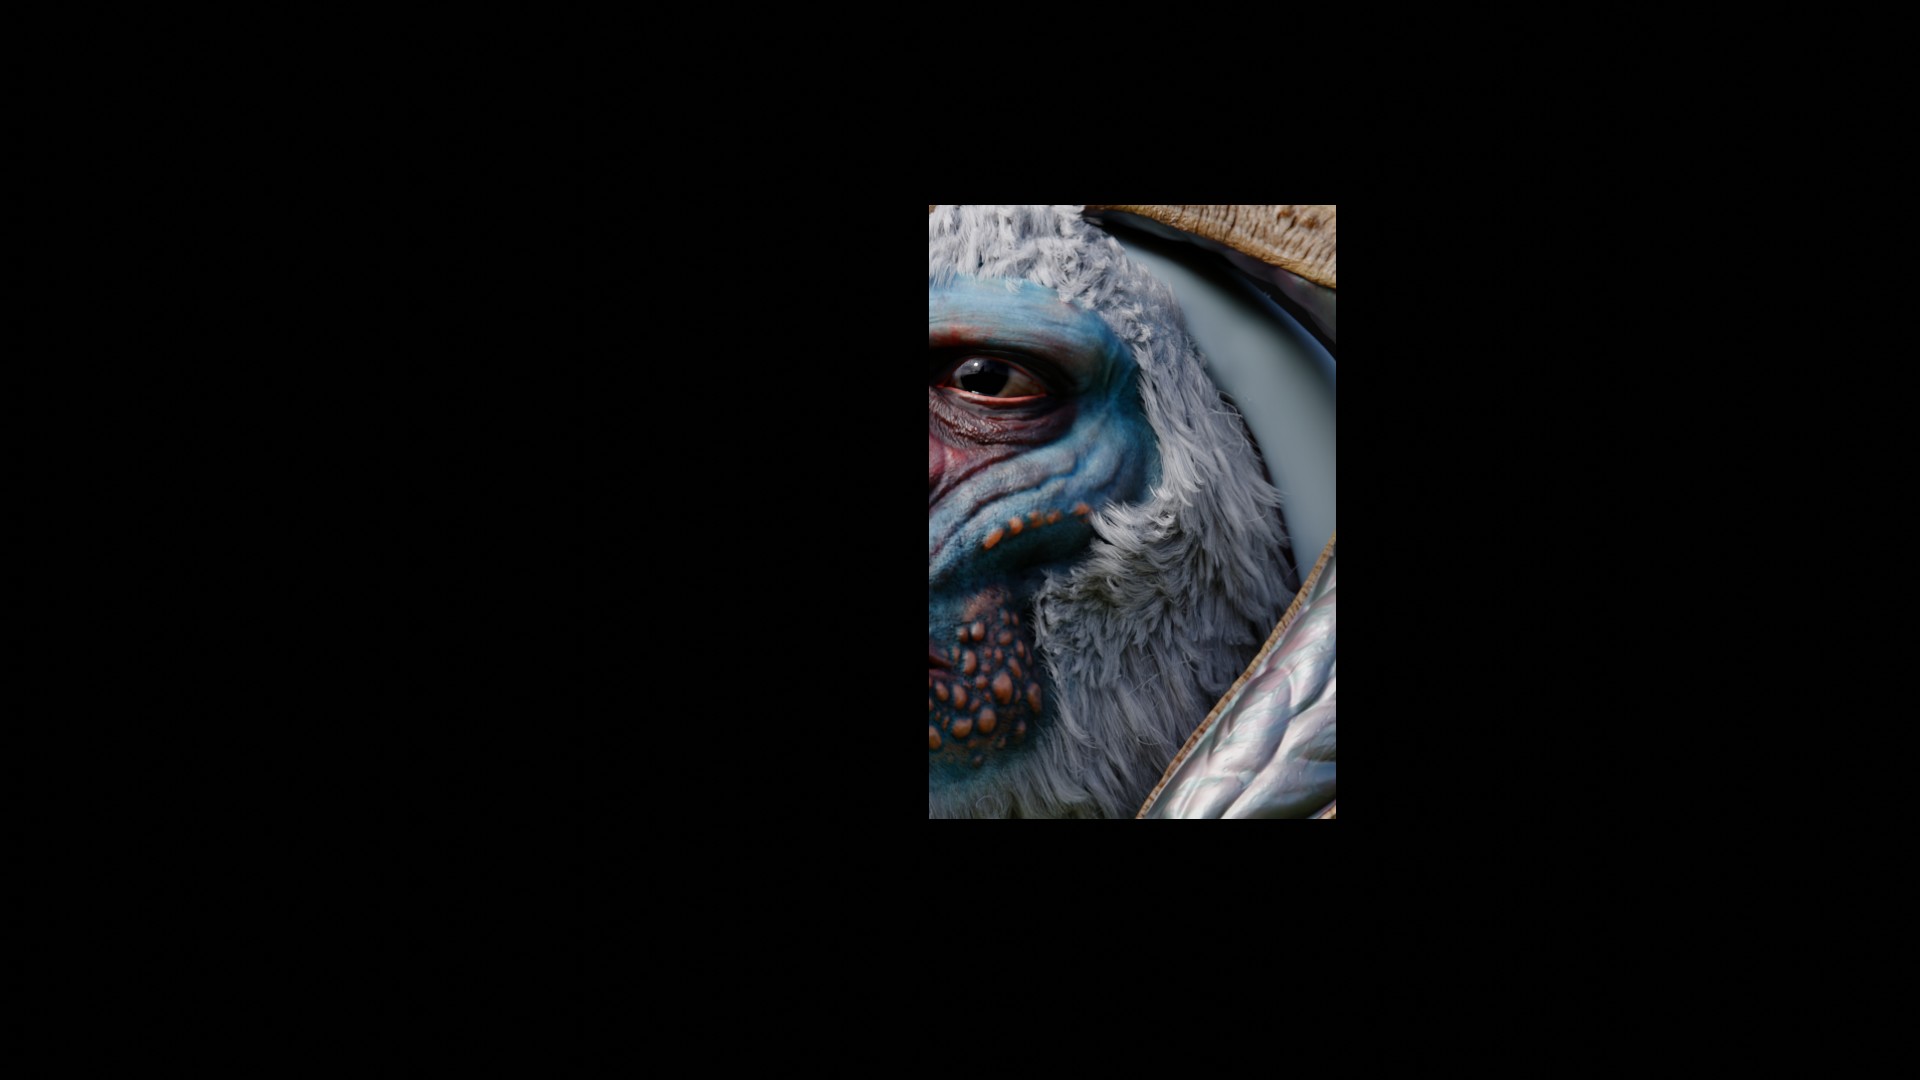
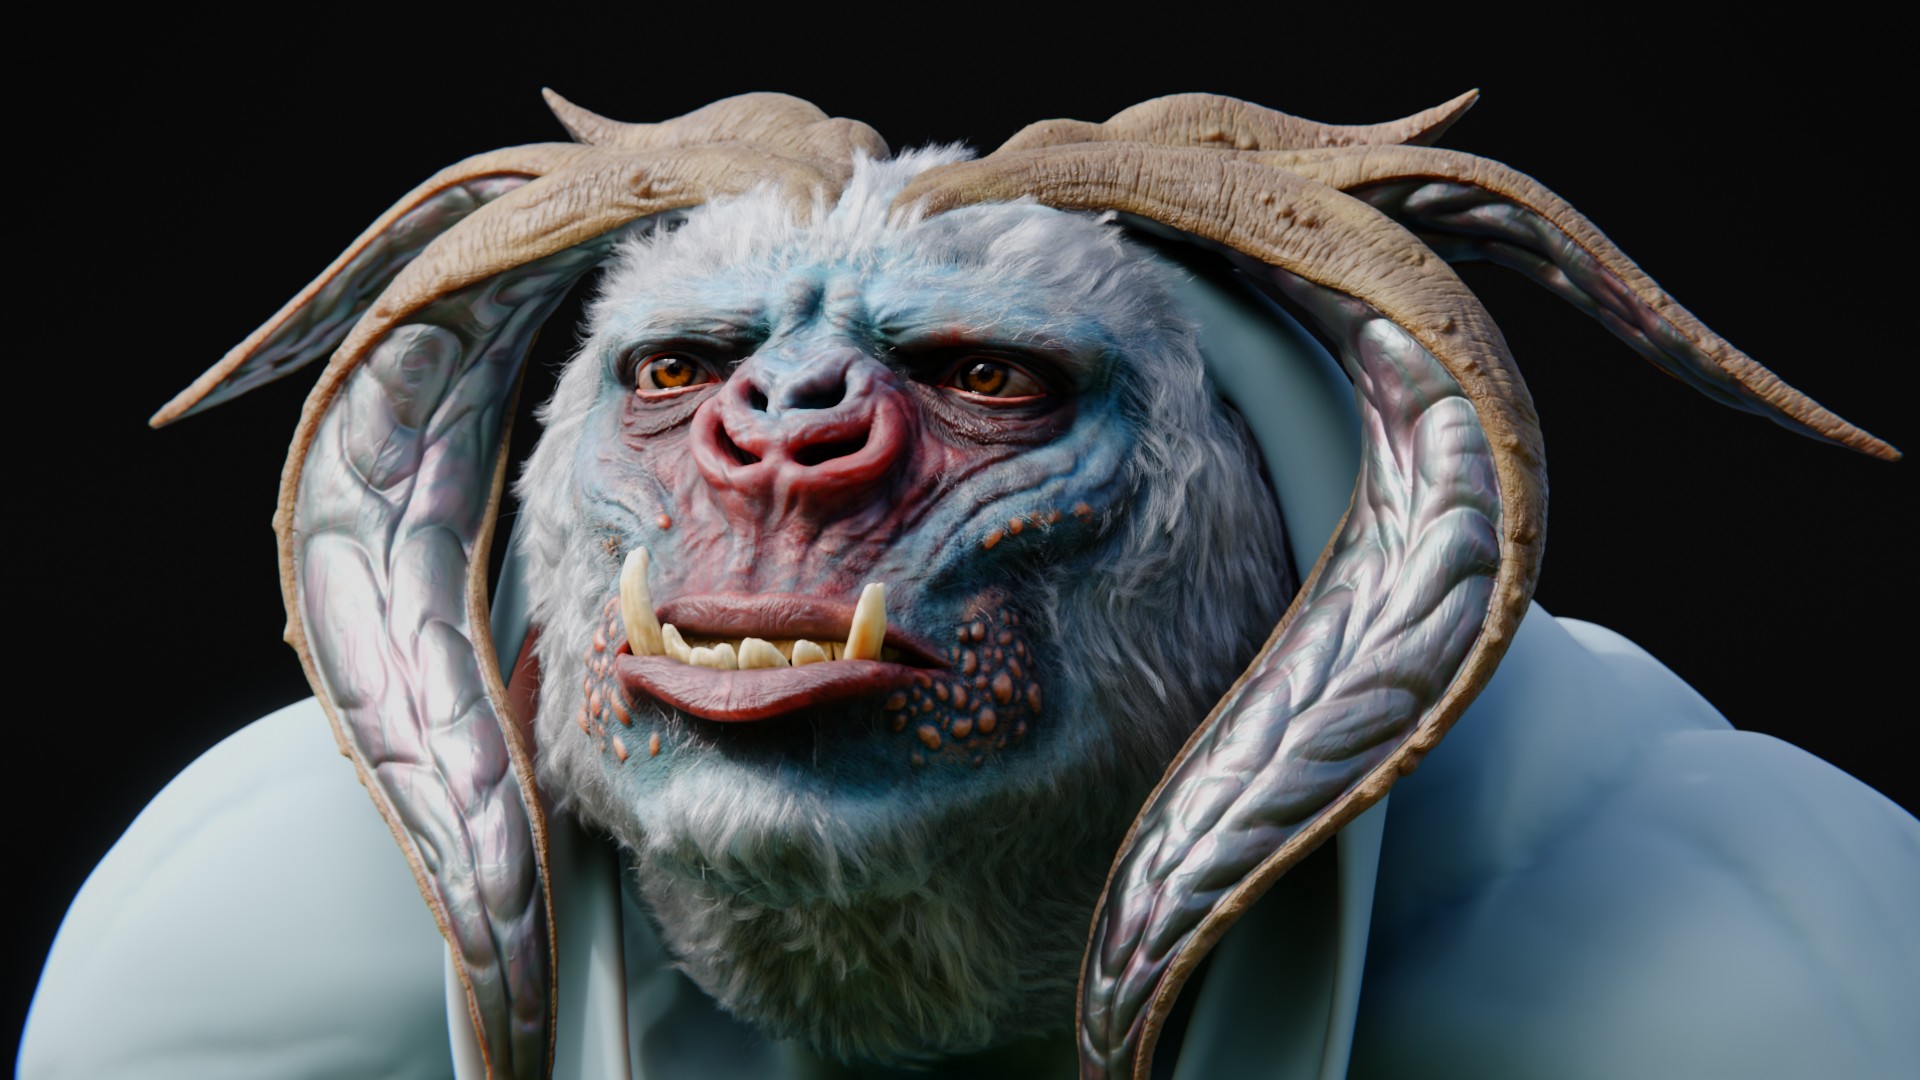
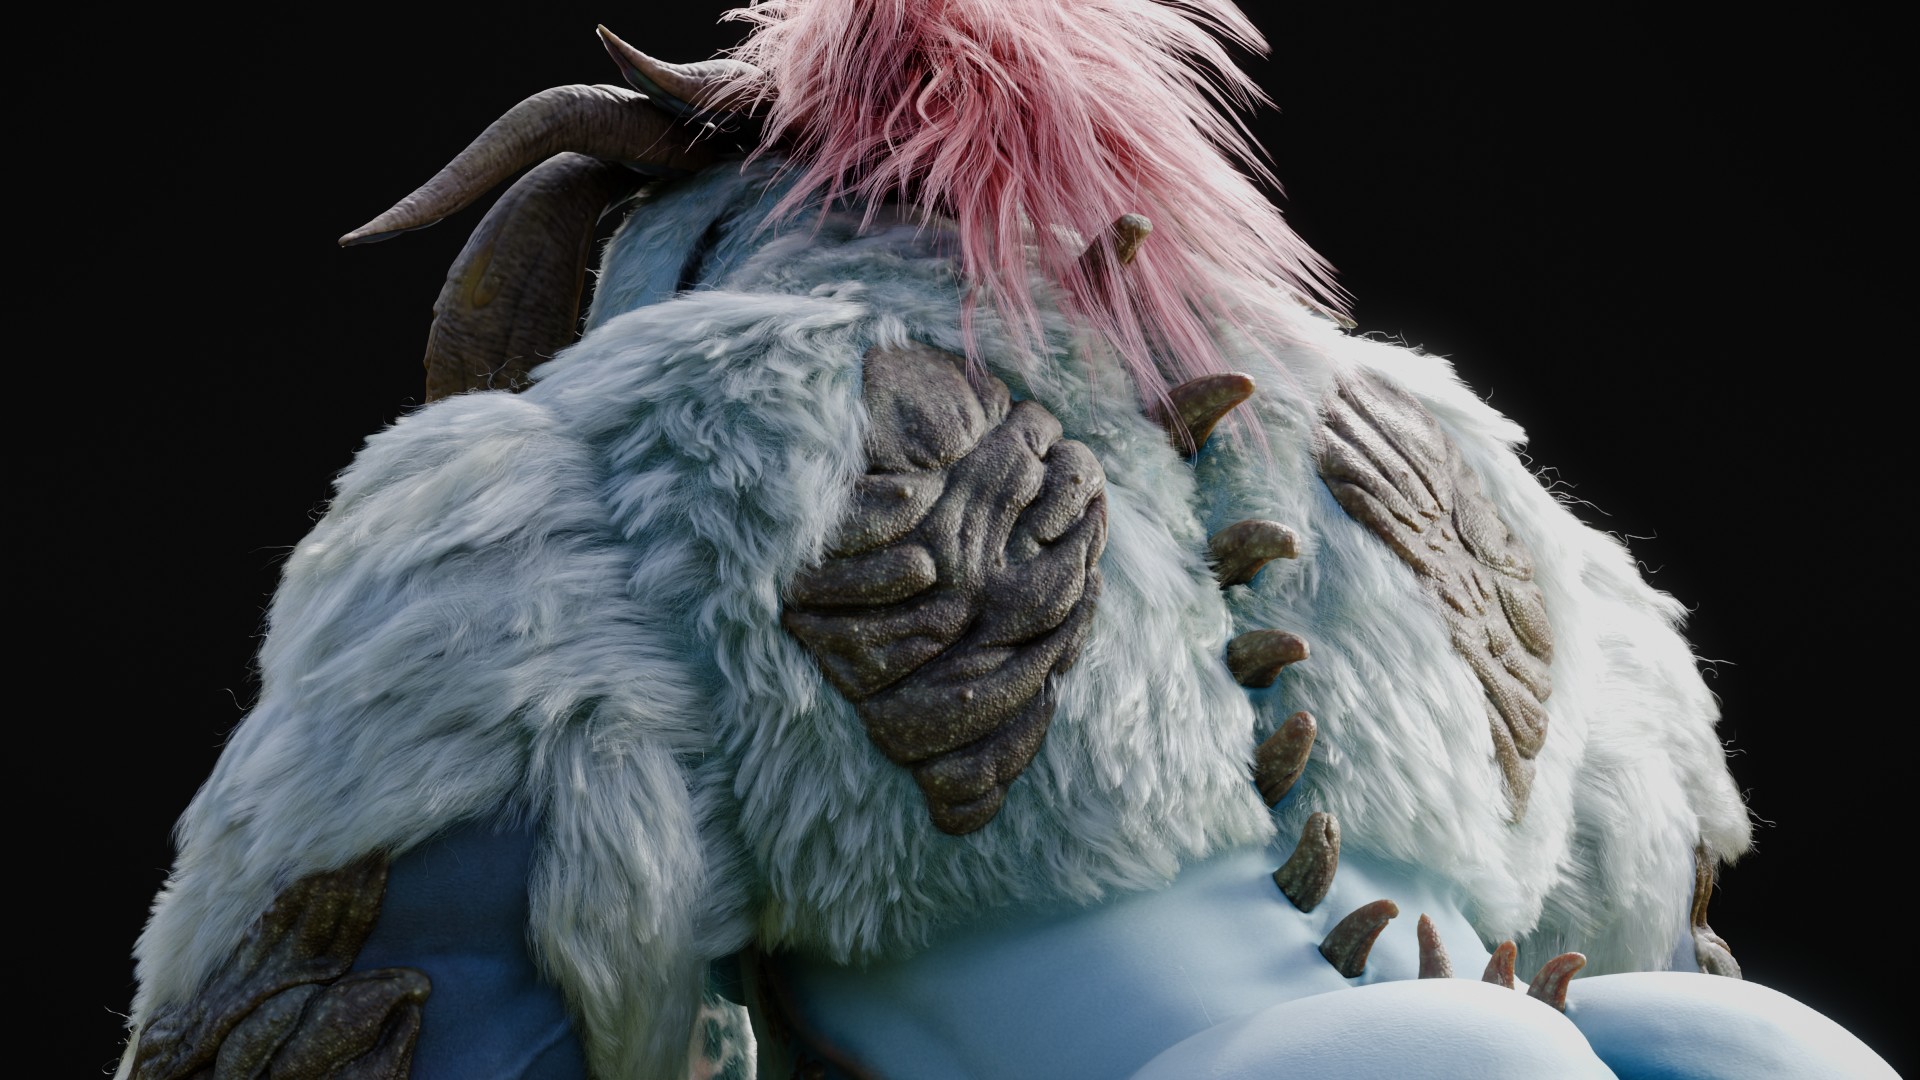
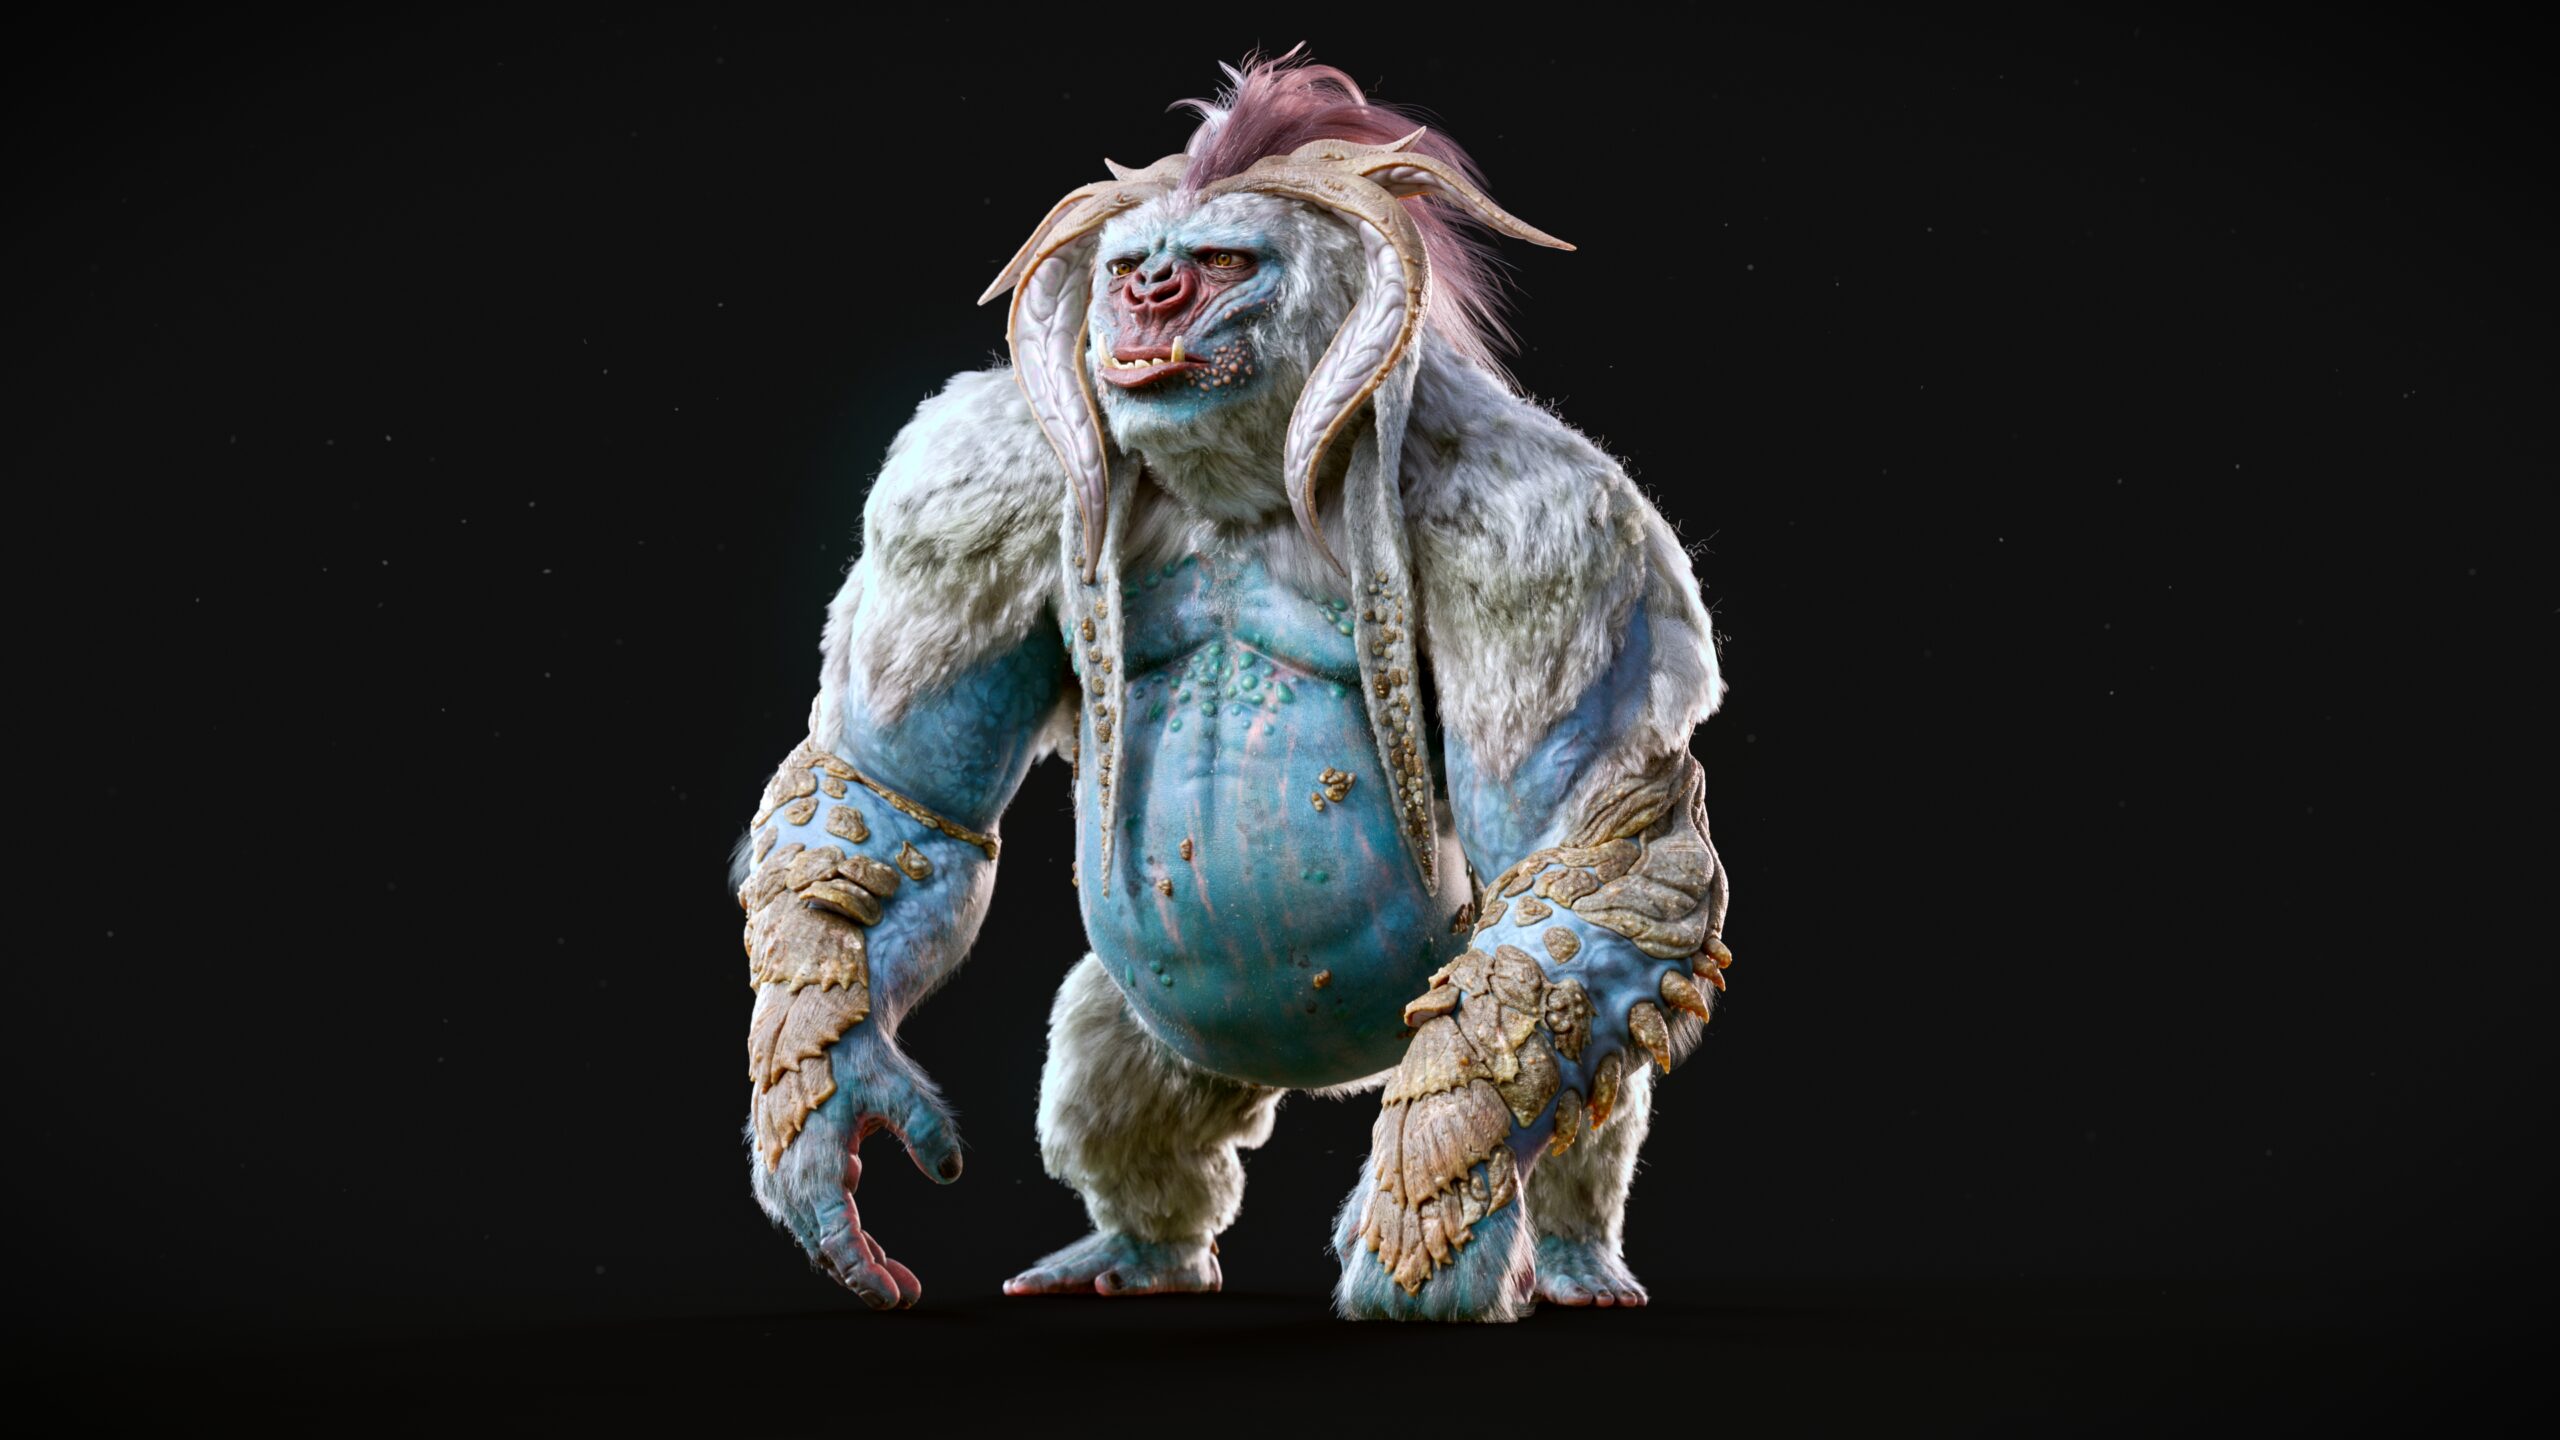
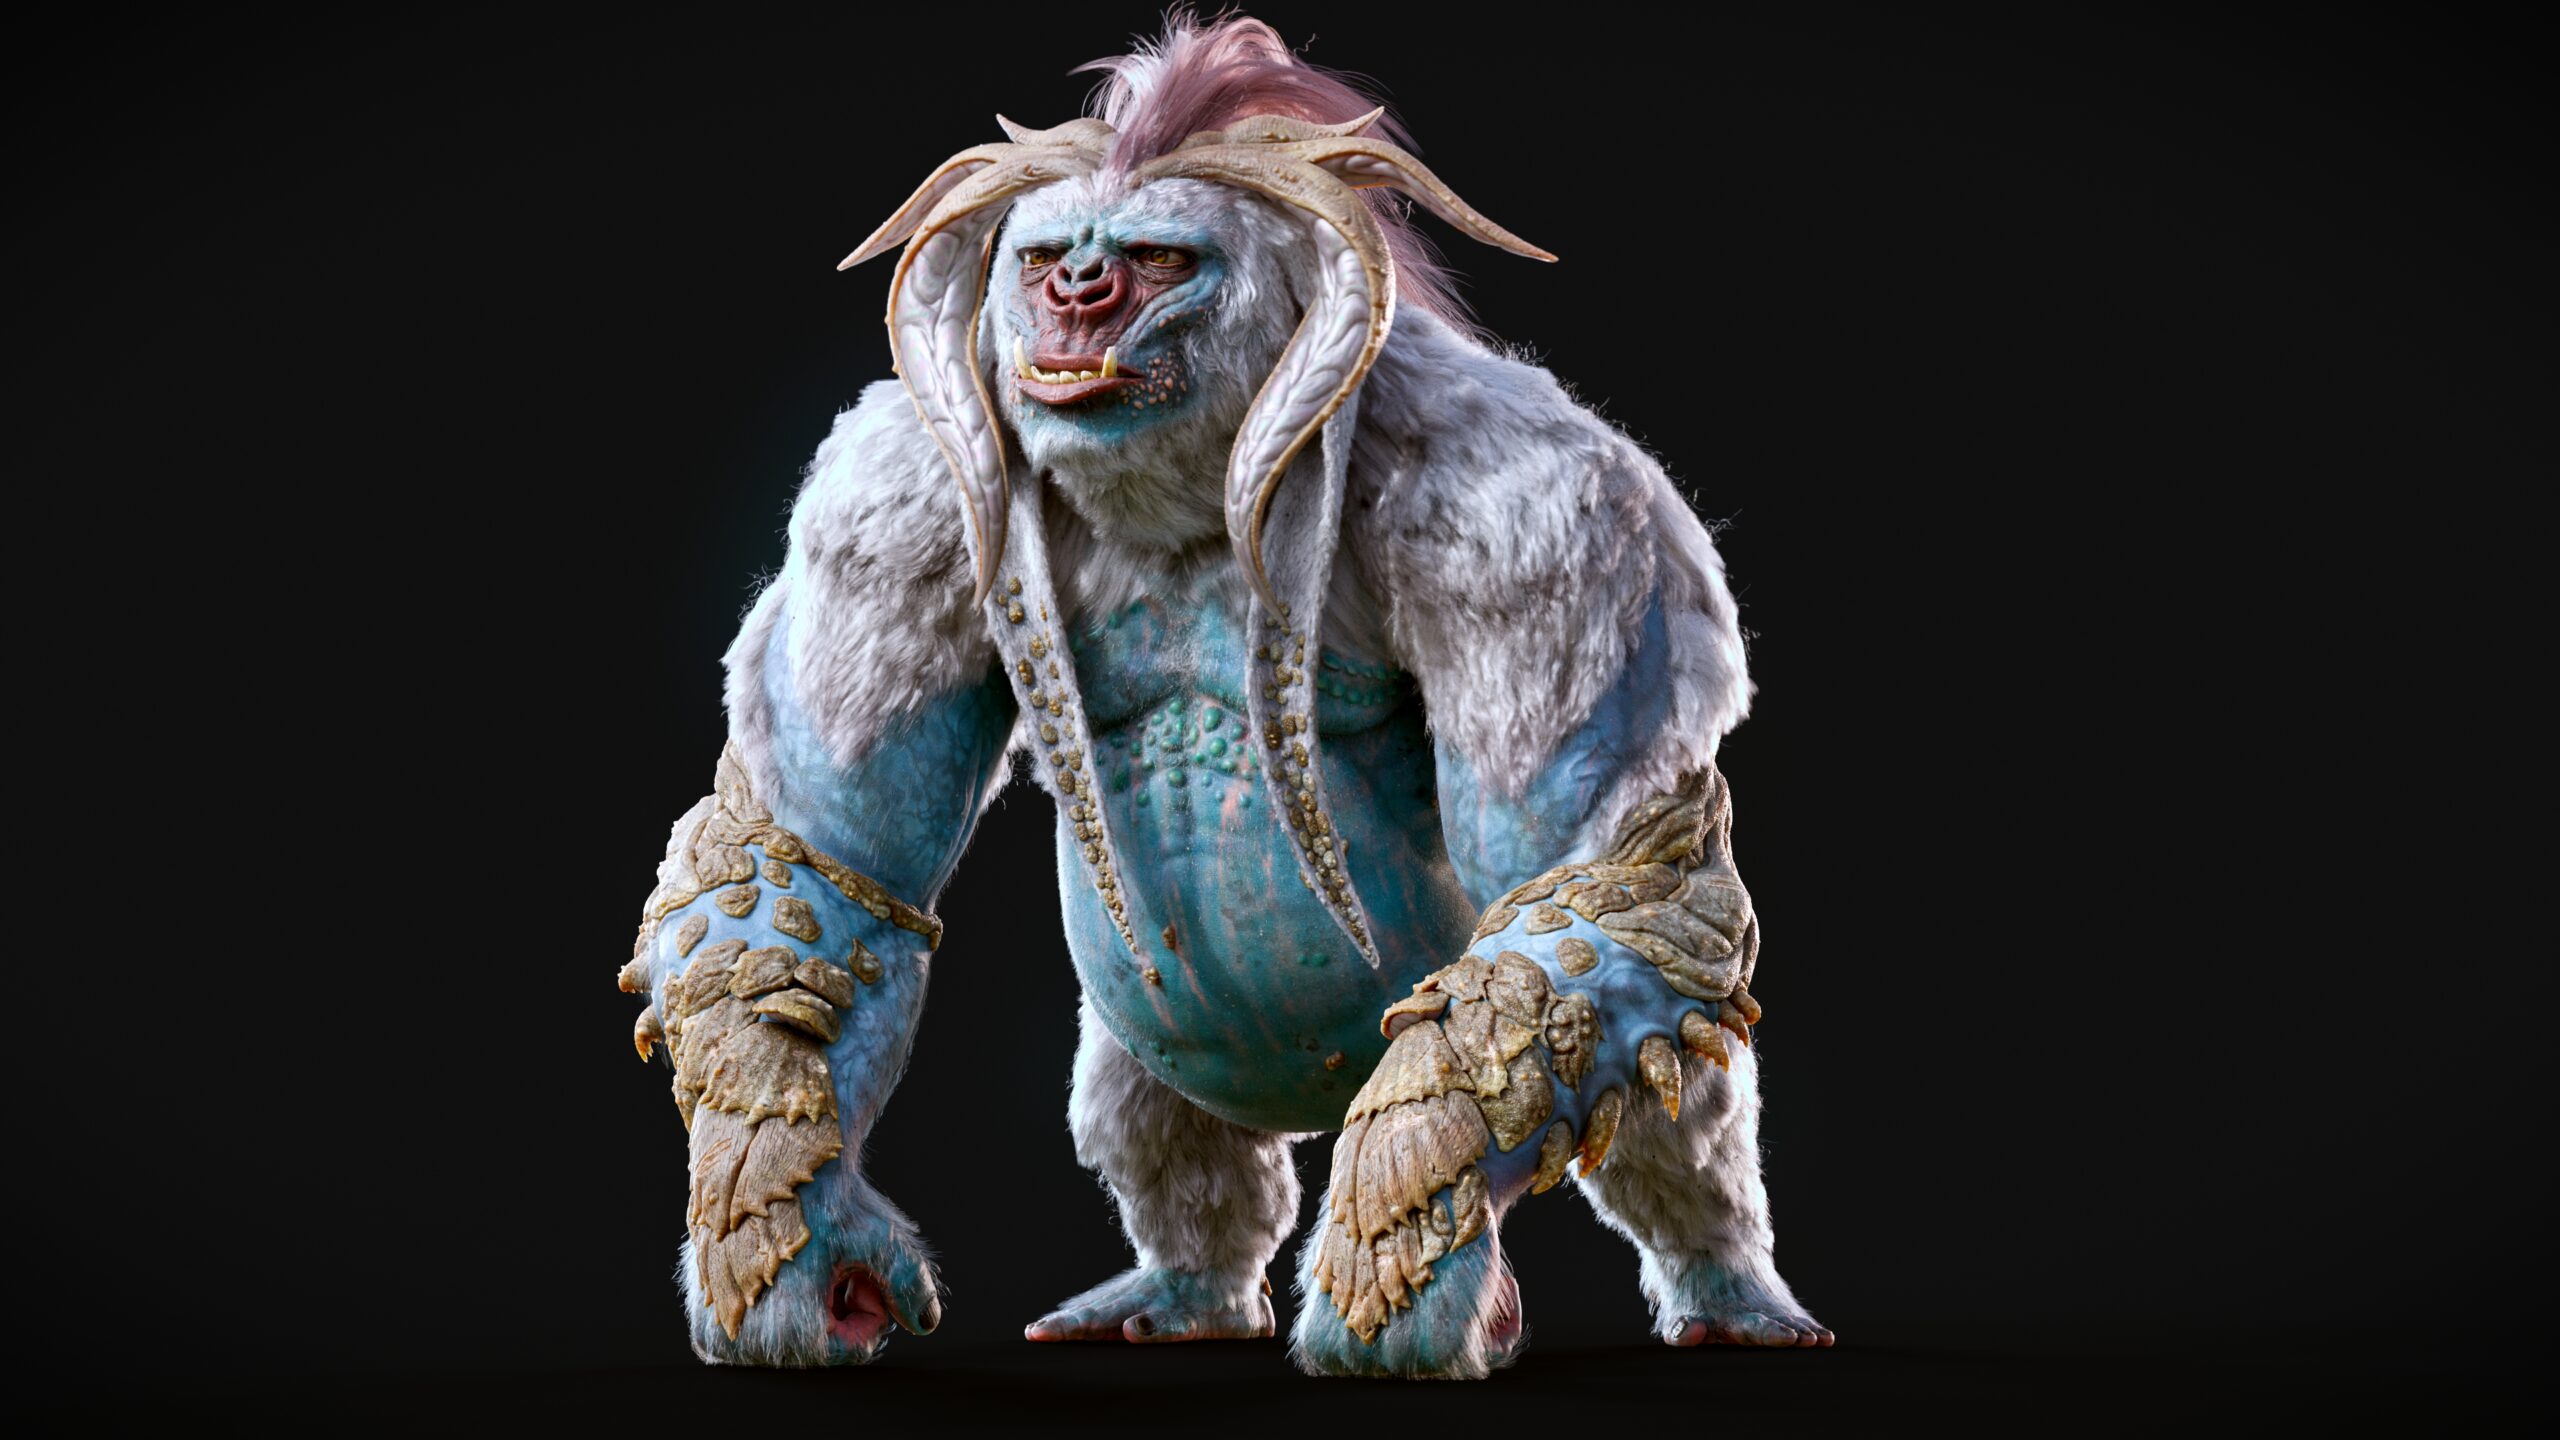
Look Development
Brad’s skin and chitin shading as well as his hair groom served as the principal opportunity for eye-catching appeal and processor-straining level of detail. This is also the most exciting part of the creation process for me as it is when the character really starts coming to life.
UVs
The single biggest mistake I made in creating the first version of the Megachitus back in 2022 was to not allocate enough texture space for a realistic and detailed creature meant for offline rendering. My experience until that point had been mostly with either stylized subjects or game characters rather than beefy VFX assets, so I underestimated the number of UDIM tiles necessary for the detail we were aiming for. Tiles – and therefore texel density – were increased 10 fold in Brad V2.
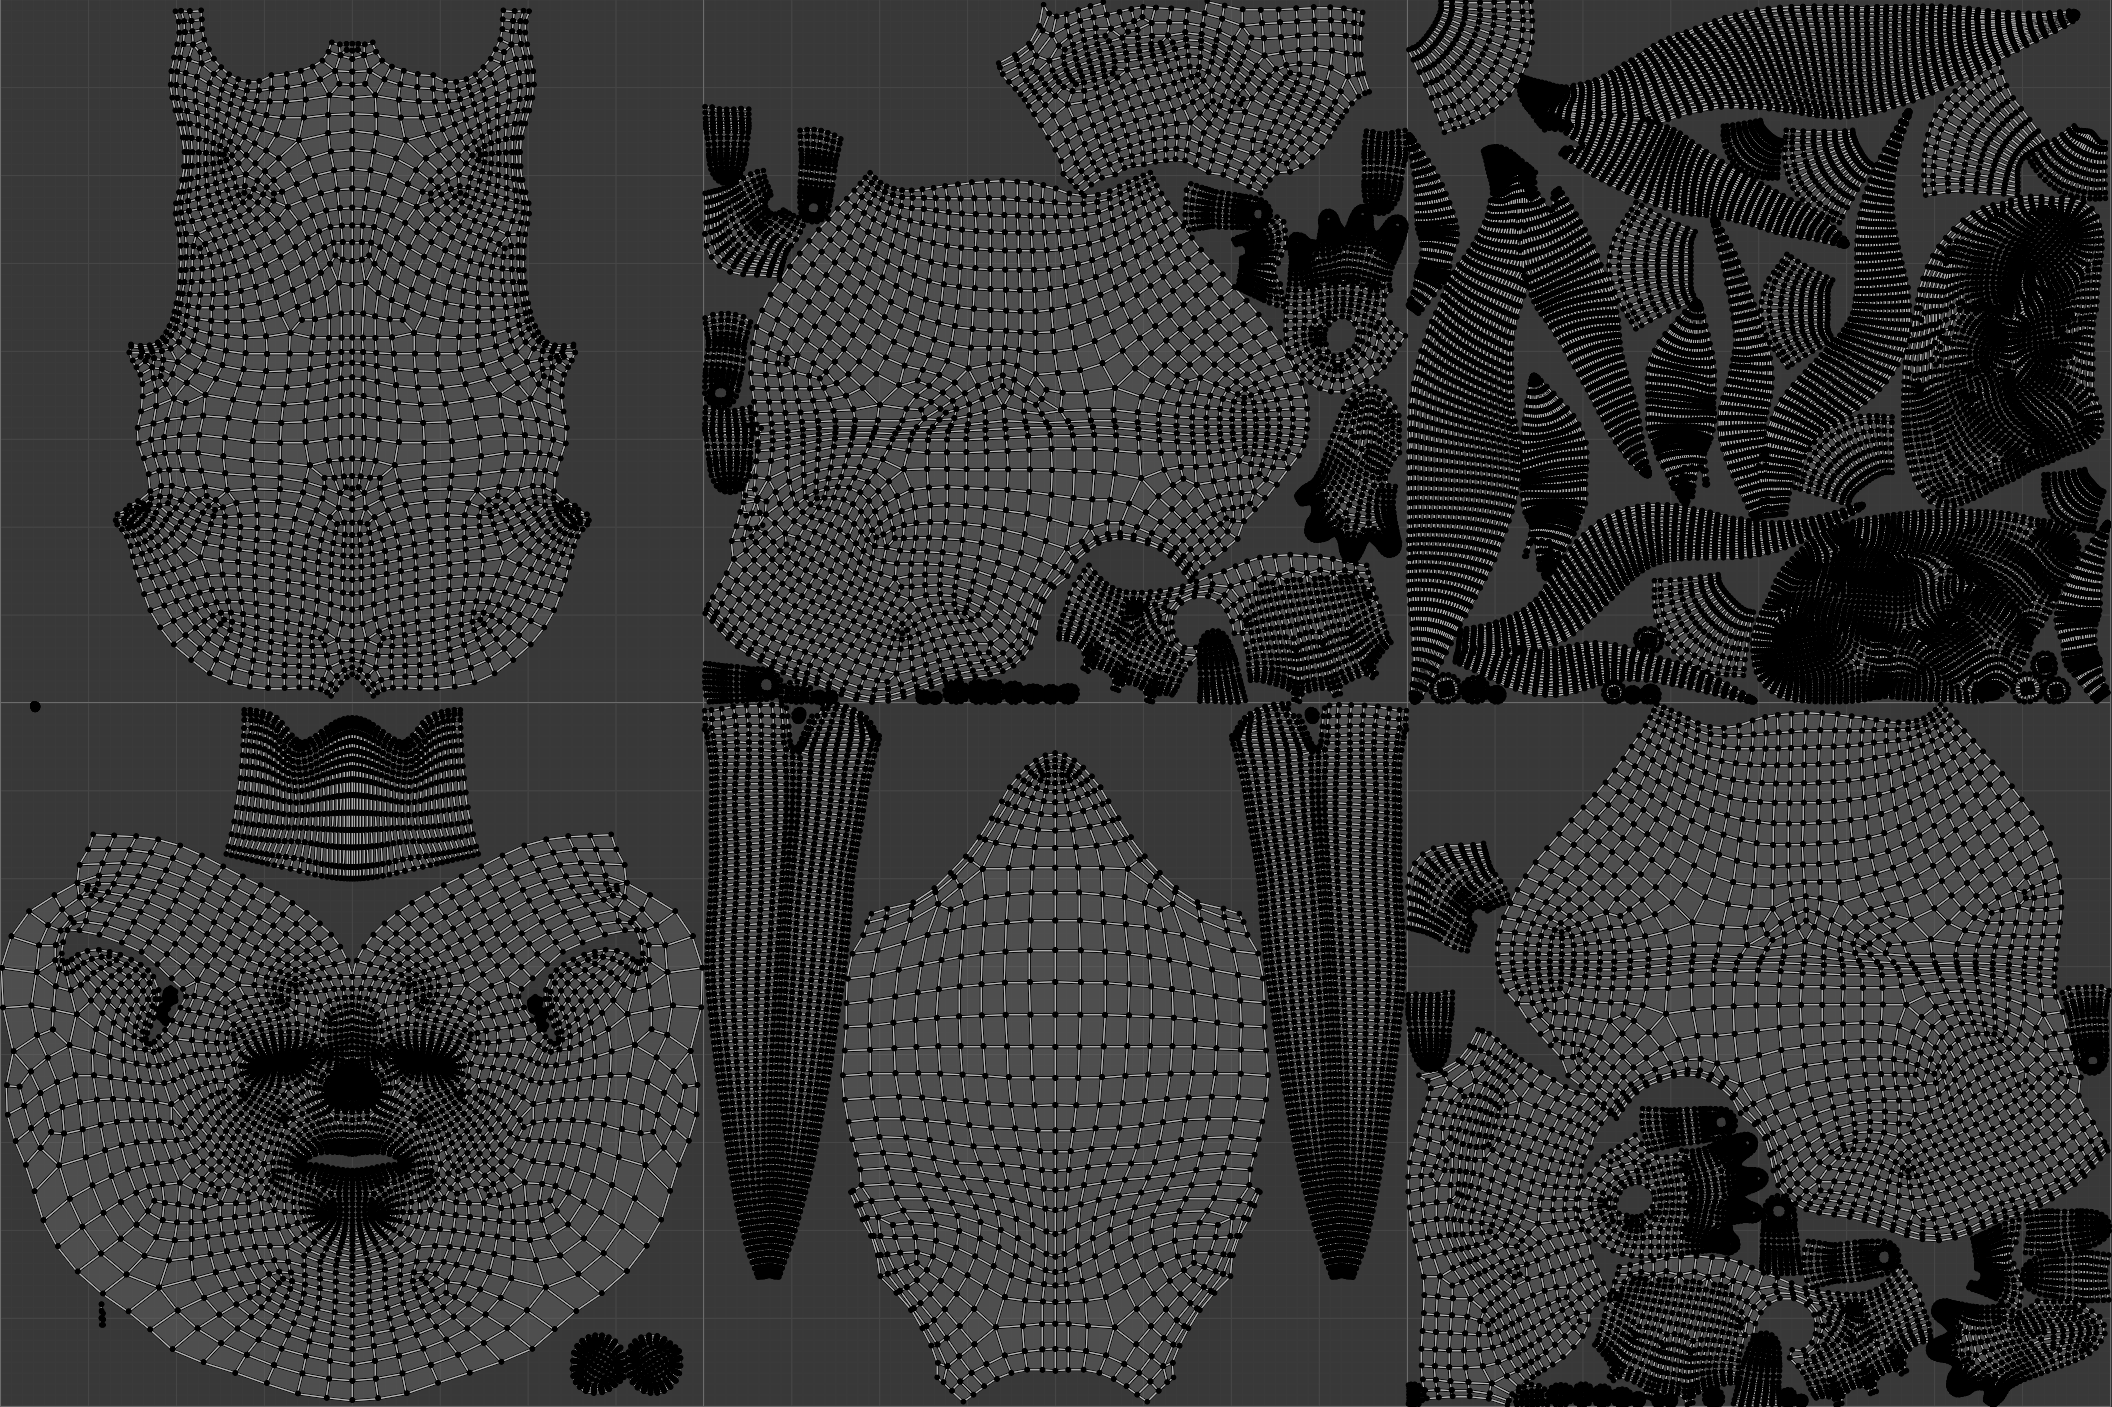
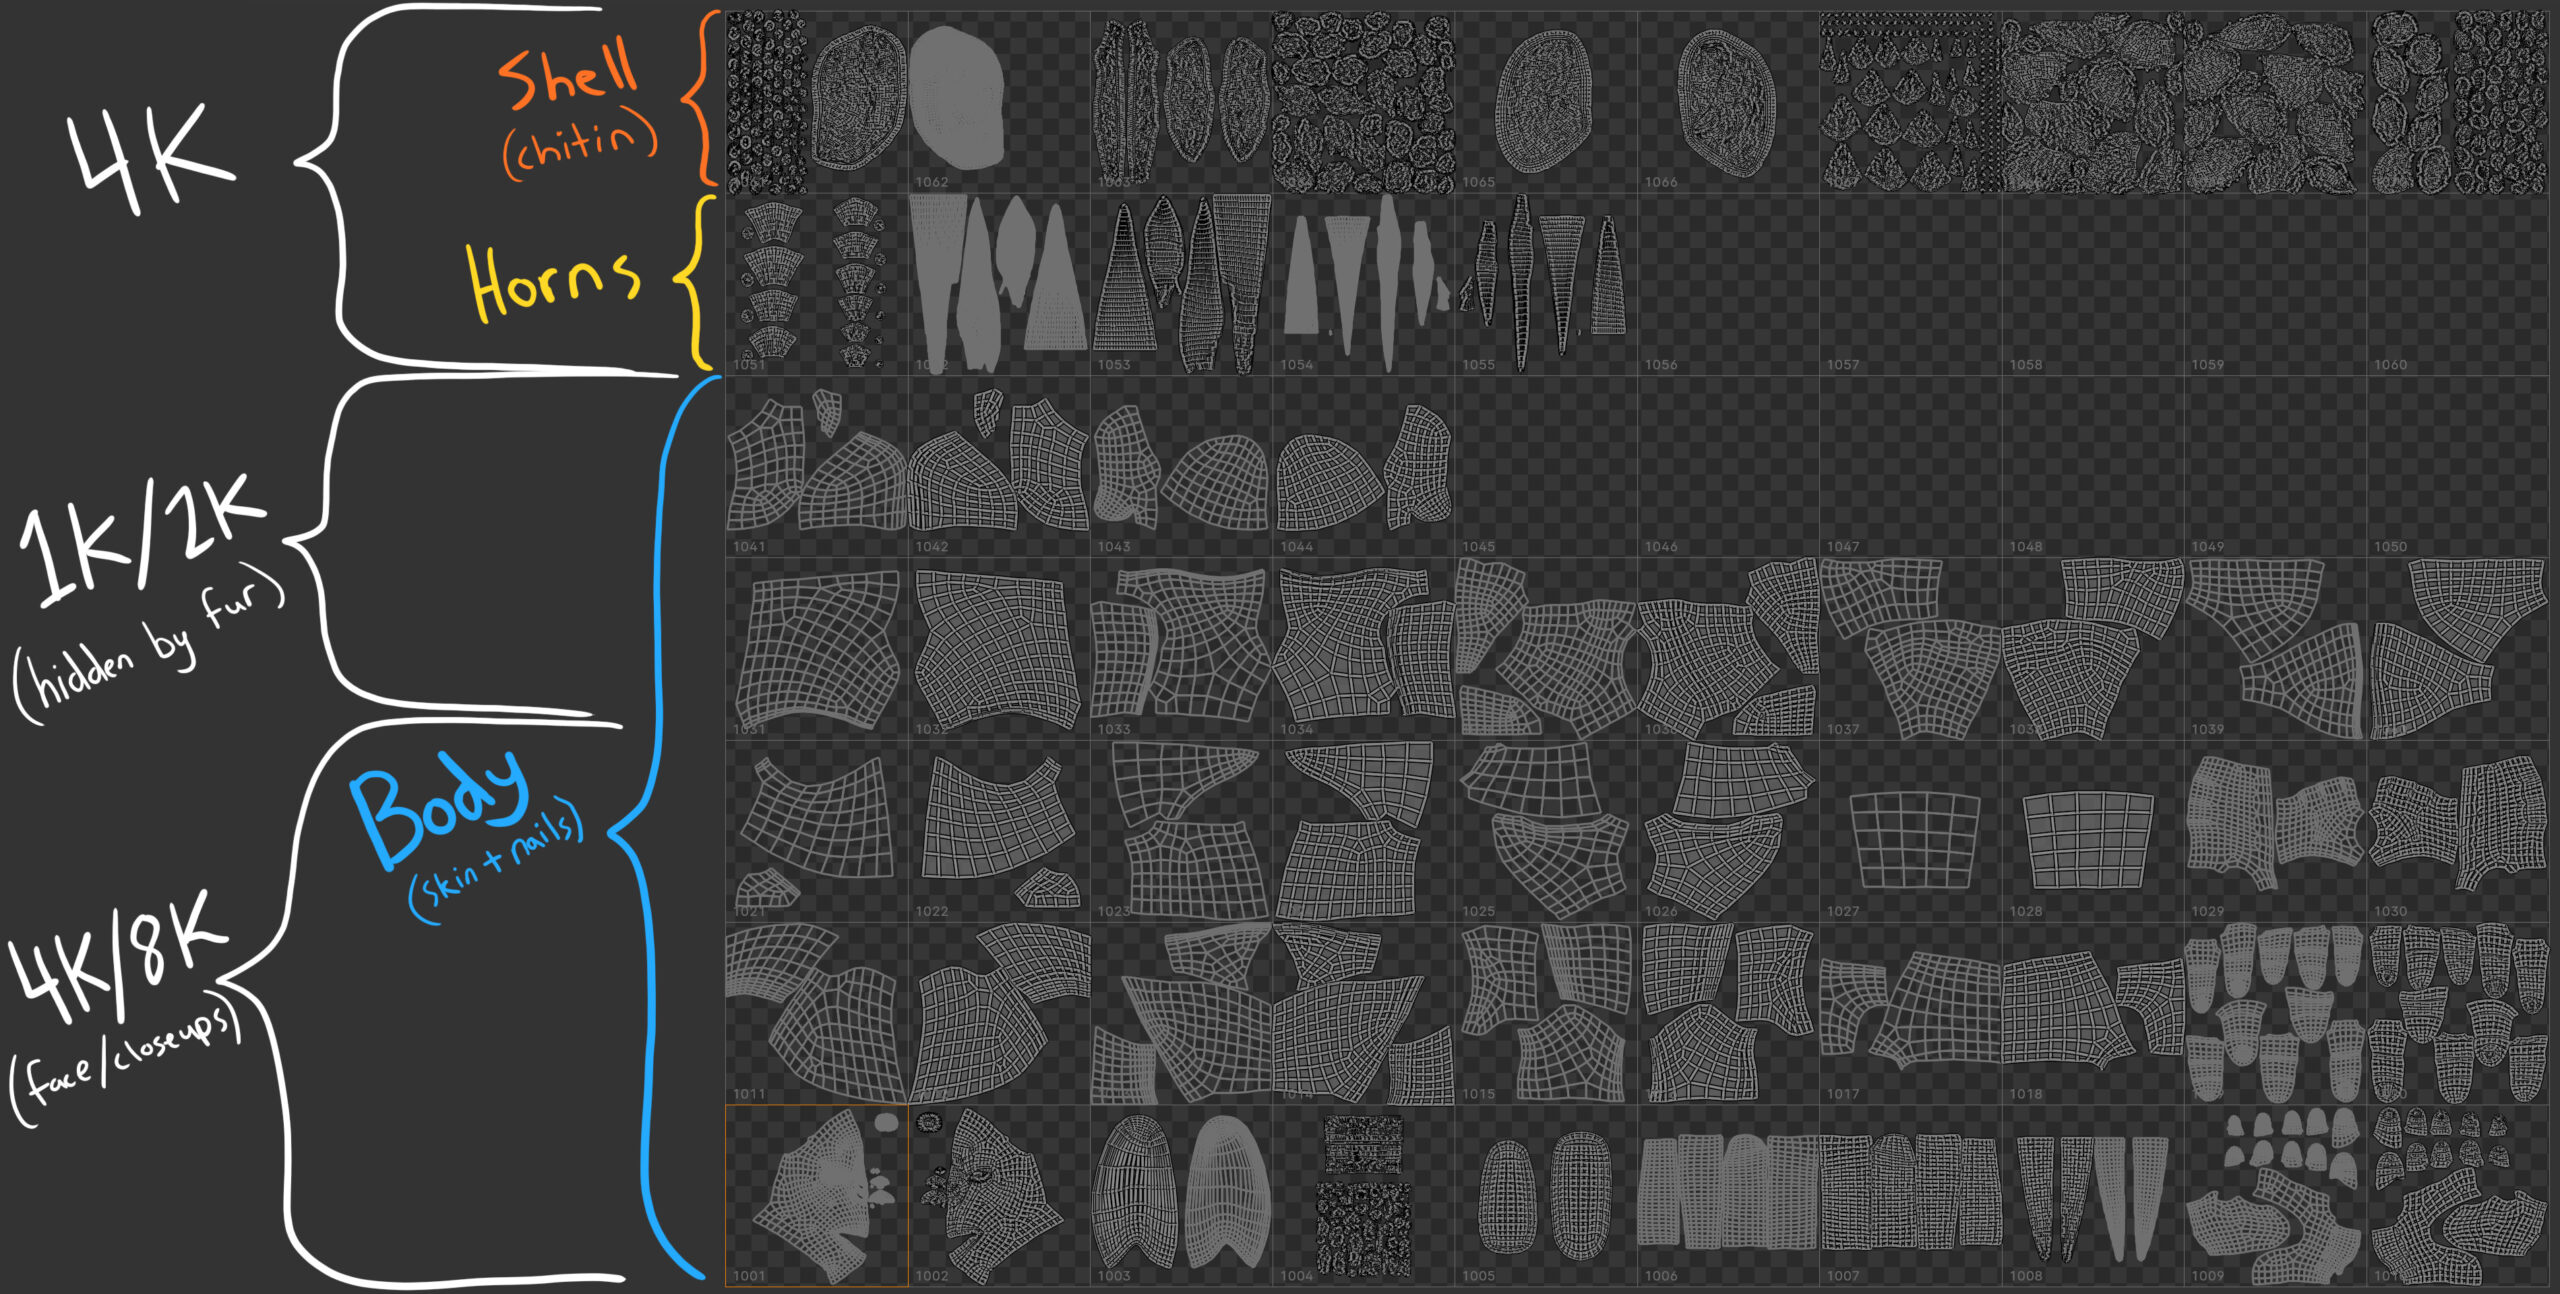
In reworking the UV layout, I also created a tool in Blender’s geometry nodes for procedurally reflecting symmetrical UVs across their adjacent UDIM tile, which was incredibly useful for iterating on the layout without losing any organization or wasting time unwrapping symmetrical topology. I was able to paint quick resolution test maps and rearrange islands while previewing the final layout for free.
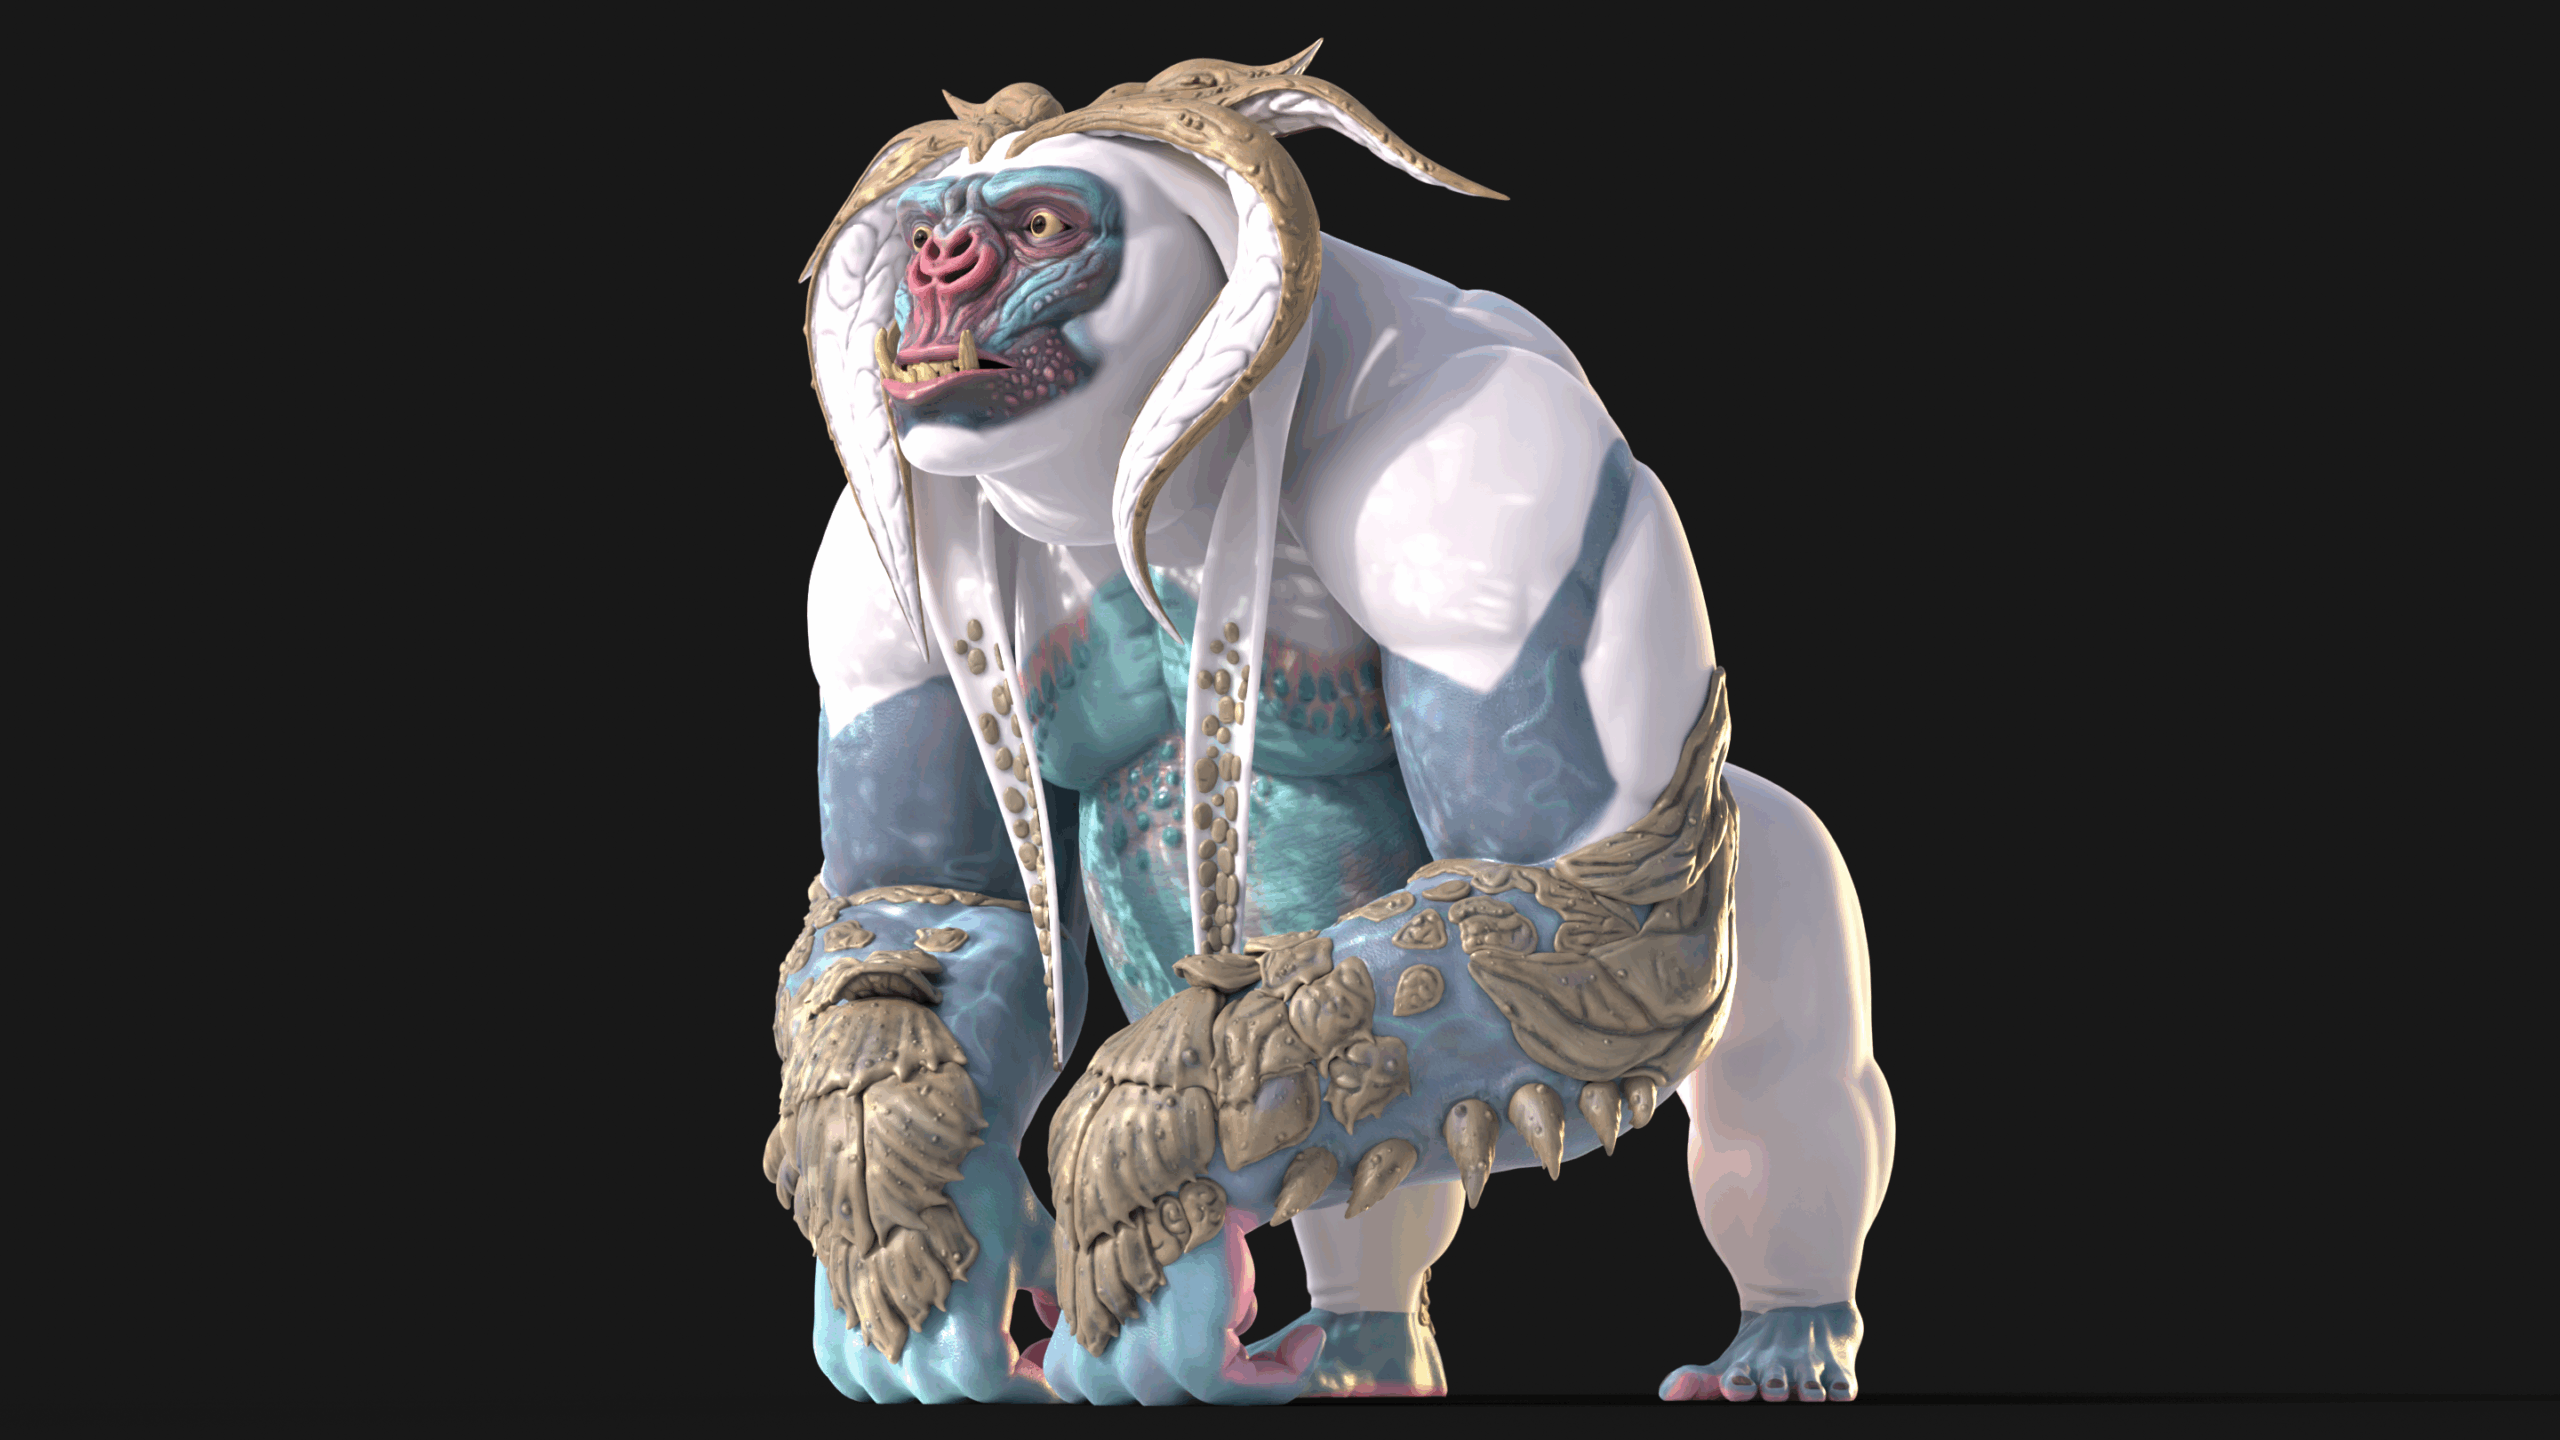
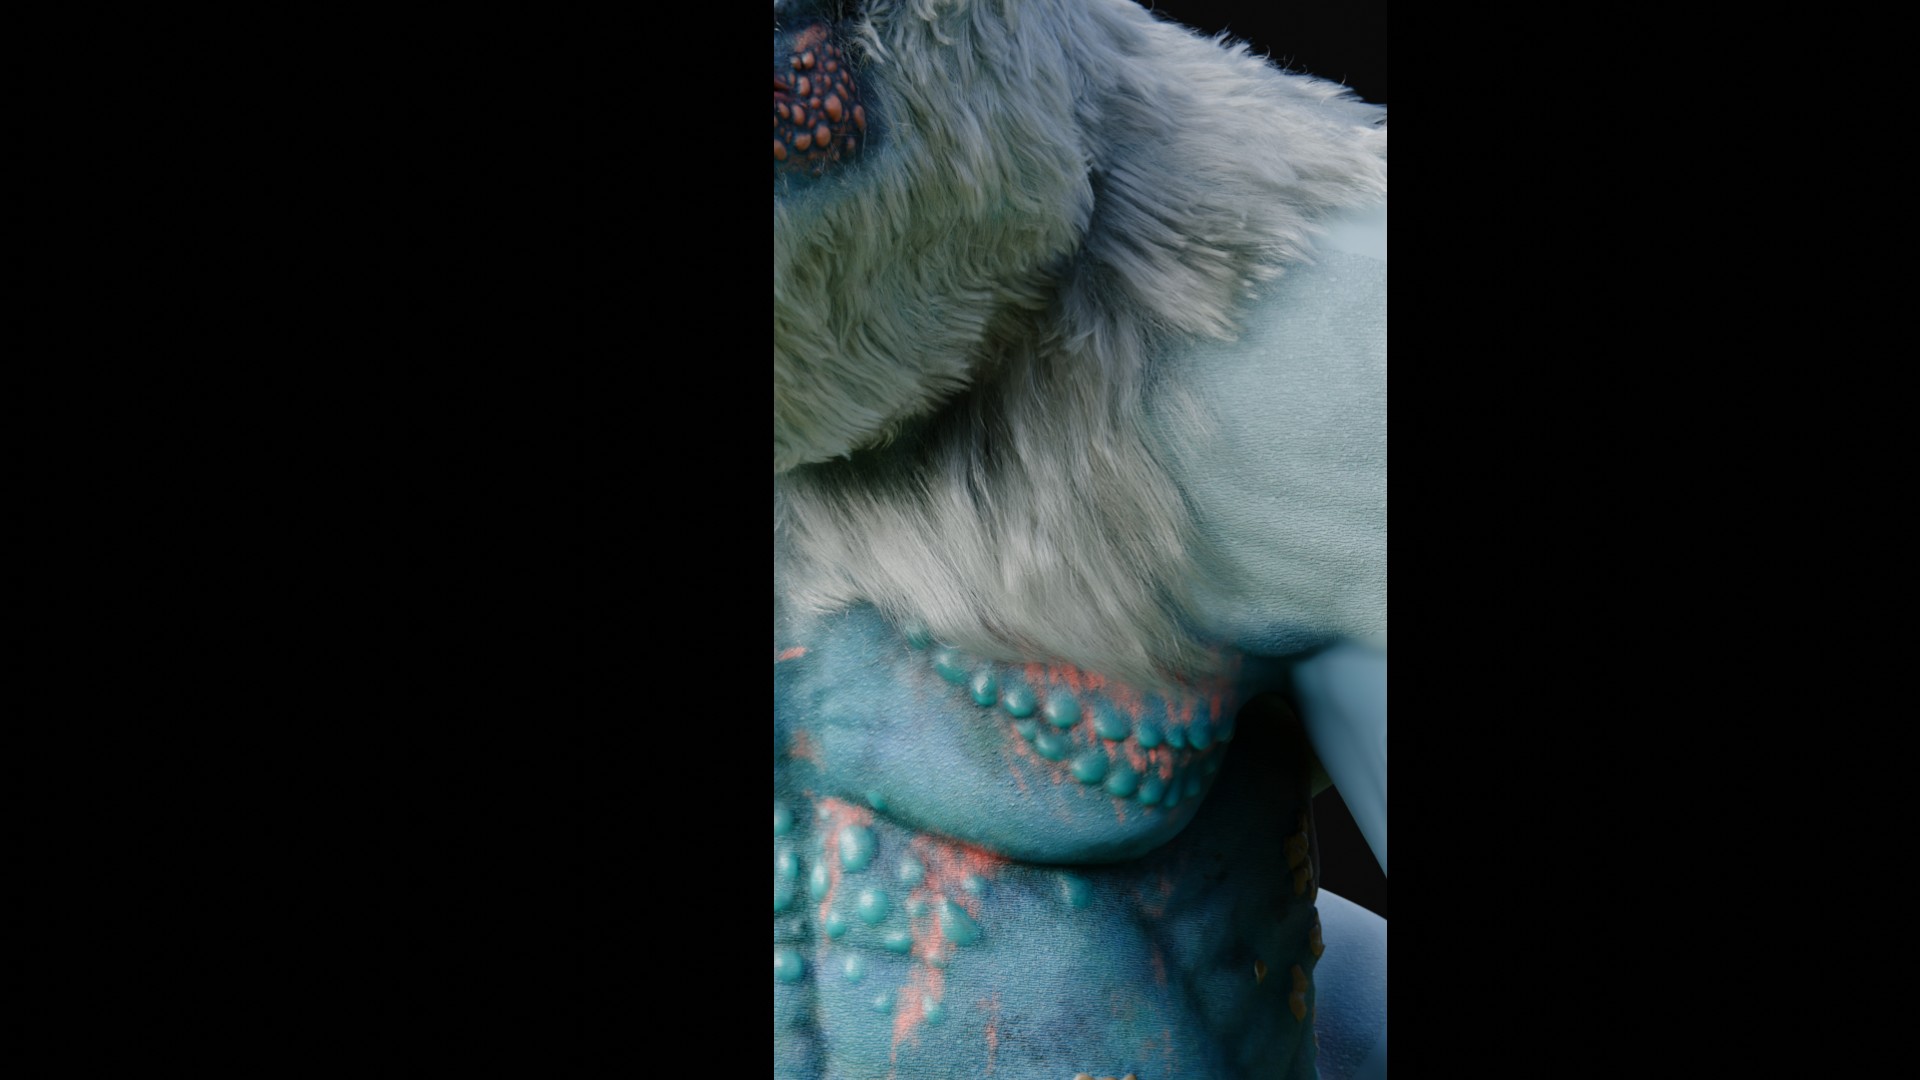
Surfacing
The first version of Brad’s textures were done in my tool of choice at the time, Substance Painter. This was the crux of the decision to initially only use 6 UDIM tiles for the body, as Painter is not performant enough for the dozens of tiles that benefit close-up shots of offline-rendered hero characters.
Working in Substance Painter with limited texel density proved to be a crucial barrier to achieving the final look and level of detail I was after, but I can’t deny that it’s a pleasure to use, with its intuitive painting, layering, and smart mask systems. The end result out of Painter was decent, but felt more like a game character than a VFX hero creature. And aside from the technical limitations, my texturing skills as an artist have come a long way since Brad’s first surfacing pass.
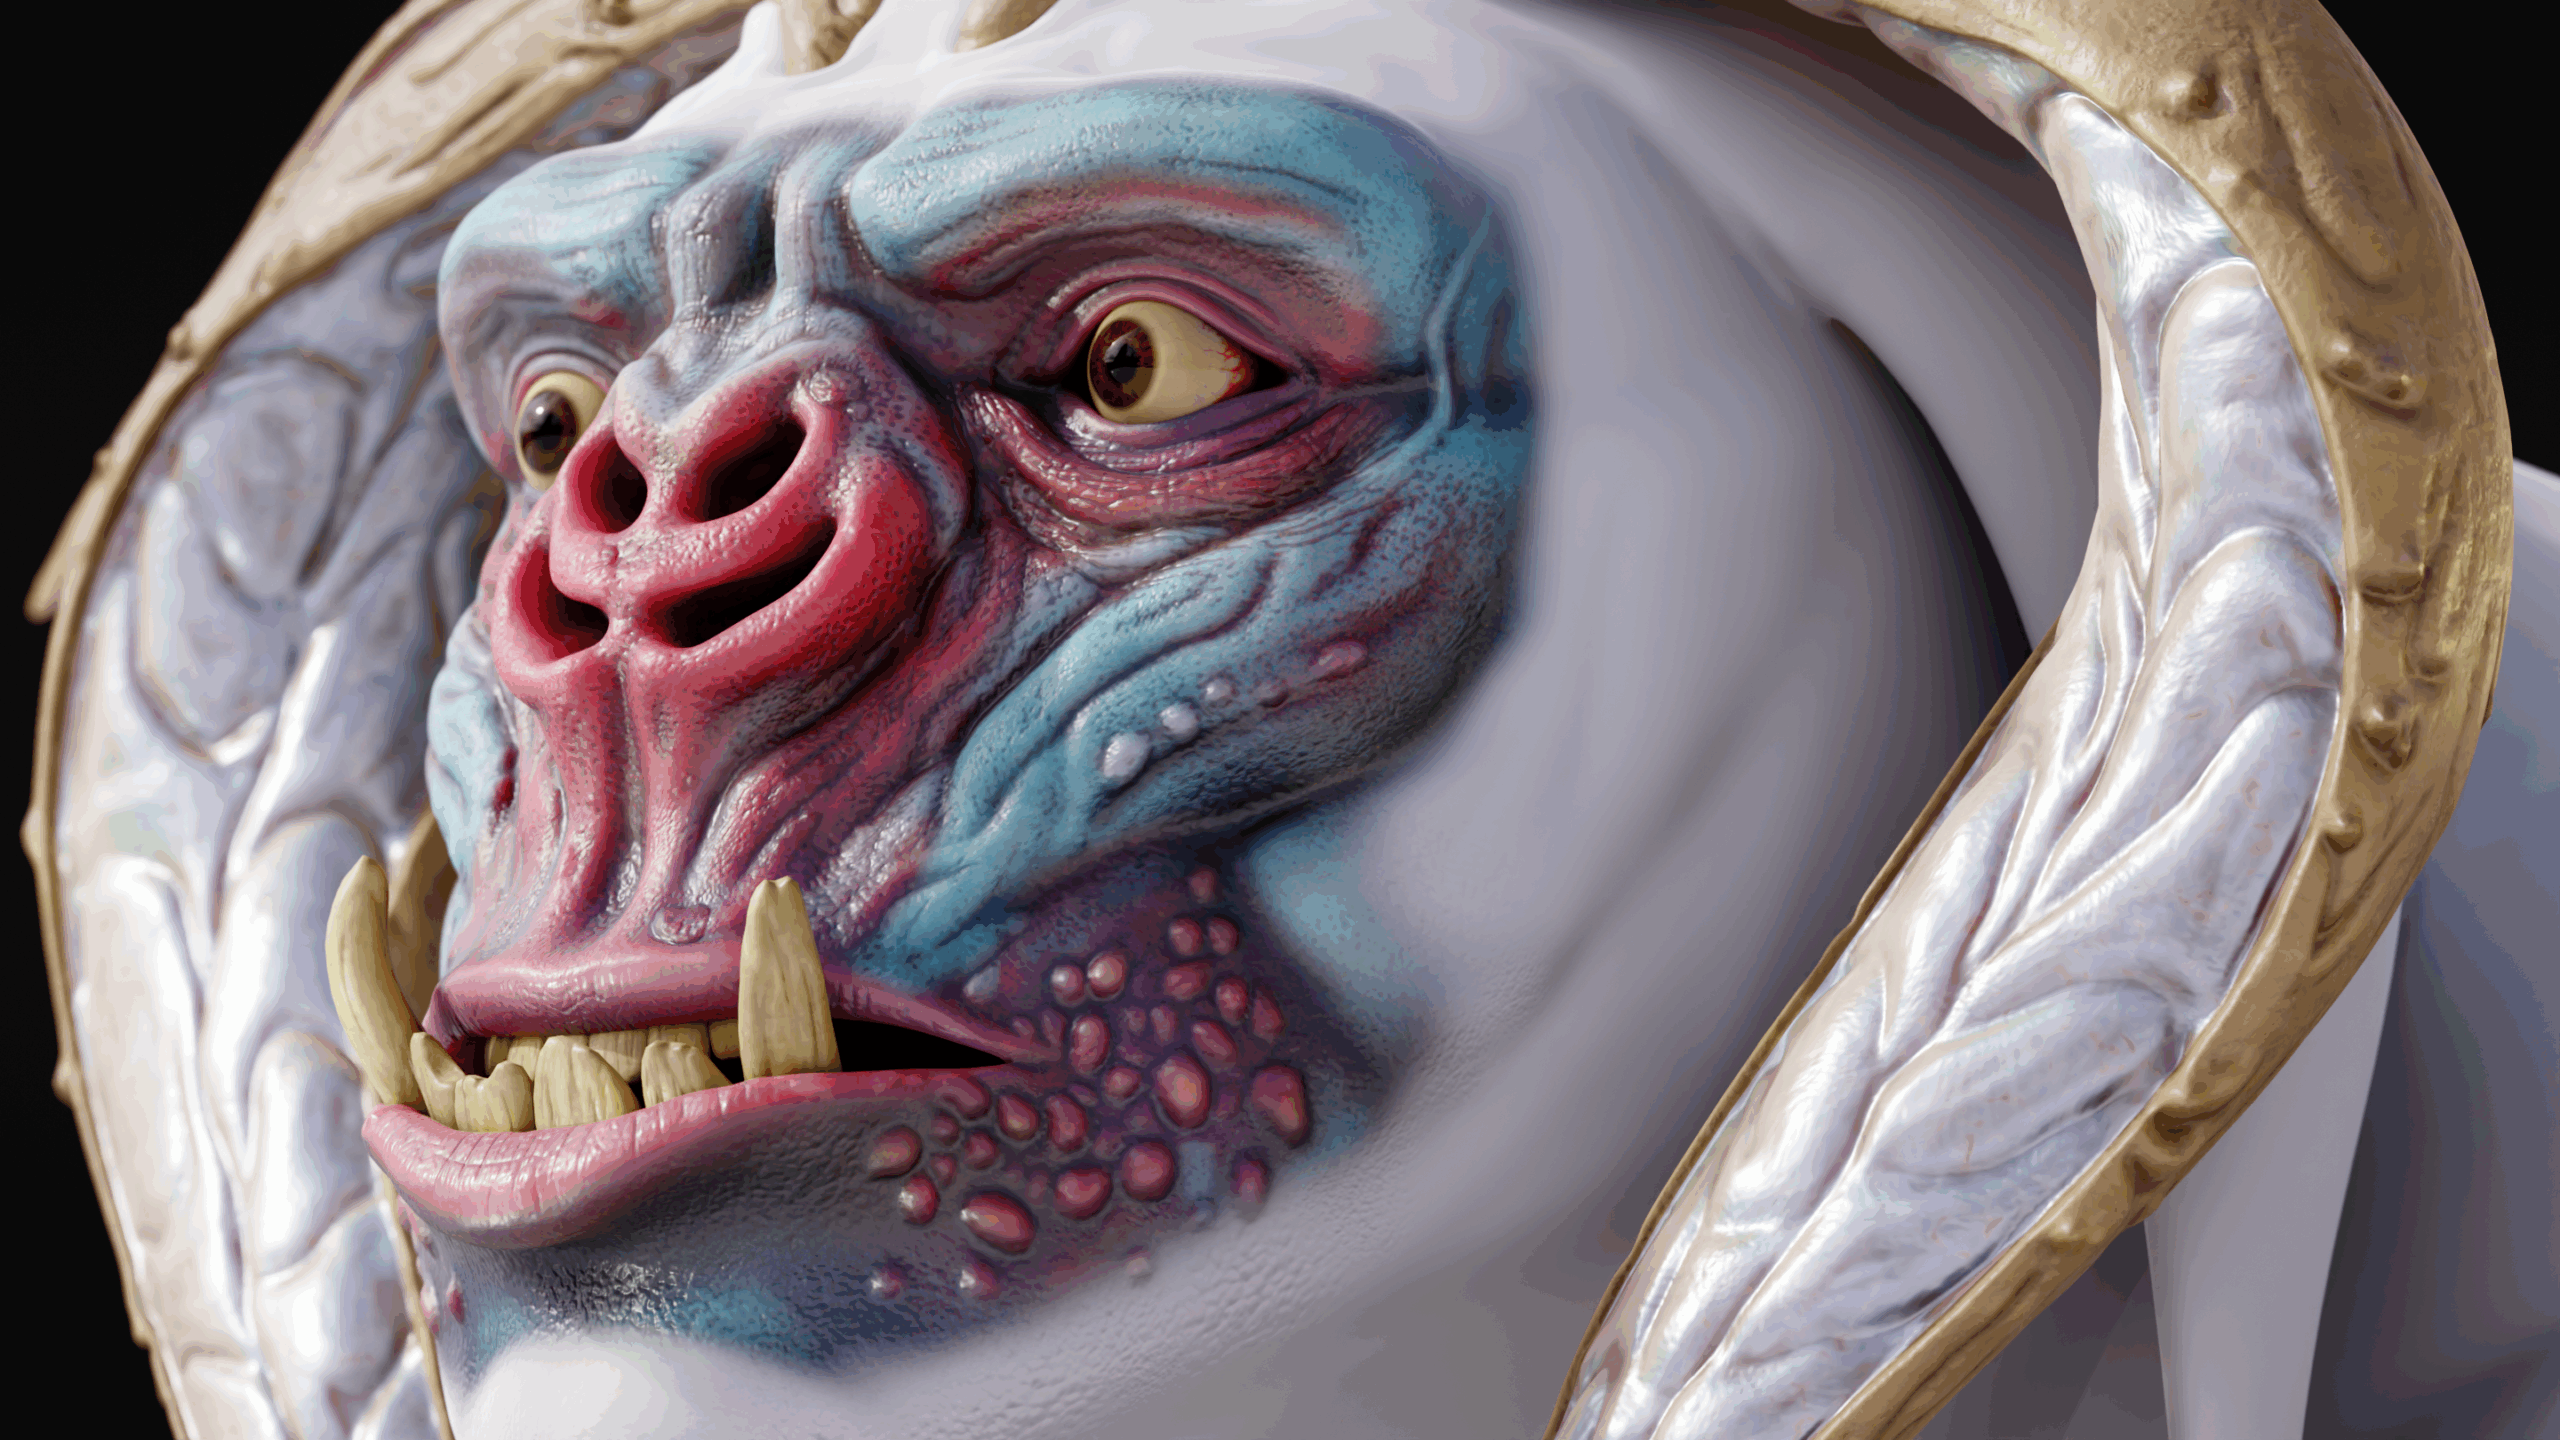
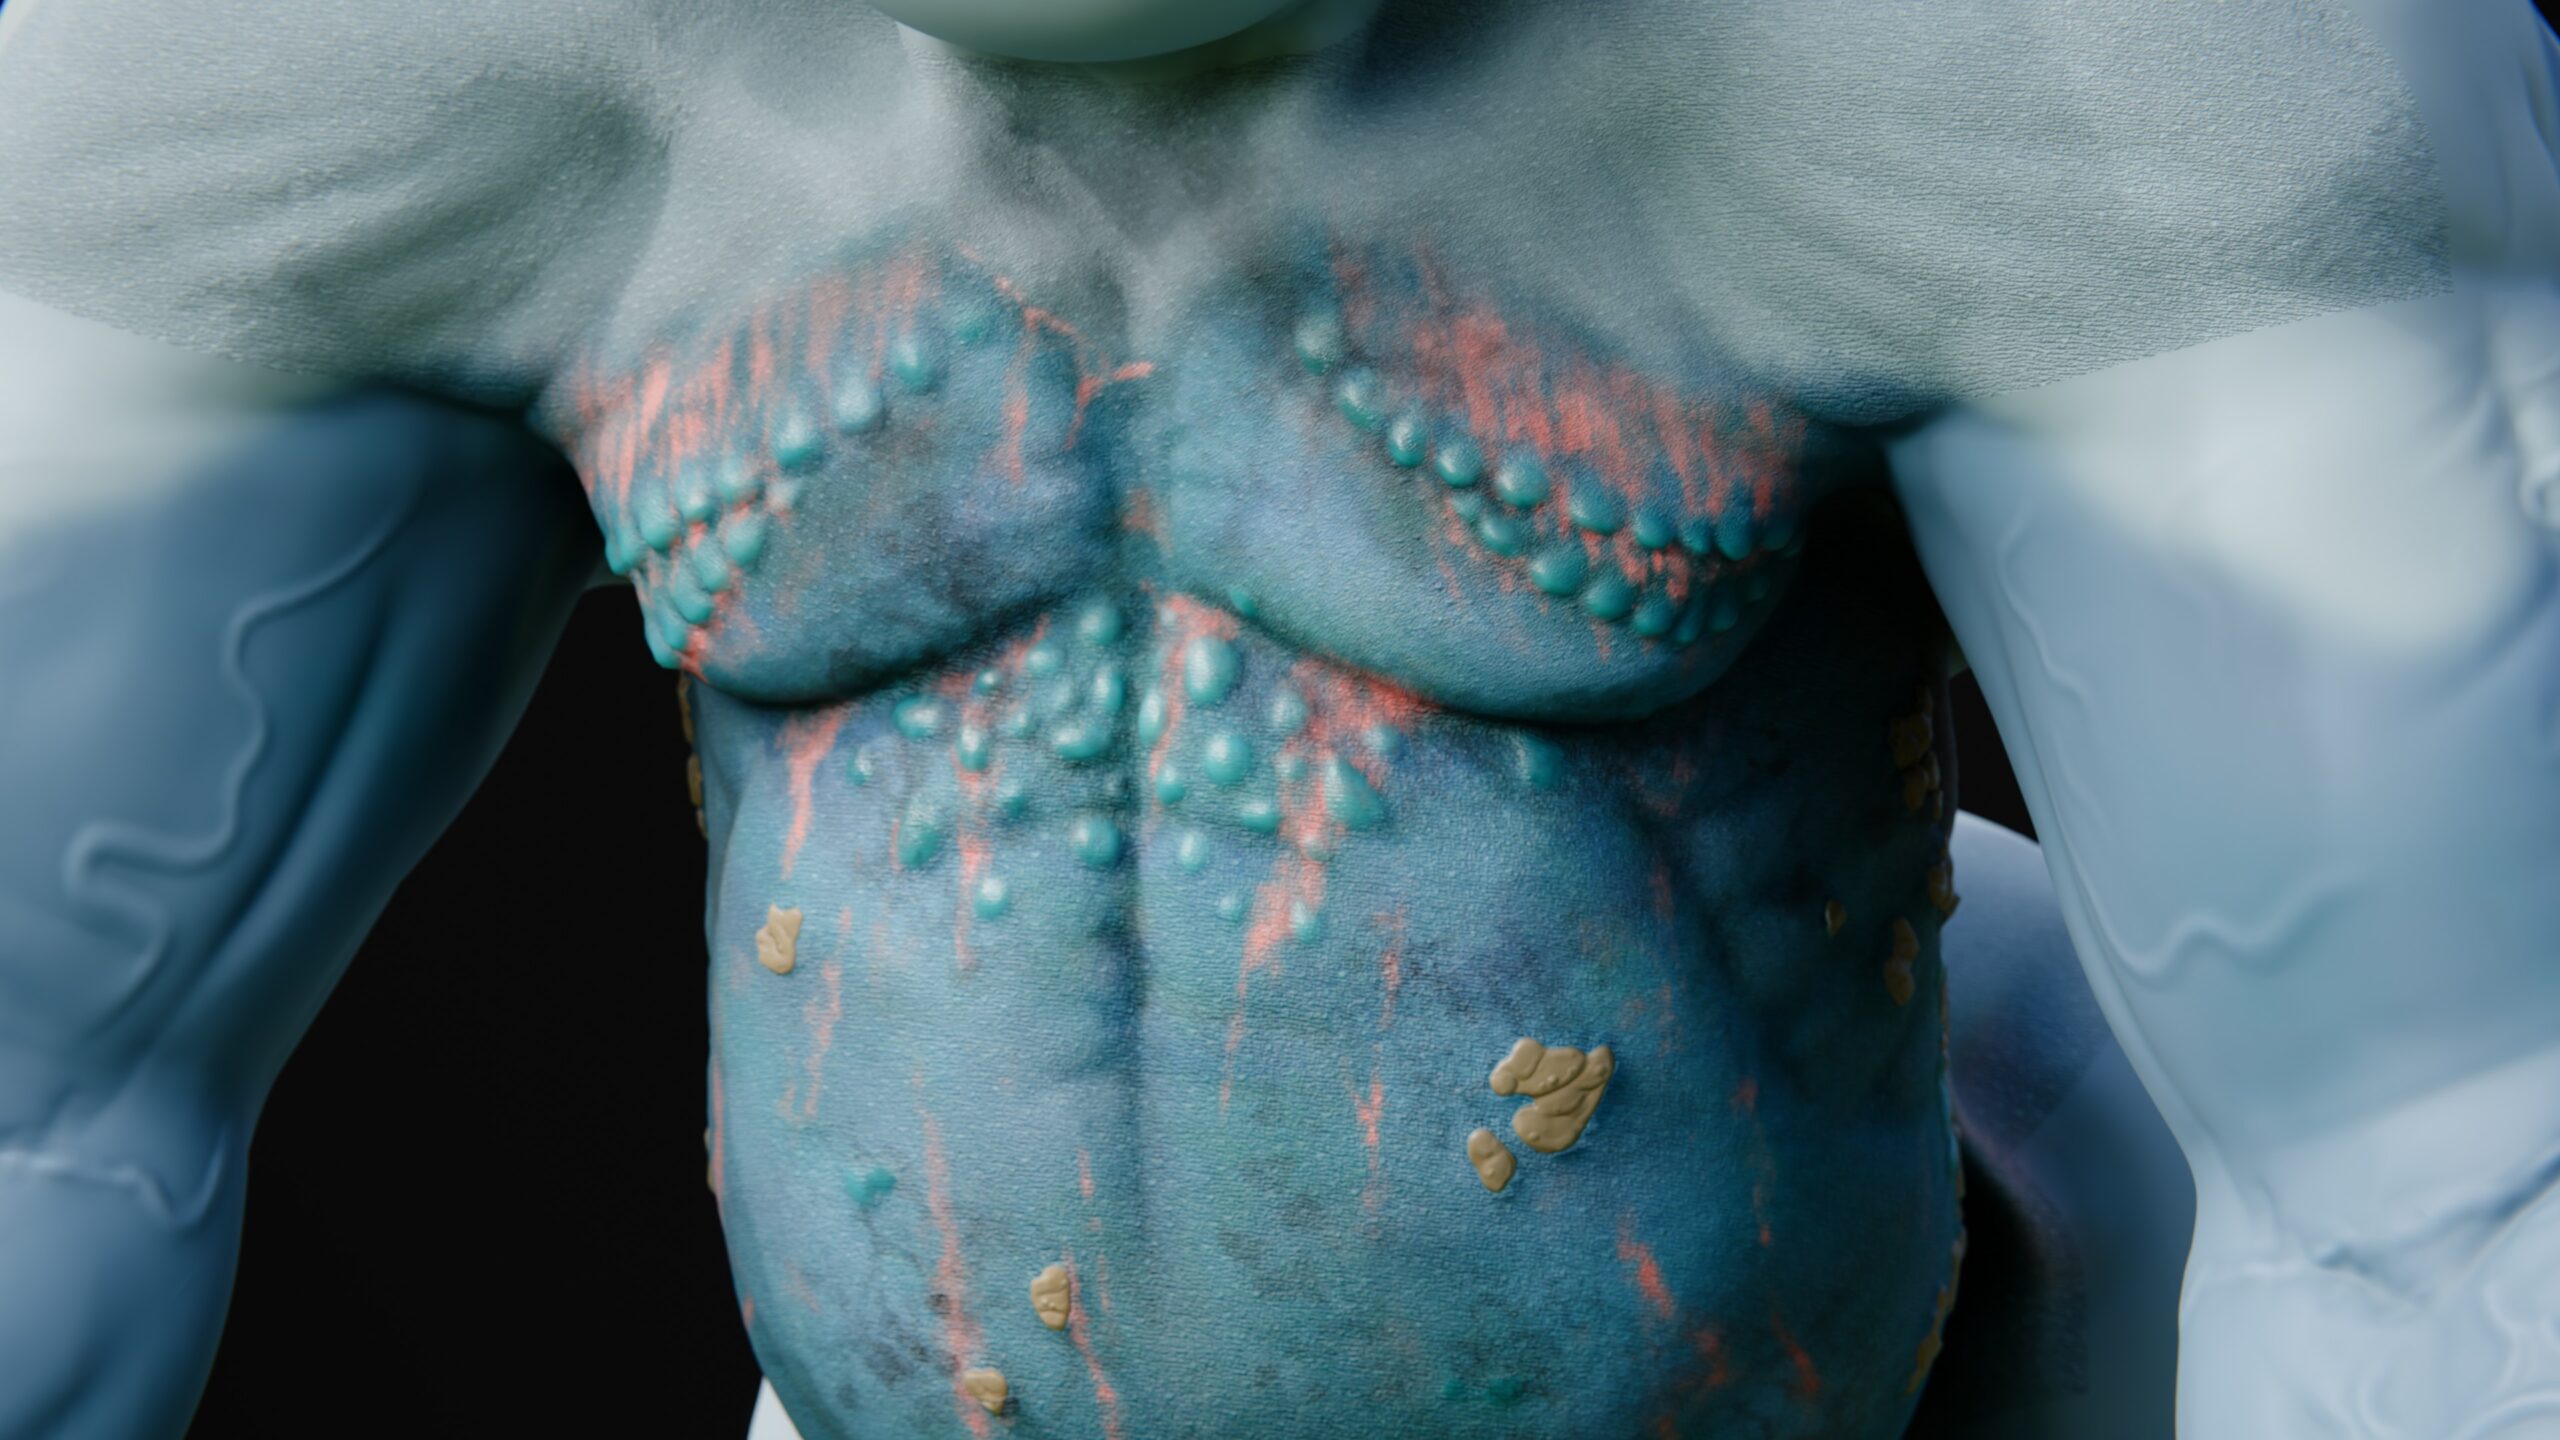
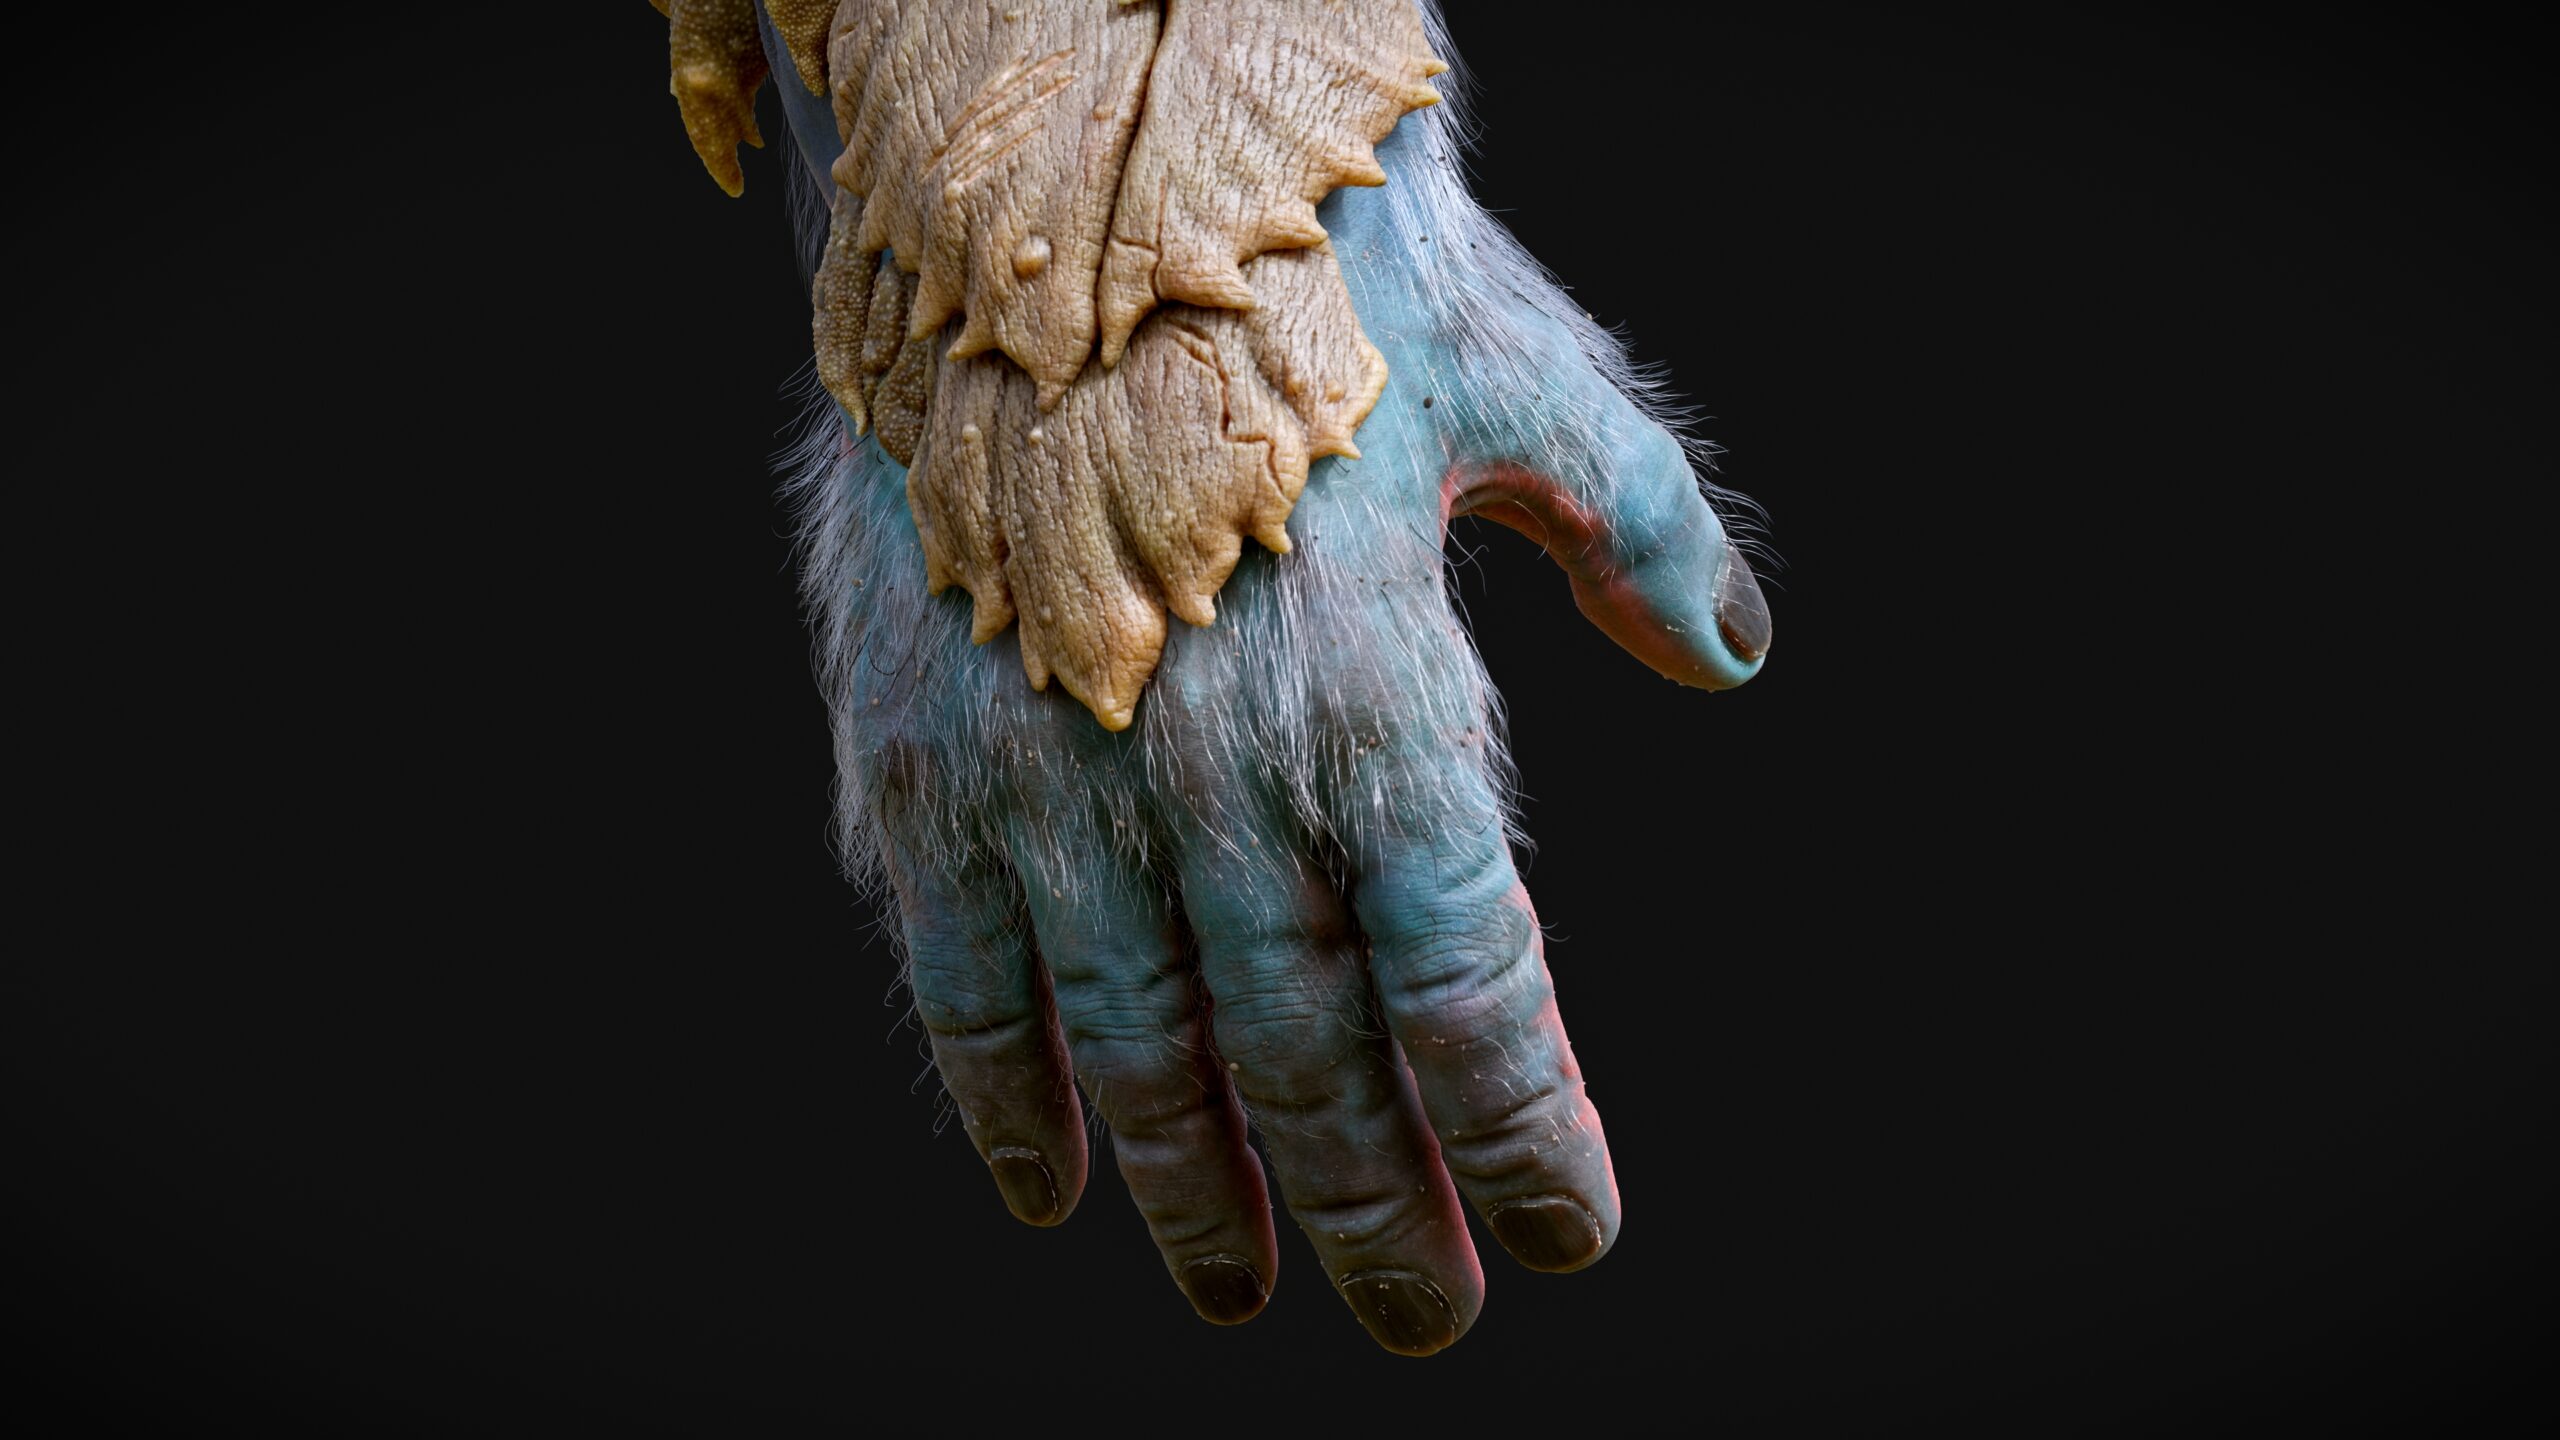
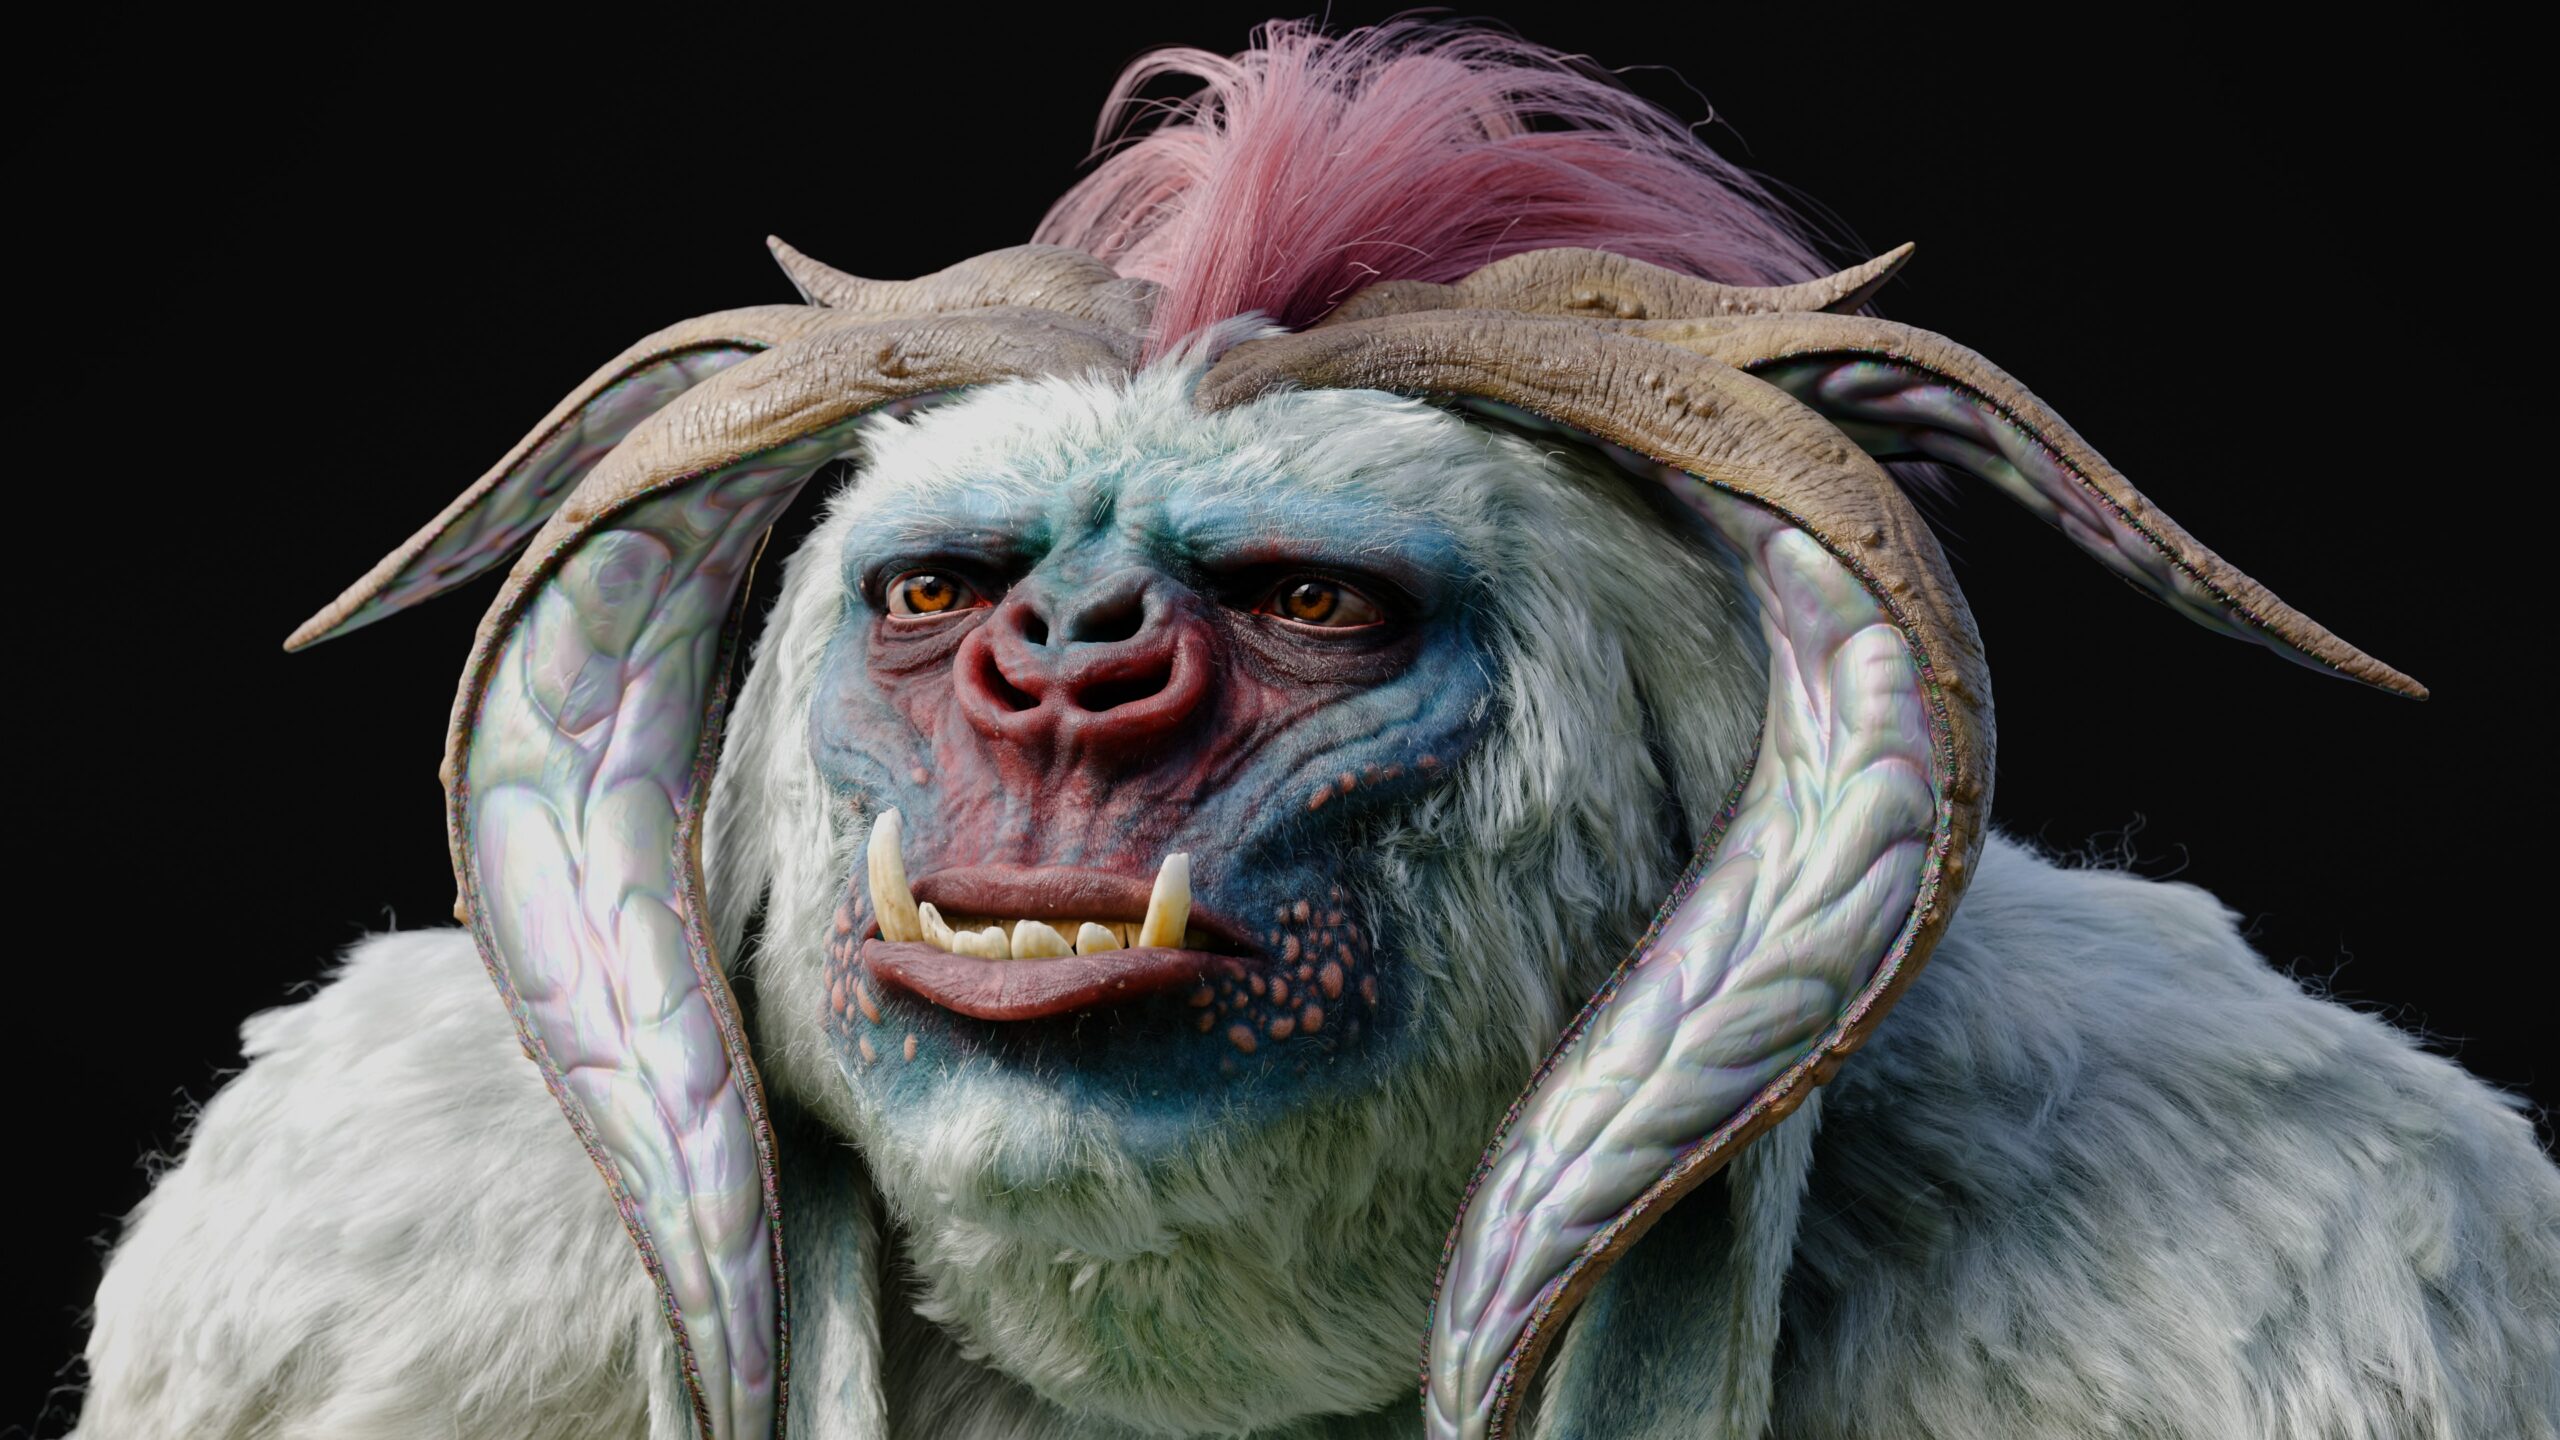
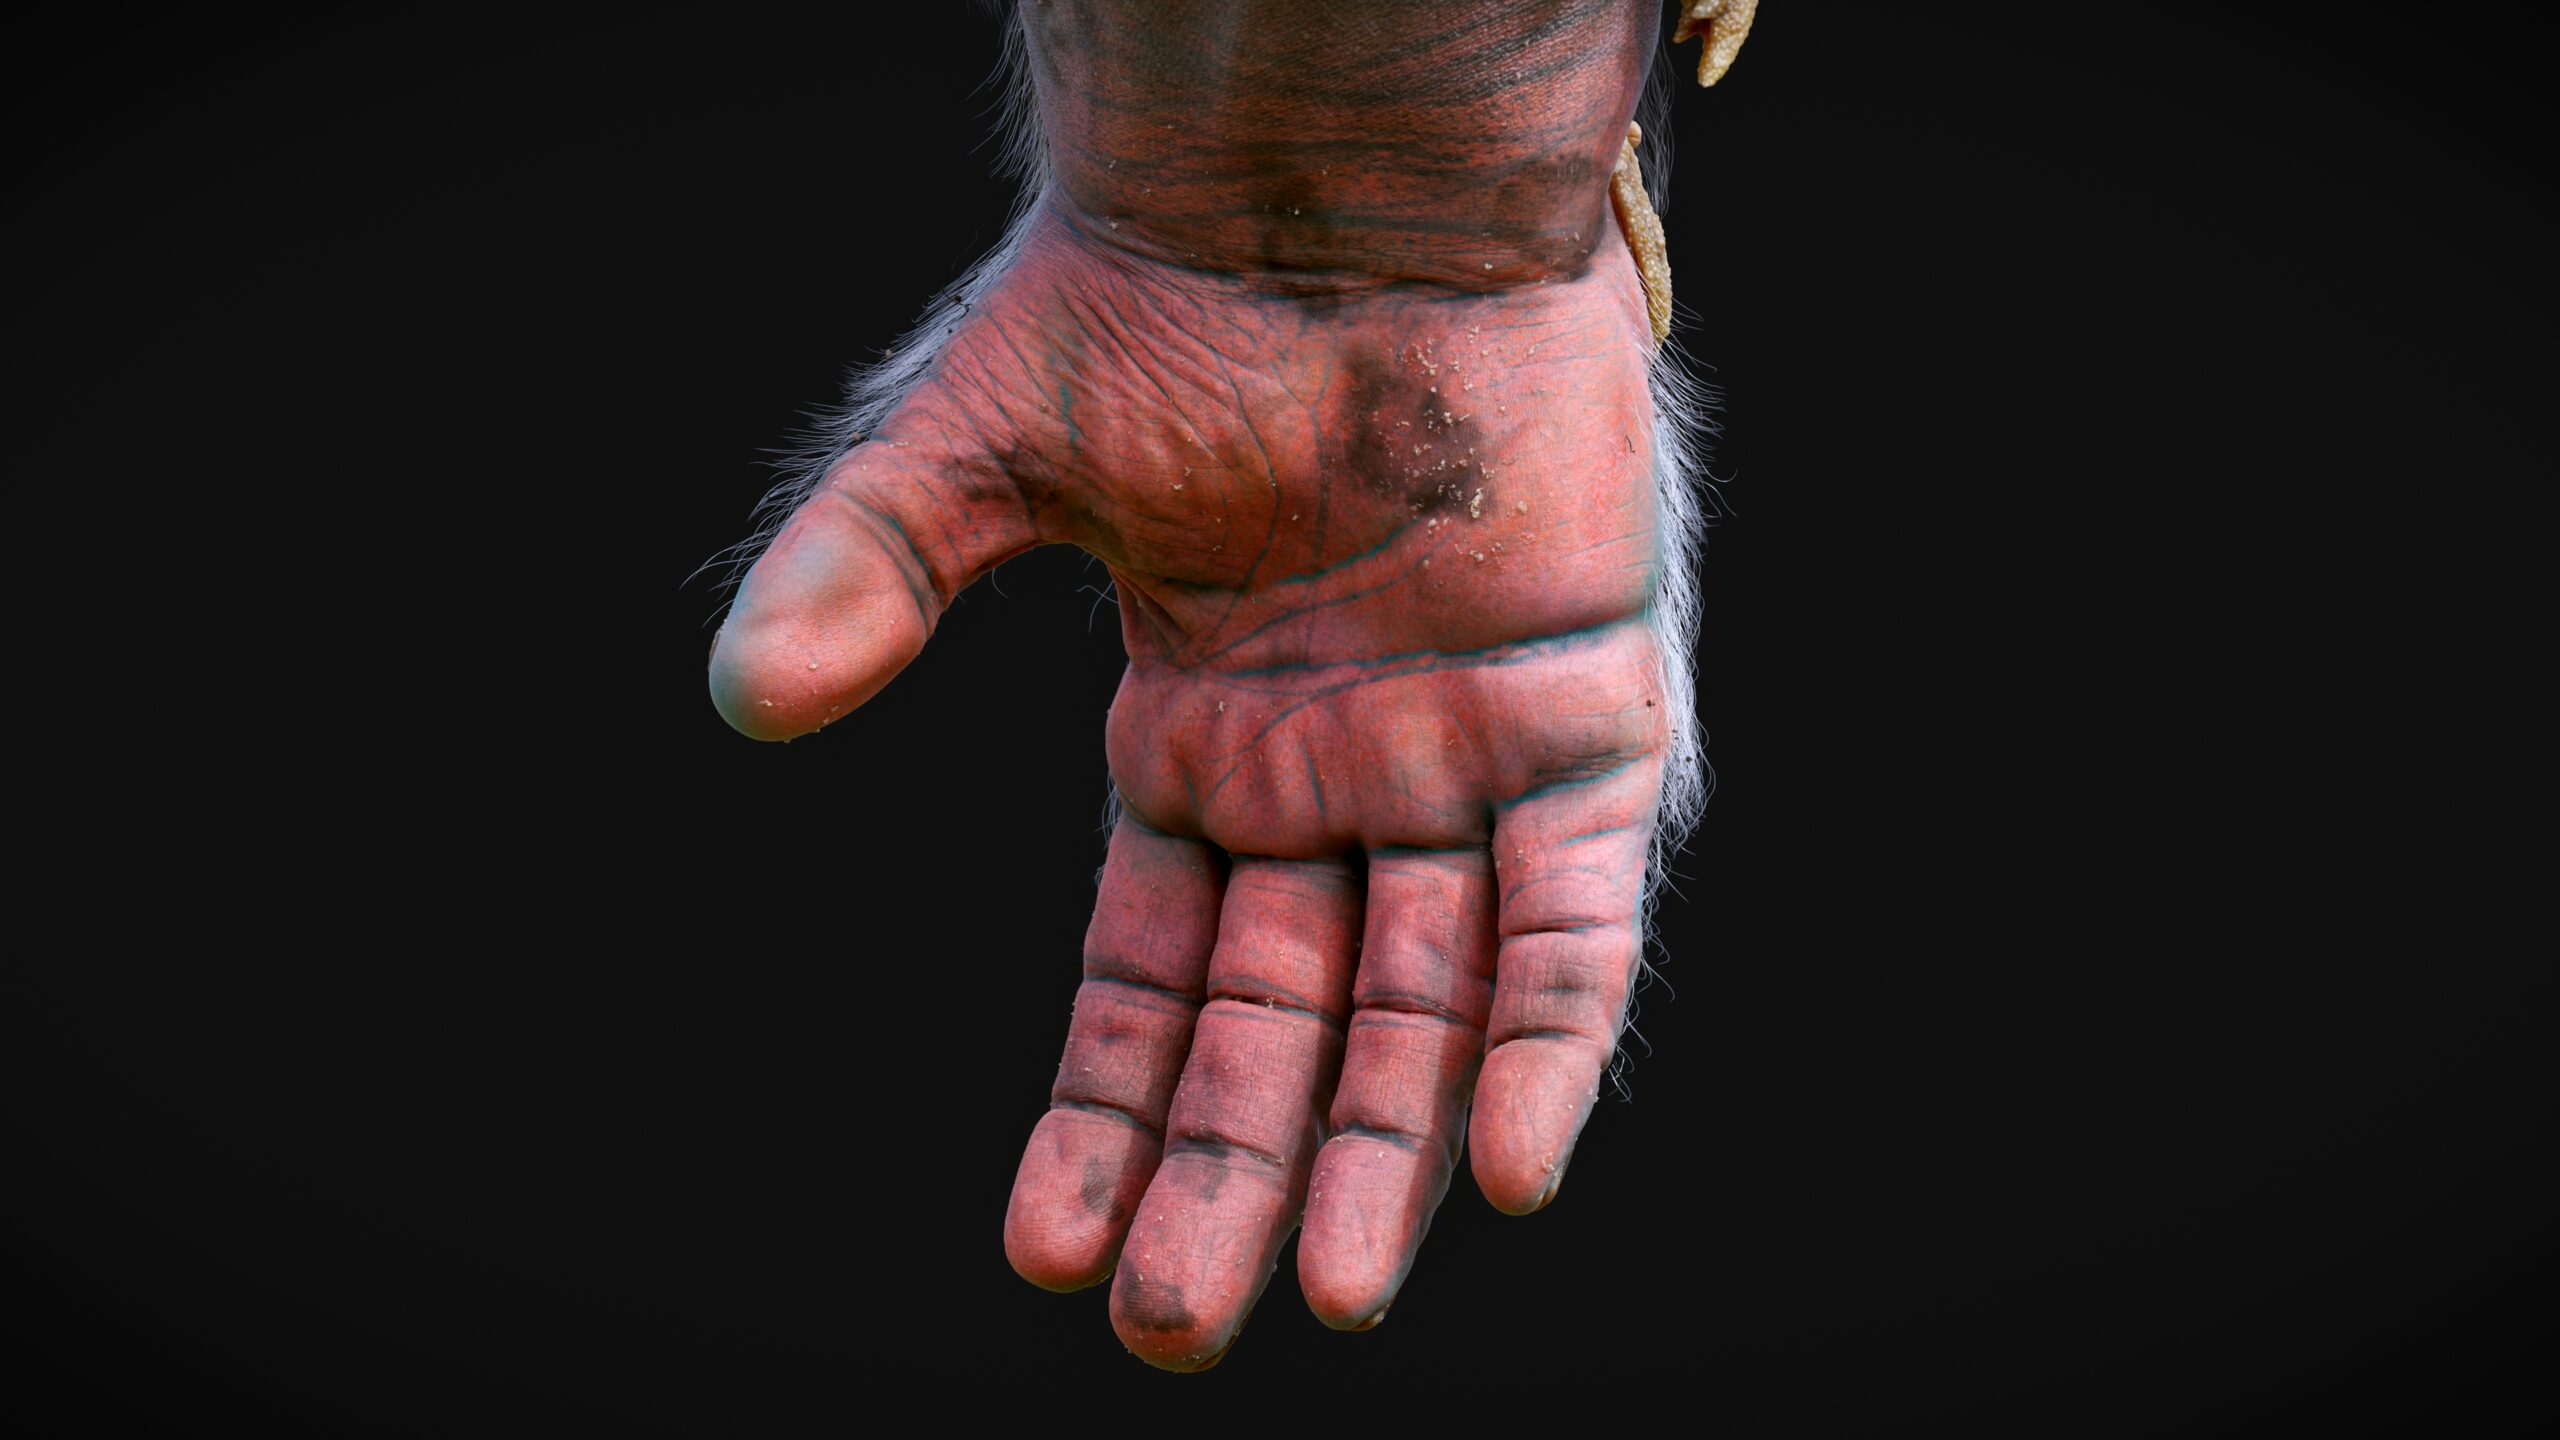
For Brad V2, the decision to increase the body UDIM tiles from 6 to 62 came with the understanding that I’d be repainting textures in Mari, a tool that eats hundreds of PBR maps for breakfast. With this pipeline, I chose to remove all tertiary skin and chitin details (pores, microwrinkles, etc.) from the sculpt and instead project them during texturing to be used in displacement and normal maps.
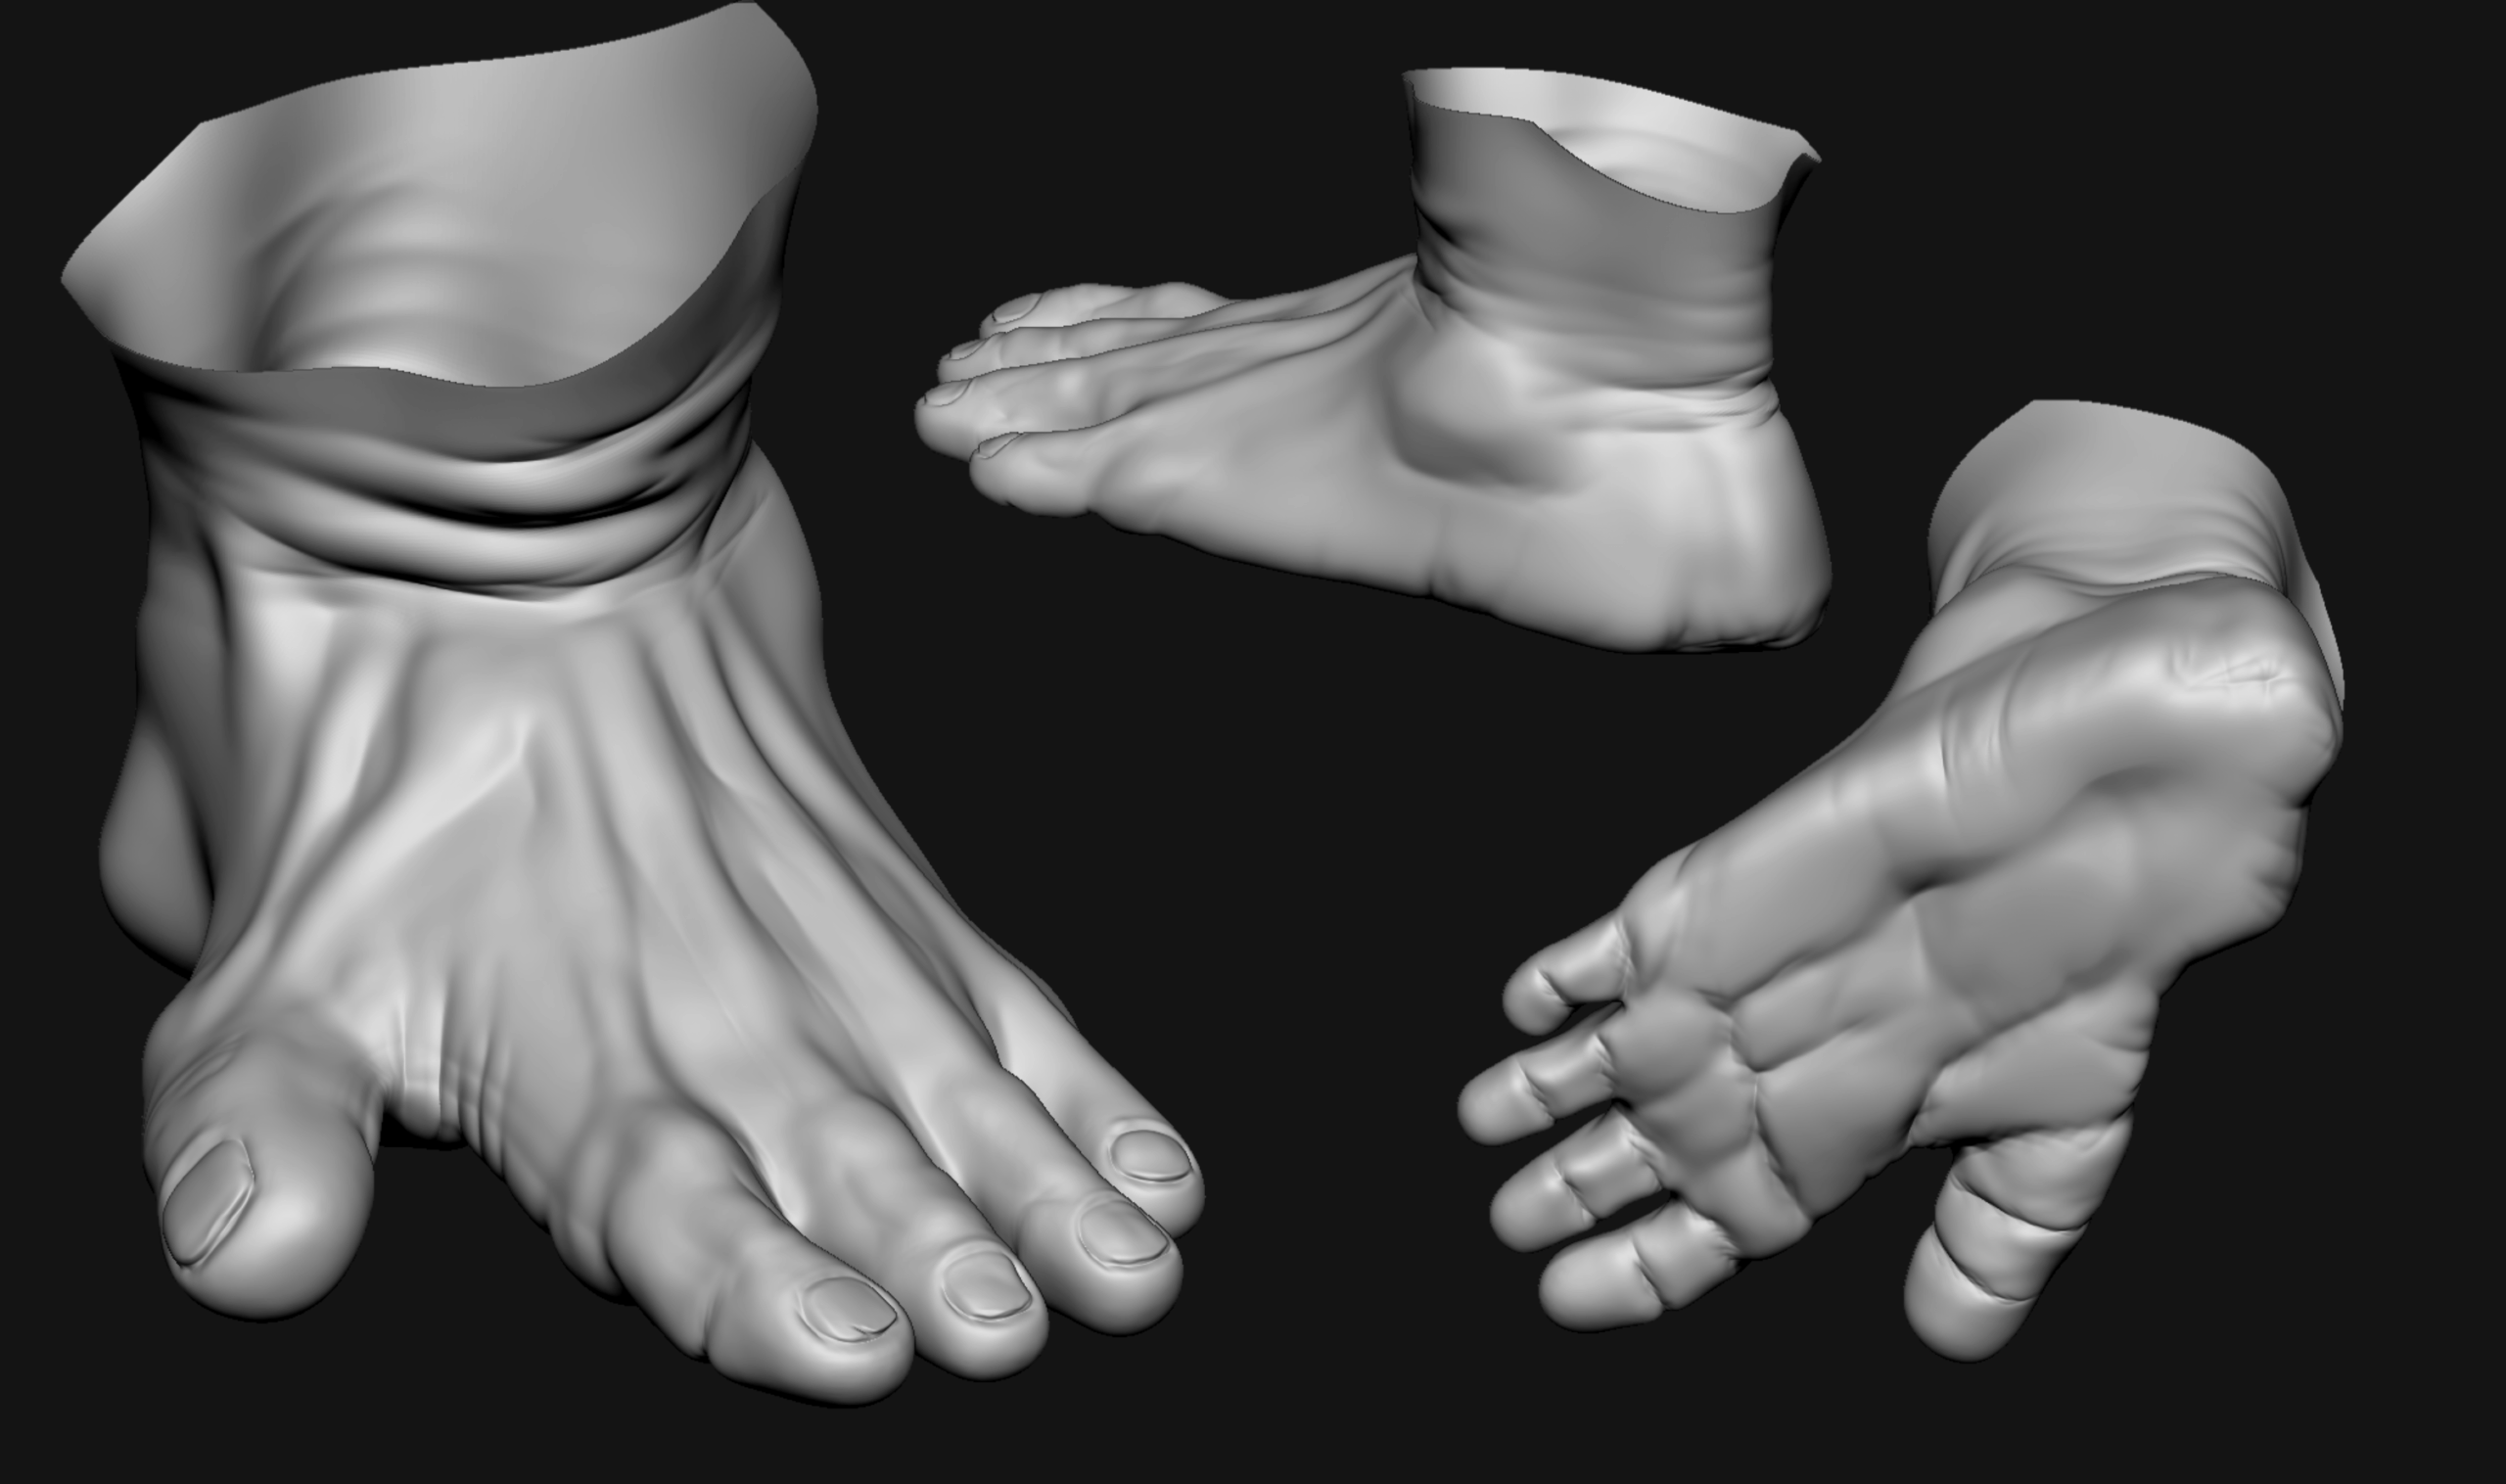
With texture images having such a higher resolution ceiling than that of polygons, it made sense to reserve these fine details for projection instead of sculpting and baking them. This idea is discussed in an interview with the talented Tom Newbury here. I utilized Houdini’s Topo Transfer node to transfer scans with ultra-high resolution skin maps from Texturing.xyz to Brad’s face and hands by baking inside Mari, then hand painted and projected more details and skin maps across the body.
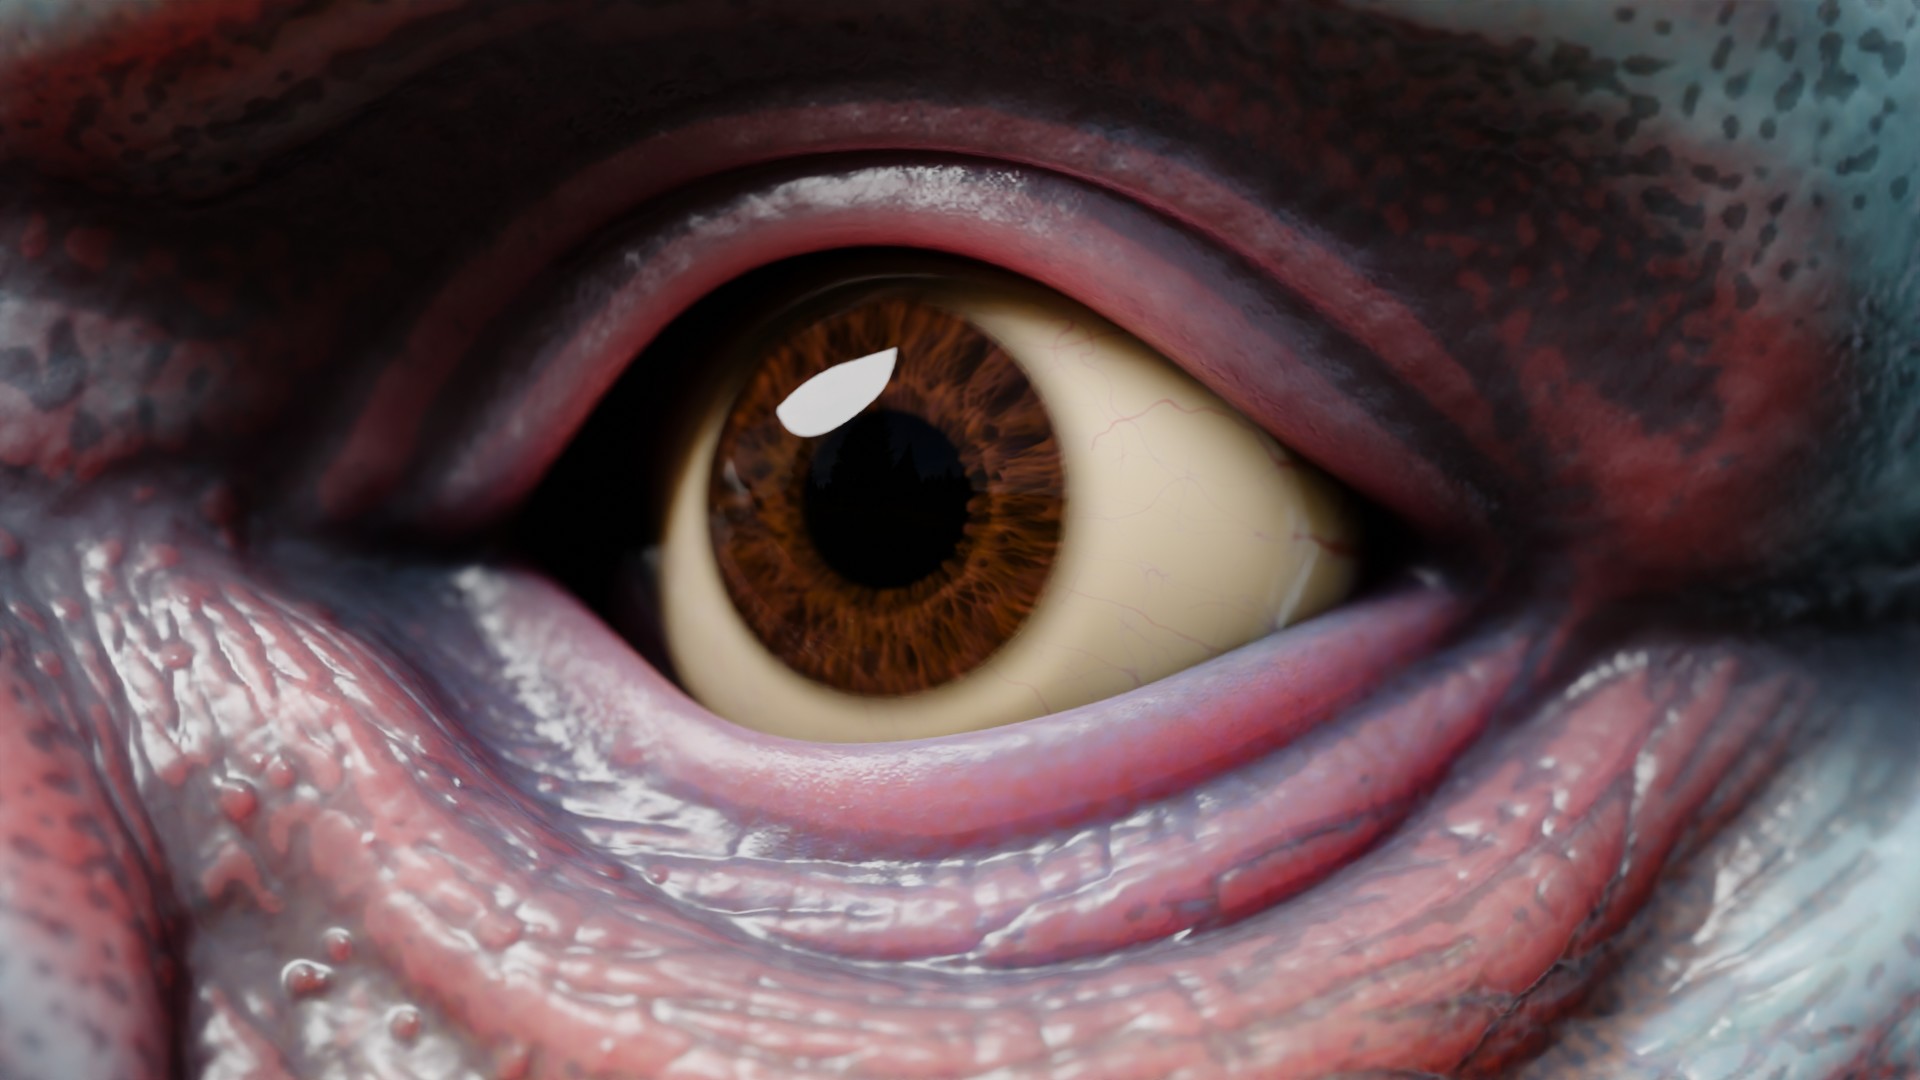
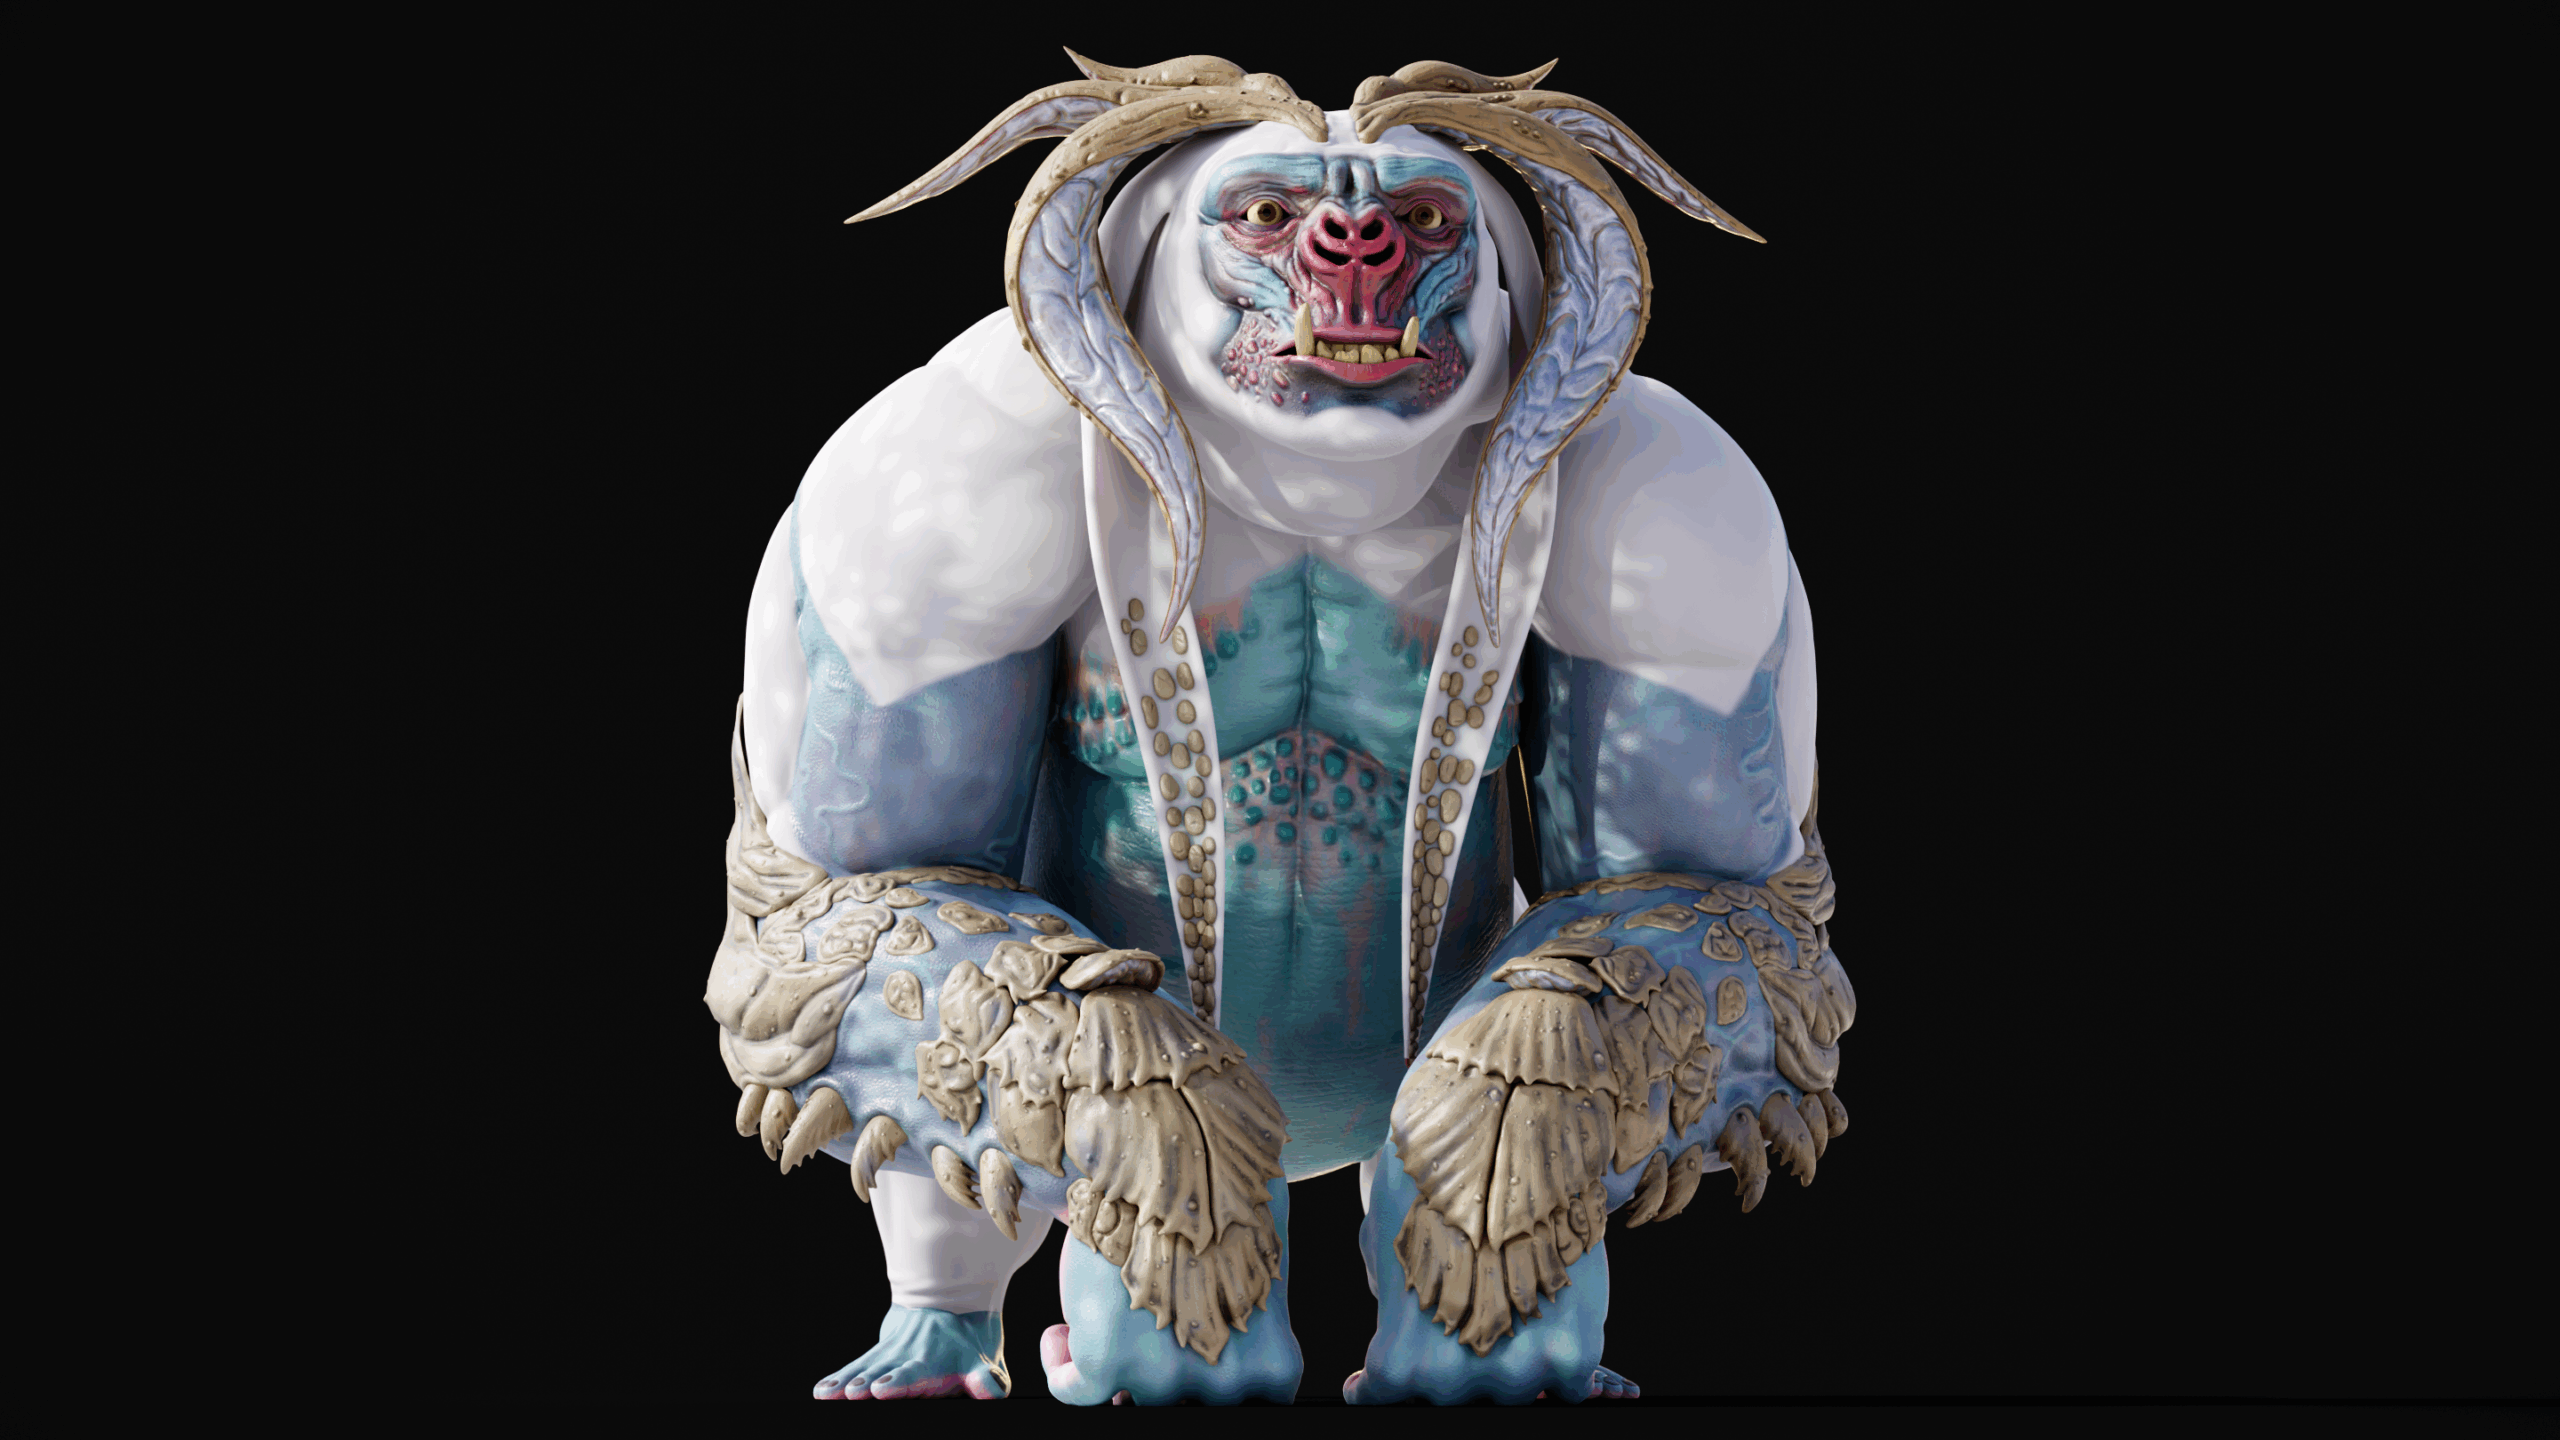
Days of painting and layering skin details, dirt, cracks, weathering, subsurface scattering variations, blemishes and veins resulted in a beautiful behemoth of a node graph describing Brad’s brand new gorgeous, elaborate skin and shell armor (another shoutout to Tom Newburry for the handy Mari PBR layering template). It felt amazing to paint individual microwrinkles under the eyes with nearly limitless resolution.

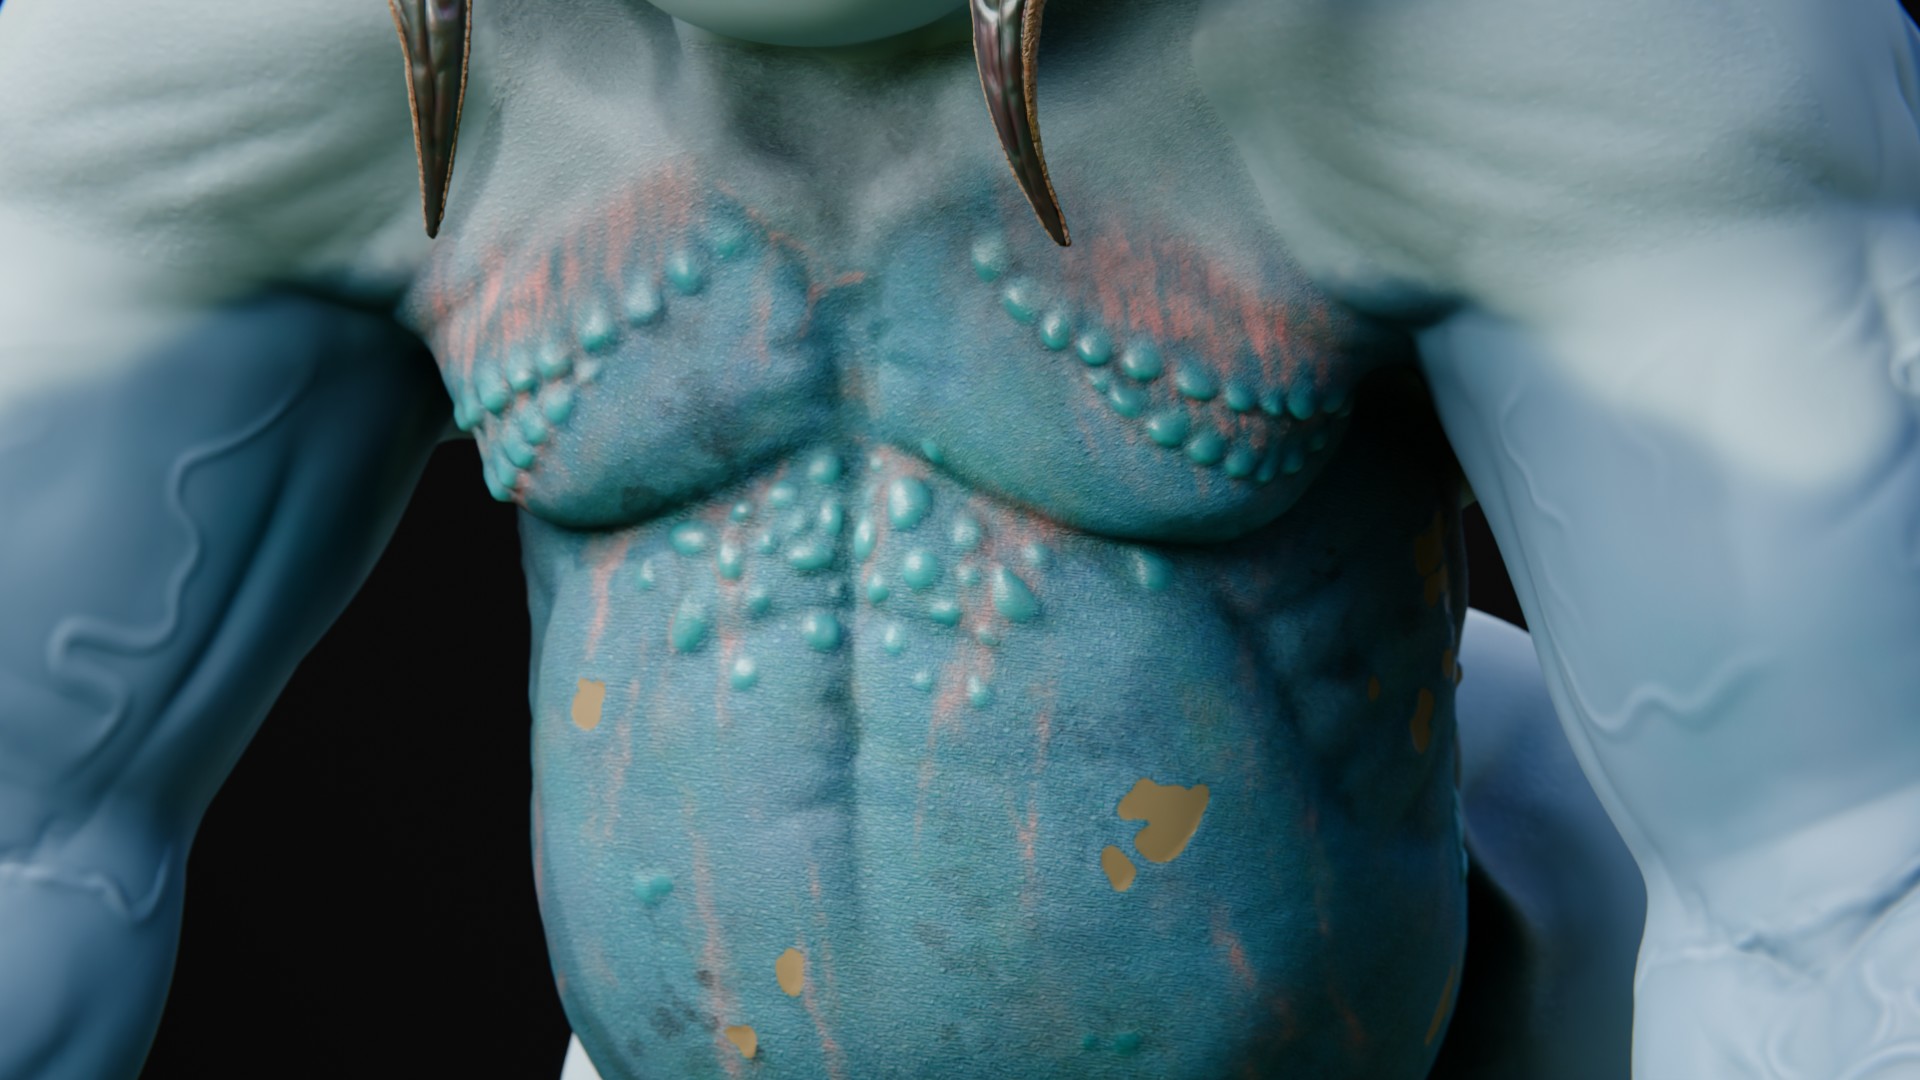
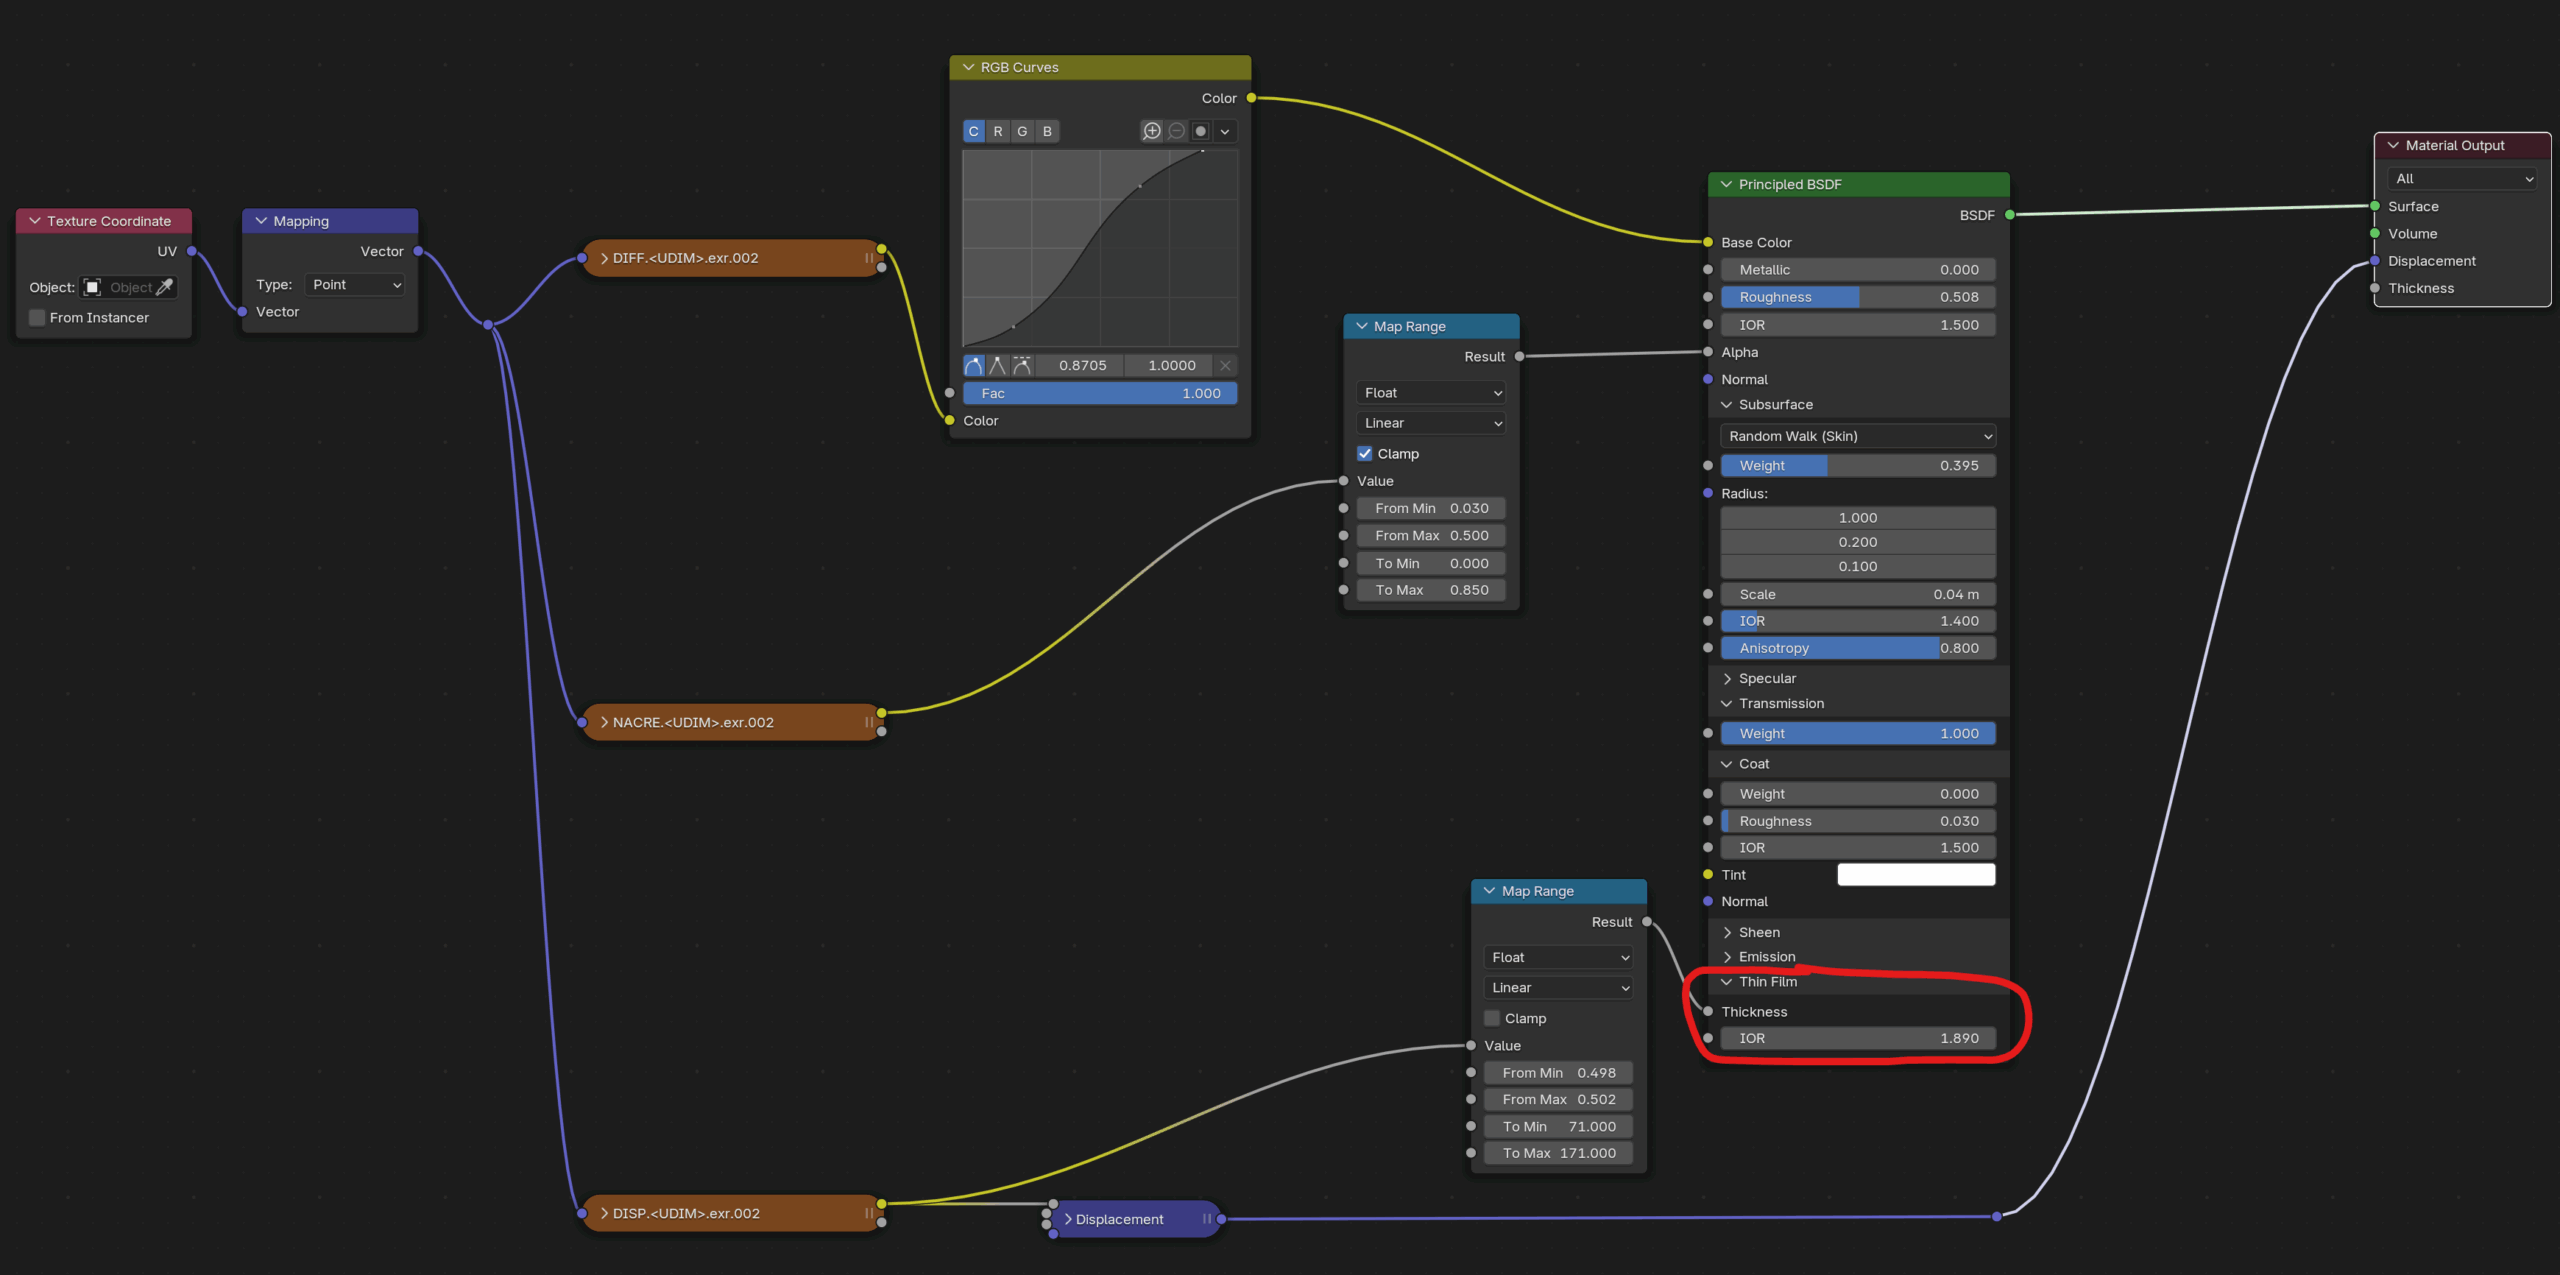
With respect to Brad’s surface shaders, my aim from the start was to maintain a simple material graph, relying on changes to the PBR maps themselves to tweak the look. In this way I could maintain a shader that could be easily ported to or rebuilt in any number of softwares and material systems. Aside from dialing in the subsurface scattering behavior, almost everything is handled by the maps rather than the nodes.

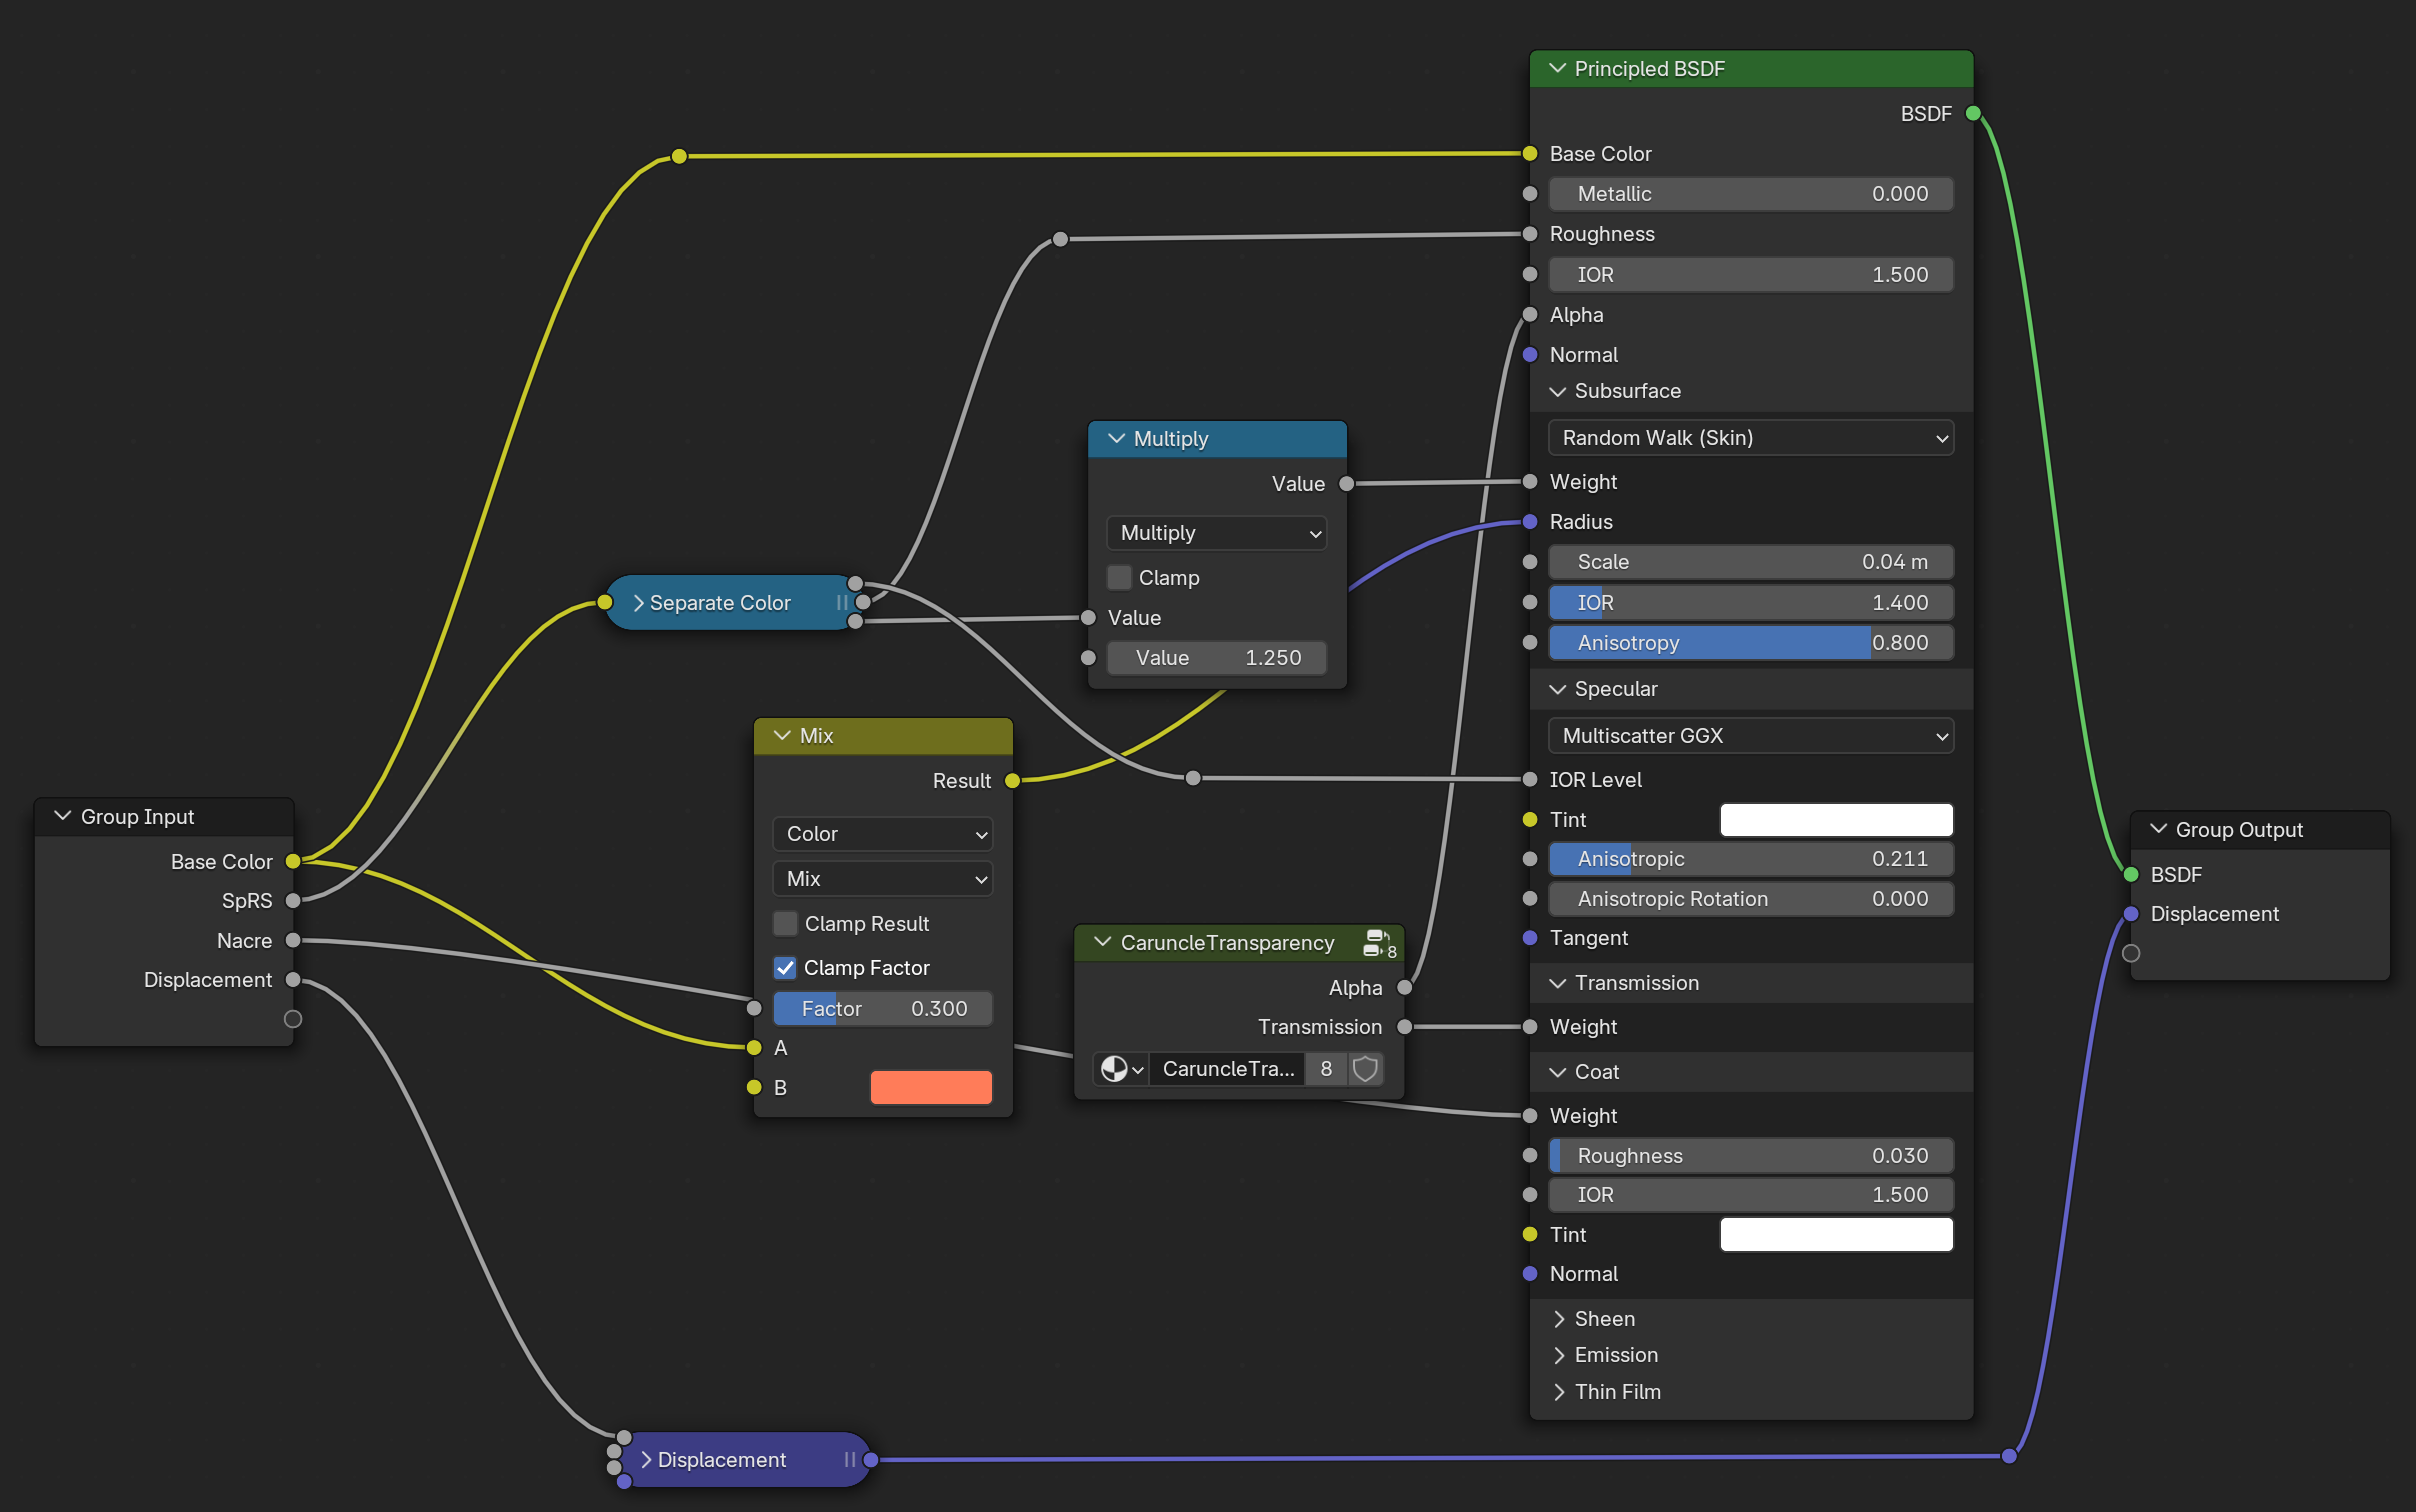
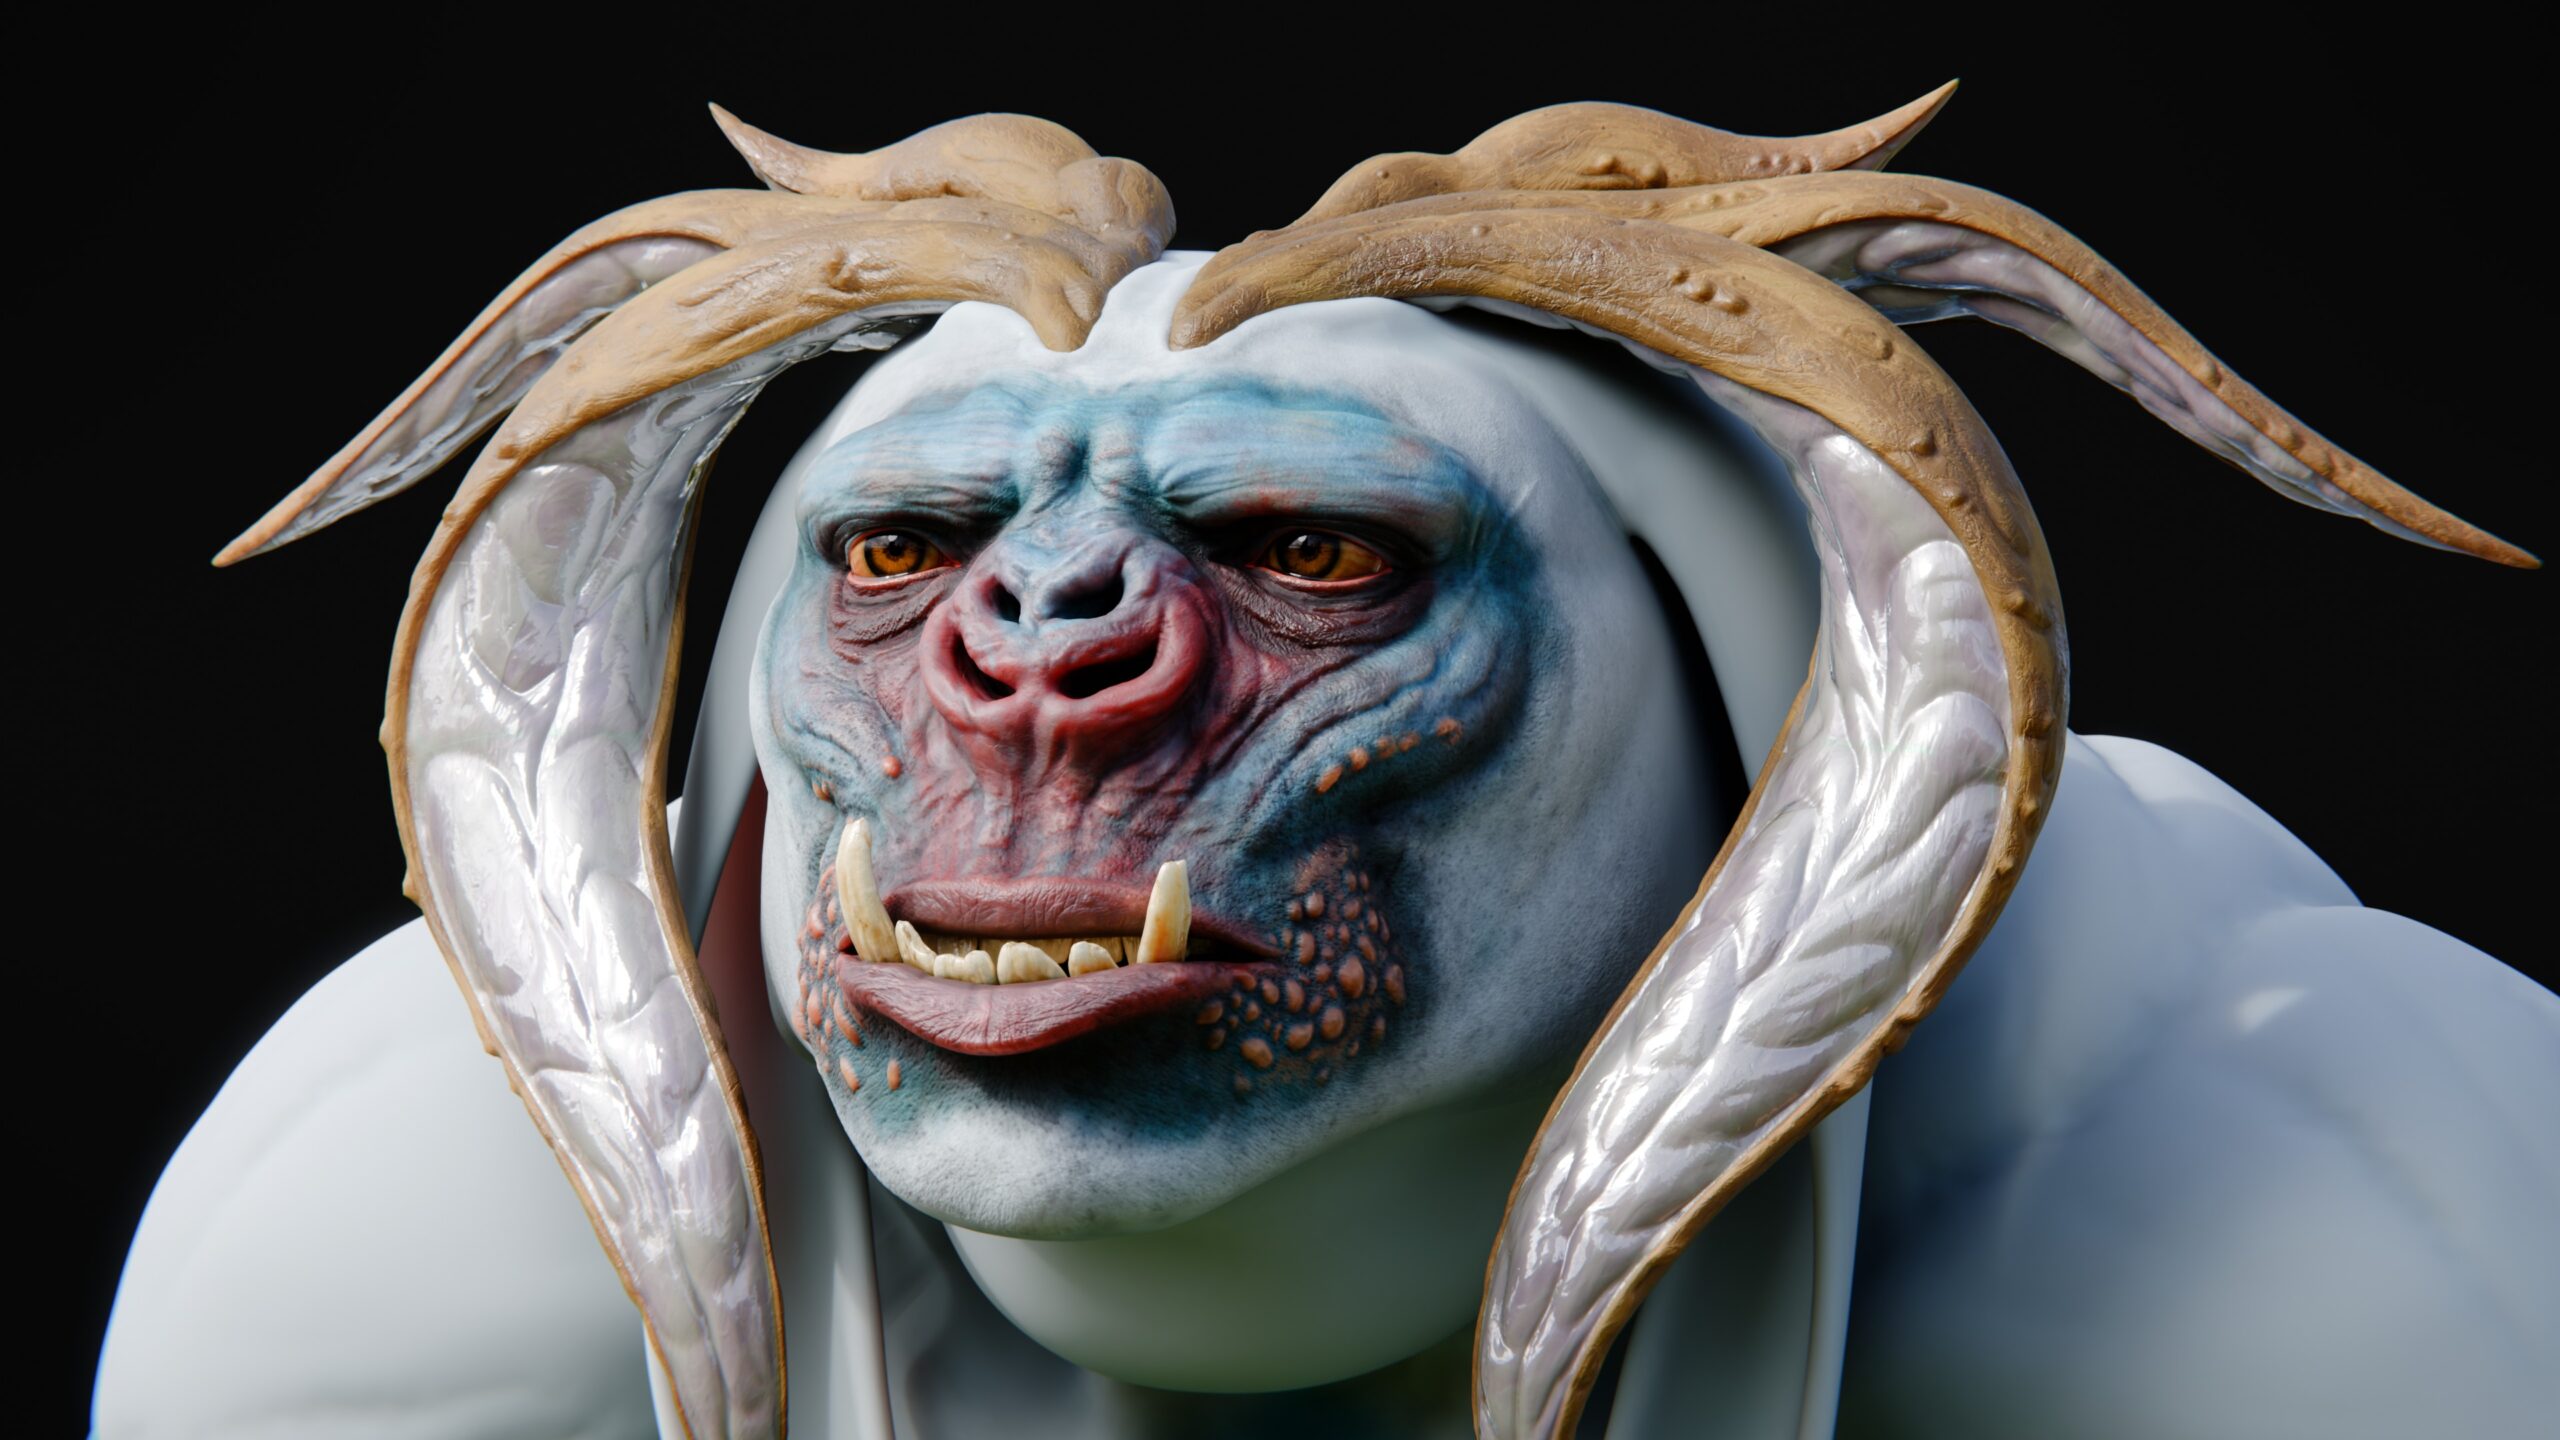
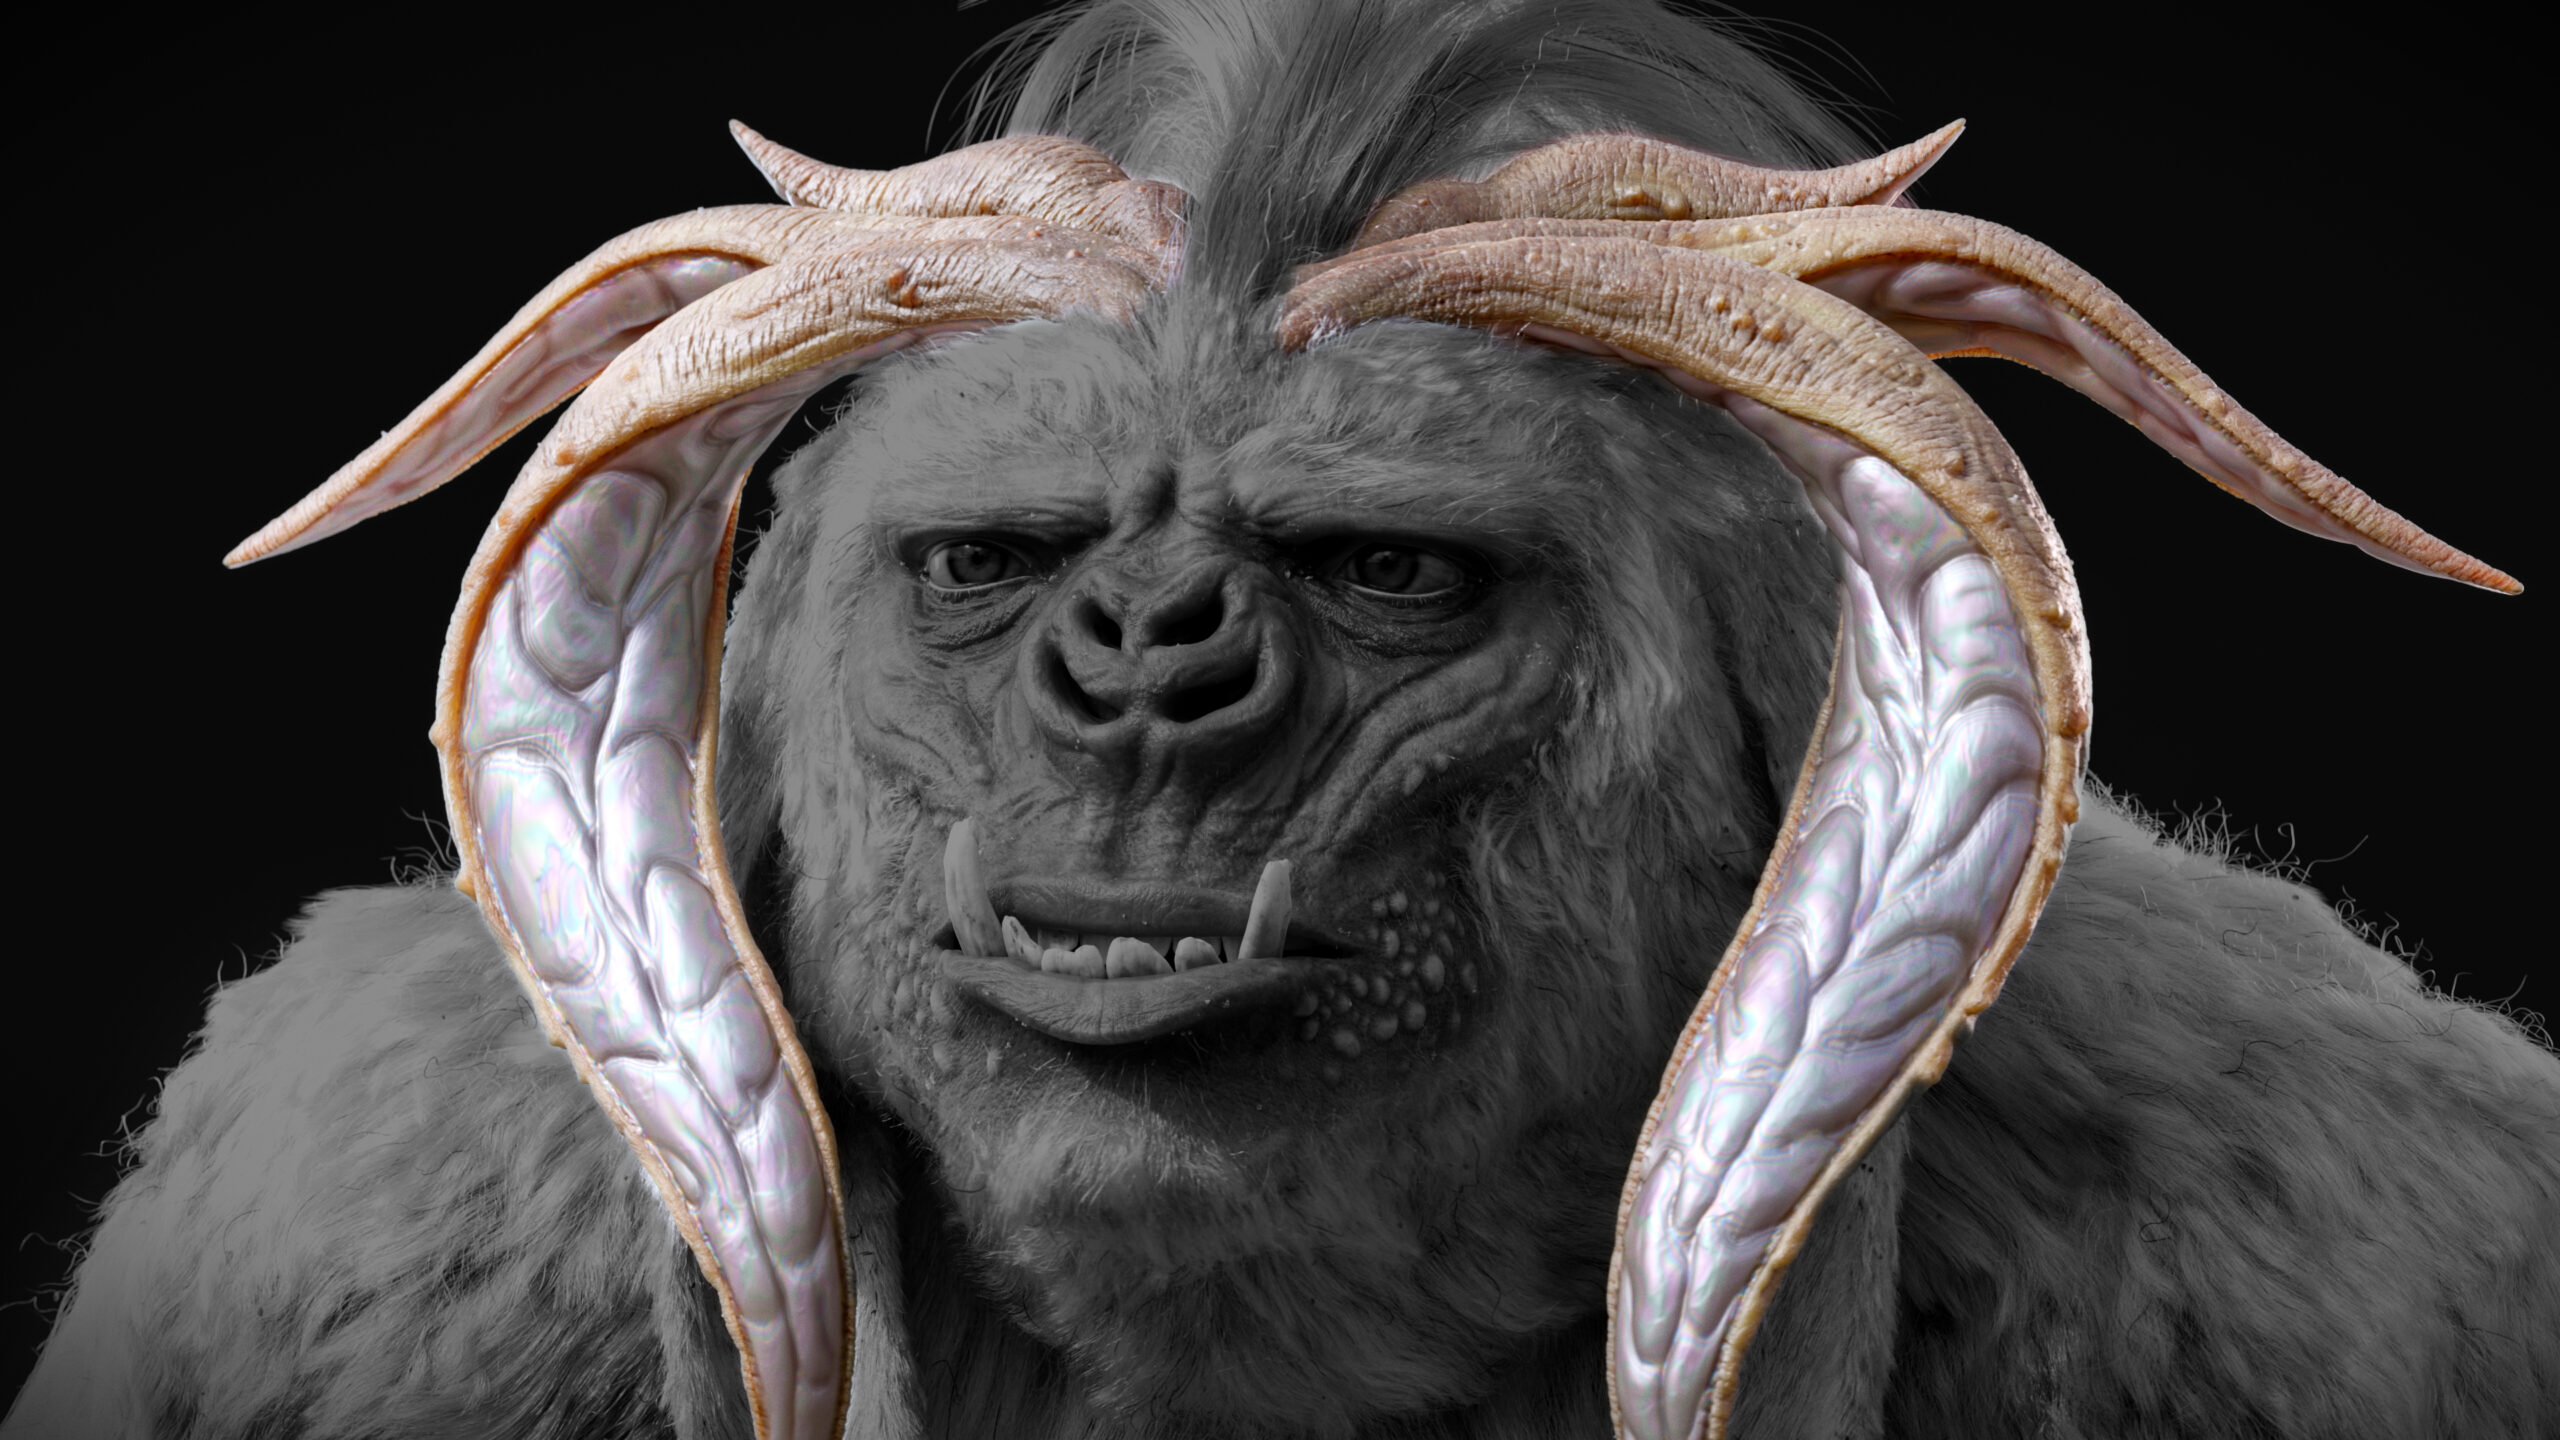
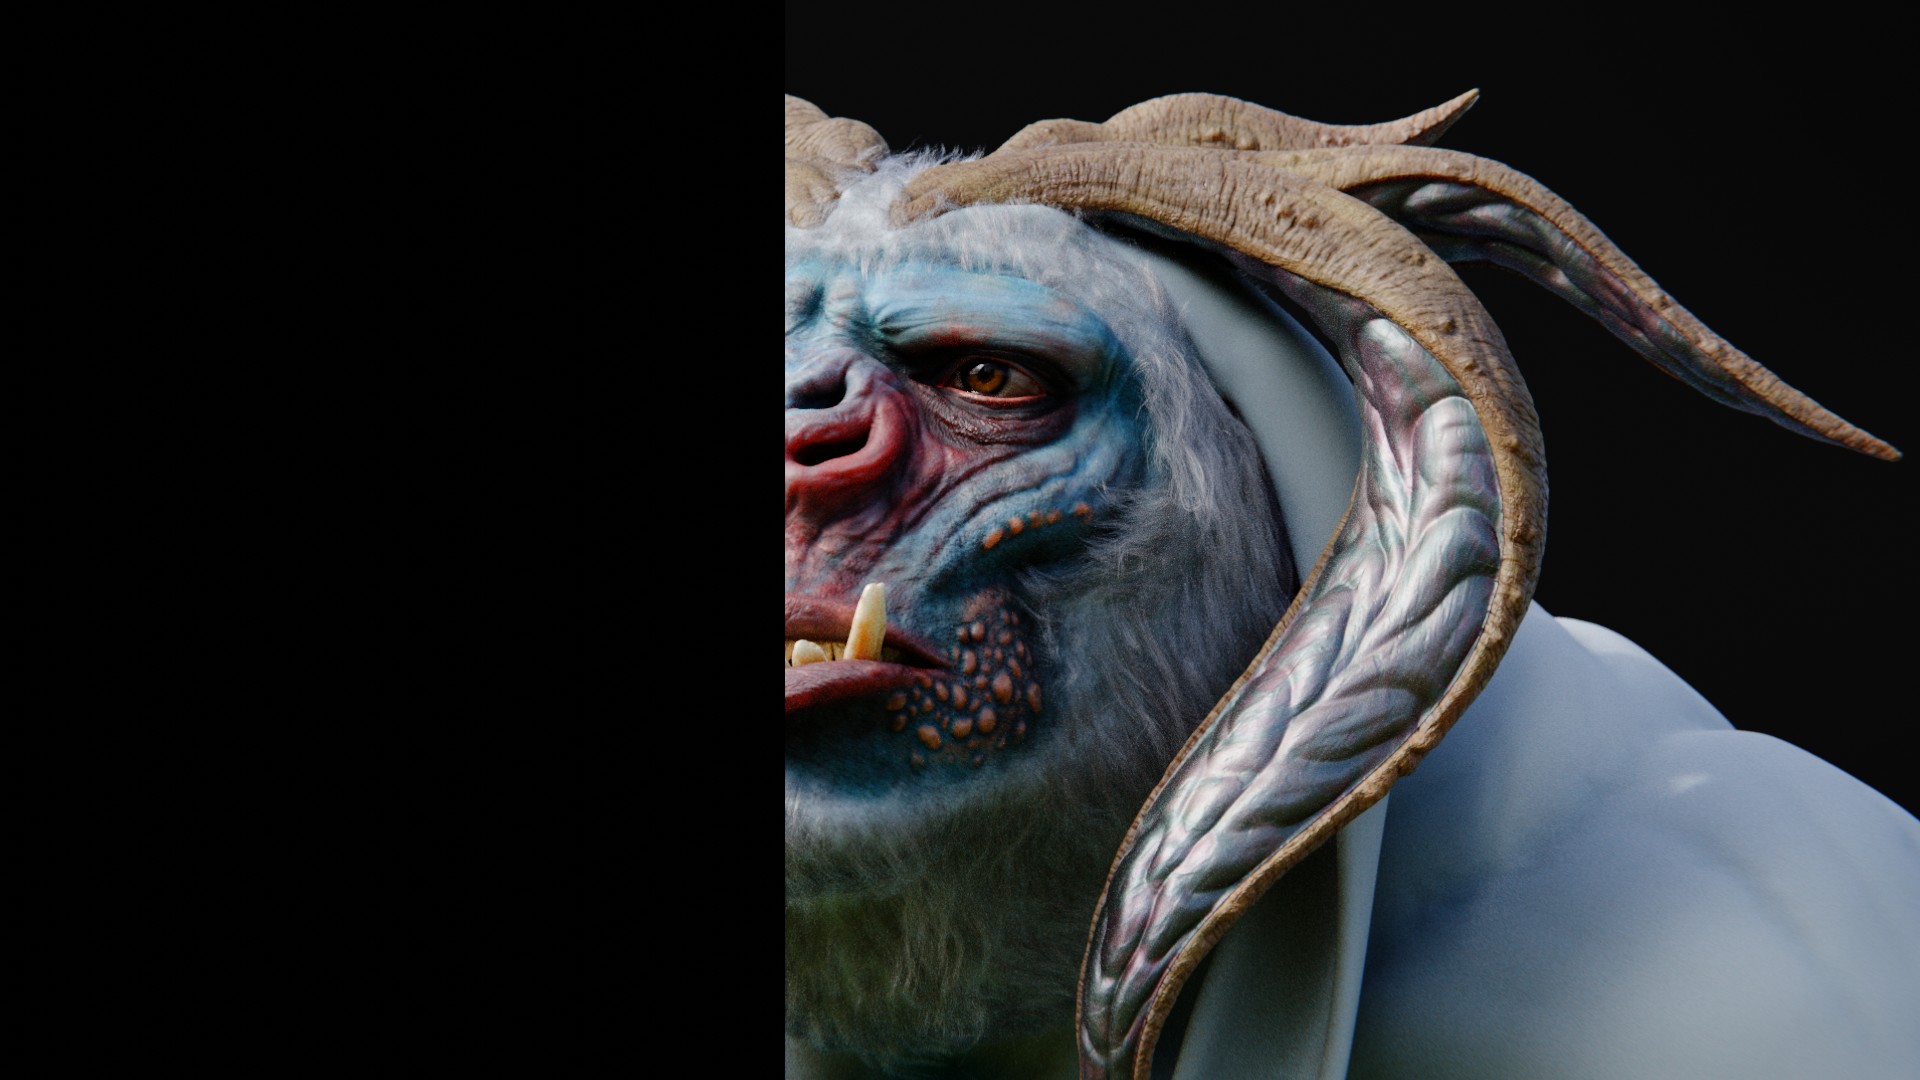
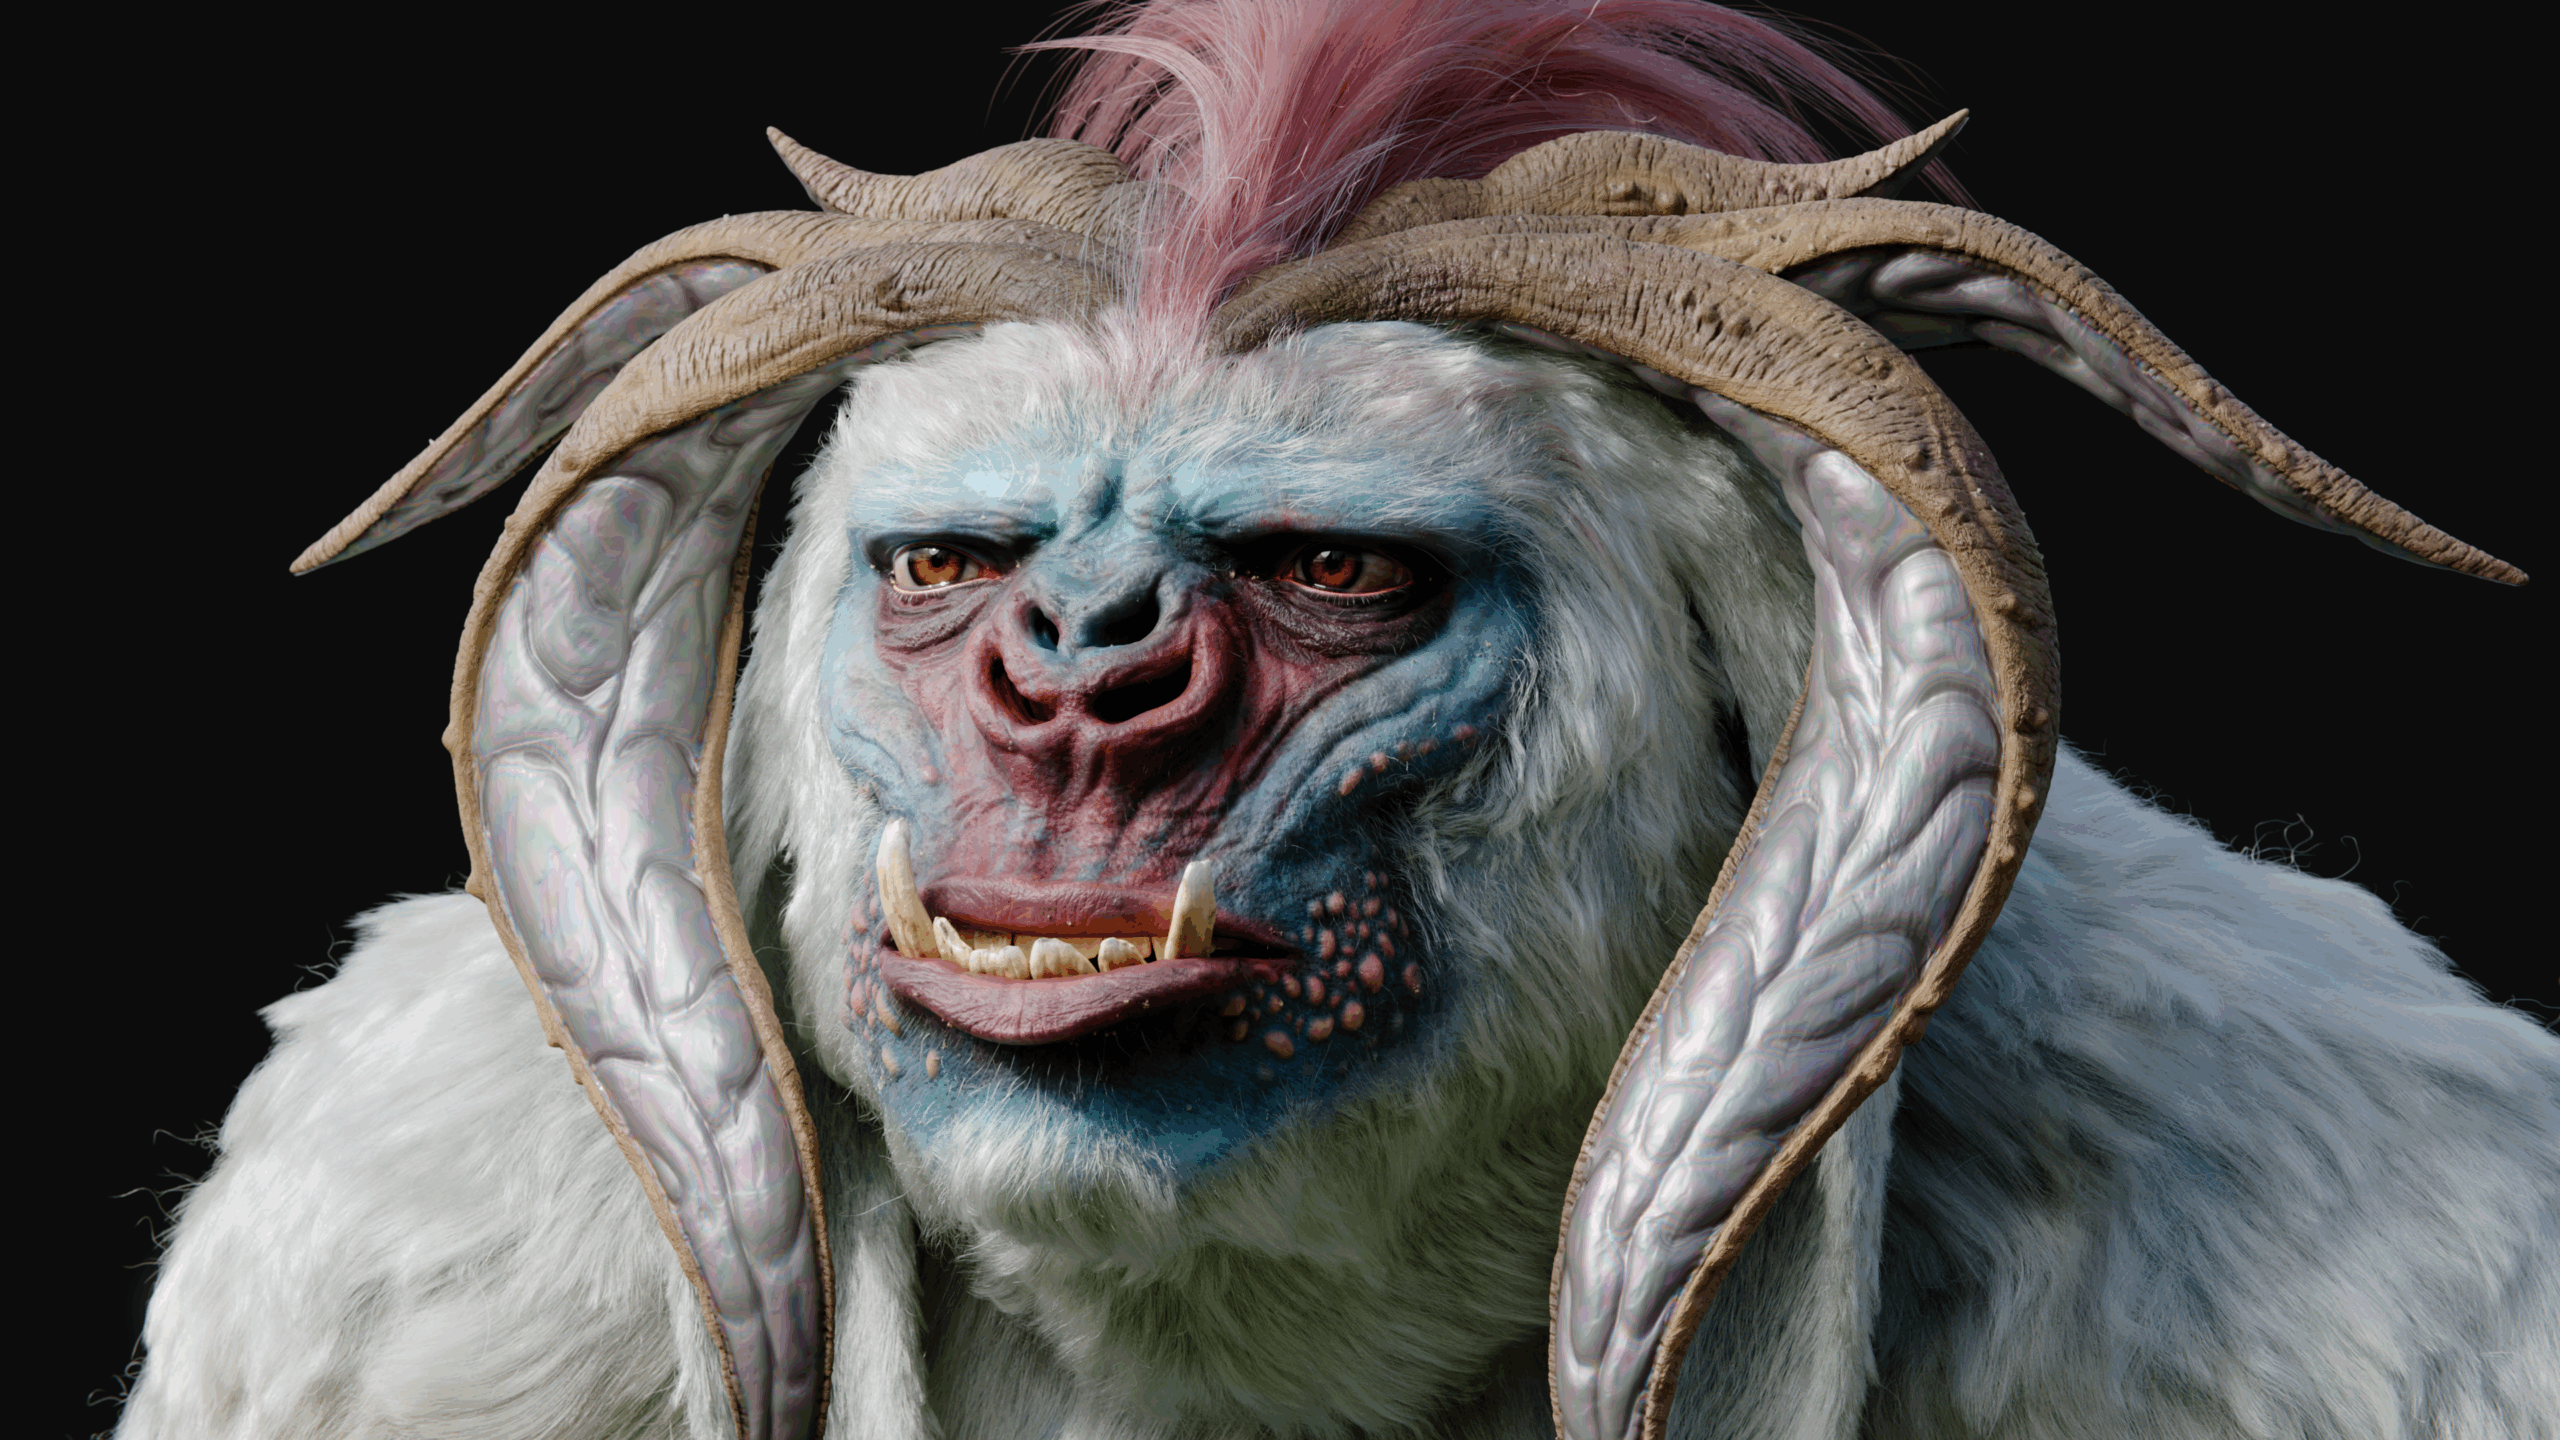
One exception was Brad’s horns, which featured a pearlescent nacre material similar to what is found on the inner layer of mollusk shells. In an attempt to simulate this, I used the thin film parameters on the latest version of the Cycles Principled BSDF in conjunction with masks and duplicate thick geometry. This helps achieve that dynamic rainbow pattern that you see on things like oily puddles. The result is decent, but with the current thin film implementation not realistically handling material layers and interfaces, I’d love to revisit the solution at some point.
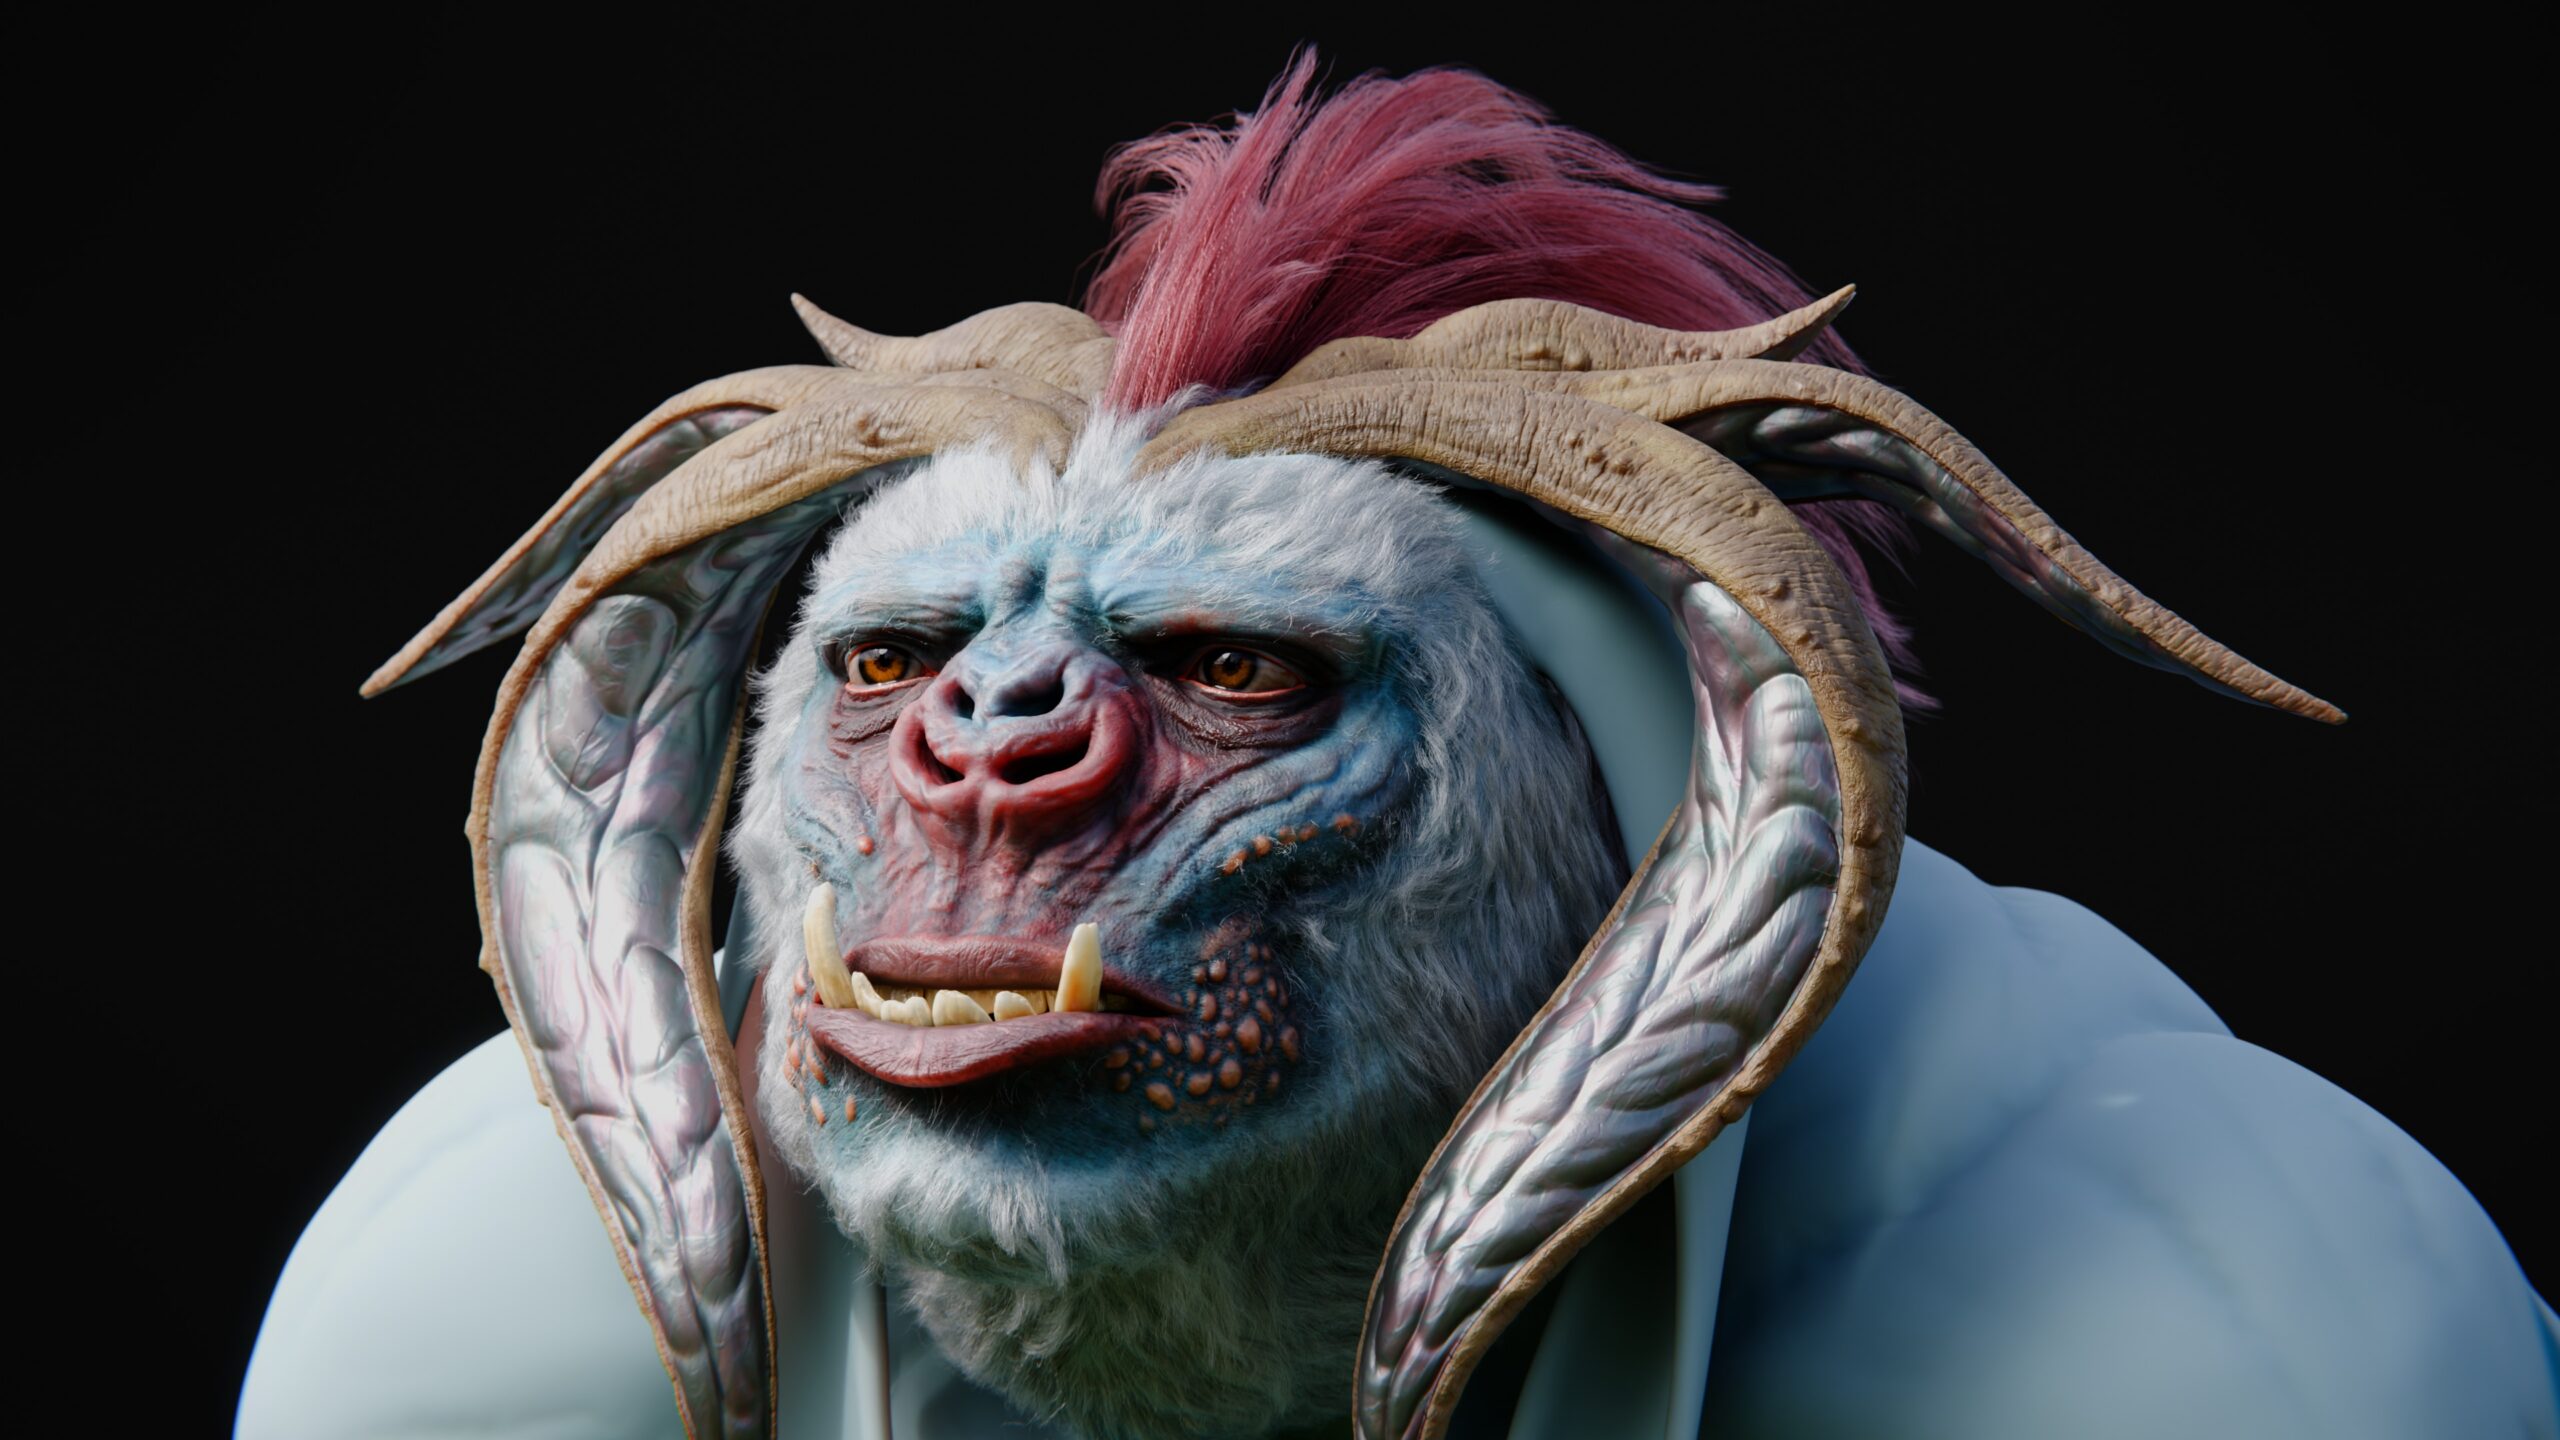
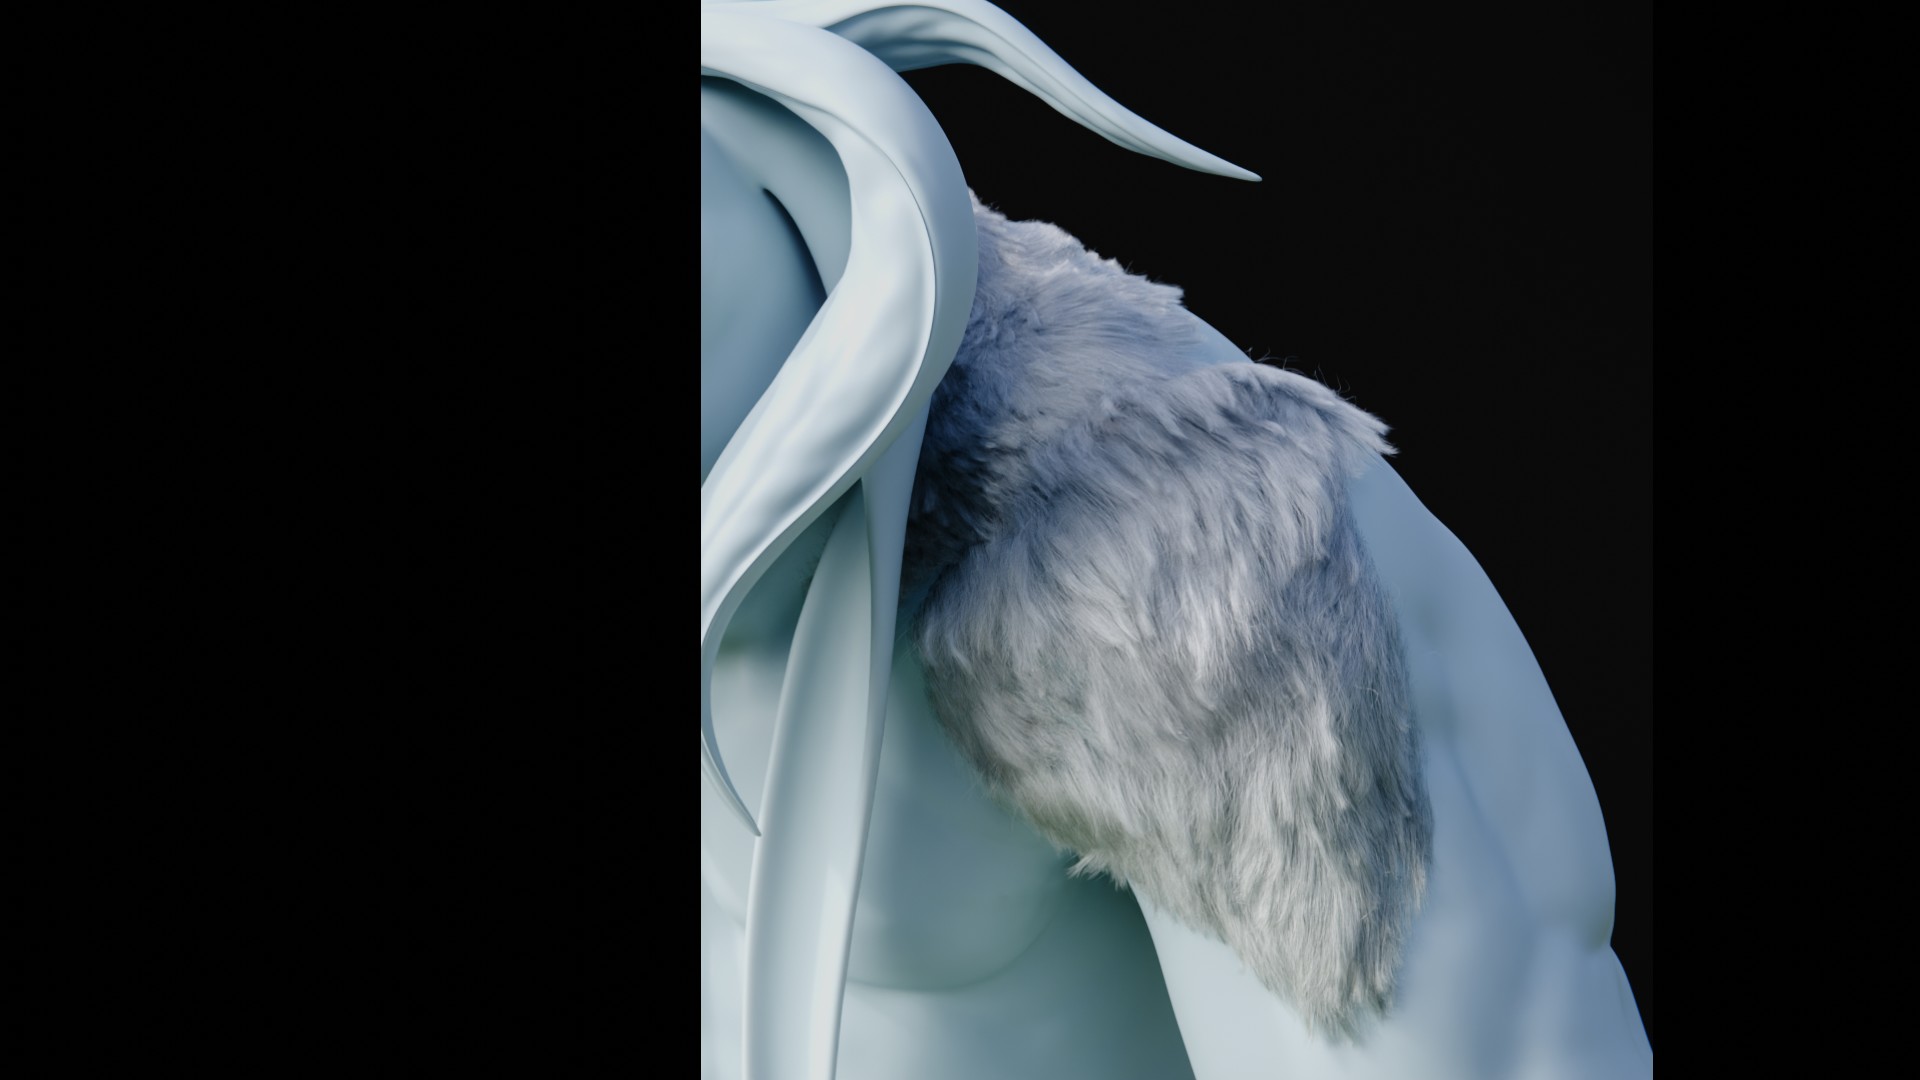
Groom
Let’s face it, Brad’s a hairy guy. It was important to me to give his 3D groom the attention it deserves; to make sure it paralleled the appeal of his skin and armor shading. But looks aside, 3D grooms pose one of the bigger technical challenges of the character pipeline, especially in their interoperability across DCCs and renderers.
Conflicting priorities of remaining USD friendly but benchmarking renders in Blender Cycles meant making compromises, and I ended up staying inside Blender for the groom process as opposed to utilizing Houdini’s groom tools or Ornatrix, which would help bring groom procedurals to USD rather than settling for Alembic guide hairs as the available export option.
In the end, it seems to me there are a lot of kinks still yet to be worked out with a USD-based groom pipeline with procedurals and simulation, which also seemed needlessly daunting as an artist working solo on a single asset, so I opted to remain Cycles-friendly for the time being.
When creating Brad V1 in 2022, the available goom option in Blender was its hair particle system. It provided basic tools for placing and combing guide hairs, built-in parameters for simple procedurals like clumping and length/density variation, and out-of-the-box hair simulation. However, it was (and still is) quite lacking in all three of these areas.

Limited customization of procedurals, inability to relay groom attributes to the shading network, and slow, inaccurate physics of the old particle hair system severely held back my first pass of Brad’s coat. This made Blender’s new Geometry Nodes hair curves look appealing, especially as their feature set improved drastically around 2023/2024. I had been testing the new system as it was developed, and loved the power and control it delivered by being built on top of Geometry Nodes. By the time Brad was ready for his CFX rework, the new hair curves had some handy built in procedurals and dedicated nodes and I was ready to fully dive in.
For the most part, building the new groom in GeoNodes curves was a dream. Placing and combing guides is fairly straightforward, with the main hiccup being mediocre hair-surface deflection. I was able to design a complex system of procedurals using both pre-built groups for simple effects and hand-made node groups for others like a custom texture-based hair parting system, attribute transfer from GeoNodes to shading for things like dark stray hairs, and versatile parameter instancing inspired by a technique from Erindale Woodford.
Another big kudos must be given to Stefan Mayr of Framestore for his excellent videos walking through handy customizations of some default Blender groom procedurals. I ended up with a 7 million-hair groom, which I managed by splitting it up into multiple systems and previewing final density using mask-based culling.
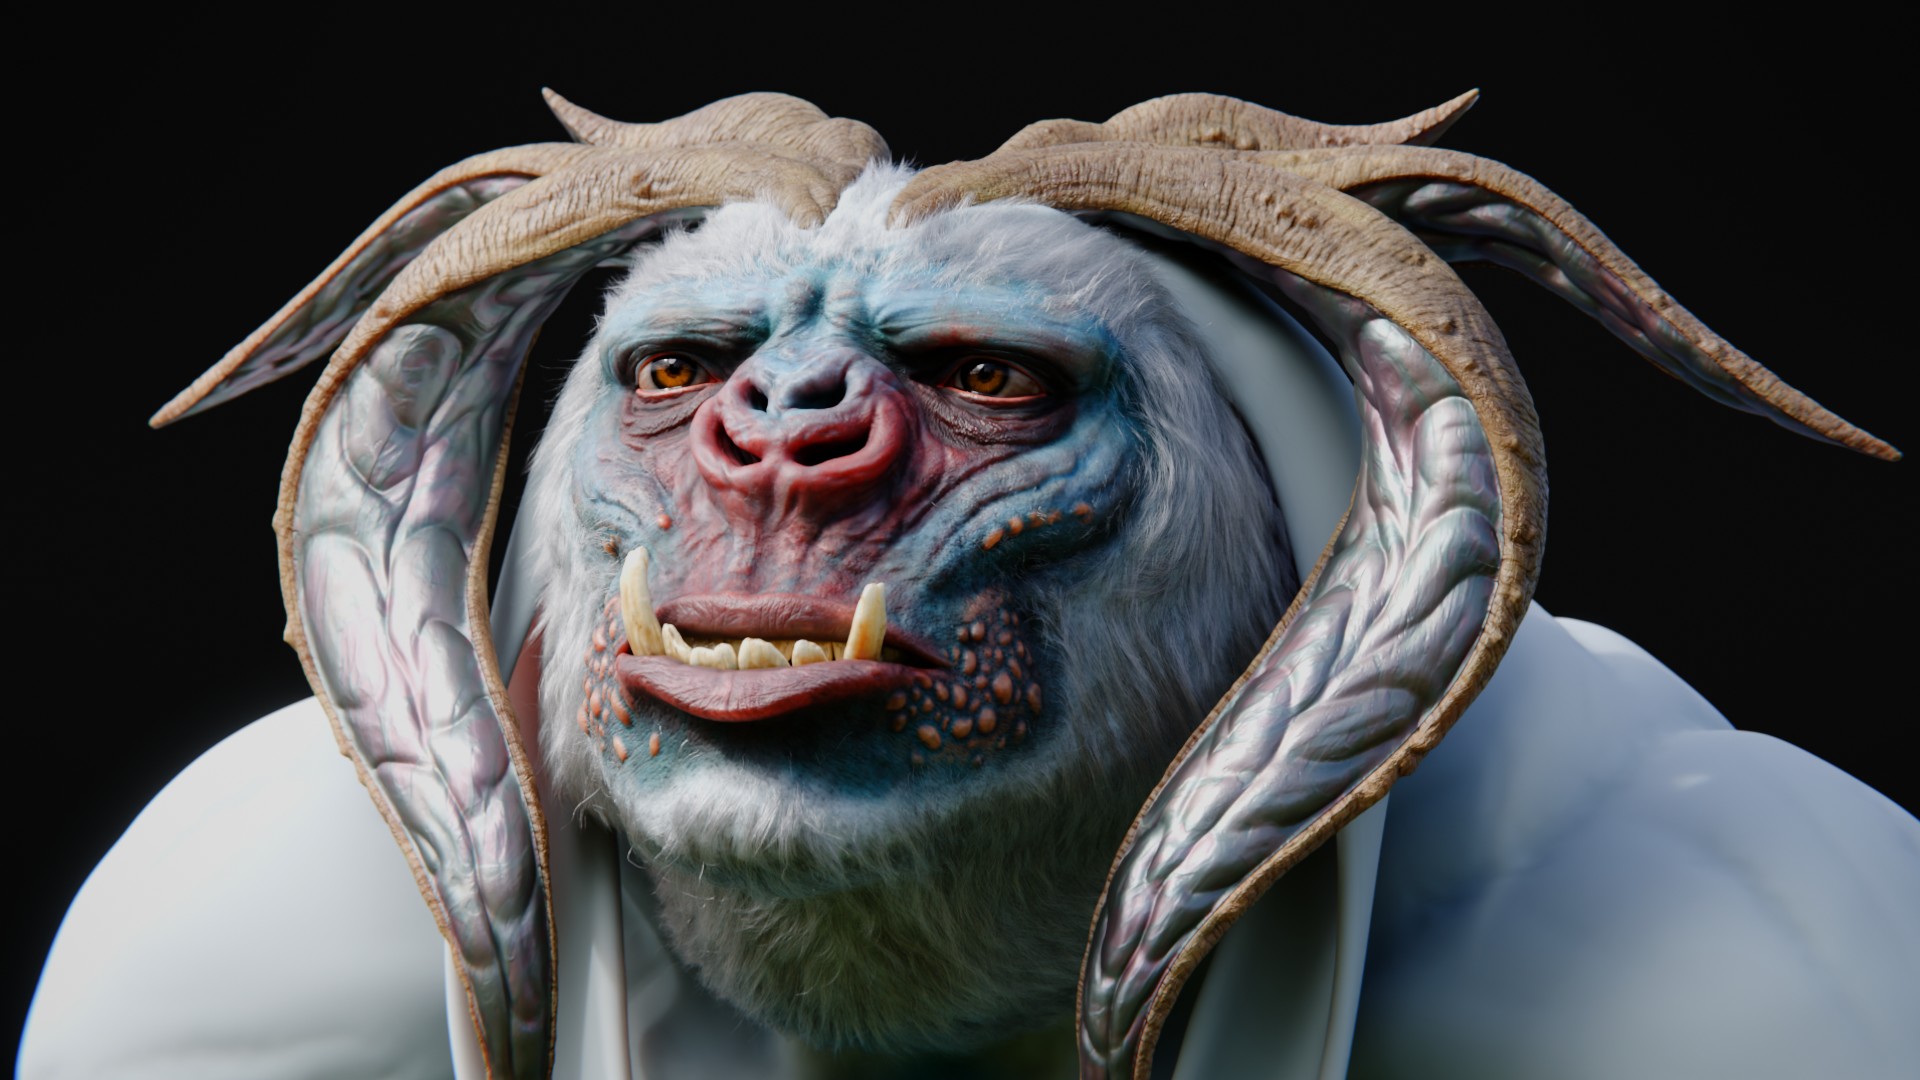

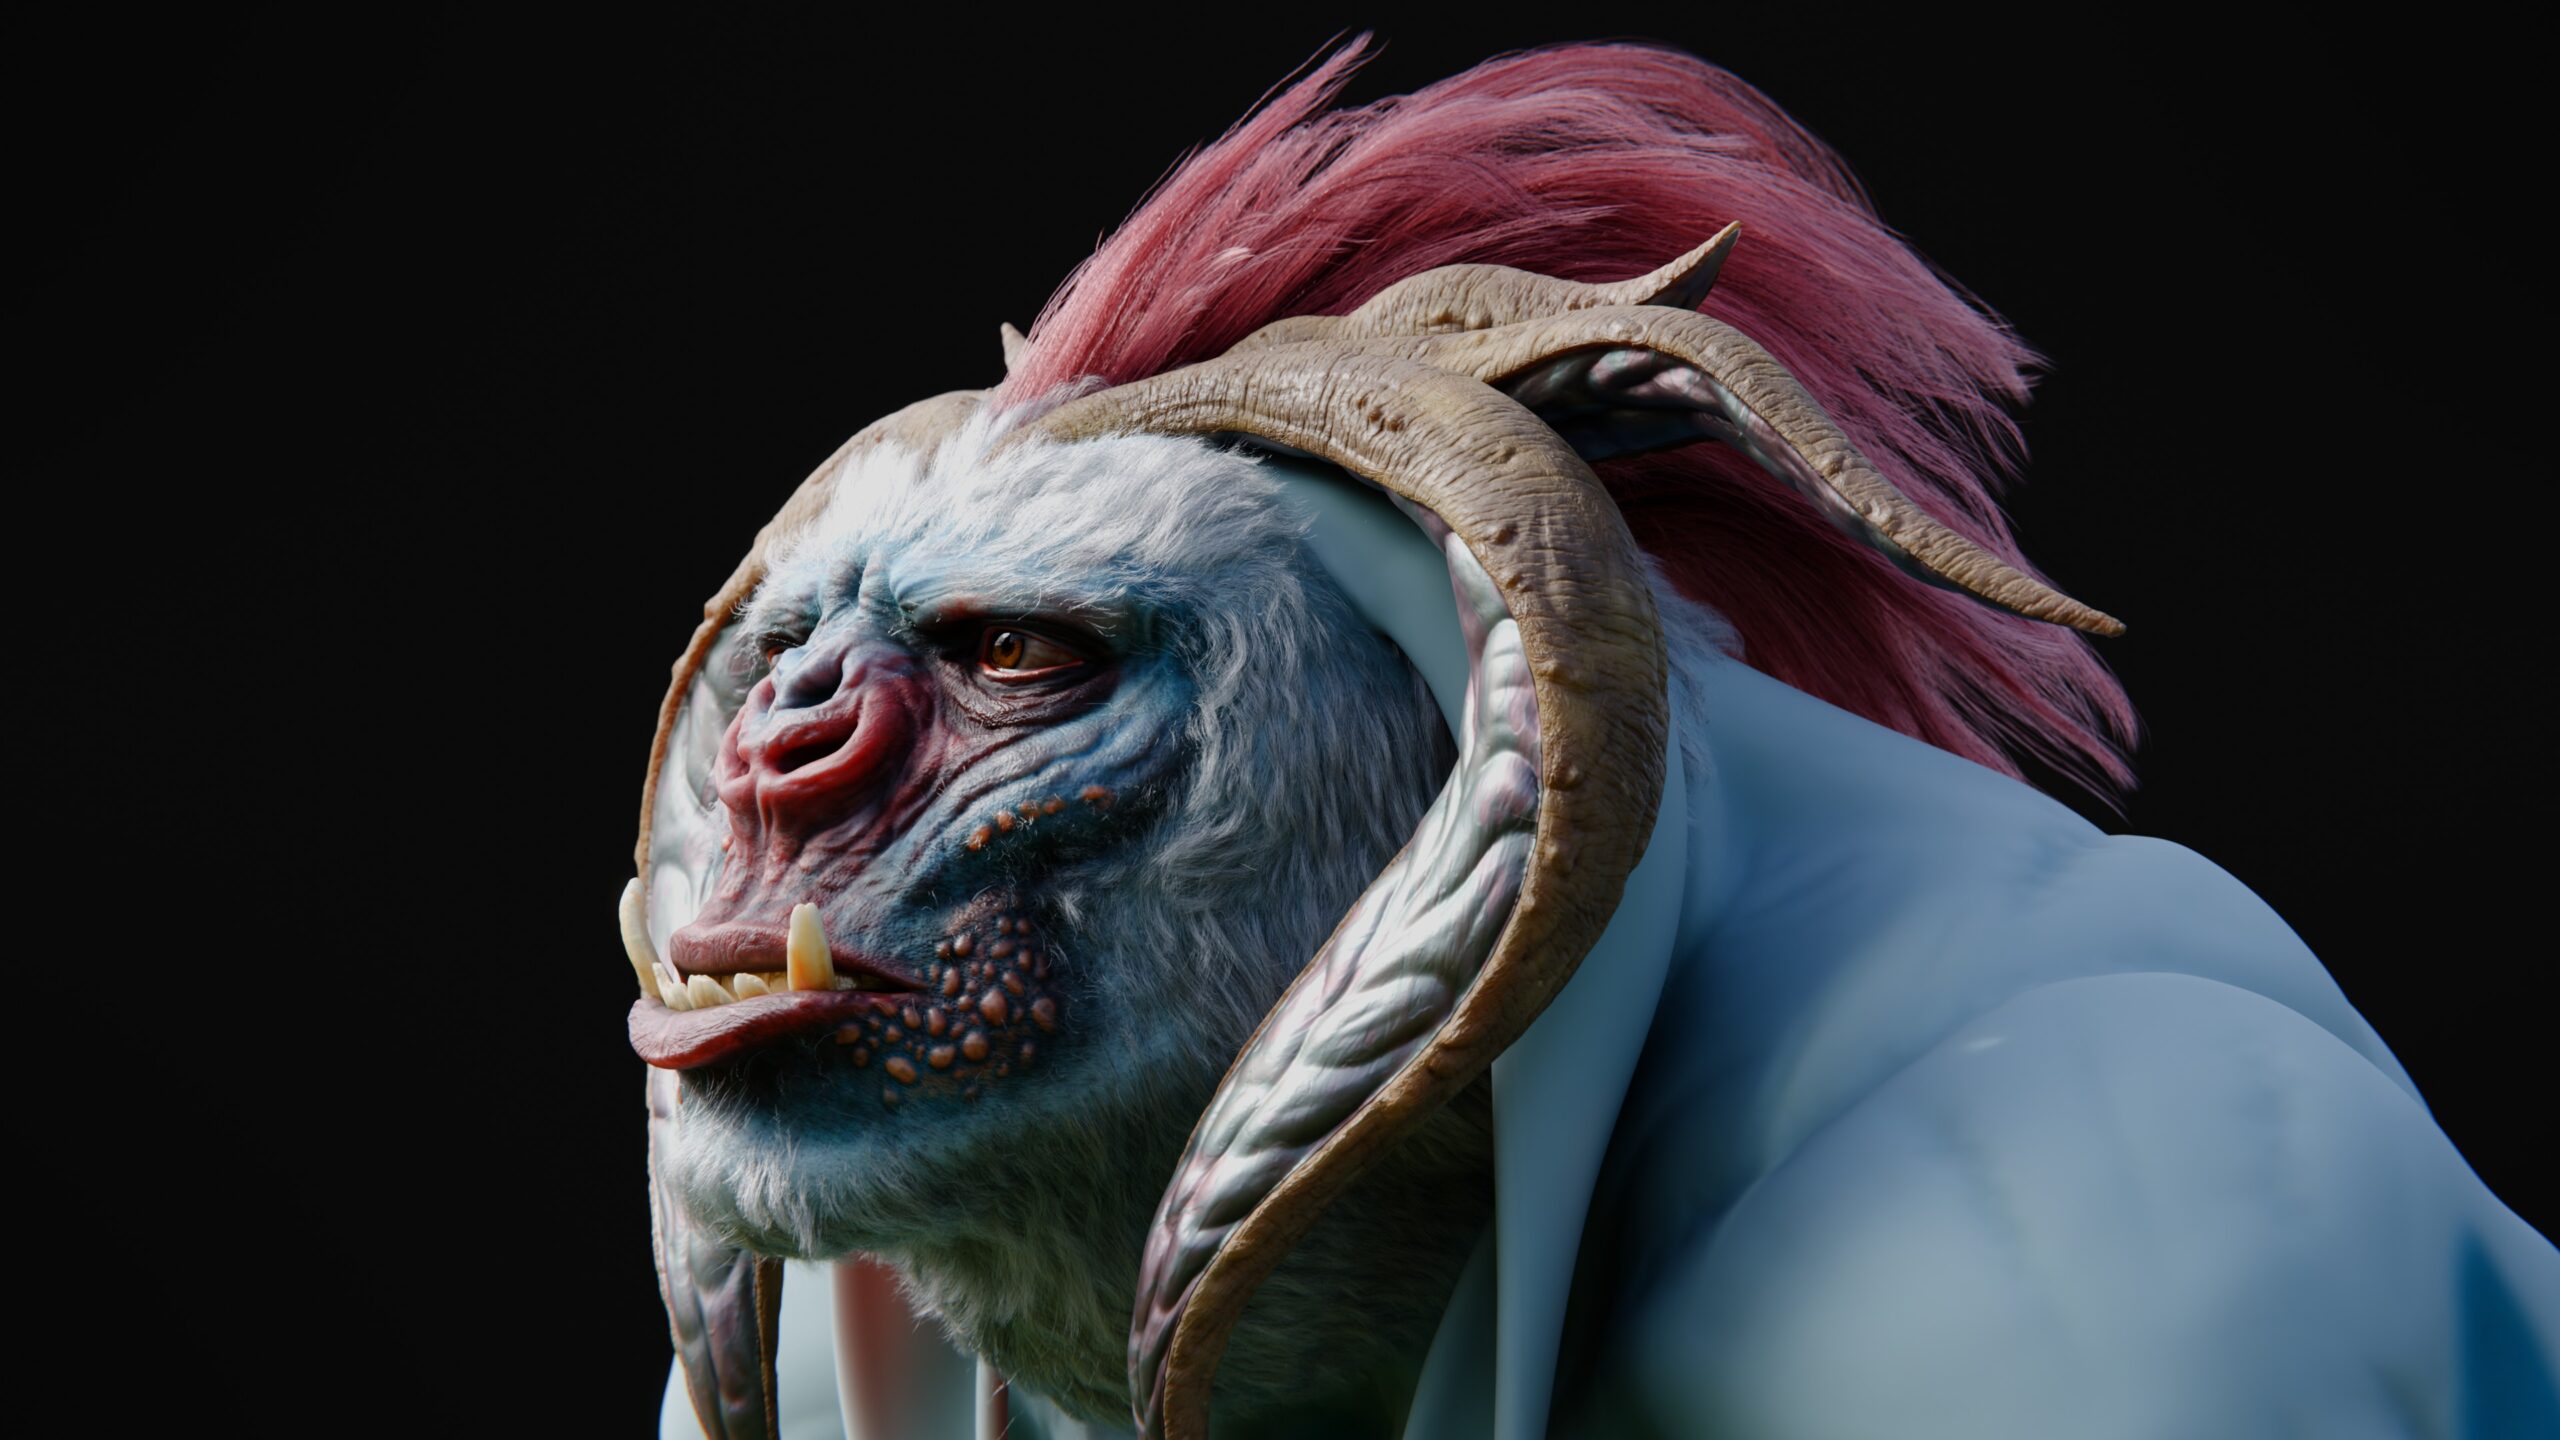

Shading the hair also presented tons of avenues for boosting the appeal and realism. I honed and learned tons of different techniques like color layering, clump-based roughness and brightness tweaks, and IOR variations.
Rigging
I am by no means a rigging artist. Typically I do whatever is required to get my characters moving somewhat naturally, using some autorigging tools and banging my head against the wall for anything bespoke and complex. Being a somewhat typical biped, Brad mostly didn’t require anything beyond my skill set in order to create a basic rig for simple animation. IK/FK switching and snapping, look target for the eyes, heel roll, and other key features were simple enough to set up.
The horns were treated as being rigidly attached to the head, so I only needed to be conscious of how far he could look in any direction without stabbing himself. Some tests were done on a very sloppy test rig to get an idea of his range of motion, and we took this to be part of the character’s design and physiology. He’s a strong fella, but at the cost of flexibility.
Ear CFX
The real challenge came with Brad’s floppy, dangling ears. While in the original version they were only manually posed with a simple tail-like bone chain, I knew that in the revised rig they should swing with realistic physics. Getting the dynamics to work and appear natural while still allowing for manual tweaking on top of the cached simulation was a head-scratching challenge, but I’m pleased with the end result. The ears follow the motion of the head and I can keyrame fix any noticeable clipping with the body and hair after simulation.
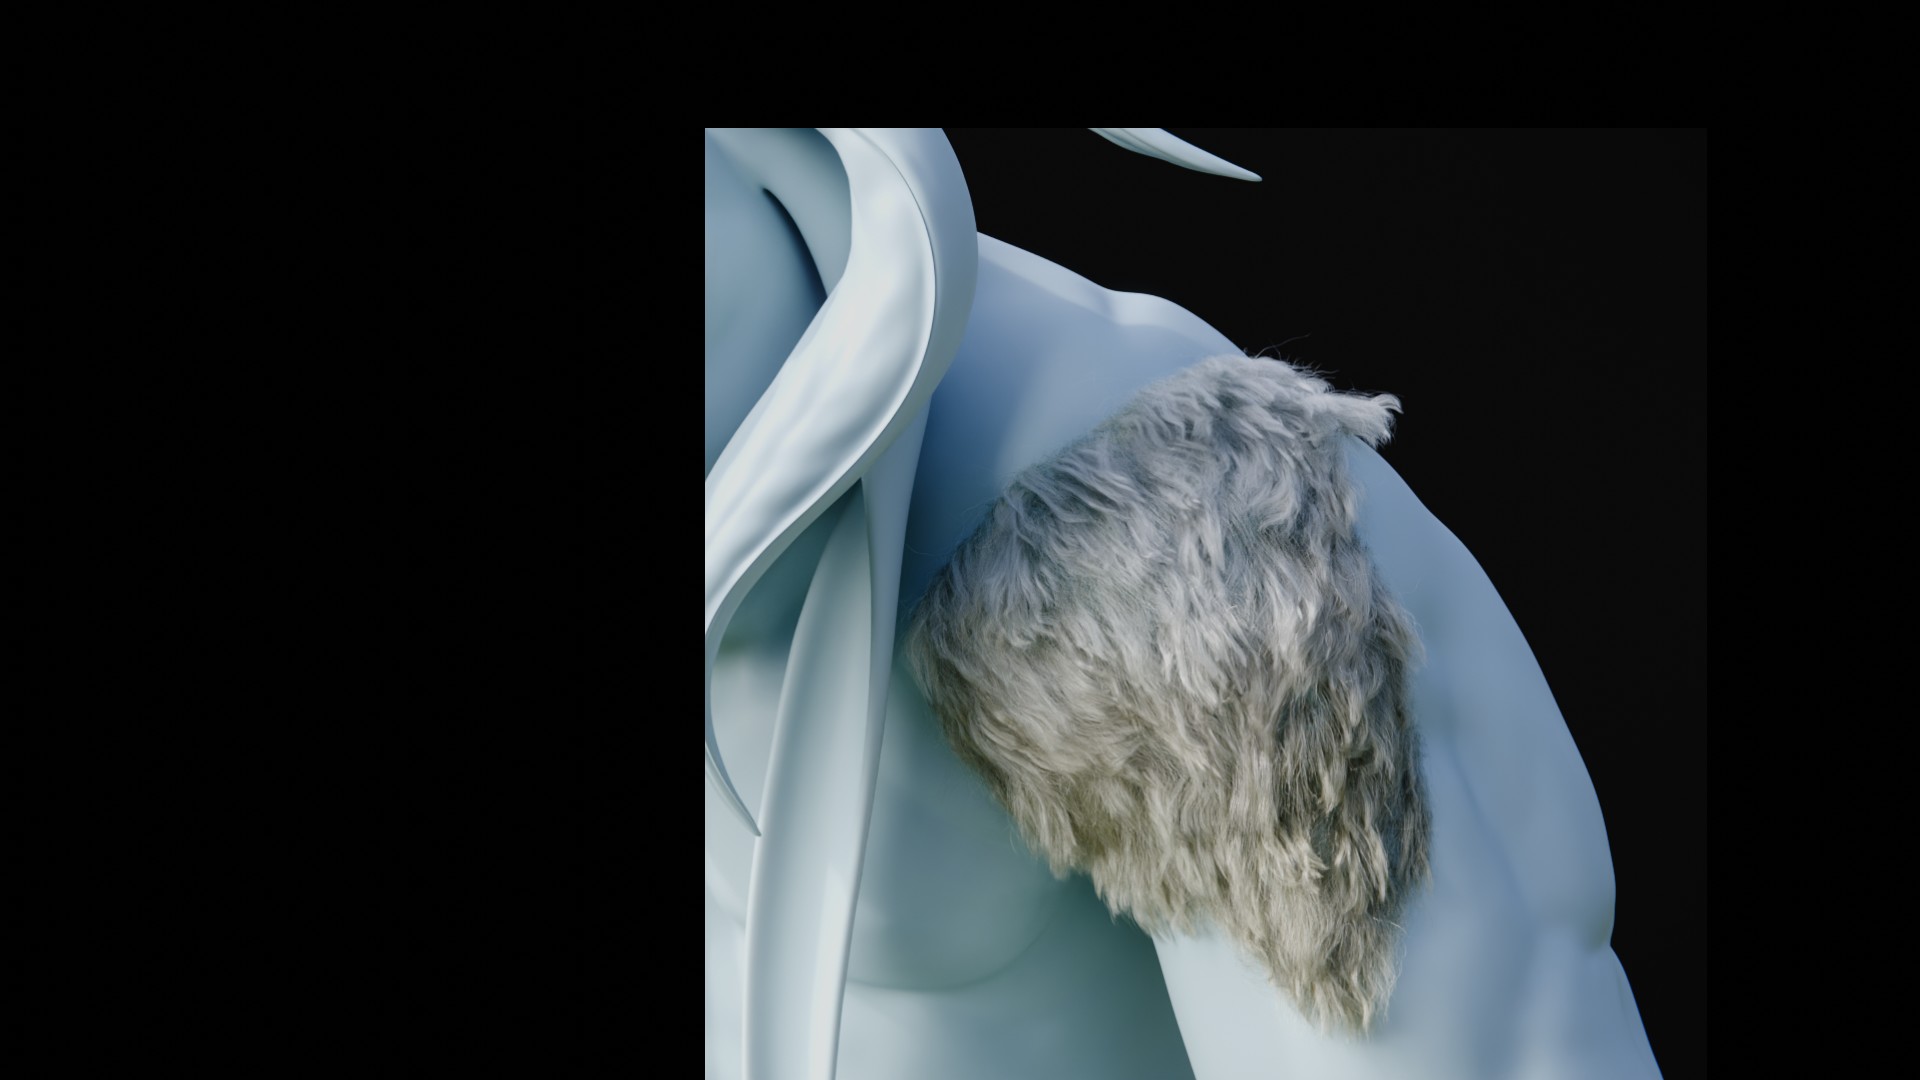
Hair Sim
Since native simulation on the new hair curves geometry type is currently in development, the best solution I’ve found for hair dynamics is to leverage Blender’s cloth solver. This involves binding the guide strands to a duplicate mesh version of themselves which have been anchored at their roots with a falloff and simulated as cloth. While the resulting behavior is quite believable and allows for simple collision and self-collision, it’s a hassle to set up because the duplication and binding process must be done manually, meaning any change to the guide curves requires re-building the sim geometry. This technique could also be used with Blender native particle hair dynamics as opposed to the generic cloth solver, so I may try that in the future to see if it has any benefits.
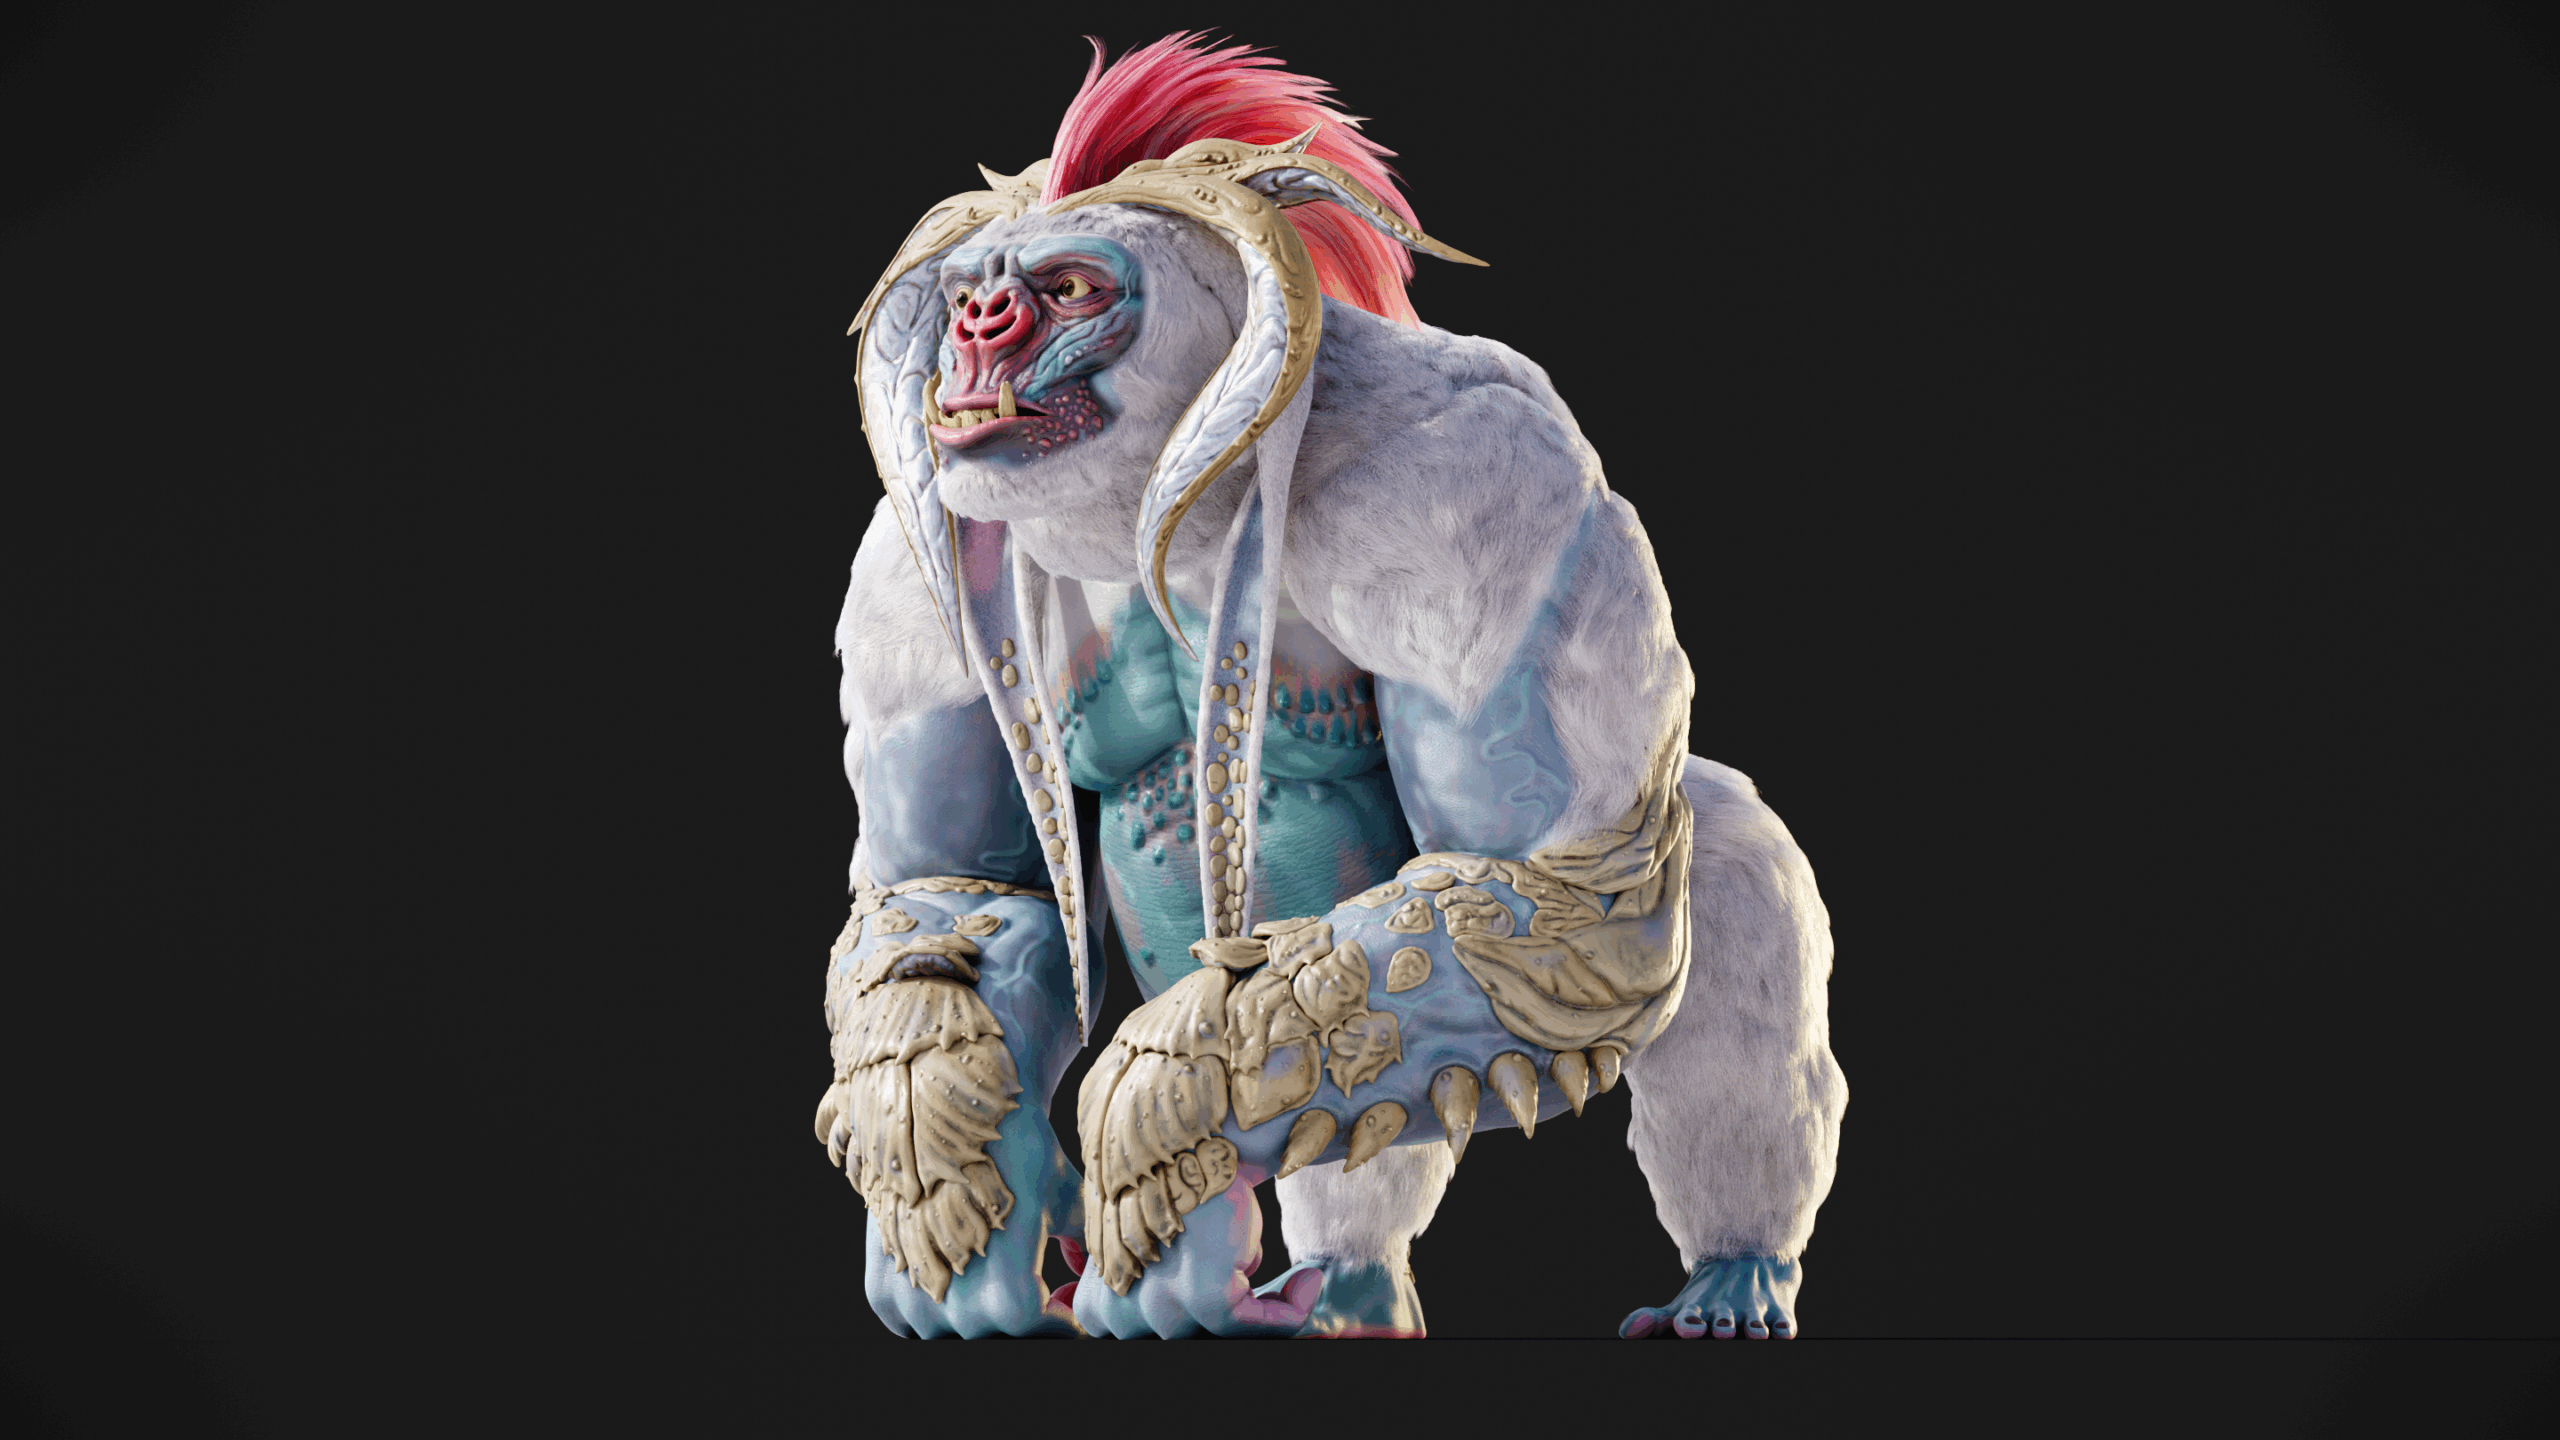
With Brad’s body hair being fairly short, I decided to limit the hair dynamics to his long mohawk for now.
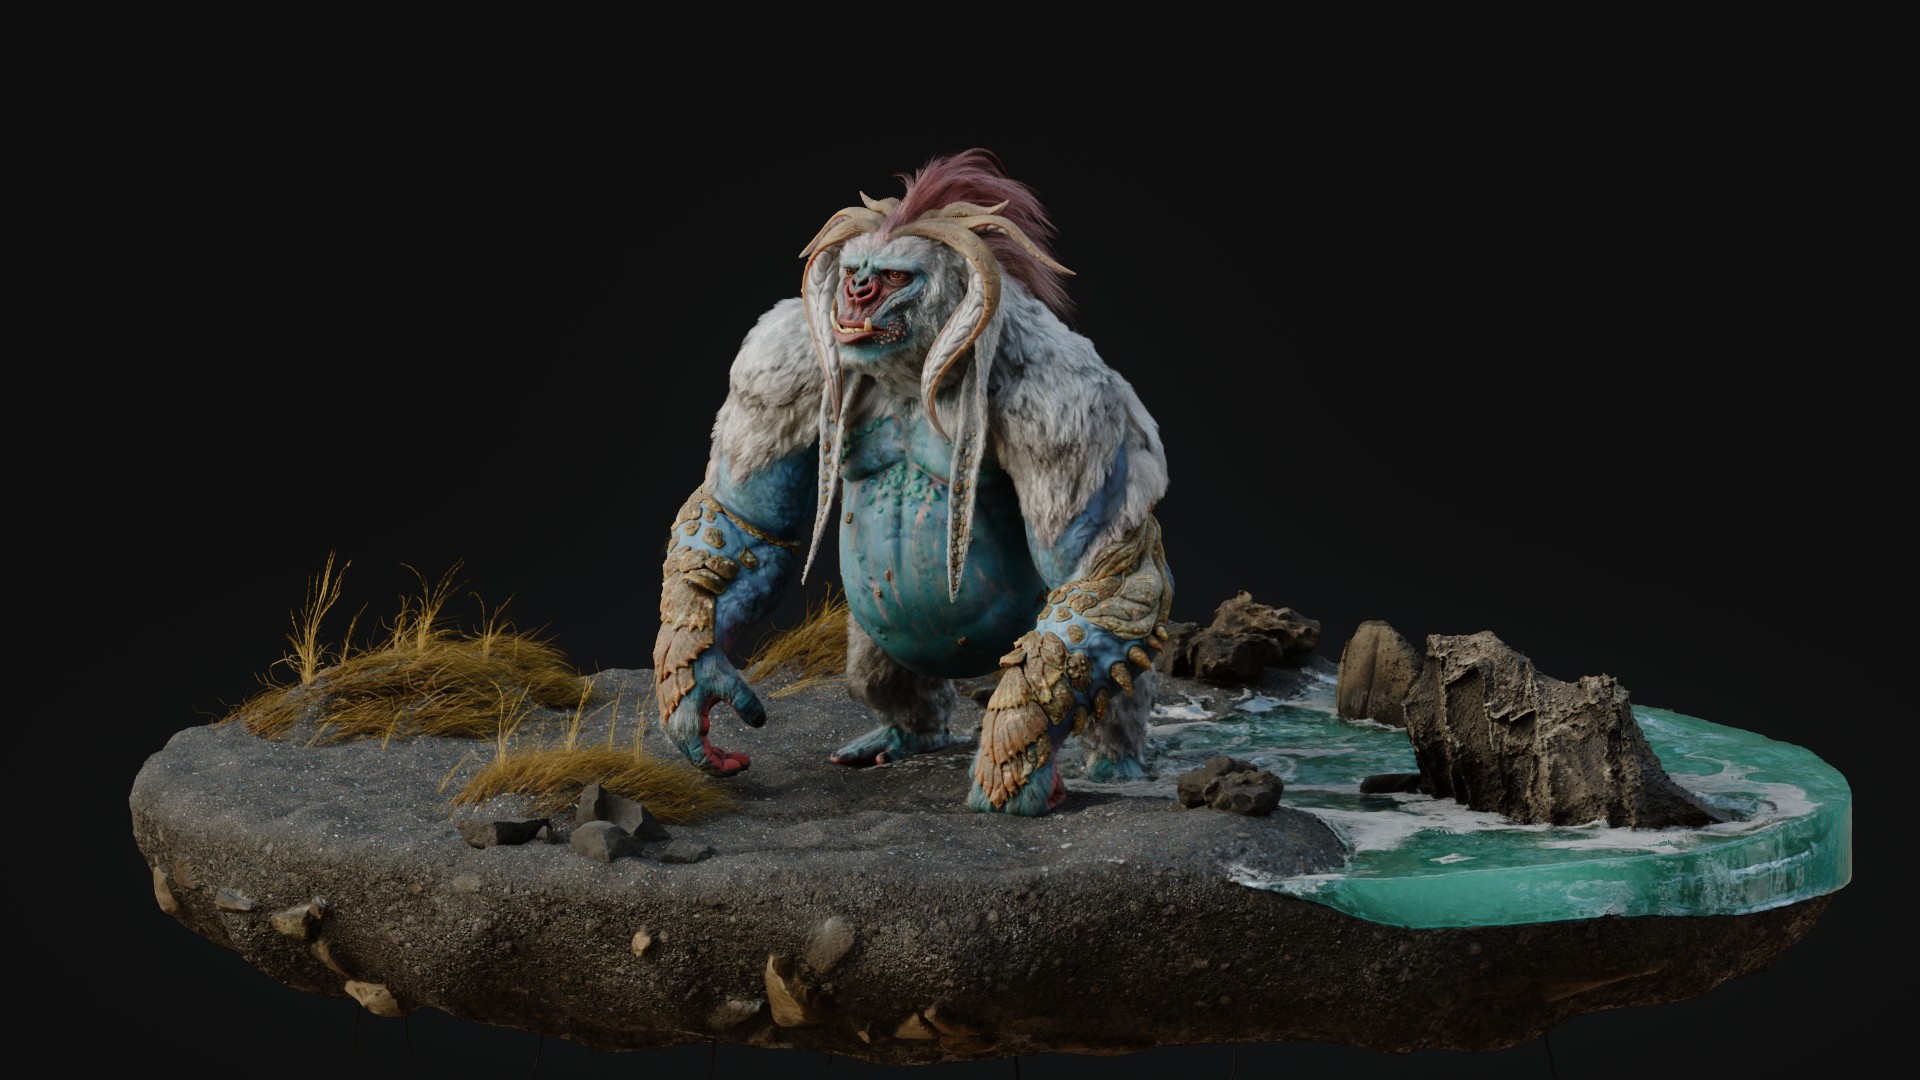
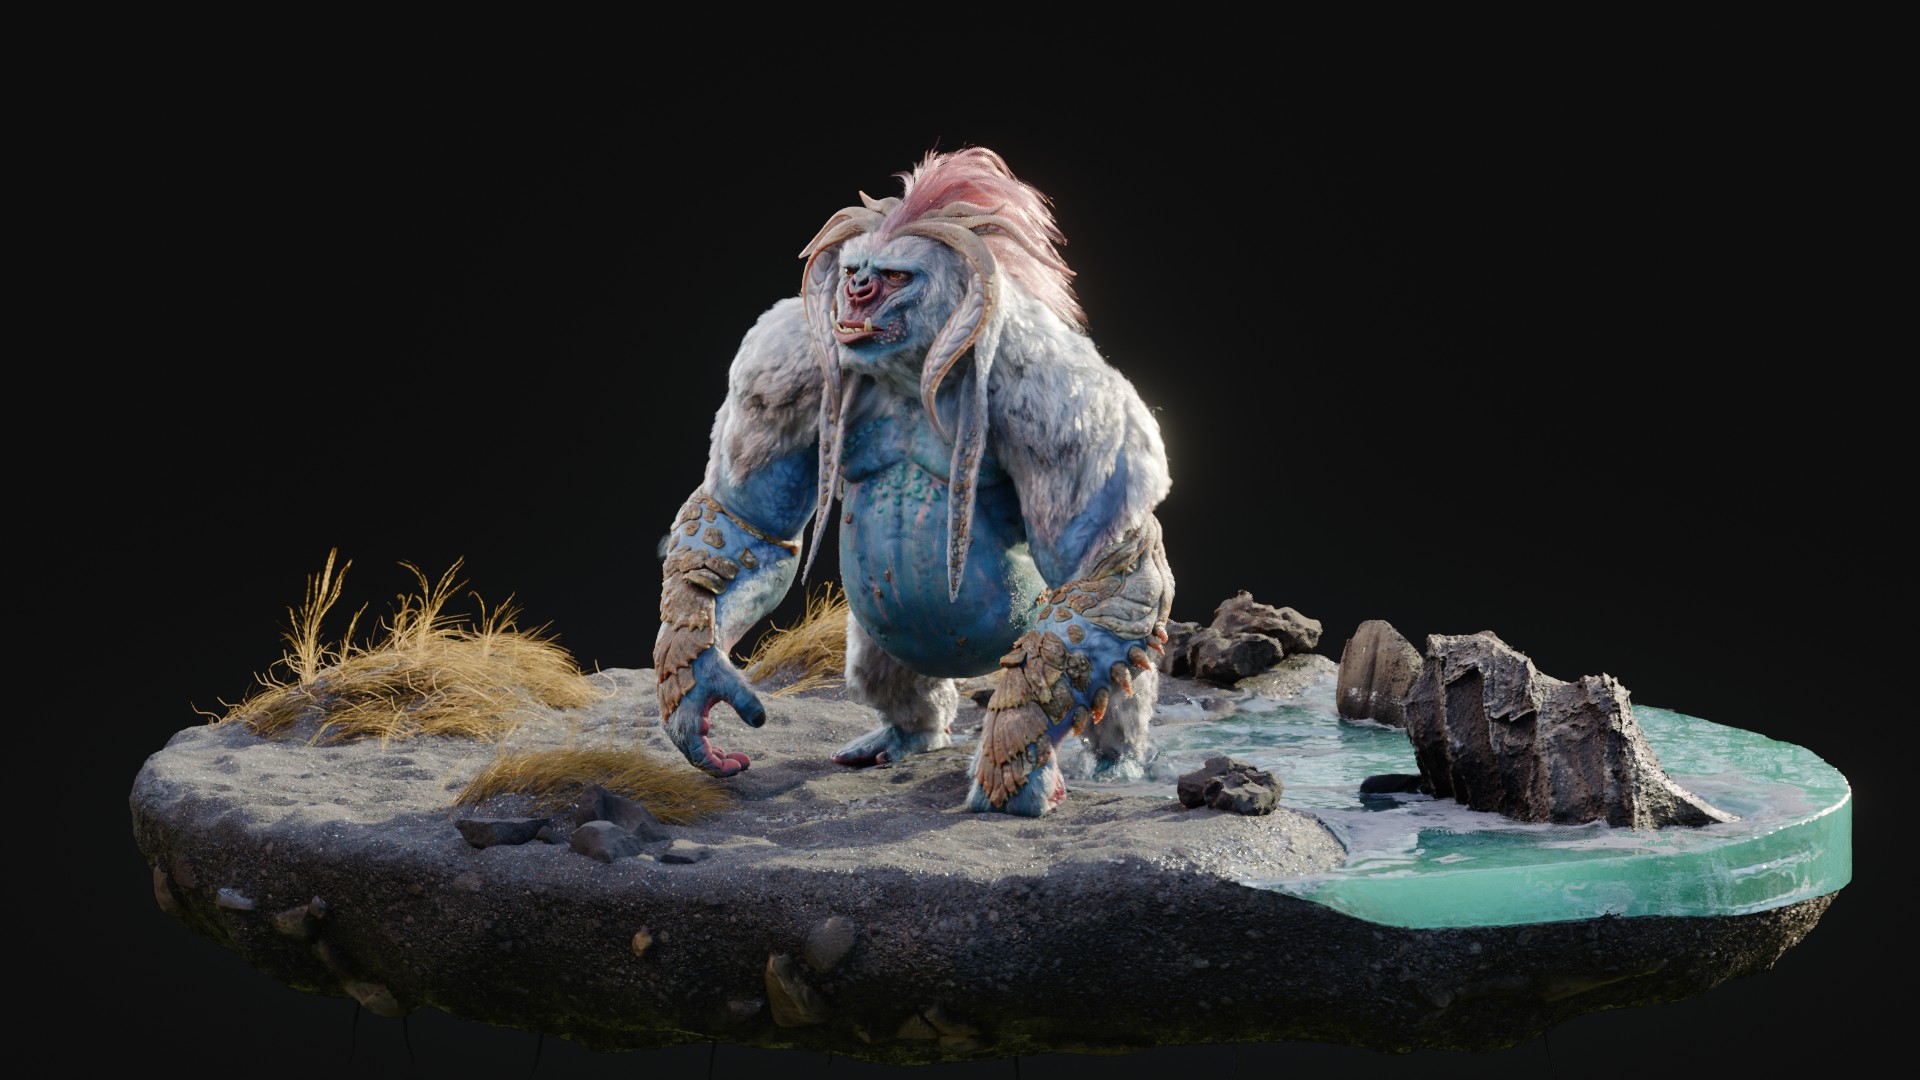
Environment Patch
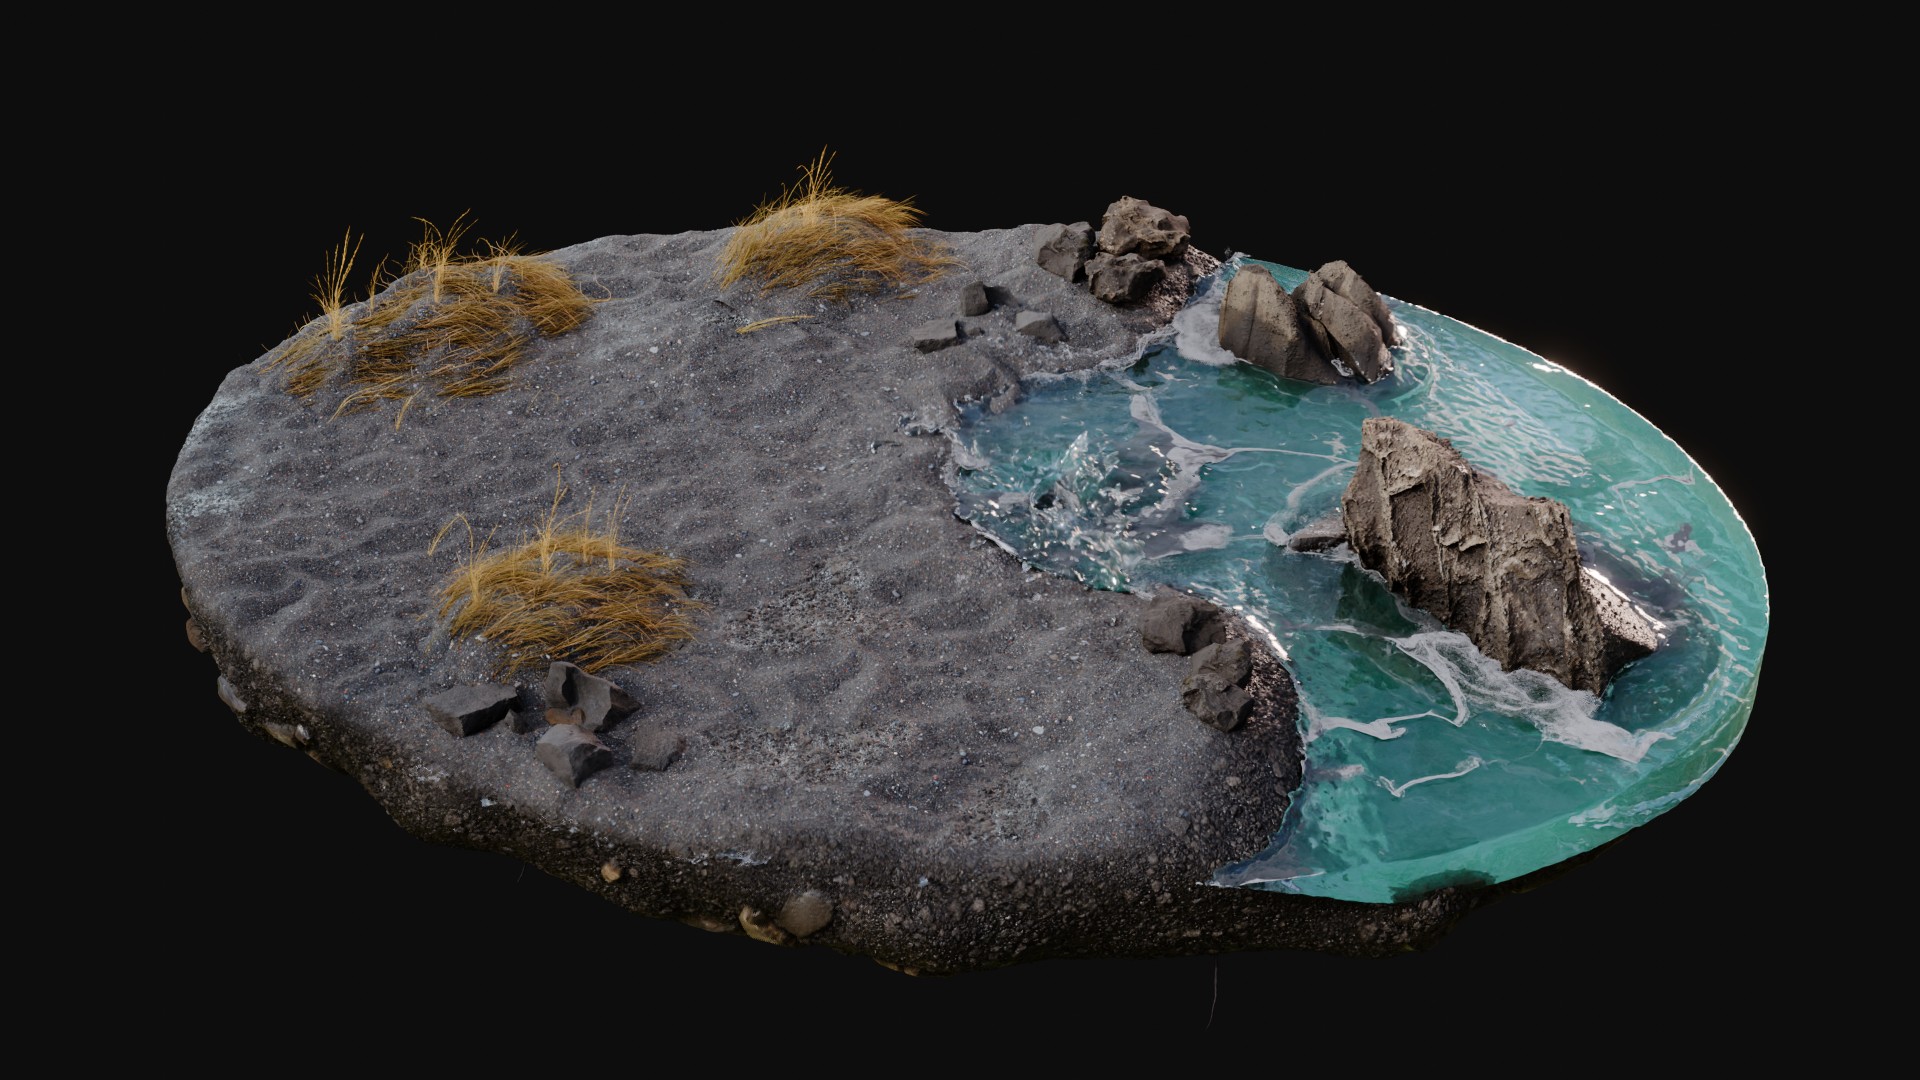
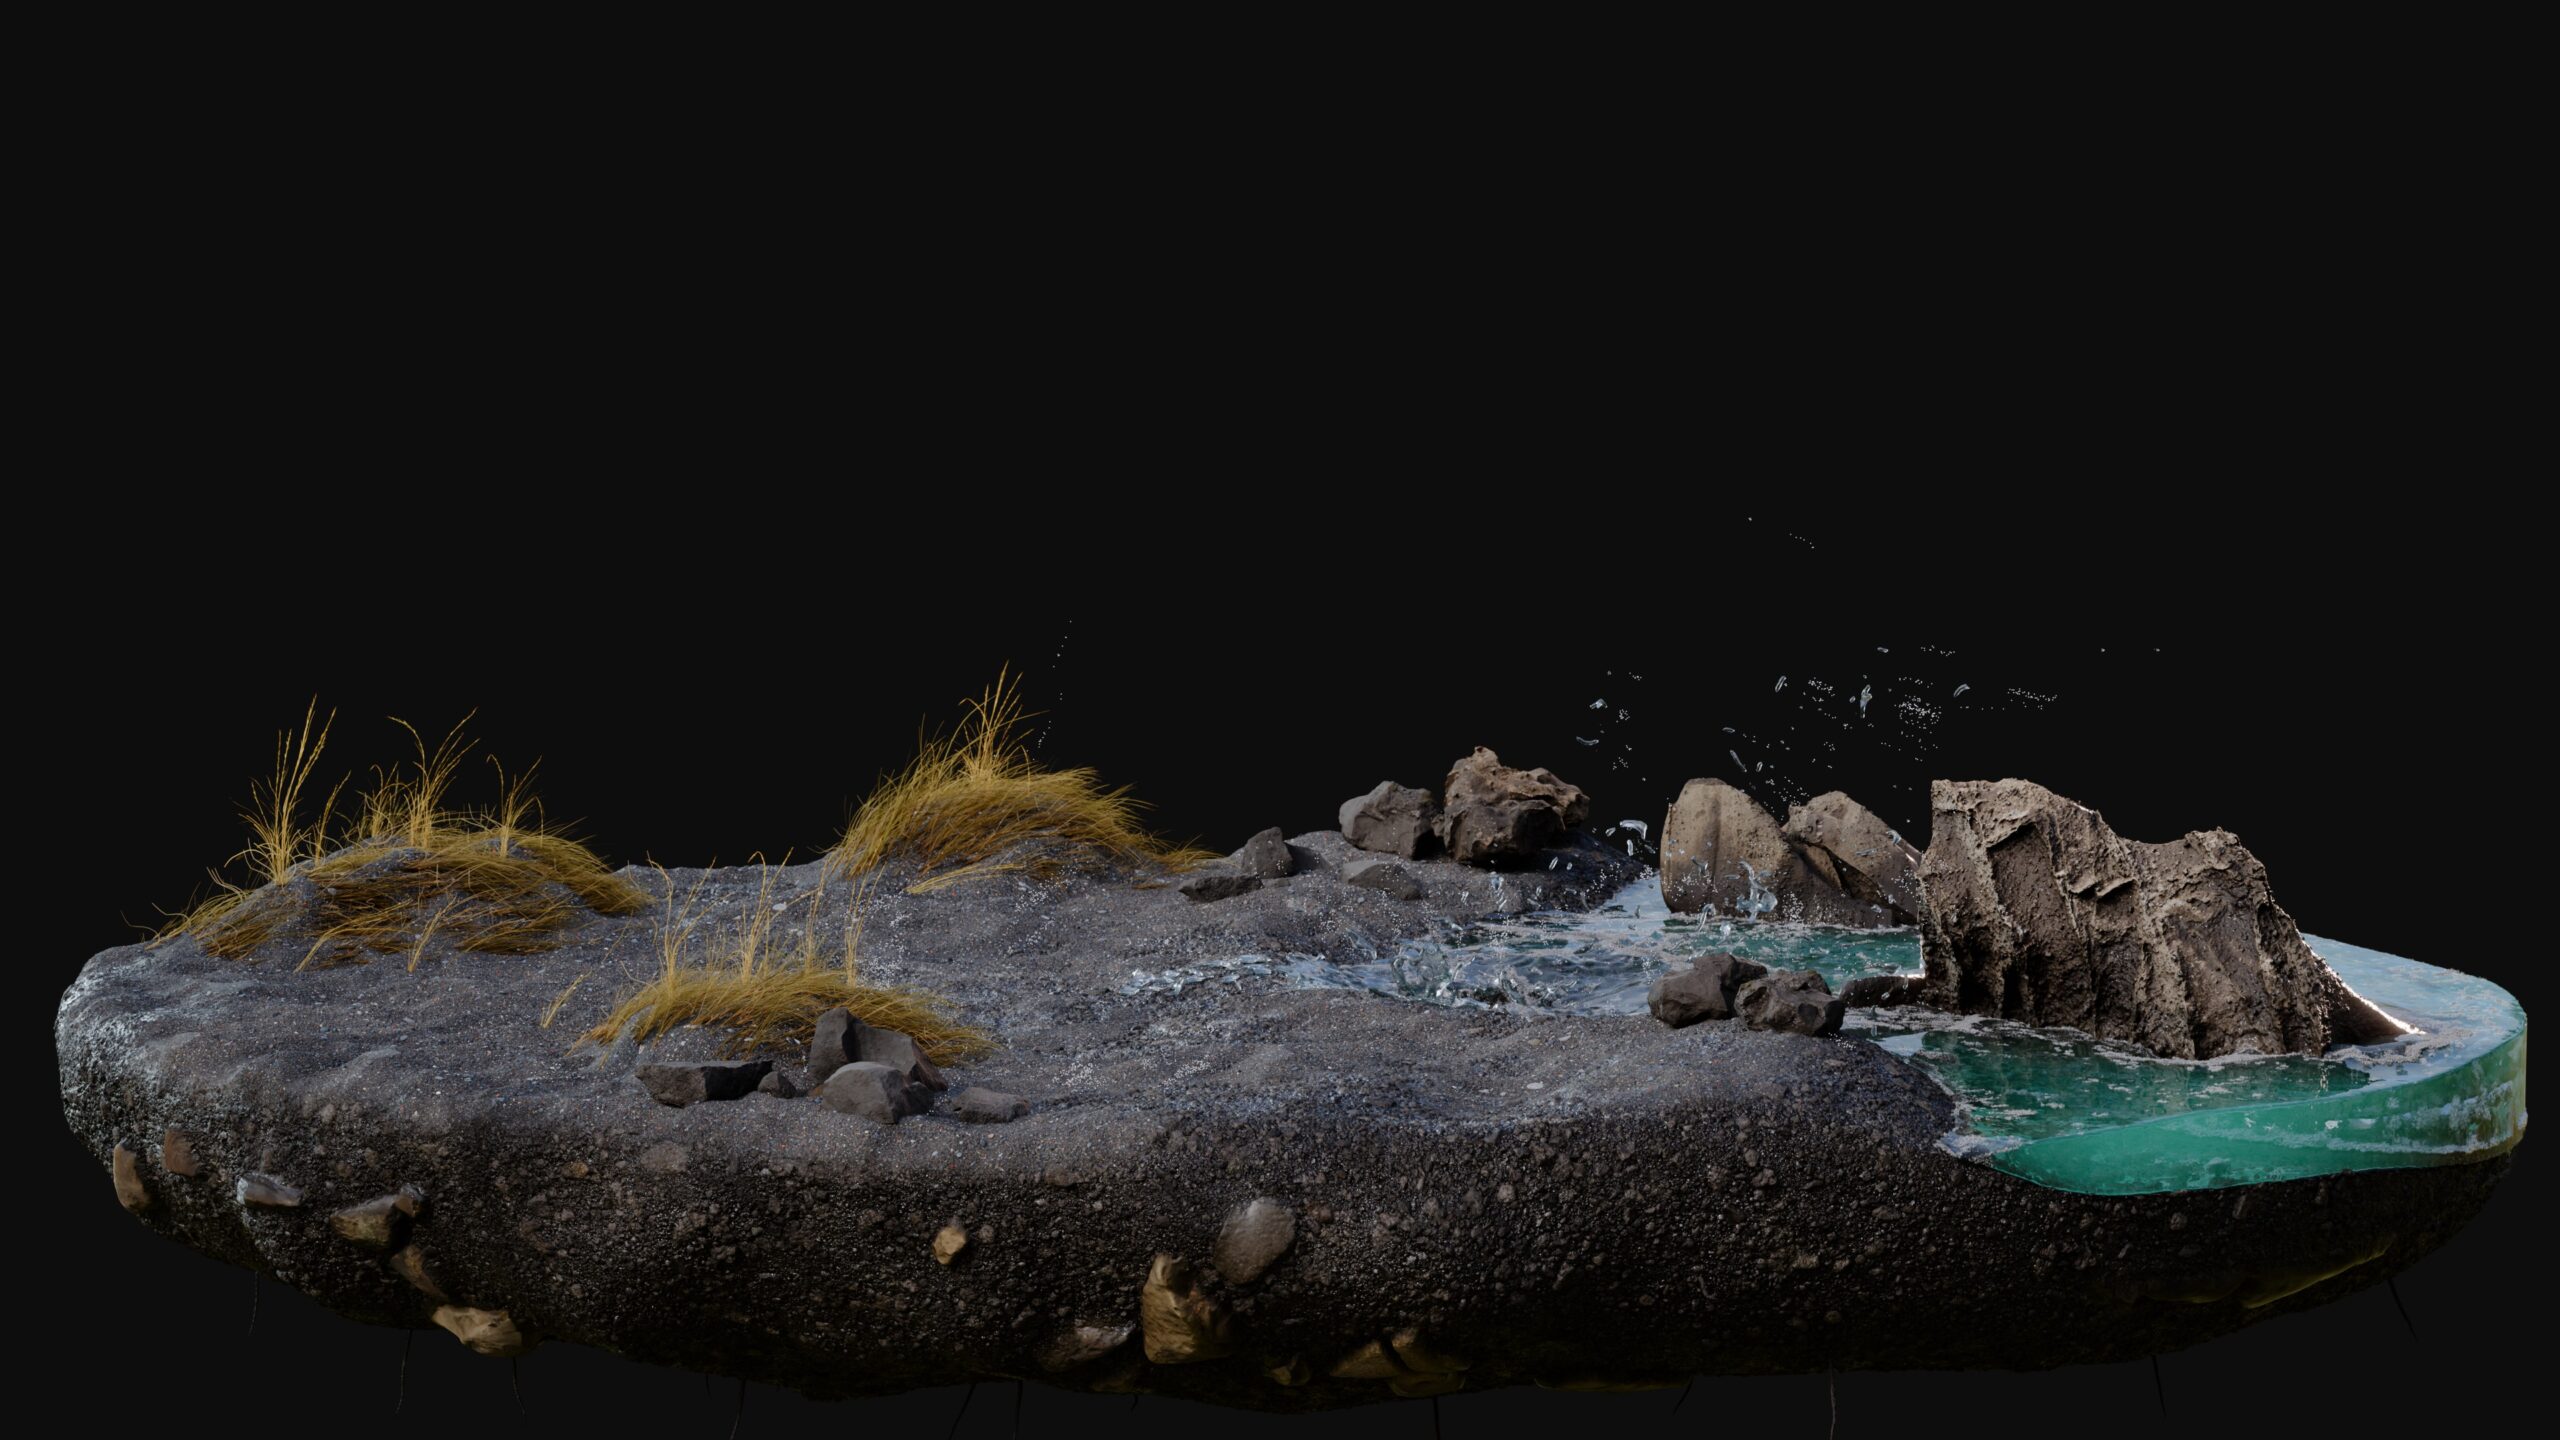
As part of Brad’s initial showcase, we wanted to place him in an environment to provide some context for his size and natural surroundings. But having limited artist resources and with an upcoming conference creating a tight deadline, we decided to limit the environment asset to a vertical slice.
My solution was a small patch of coastal environment showing the cold, Icelandic-inspired grassy beaches where Brad can be found on land and splashing around in the ocean.
Shot Production
Once Brad V2 was complete, we wanted to showcase his new looks by creating a short, simple animation that could be dropped into his environment patch. This would serve as a great opportunity for testing the rig and taking Brad from a static asset to a living, breathing beast.
Animation
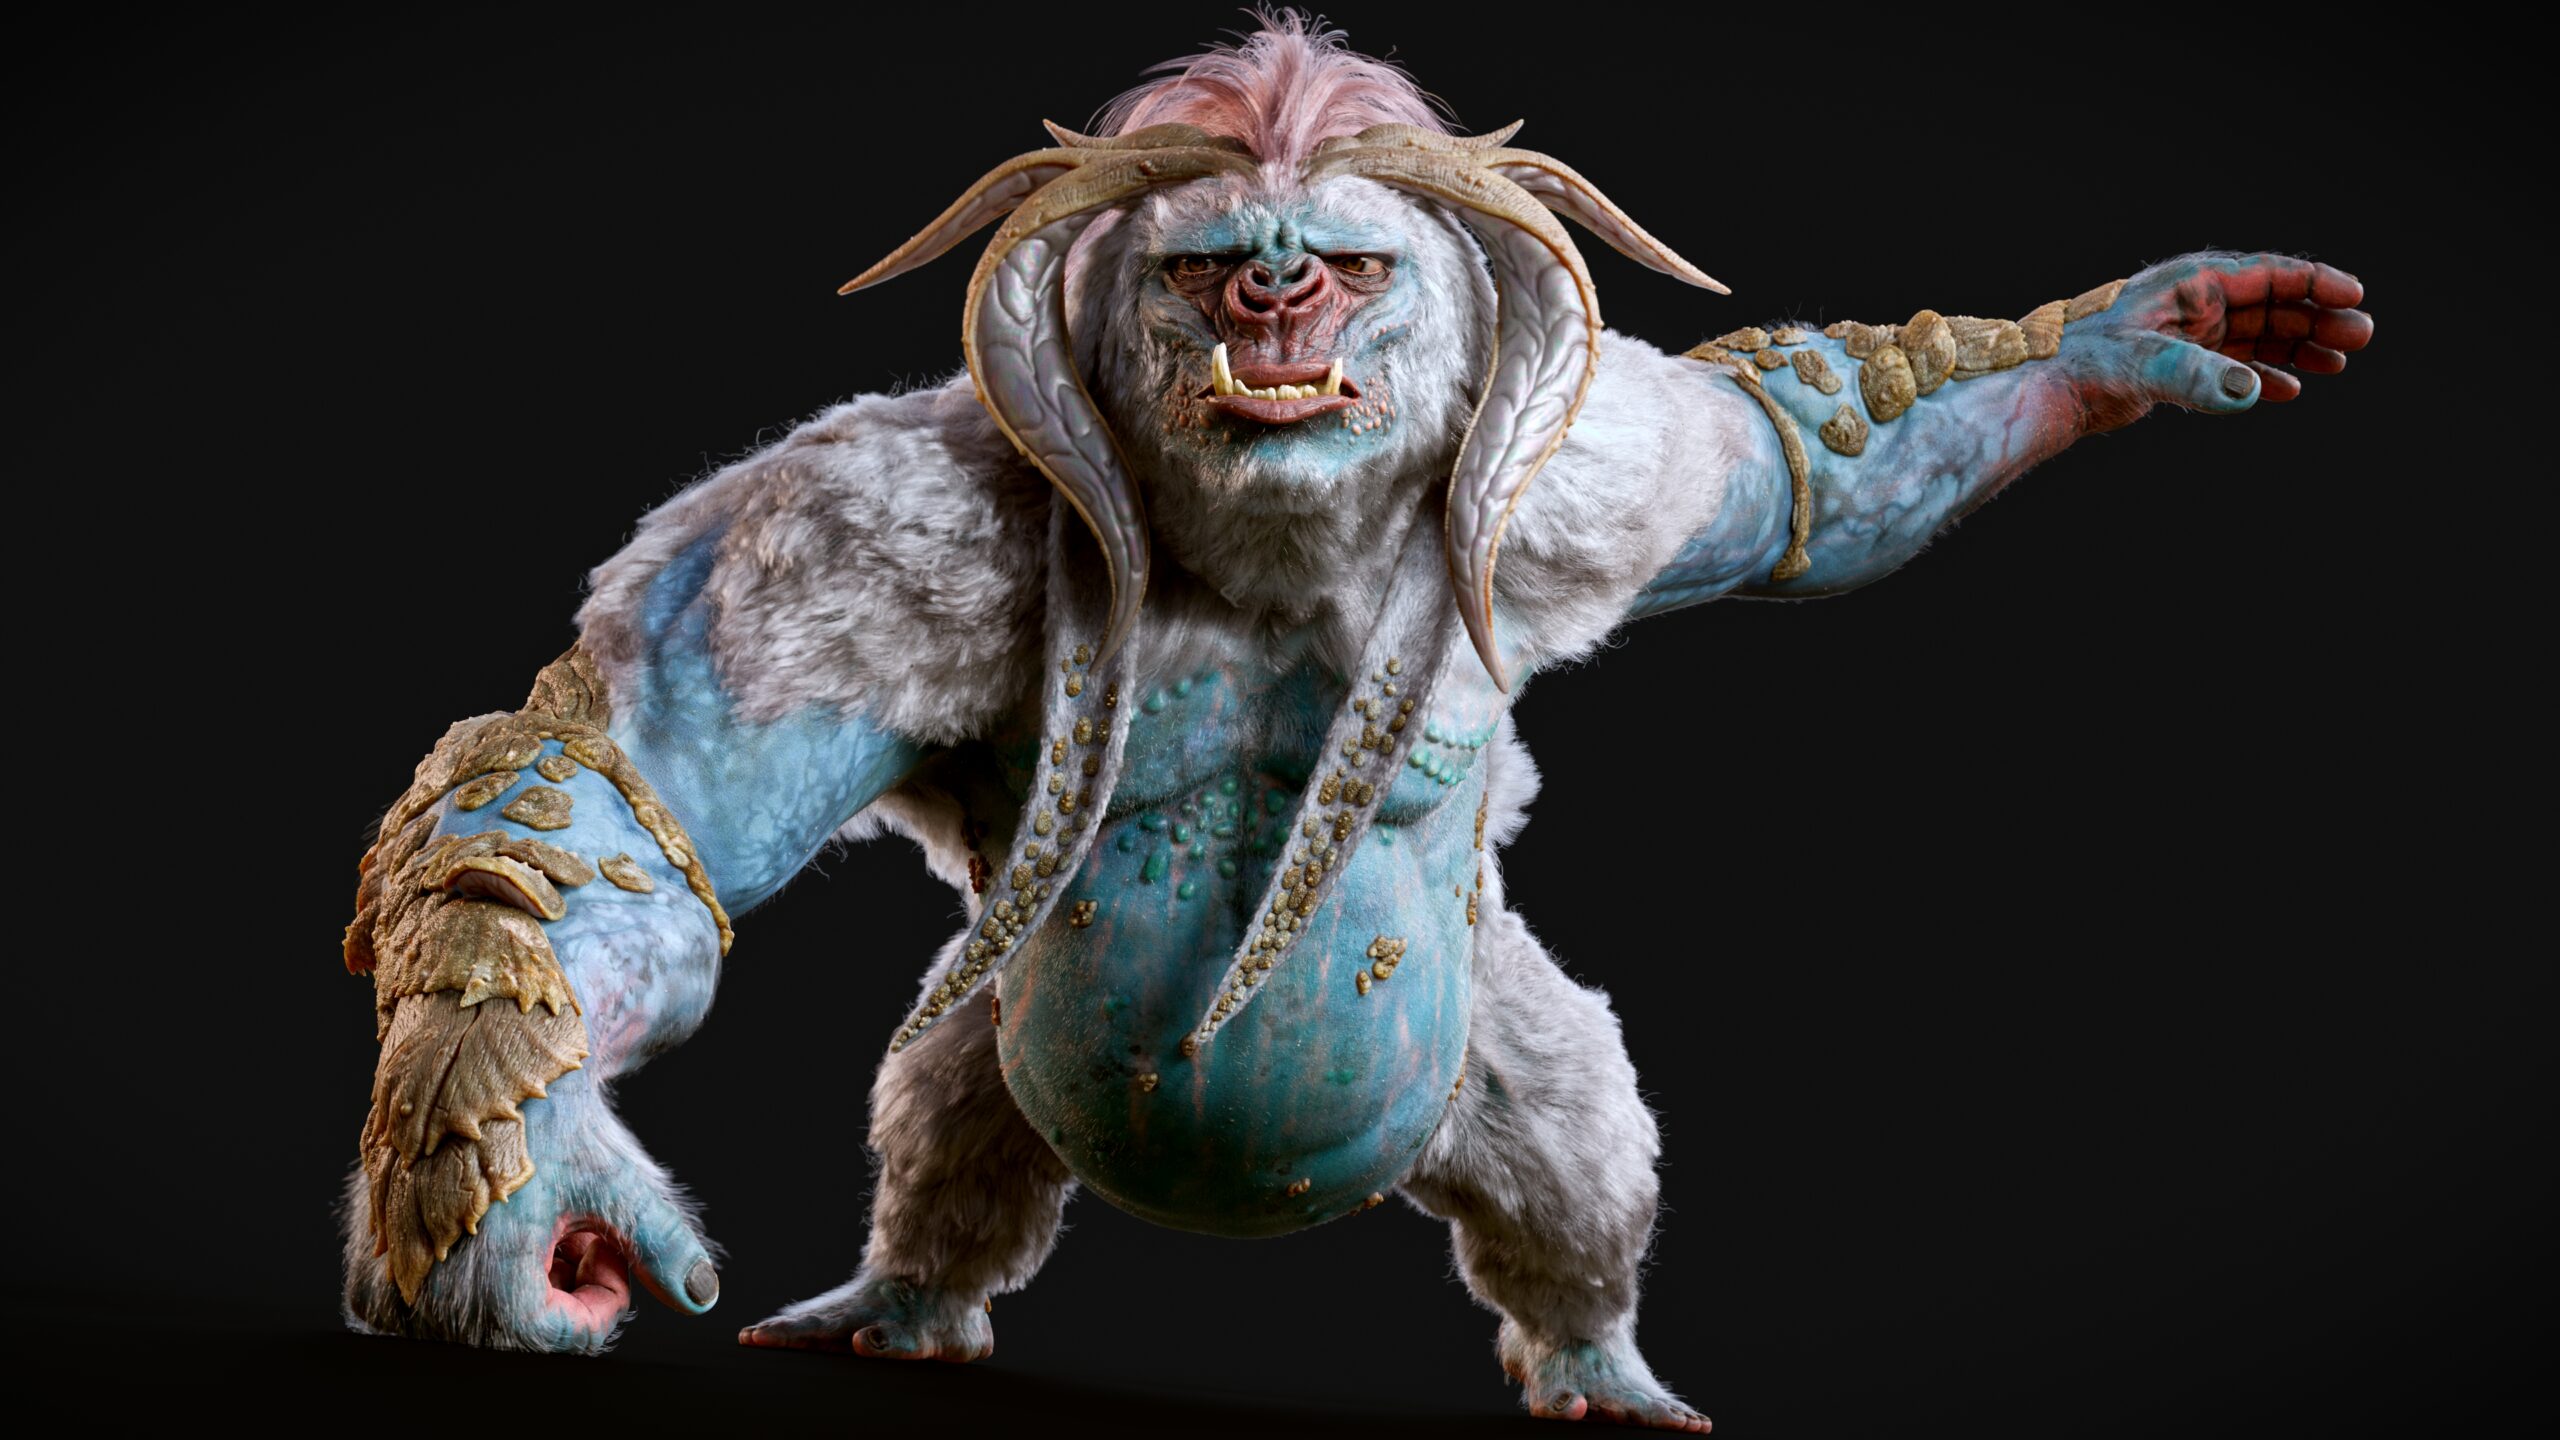
For the Megachitus showcase animation, I wanted to focus on demonstrating a few key poses and movements without distracting from his hairy, muscular beauty. The goal was to make something quick and simple that made him feel truly alive but wasn’t busy with motion.
I settled on a sort of idle animation, where Brad is alerted to something and stands up, stomping his hefty foot and fist into the ground, huffing and looking concerned.
With some clever fading of the cached ear and hair simulations, I was eventually able to get the animation looping nicely for the final shots. This allowed me to play around with camera angles and slice up the looped animation without worrying about harsh cuts showing up as he restarts his movement.
We also wanted to bring this animation cycle into Brad’s environment patch, which involved a beach water simulation as well as some grass blowing in the breeze to match his mohawk. The animated shots of the beast in his environment are still being finished up and will be rendered out soon.
Brad’s stomping animation was brought into Houdini via Alembic, where I iterated on a FLIP sim to get a nice splash from his foot. I then brought the sim back to the Blender scene with a USD sequence. For the whitewater I used a USD point cloud cache, which allowed me to dial in particle size based on age and random variation inside Geometry Nodes. I certainly wouldn’t consider myself an FX artist, so this whole process was quite the learning opportunity.
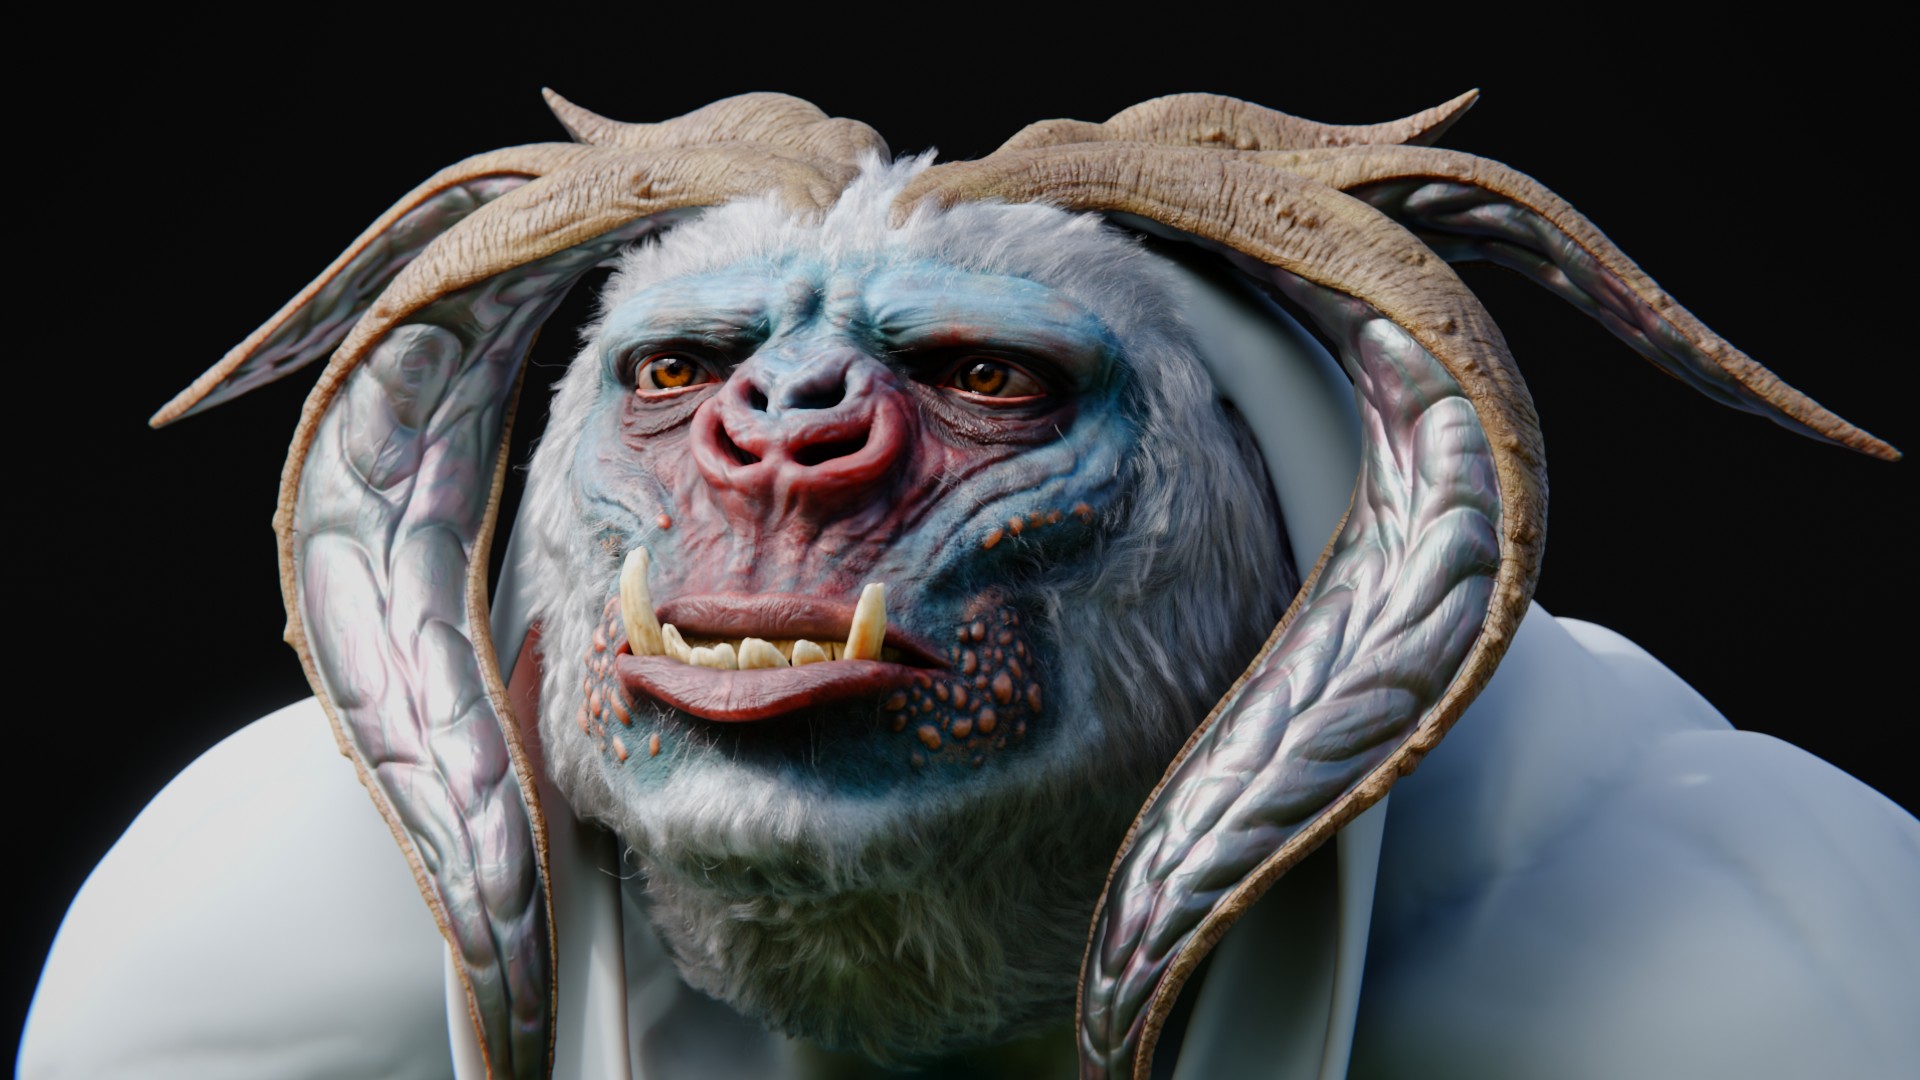
Rendering
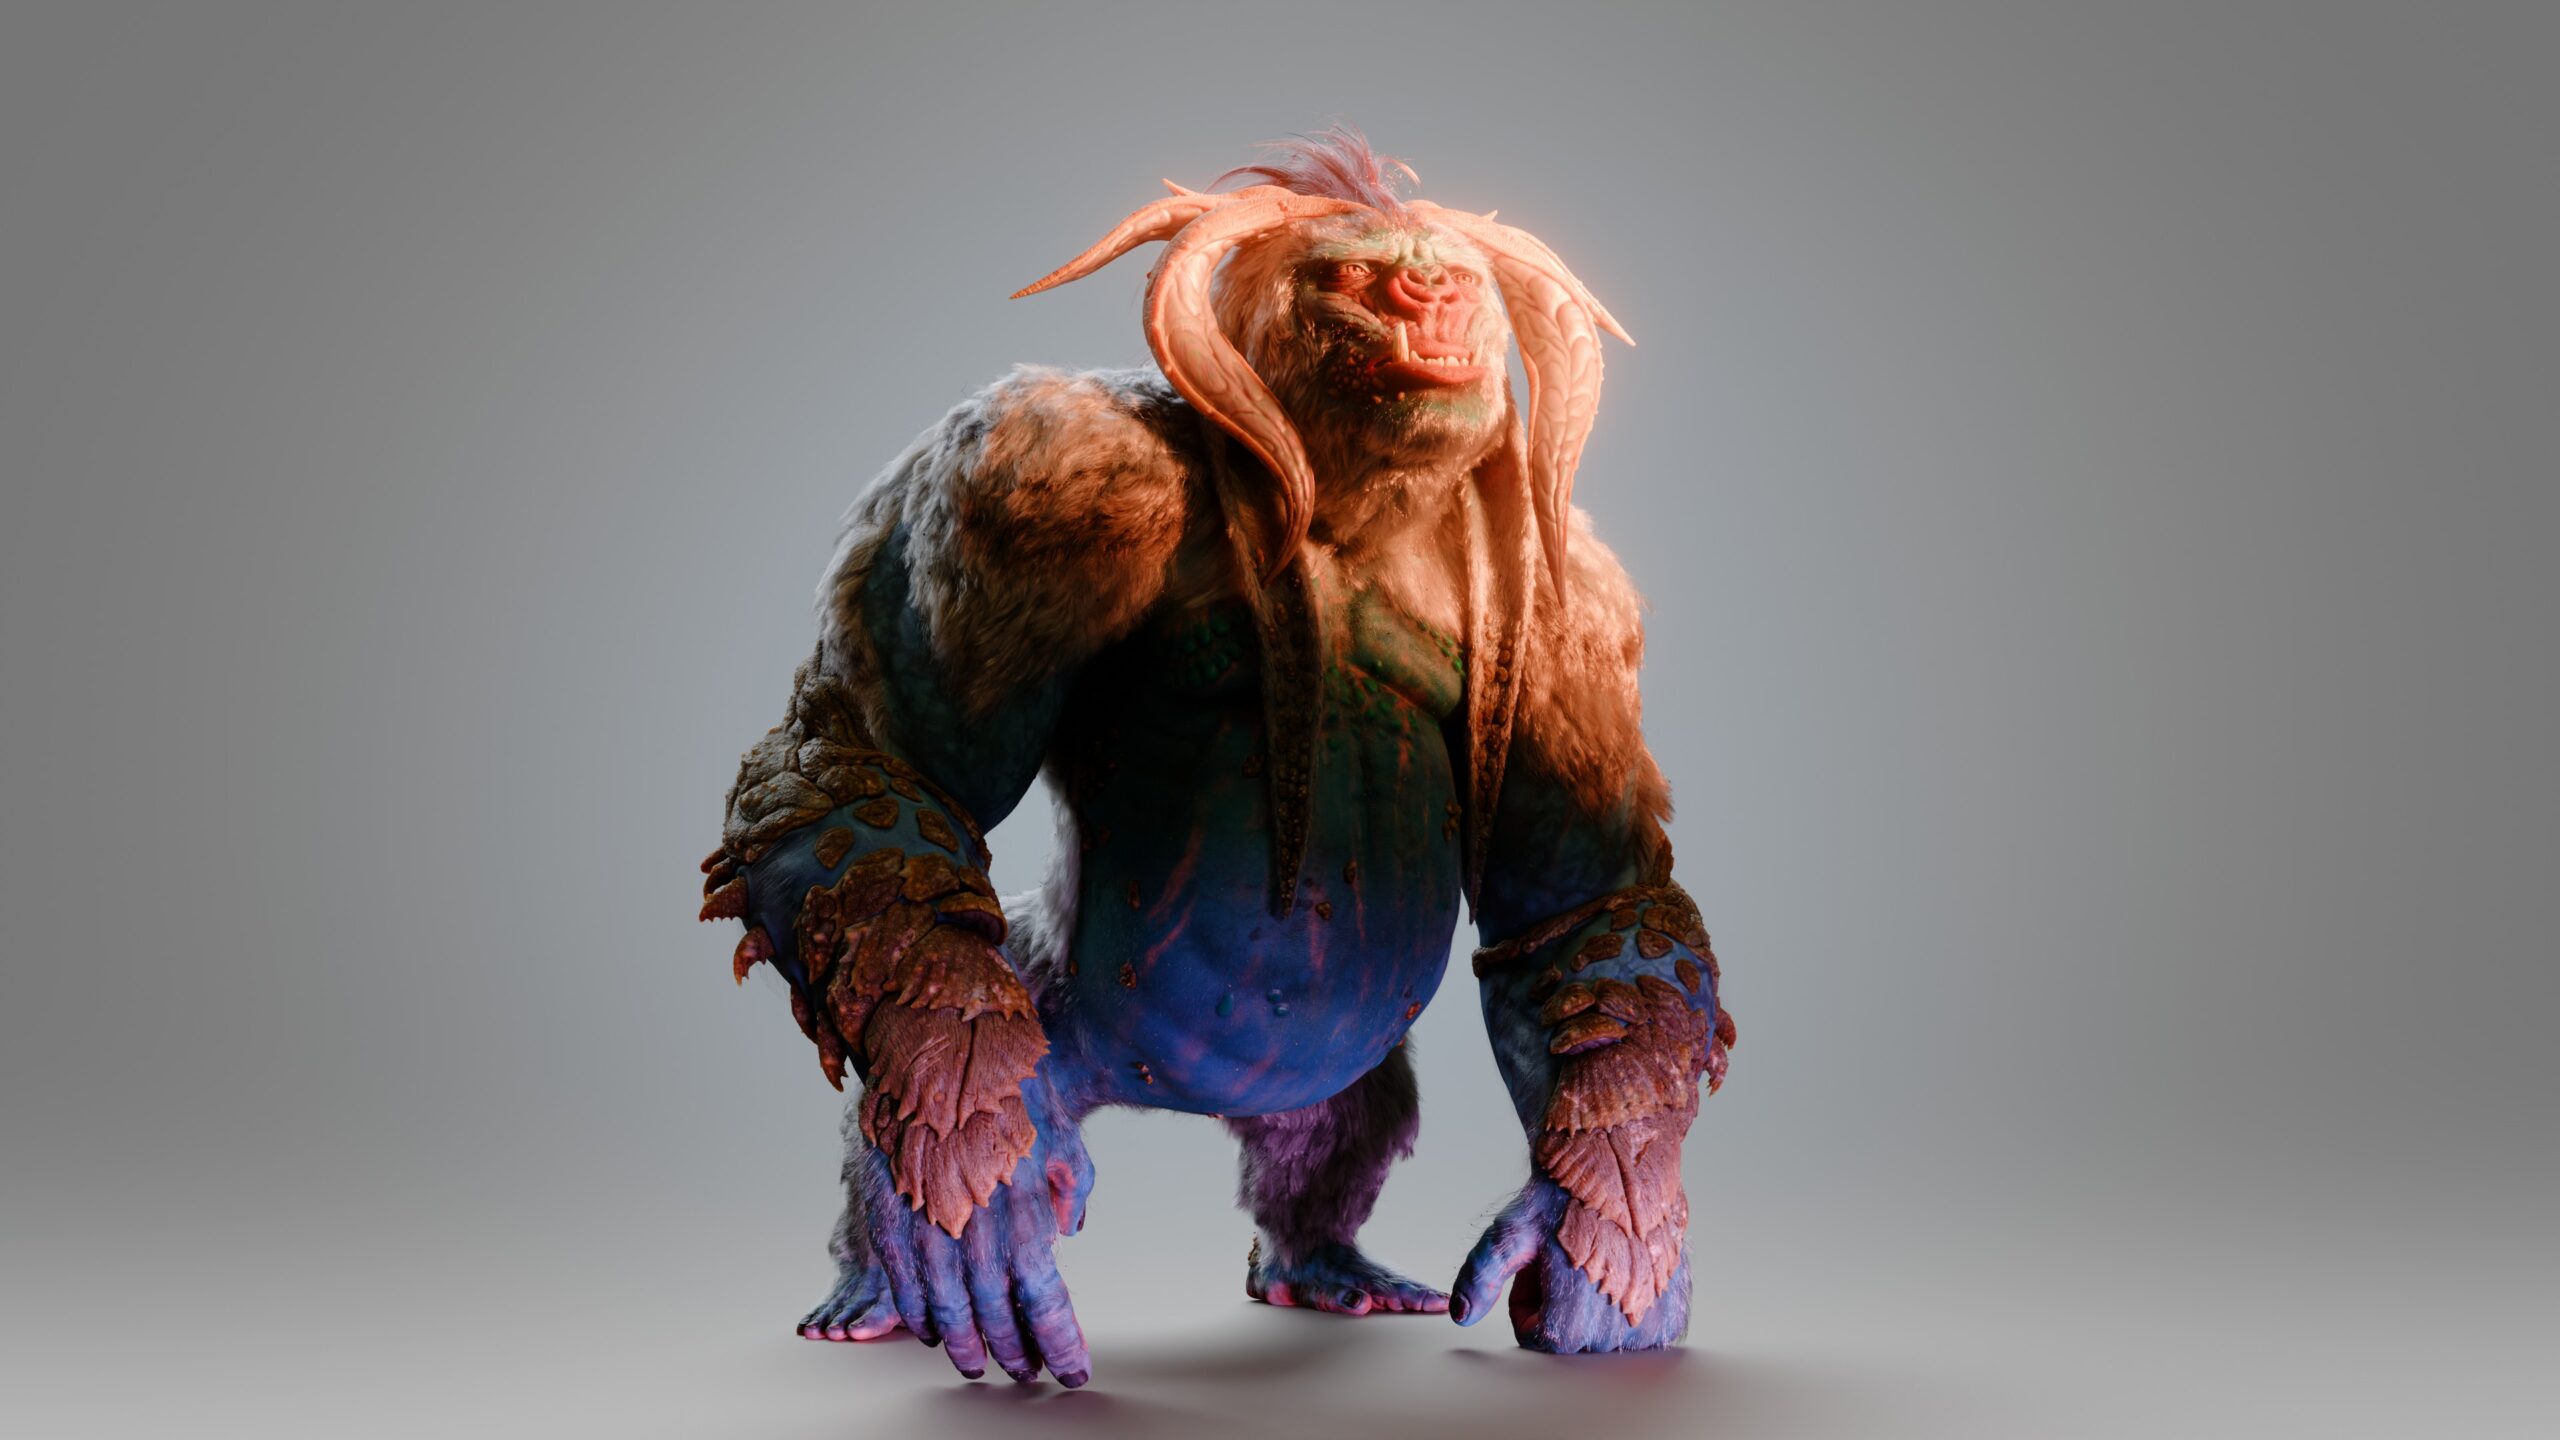
At long last, it’s time to shine some pretty lights on our big boy and see his pathtraced beauty reflecting hundreds of hours of creation, tweaks and technical headaches. This is where Brad becomes both a beloved mascot and a heavy rendering benchmark for Bolt.
So far, the beast is being rendered in Blender Cycles on an Nvidia RTX 3090Ti or similar, using the Optix framework. I love working with Cycles. Just like with any of the other popular production pathtracers (Renderman, Arnold, Octane) I can get gorgeous realistic results with some initial setup, decent lighting and materials, and proper color management. However, Cycles in its current state lacks one crucial feature that makes it a pain to render heavy VFX assets on the GPU: texture caching and mipmapping.
Other production renderers utilize tiled, mipmapped textures (typically in .tx format) in order to take hundreds of 4K or 8K maps and load into RAM only the size that is necessary to achieve a desired resolution in screen space. For example, if a character’s foot is only taking up a tiny portion of the frame, the engine might grab a heavily downscaled 256×256 mipmap of the original 4K texture set for that particular tile, drastically reducing the amount of texture data loaded into memory.
Currently, Blender can read these .tx images but cannot perform the caching and mipmapping that makes them useful. For Brad, this means carefully selecting tile resolutions so that the entire texture is just shy of filling the 24GB of VRAM when combined with his dense groom. It has forced me to create several different copies of his entire texture set (62 tiles, 372 maps) to prioritize specific tiles for close-up shots, and in the end I’ve hardly been able to use any 8K maps while rendering on GPU.
In my mind, this is the single biggest feature keeping Blender from tackling heavy VFX rendering workloads. Fortunately, it just so happens that development on the task is finally underway after years of discussion and support. During this year’s Blender Foundation community meetup at SIGGRAPH in Vancouver, I immediately empathized with another artist who brought up the topic during the Q&A at the end of the session. Francesco, Blender’s current COO among many other roles, was quick to share that the feature is now actively being tackled.
All this being said, I’m incredibly proud of how far we’ve taken Brad and how stunning he looks after the serious revisions. All that was left was to give him some fun poses for stills, render his animation sequence, and do some final grading.
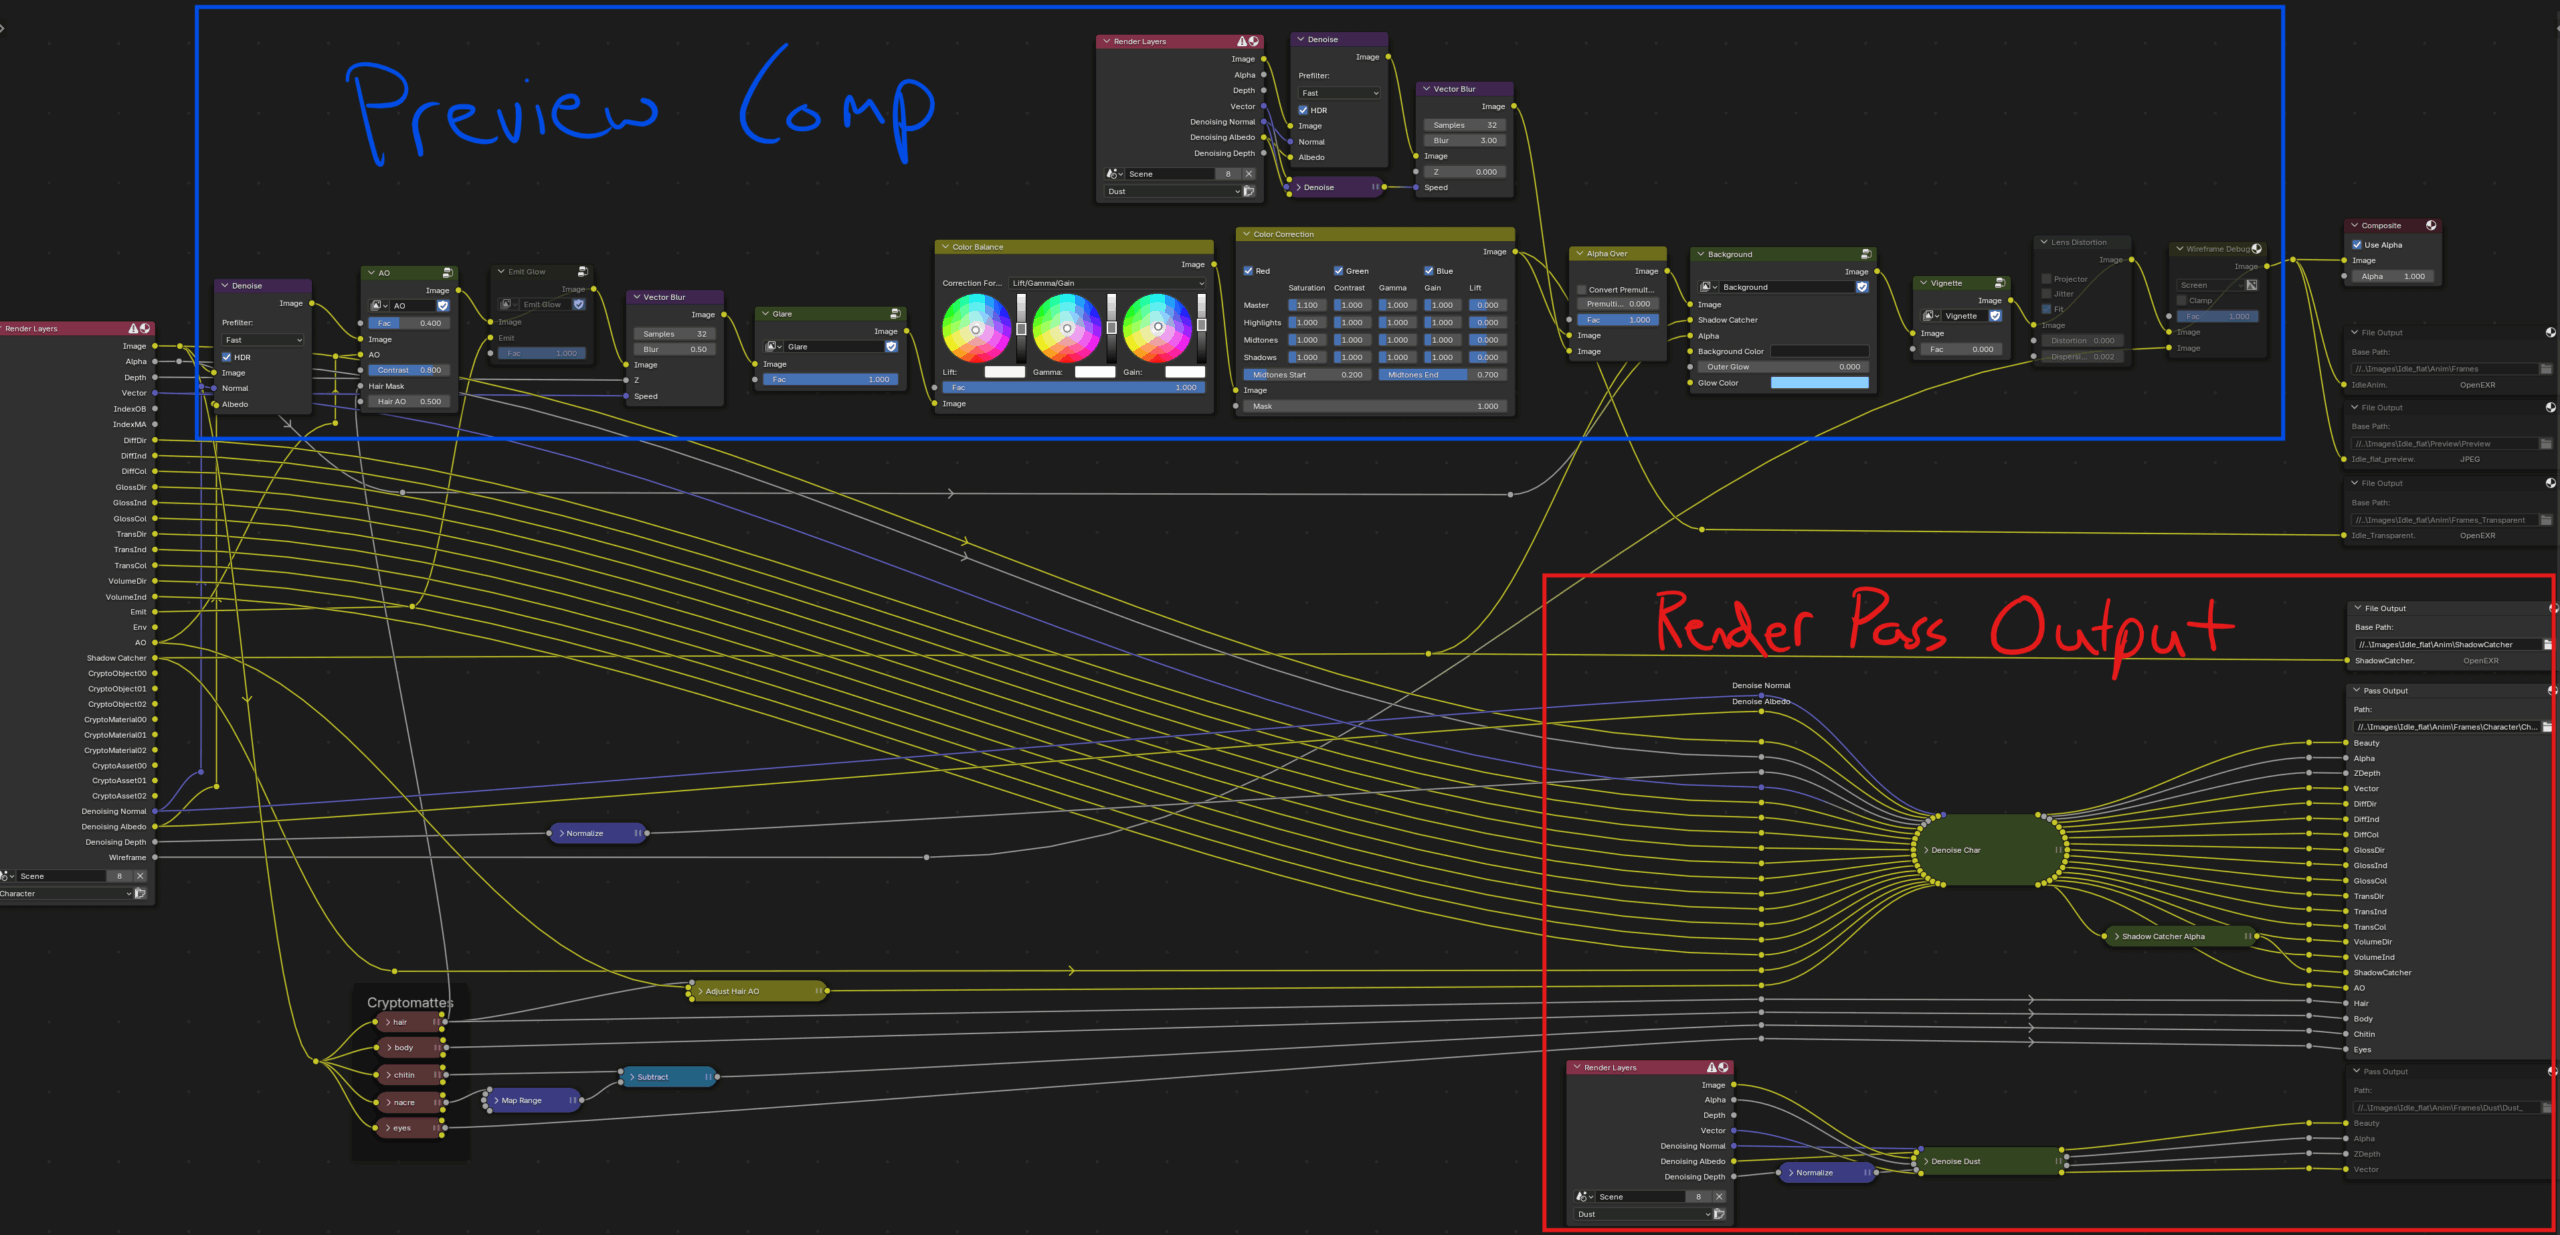
Compositing
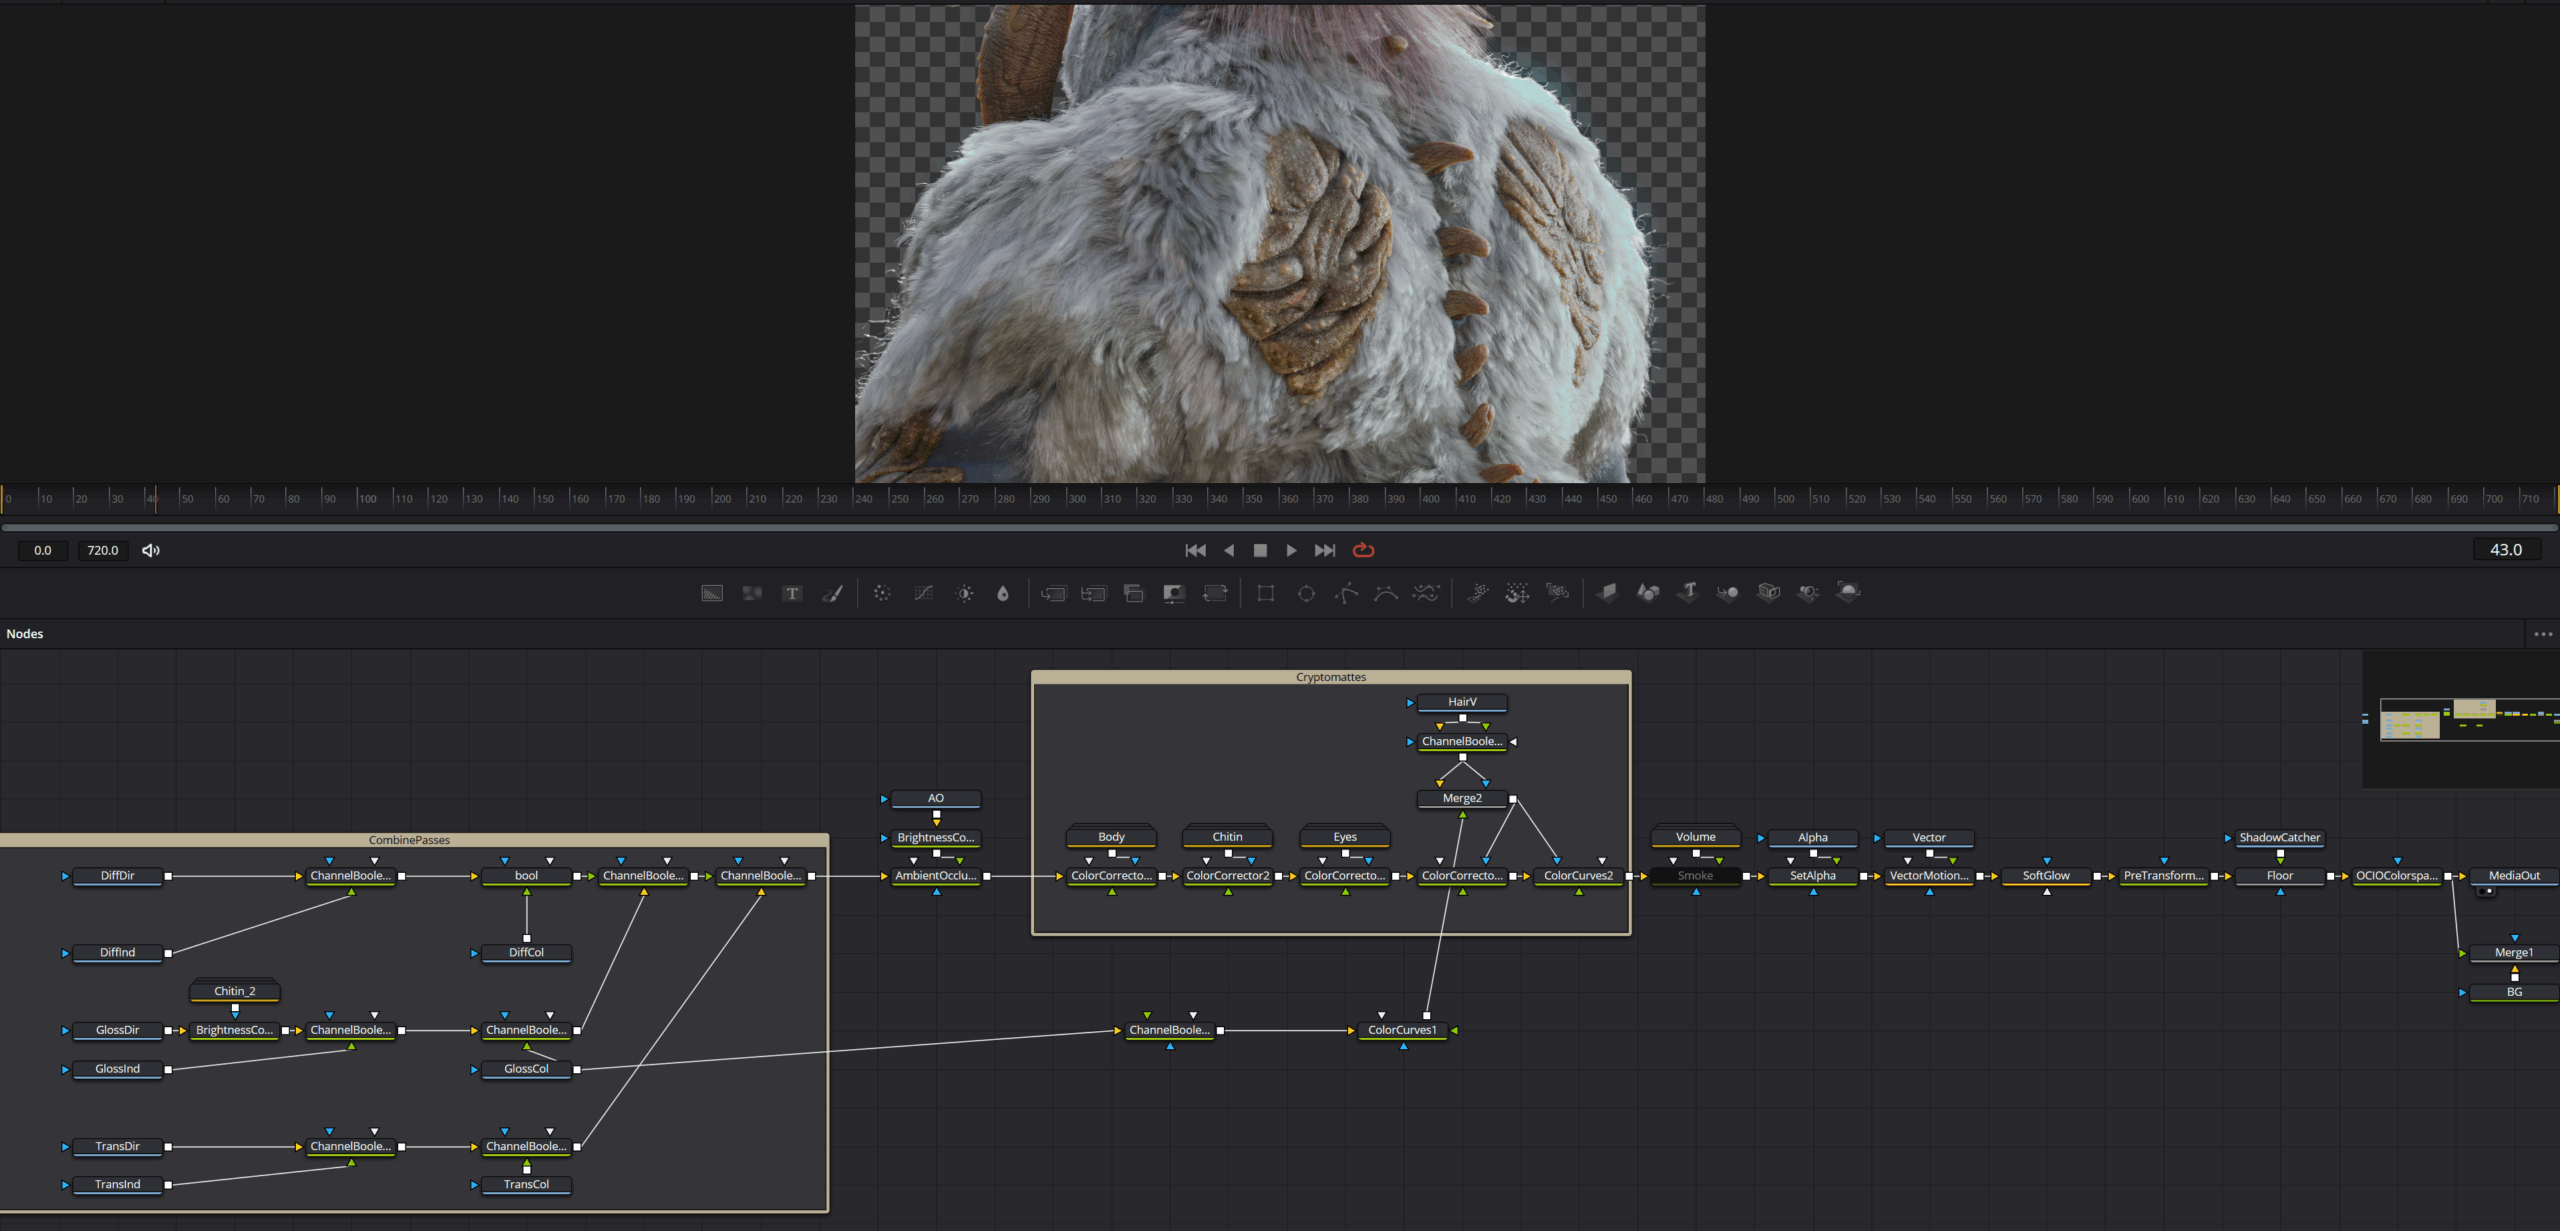
For this project, I did a preview grade in Blender’s compositor to get an immediate sense of the picture during test rendering, then put together the final composite and grade in Davinci Resolve Fusion. This gave me tons of flexibility with adjusting the look of individual materials, surface response, etc. by utilizing the render passes and cryptomattes out of Cycles.
I generally enjoyed this workflow with the exception of trying to deal with vector motion blur from Cycles to Resolve Fusion. I was getting tons of buggy results leading to hours of headache. Once I get my hands on Bolt’s Zeus GPU I’ll be able to bite the bullet and render pathtraced motion blur from the get go and get nice realistic motion without having to wait ages or deal with hacky vector blur.
Project Debrief
Remaining Work
It’s tough to call a project like this finished. While I’m happy with Brad’s final appearance and looking forward to getting him in some truly complete shots and environments, there are a few things I’d like to change. Some of these are issues that I’ve learned from and will take into consideration for future projects, while others are additions I may make to Brad soon if I get the time.
- Topology: Brad’s final topology is inconsistent between the body and shell armor, with edge loop flows being less than ideal and density not matching. I imagine this may introduce some sliding issues with more extreme posing.
- Rig: The current rig is fairly simple and I don’t think it will be very flexible around the face and limbs. There is also the option of adding muscle sim which would take some R&D or a more skilled rigging/CFX artist.
- Wet hair and skin: Since Brad is clearly no stranger to the sea with his chitinous armor, I should really develop a wet hair/skin system so that he can take some realistic splashes or appear like he’s recently had a swim.
- UV Efficiency: Mipmapping and memory woes aside, I don’t think Brad is necessarily benefiting from the number of UDIM tiles he now has. I wanted to lay everything out with consistent texel density in case I changed up his hair coverage, but now that the groom is finalized I don’t think it’s necessary to have 14 tiles that are almost completely covered by hair. Even though I can export these tiles out at a very low resolution, they could be consolidated into a fraction of the UDIMs to speed up render initialization.
- Environment Patch: I’m not completely satisfied with the look and motion of Brad’s slice of coastal scenery. The island-like mass of sand doesn’t read quite like I’d envisioned and the water FX aren’t feeling as realistic as the rest of the scene, so I’d love to revisit these assets at some point.
Pipeline & Tech Pain Points
Overall, I’m fairly happy with the character pipeline that’s been thrown together and somewhat improvised for this project. Blender, ZBrush, Mari, and Houdini play nicely together in general, but there are certainly some changes I’d like to explore. Exchanging files between software for anything beyond simple geometry can be a headache, so minimizing transfers outside of USD is ideal. On the hardware and performance side, most of the pain points are things I take for granted, but all that will change with Bolt’s tech.
DCCs
One avenue for pipeline improvement is to steer into Houdini once the model and textures are complete. This would certainly require improving my Houdini skillset (which mostly revolves around SOP and DOP level procedural modeling and simulation), but would open the door to a more feature-complete groom system, potential muscle sim, texture mipmapping when rendering with Karma, and comprehensive USD staging.
Performance & Hardware
Many of the performance and tech related headaches that I experience in 3D are things I take for granted. When I think about how interactive viewport pathtracing was not possible only a handful of years ago, it seems silly to get frustrated when my render takes a while to start. But I do. As technology continues to improve we expect more from it and that’s what keeps it moving forward.
Soon enough, with the efforts from Bolt (and hopefully others), maybe I won’t have to cull my creature groom down to a small patch to see the final density in the viewport. I won’t need to worry about how much data I’m cramming into VRAM when rendering. Maybe waiting minutes or even seconds to see the result of a lighting tweak will be in the past. Even Mari, which was designed to handle the insane UDIM count and resolution of VFX hero characters, quickly starts to choke unless the utmost care is taken to bake down node chains and isolate areas of focus. I look forward to seeing how much better everything can run and how much more enjoyable it can be to work with huge 3D assets and scenes when the future of graphics tech is in our hands.
Final Thoughts
Getting the opportunity not only to create such an epic creature from scratch but also to revisit and improve it years later has been amazing. Brad has given me an avenue for improving my skillset, learning new character creation concepts, and discovering limitations of today’s VFX workflows and tools.
It also tested my patience as a single artist working on a complex project without technical support. Spending numerous days banging my head against the wall trying to fix problems and decipher unfamiliar tools has strengthened my appreciation for living in the digital age with forums, communities, and documentation easily accessible. At the same time, I’m looking forward to growing the art team at Bolt and getting to work in a proper team again.
Thank you for checking out my journey through the evolution of Brad and stay tuned for more fun creatures, product visualizations, and experimental scenes from me and the Bolt crew!
Matt will be at the Blender Conference September 17-19 in Amsterdam with the Bolt team if you want to meet up!

