Exploring USD in DaVinci Resolve
This article is a brief introduction to the newly released USD features inside Black Magic Design’s DaVinci Resolve v18.5. What is USD and how can it help with your 3D workflow? We’ll explore all the new USD nodes in Fusion and work through a graph to familiarize ourselves with their features. We’ll examine USD techniques that can help organize your assets and make remote collaboration more structured and assist in having efficient control of your scene elements as they are modified and evolve throughout a project. We’ll see how a USD workflow allows us to work quickly and independently while being able to perform high level 3D operations easily and natively within Fusion.
What is USD?
OpenUSD or USD is the Universal Scene Descriptor framework which is an open standard for the composition and exchange of 3D scene elements. It’s much more than a file format or scene description language. It’s an ecosystem and tool chain for defining, organizing, composing and collaborating on all the elements that make up a 3D production. It’s a language and set of system tools for describing and manipulating scene elements that is not tied to a particular content creation platform or to a particular renderer or animation system. Portable and open source, the USD ecosystem can run on a variety of platforms and architectures and is designed to be flexible and extensible so that it best meets the needs of 3D creators in an active and evolving production environment.
If you’re new to USD here are some great resources for getting started:
This isn’t a USD tutorial but I’ll try to briefly introduce the concepts as we explore the new Fusion nodes. We’ll only be exposing a fraction of what USD is capable of, but I think you’ll agree these tools can significantly enhance your 3D productivity and it’s great to have them available to us in Fusion.
Importing USD Scene Data
To get started let’s build up a simple 3D scene and image it in the viewport. Let’s begin with some 3D content and import a 3D model. Most content creation tools now export .usd file format. If you need a model for this exercise, take a look at assets available on Sketchfab. There are quite a few flexibly licensed downloads and they support the .usdz format. I’ll be using a CC0 sculpture of Julius Caesar. A .usdz file is a zipped USD scene file. Fusion has a new loader node uLoader which is available with all the USD nodes in the graph menu Add Tool > USD > uLoader. Drop or copy a USD file to your asset bin or use the file browser on the loader to read in the object file. Fusion supports .usd, .usda, .usdc and .usdz formats. The .usda files are ASCII readable. Here’s what a .usda file looks like:
					#usda 1.0

def Xform "hello"

{

    def Sphere "world"

    {

        float3[] extent = [(-2, -2, -2), (2, 2, 2)]

        color3f[] primvars:displayColor = [(0, 0, 1)]

        double radius = 2

    }

}
If you cut and paste that into a text file, say sphere.usda you can read it into Fusion. It’s a blue sphere of radius 2 centered at the origin. The other USD file formats are simply binary and compressed versions of the scene. We’ll render unto Caesar and use the statue model for our scene. Place the uLoader into the graph editor and load the USD file. Just like the other 3D tools in Fusion we’ll build up a simple scene that can be imaged by merging the scene elements and then rendering them.
Lights, Camera, Graph
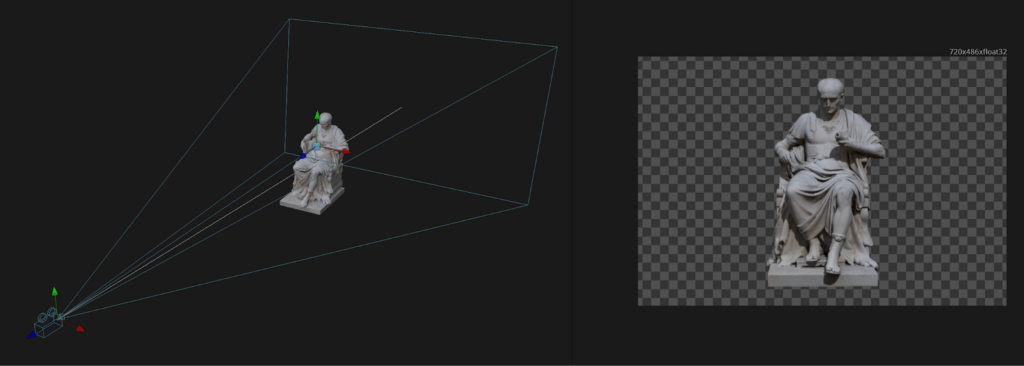
Let’s add a uCamera and some light to the scene. Adjust your camera parameters to taste. Depending what model you decided to use, you may need to adjust your clipping planes. Once you’ve selected a focal length and set your Translation and Target point you should be pretty close to a final composition. The camera is quite physical with the right renderer. In later articles we’ll explore depth of field, motion blur and other camera effects.
The supported USD light nodes include:
- uCylinder
- uDisc
- UDistant
- uDome
- uRectangle
- uSphere
The uDistant is a directional light. uDome is an image based light that allows you to use a latlong HDR panoramic texture for lighting. The others are area lights of various shapes. I added a 3D > Light > AmbientLight as well just to bring up the shadows a bit. The affordances and manipulators in the 3D viewports are very useful for tweaking. Explore turning on and off the camera Frustum, Target points for lights, etc. Hot key navigation in the 3D viewports will have you flying around in no time.
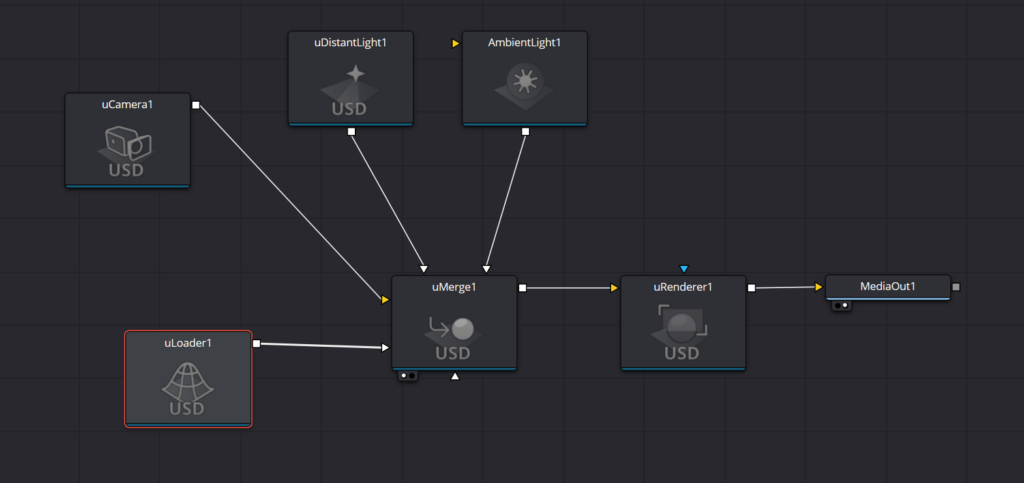
Connect the elements to a uMerge node to bring the scene together. Experiment solo previewing the elements alone to the left/right viewport (right click the node and menu ViewOn > LeftView etc.) You can gain a lot of control by manipulating each node separately. The view output from the merge node allows you to access most of the scene controllers and manipulators.

In the graph view in this figure I’ve opened up the tile pictures so you can see the icons of the various nodes. Normally I’d work with the tiles off to have a more compact graph but if you find them useful to self document the graph or to learn the new nodes go for it. You can toggle those by right clicking the node menu Show > Show Tile Picture.
Setting Up the Render
The uRenderer node takes the merged scene as an input and renders out final images. In USD parlance, the renderer is a Hydra render delegate. Currently Fusion uses the USD hdStorm renderer. Storm is a very performant renderer that takes advantage of whatever GPU you have available. If you have a hefty GPU with lots of texture memory it will handle large scenes well and hopefully degrade gracefully if you have lesser resources.
As USD support expands across our industry many commercial and open source renderers are making hydra delegate builds of their renderers available. This means many of the rendering tools you use in your content creation apps may become directly callable through the USD integration in Fusion. This will lead to some pretty exciting workflow integrations so stay tuned to how quickly USD is evolving and opening up opportunities for collaboration and easier asset exchange.

Let’s take a look at some of the uRenderer parameters where much of the imaging control is happening. For example Enable Shadows and Enable Sky Dome can be toggled on/off here. A powerful tool for creating additional useful passes is the AOV setting of the renderer. AOV stands for Arbitrary Output Variables and is a USD render term for passes or channels that the renderer can produce. By default the Storm AOV produces a color buffer of the rendered pixels, but it could also output a depth channel or primid pass. These AOVs can be used to make powerful selection masks or to drive other compositing operations in your graph. The depth AOV could be used for example to layer 3D elements or to create a distance based atmospheric dropoff or haze. There is also a simple but useful Lighting override available in the uRenderer where you can turn off the scene lighting or replace it with a shadowless light coming from the direction of the camera. This global control is convenient for quickly switching off all the scene lighting and being able to swap between lighting setups across multiple render nodes. True power comes from animating parameters and of course all are keyable and editable.
Backdrop and Composite
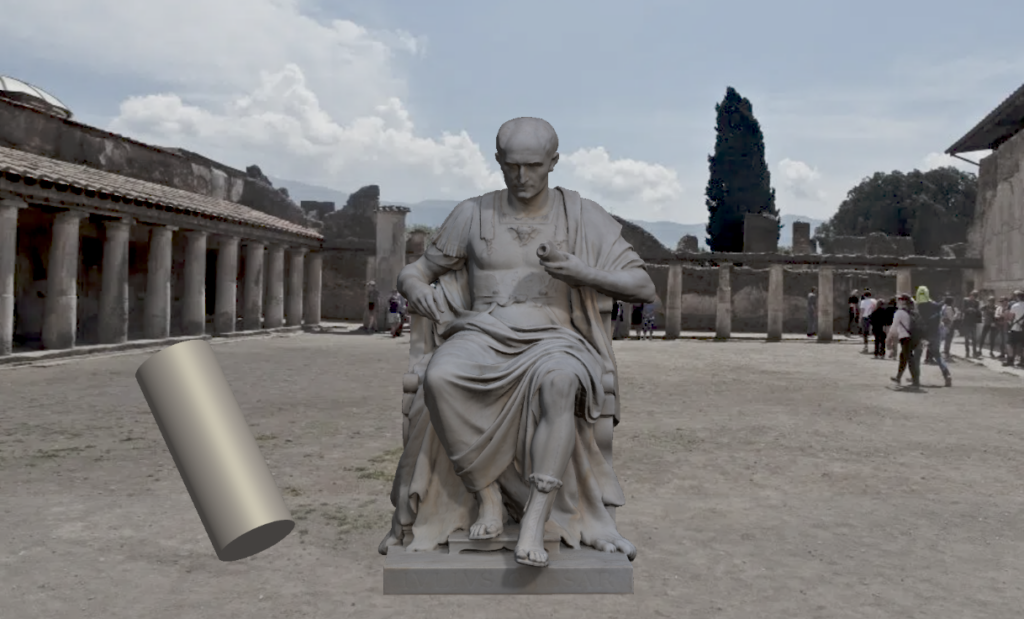
The uImagePlane node has a File input parameter, but to have more control of the background image, use a MediaIn node. Then you can add any image adjustment or color correction nodes after it as needed. Your processed background can be then used as an input Image to the uImagePlane which connects directly to the scene merge.
We’ve used the image plane to illustrate how integrated the USD node is with the scene camera, but if you’d prefer, you may choose to simply keep your back plate as standard media and composite your 3D elements over it as normal. This would afford you more flexibility to match the plate color, resolution and noise characteristics. But for now, let’s just try out all the USD things.
Without creating shadow masks, we’ll use the Opacity of the plane’s Material to act as our shadow catcher. Adjust the color and any specularity on your ground plane so that you can make it disappear by just turning down its Opacity. We only need the slightest hint of shadow, but if your backplate is more complicated you may need a more exact mask and should comp over your plate rather than using just the image plane. Future renderer and materials support will open up reflections and more physically based render layers to composite with.

That’s it, we’ve skimmed through all the new USD nodes and we didn’t even have to use a render farm. Much of USD’s power comes from being able to compose assets and variants of scene elements non-destructively while being able to share and version your changes with collaborators. If you have any questions or features you’d like covered in more depth please comment below.
Conclusion
Hopefully this hands-on introduction to USD nodes in Fusion has gotten you up to speed quickly and gives you enough information to get started on your own projects. An industry standard way to exchange assets and scene data is a game changer for interoperability and USD is just reaching that exciting point of mass adoption. Please like and share this article with someone who’s 3D well being you’re concerned about.
Get Exclusive Updates
Subscribe to our newsletter for the latest news.